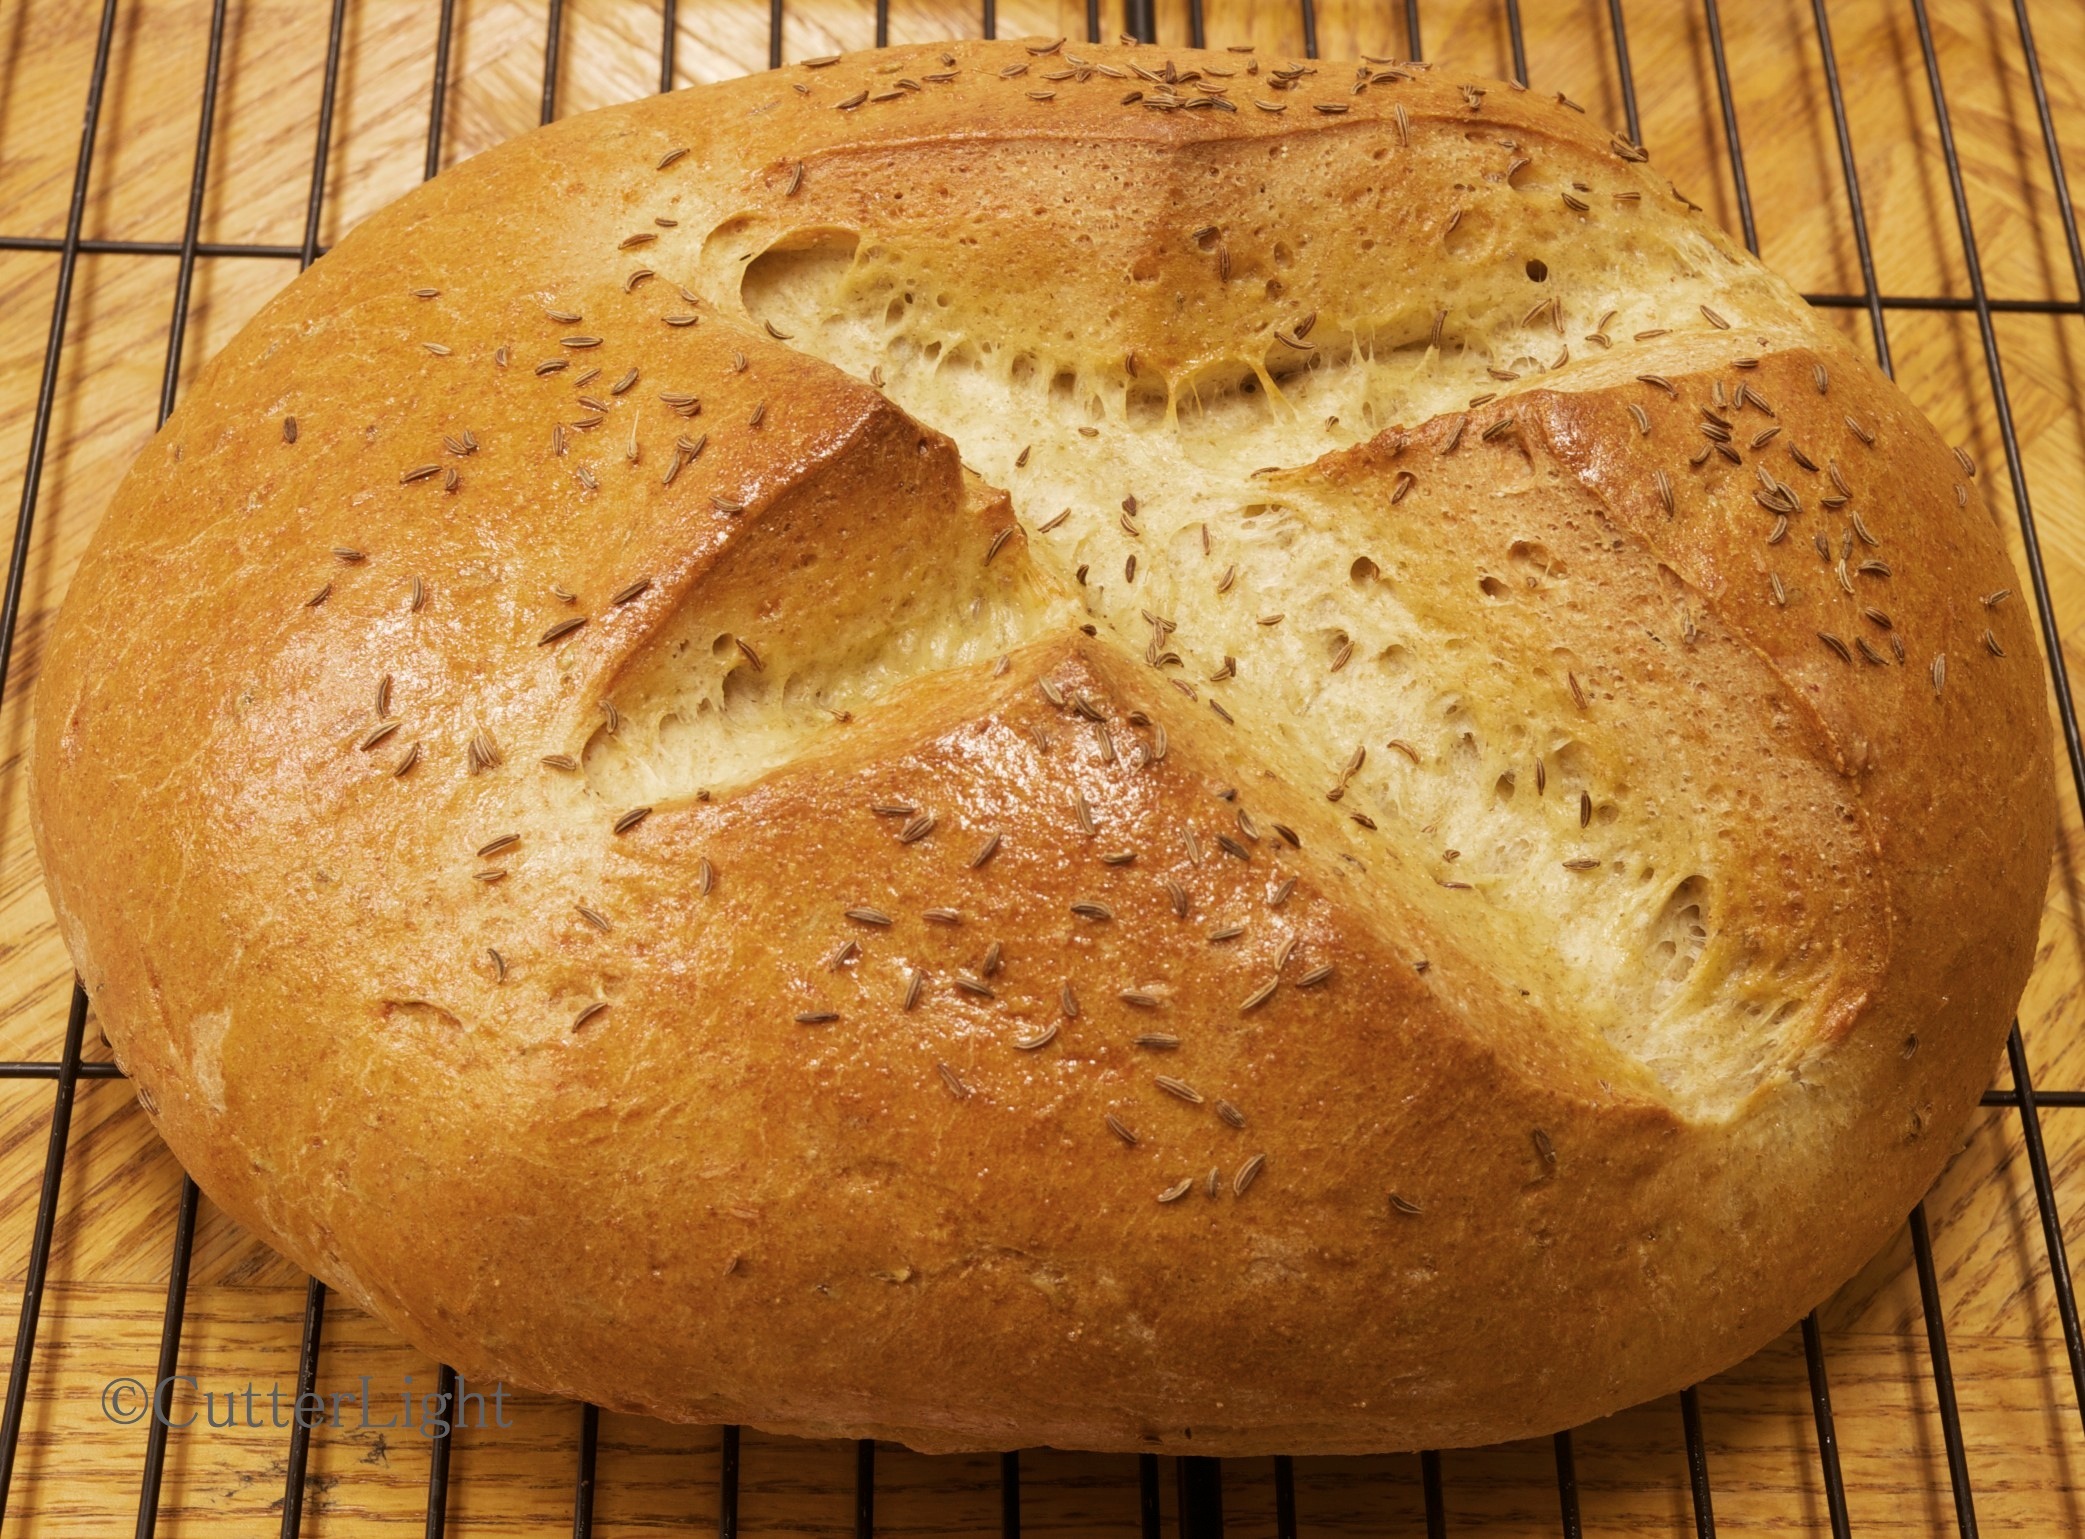
Almond Lace Ice Cream Cups

almond lace ice cream cups n

Extra rich vanilla ice cream is a delicious accompaniment for these elegant, lacy almond ice cream cups.

Every fall we enjoy making homemade ice cream in a variety of interesting and delicious flavors. And thinking as photographers, we wanted to show off one of this year’s star creations with something less ordinary than a store-bought cone. So, continuing with the almond theme we seem to be on recently, we created a sweet, candy-like bowl featuring the flavor and crunchy texture of this very versatile nut.

The finished ice cream cups came out a beautiful golden brown, supremely crunchy and sturdy enough to handle multiple scoops of ice cream or mounds of fresh fruit and whipped cream. We already have plans to heap them with three flavors of ice cream, sliced bananas and toppings for tomorrow’s dinner – banana splits!

almond lace ice cream cup b n

This almond lace cup is in the final stages of cooling on an upside-down ramekin. 

Almond Lace Ice Cream Cups

Ingredients

  • 4 tbsp unsalted butter
  • ¼ cup light corn syrup
  • ¼ cup packed brown sugar
  • a few drops of almond extract
  • ½ cup sliced almonds
  • 6 tbsp all purpose flour

Directions

  1. Preheat the oven to 350 degrees F. Line a baking sheet with parchment paper. Have 6 teacups or small ramekins ready.
  2. Melt butter in a medium pan over low heat.
  3. Mix in corn syrup and brown sugar. Mix well.
  4. Turn heat off and stir in almond extract, sliced almonds, and flour.
  5. Pour batter onto a parchment-lined baking sheet. Spread evenly.
  6. Bake for 10-12 minutes. The finished product should be golden brown.
  7. Remove from oven and let sit on baking sheet for about 45 seconds.
  8. Cut the large cookie into 6 even rectangles (one slice lengthwise down the middle to create two long pieces. Cut the long pieces into thirds.
  9. Lift each cookie off with an offset spatula (or other long, thin spatula) and drape the cookie on an overturned ramekin or teacup to cool and set in the shape of a bowl.
  10. If the cookies are too firm to shape, you can return the cookies to the oven briefly while they are on the overturned cups in order to let them melt to the right shape. Make sure you watch them, because they will begin to melt quickly.

Almond Breakfast Crumb Cake

Image

Moist cake loaded with almond flavor and a sweet, crunchy, crumbly top is guaranteed to make everyone in the house dash to the breakfast table. This cake is simple to make and delivers a triple dose of almond using almond paste, almond extract, and crunchy sliced almonds.

So, you’ve finished eating all ten polar bear claws and your appetite for almond flavored breakfast pastries is still not sated. You dip your finger into the leftover half-can of almond paste and quickly realize that this product is not intended to be eaten straight. The solution? Almond breakfast crumb cake. The beauty of this cake is that it can be eaten anytime, but since it has breakfast in the title there is no guilt about eating a slice or two first thing in the morning with your coffee. Or drizzle it with a berry syrup for a scrumptious dessert.

Almond Breakfast Crumb Cake

Ingredients

  • 2 cups all-purpose flour
  • 1 1/2 tsp baking powder
  • dash salt
  • 1/2 cup unsalted butter, softened
  • 1/2 cup almond paste
  • 1 cup granulated sugar
  • 2 eggs
  • 1 tsp vanilla
  • 1/2 tsp almond extract
  • 3/4 cup whole milk
  • crumb topping (see below)

Directions

  1. Preheat oven to 350 degrees F.
  2. Grease a 9-inch springform pan. Set aside.
  3. Sift together flour, baking powder and salt in a medium bowl.
  4. In bowl of a stand mixer, combine butter and almond paste. Beat on medium speed until smooth.
  5. Add sugar and mix until blended.
  6. Add eggs, vanilla and almond extract and mix until blended.
  7. Add half of the flour mixture and milk. Mix until blended.
  8. Add remainder of flour mixture and mix just until blended.
  9. Pour batter into prepared pan.
  10. Sprinkle crumb topping evenly over top of batter.
  11. Bake until toothpick inserted into center comes out clean, about 50 minutes.
  12. Let cool completely in pan on wire rack.
  13. Store at room temperature.

Crumb Topping Ingredients

  • 6 tbsp all purpose flour
  • 1/3 cup firmly packed brown sugar
  • 1/4 tsp ground cinnamon
  • 2 tbsp melted unsalted butter
  • 1 cup sliced almonds

Crumb Topping Directions

  1. Stir together first three ingredients.
  2. Add melted butter and stir mixture together until crumbly.
  3. Stir in almonds until mixed well.

Honey Glazed Polar Bear Claws – Grrrr, Grrrr

bear claw n

A tempting polar bear claw from our Arctic bakery. No bears were harmed in the making of this pastry!

Topping my baking to-do list this winter were bear claws. There is something about the sweet almond filling that makes these a mainstay of bakery shops – or perhaps it’s their cool name. Jack and I usually pass on these confections because most bakeries prepare them with an overload of sweetness. In researching recipes, I found a plethora of styles, from giant grizzly-sized pastries smothered in sliced nuts to tiny paws with a perfectly manicured almond on the end of each claw, and everything in between.

The recipe I settled on took a bit of time and effort. I wanted a medium-sized confection that emphasized not sweetness but almond flavor.The resulting pastry was superb – a little lighter than standard bakeshop fare and with a nicely balanced taste of almond.

Polar Bear Claws

Ingredients

Dough:

  • 1 3/4 cups all purpose flour
  • 3/4 cup unsalted butter, cold
  • 1/4 cup warm water (105 – 115 degrees F)
  • 2 1/4 tsp yeast
  • 1/4 cup heavy whipping cream
  • pinch salt
  • 1 egg
  • 1/8 cup sugar
  1. Place flour and butter in a medium bowl. Mix together using a pastry blender until well blended and butter pieces are no larger than kidney beans.
  2. In a large bowl, dissolve yeast in warm water. Let stand 5 minutes.
  3. Stir cream, salt, egg, and sugar into yeast mixture.
  4. Pour flour mixture into cream mixture. Stir with a rubber spatula until ingredients are just moistened.
  5. Place dough in plastic wrap and chill overnight in the refrigerator.
  6. Turn dough out onto lightly floured surface. Dust dough with flour. Roll out dough to 14 x 18 inch rectangle. Fold into thirds, making three layers. Roll out again. Fold into thirds once more and place back into refrigerator while you make the filling.

Filling:

  • 1 egg white
  • 1/2 cup almond paste
  • 1/4 cup confectioners sugar
  • 1 tsp cinnamon
  1. Add all filling ingredients to bowl of a stand mixer. Mix on medium speed until all ingredients are well mixed and filling is smooth.

Assembling the pastries:

  1. On a lightly floured surface, roll the chilled dough to a 12 x 16 inch rectangle.
  2. Cut the dough in half, length-wise.
  3. Spread half of the filling down the middle of one piece of dough. Repeat with other piece of dough.
  4. Roll each dough rectangle jelly-roll style from the long side.
  5. Tuck seam under roll.
  6. Cut each long roll into 5 pieces.
  7. Cut three slits into each piece to make the toes.
  8. Place each pastry on a parchment-lined baking sheet, curving them slightly (to spread the toes).
  9. Allow pastries to rise in a warm place for about 20 minutes. They should puff up.
  10. Preheat oven to 400 degrees F.
  11. Brush each pastry with beaten egg.
  12. Generously sprinkle pastries with sliced almonds.
  13. Bake 12 minutes. Pastries should be lightly browned.
  14. Let cool slightly on wire rack. Drizzle with honey glaze.

Glaze:

  • 1/2 cup confectioners sugar
  • 1 tbsp honey
  • 1 tbsp milk
  1. Stir together ingredients until smooth. Add more confectioners’ sugar if too thin, or add more milk if too thick.  Drizzle over warm pastries.

Pesto Pine Nut Bread

pesto bread_n

Pesto gives this bread a subtle tint with basil speckles, the aroma of parmesan and a pleasant pine nut crunch. 

A previous version of this bread I made was really tasty, but I wanted more pizzazz. So I upped the amount of pesto and added additional chopped pine nuts for more flavor and a subtle layer of texture. The mixture went into my Zojirushi bread machine and came out with the desired taste and texture but still light and airy. It was so tempting, half the loaf didn’t survive till the photo shoot!

Pesto Pine Nut Bread Machine Loaf

Ingredients

  • 1 cup water
  • 1/3 cup prepared pesto sauce
  • 3/4 tsp salt
  • 3/4 tsp granulated sugar
  • 1/4 cup whole wheat flour
  • 2 3/4 cups all-purpose flour
  • 2 1/4 tsp dry yeast
  • 1/3 cup chopped pine nuts

Directions

  1. Place ingredients in bread machine in the order recommended by the manufacturer. Start machine.
  2. Remove baked loaf at the end of cycle and cool on a wire rack for at least an hour before slicing.

Really Righteous Rye for Reubens

Rye bread_nWith a golden-brown crust and a soft inside, this flavorful combination of rye flour and caraway seeds is the perfect loaf to be sliced thick for home-made reuben sandwiches. 

One of our favorite sandwiches is an East Coast style reuben with the rye sliced thick and everything piled high. Up here in the Arctic, the only way to get a sandwich like that is to make it ourselves. So, based on several recipes and my own calculations, I created a rye bread recipe for my Zojirushi “dough machine.” After four years of fairly heavy use (we bake all our own breads), this built-like-a-tank bread machine is still going strong. After it had done its magic, I kneaded the dough once more by hand and shaped it into an oval for one last rise.

I gave the dough two quick slashes, brushed it with egg, popped it in the oven and 35 minutes later our kitchen was filled with the delicious aroma of freshly baked rye bread – the final ingredient for our “up-town” Arctic lunch of hot tomato soup and reubens! Our recipe for DIY sauerkraut to follow.

Bread Machine Rye Bread

Ingredients

  • 3 tbsp melted unsalted butter
  • 1 egg
  • 1 cup whole milk
  • 1 tsp extra virgin olive oil
  • 1 1/2 cups all-purpose flour
  • 1 cup rye flour
  • 1 tbsp caraway seeds (a few more for the top)
  • 1 envelope active dry yeast
  • 1 tbsp granulated sugar
  • 1  1/2 tsp salt
  • 1 egg (to brush the top of the loaf)

Directions

  1. Place all items except the last egg in the bread machine in the order recommended by the manufacturer.
  2. Set machine to dough setting.
  3. Start machine.
  4. Remove dough from machine and place onto lightly floured board. Knead dough a few times and shape into ball.
  5. Place dough ball on a parchment-lined baking sheet and cover with a damp cloth. Let rise until almost doubled in size.
  6. Preheat oven to 350 degrees F.
  7. Slash a big X on top of loaf.
  8. Brush loaf with egg and sprinkle a few more caraway seeds on top of loaf.
  9. Bake for 35 minutes. Finished loaf should should have a golden brown crust and sound hollow when tapped.

Lighter than Air: Cream Puffs and Eclairs

cream puffs_n

Friends who share a love of baking and cream-filled pastries dipped in chocolate ganache warmed up a rainy afternoon in our kitchen north of the Arctic Circle.

Perfectly turned out pastry puffs filled with delectable cream and dipped in chocolate ganache are the the stuff of home bakers’ dreams. Cream puffs and eclairs require a special dough called pâte à choux. Worked to exactly the right consistency, this dough bakes up light and flaky and leaves a hollow space in the center of the confection. Although we used traditional vanilla-flavored pastry cream, we also imagined filling these airy profiteroles with fresh whipped cream, homemade ice cream and even savories such as smoked salmon cream.

Making cream puffs and eclairs can’t be rushed. The pâte à choux dough requires time and attention in order to get it to the correct consistency as it cooks on the stove top. Next, it must be carefully piped onto a baking sheet and placed in the oven where it will finish. Creating the pastry cream is fairly easy, and making chocolate ganache is magical.

All that work, and between three bakers, three tasters and steaming mugs of of rooibos almond tea, our eclairs and puffs disappeared in short order.

Pâte à Choux

Ingredients

  • 1/2 cup water
  • 1/2 cup whole milk
  • 1/2 tsp salt
  • 1/2 tsp sugar
  • 4 oz. unsalted butter, softened
  • 1 cup all-purpose flour
  • up to 4 eggs

Directions

  1. Line two baking sheets with parchment paper. Preheat oven to 400 degrees F.
  2. Pour milk and water into medium pan.
  3. Stir in salt and sugar.
  4. Add butter.
  5. Bring mixture to a boil over medium heat.
  6. Take mixture off heat and stir in all the flour. Mixture should look like mashed potatoes.
  7. Return pan to low heat and stir continuously. This will dry out the dough a little.
  8. Dough should come together to form a ball.
  9. Starchy residue at the bottom of the pan is an indicator that the dough is dried out enough.
  10. Take dough off stove and place it in the mixing bowl of a stand mixer. Turn it to low to allow the dough to be cooled off by the mixer.
  11. Mix in eggs one at a time, watching that the dough does not become too thin. The dough should be soft, creamy, and shiny.
  12. Transfer the dough to a piping bag with a large tip.
  13. Pipe ball shapes onto parchment-lined baking sheets, leaving plenty of room for these puffs to double in size.
  14. Bake puffs for 10 minutes.
  15. Turn oven down to 325 degrees F and continue to bake for 15 minutes.
  16. Fill with chilled whipping cream or pastry cream – savory or sweet.

These will freeze nicely.

Chai Crème Brûlée for Two

chai creme brulee_n

Easy to create, this crème brûlée features a rich custard flavored with vanilla and chai tea and is sealed with a crunchy caramelized top.

We give careful thought before adding any new item to our kitchen. Does the tool merit the space it will take up in Bandon’s galley or in the kitchen of our Arctic home? Will it be durable? Is it practical?

For the past few years, both of us have been eyeing a butane torch – the perfect niche tool for toasting a couple of  homemade marshmallows, singeing  meringue pie tips, and of course, for creating the perfect crème brûlée.

For most people, the addition of an item such as a kitchen torch means driving to a local store and picking one out along with the necessary fuel. For us, getting a canister of butane out to bush Alaska means purchasing a haz-mat certificate and having the item sent by cargo flight out here because the post office doesn’t ship hazardous materials via airplane.

Last night, the torch came out of the box, was fueled up, and put into service to finish a dessert that we and our guests couldn’t get enough of – chai crème brûlée. For this recipe, we began with a traditional crème brûlée custard recipe and infused it with the mildly spicy, sweet flavors of loose leaf chai tea and vanilla paste.  The resulting dessert was more complex and flavorful than typical crème brûlées. Using our new torch so that our guests and we could caramelize the tops of the custard just before serving, this turned out to be the best crème brûlée we and our guests had ever had.

Chai Creme Brulee for Two

Ingredients

  • 1/4 cup whole milk
  • 3/4 cup heavy whipping cream
  • 1/3 cup granulated sugar
  • tiny pinch salt
  • 1/2 tsp vanilla paste
  • 1 tbsp loose chai tea
  • 3 large egg yolks
  • 2 tsp granulated sugar for topping

Directions

  1. Preheat oven to 325 degrees F. Place an oven rack in the slightly lower than center position.
  2. Whisk milk, heavy whipping cream, sugar, salt, vanilla paste and chai tea in a medium pot over medium heat. Whisk until mixture steams and almost boils. Set aside to cool for 10 minutes.
  3. Strain cream mixture to remove tea leaves.
  4. Whisk eggs in a medium bowl. Stir in cream mixture to eggs one tablespoon at a time until the egg mixture is warmed. Once mixture is warmed, increase addition of cream mixture to 1/4 cup at a time. This will prevent eggs from cooking and scrambling.
  5. Pour mixture into two 4-ounce ramekins.
  6. Set ramekins in a baking dish. Pour enough hot water to reach halfway up the ramekins.
  7. Bake uncovered in preheated oven until desserts are softly set, about 45 minutes. The centers will jiggle.
  8. Remove baking dish with ramekins from oven and let desserts come to room temperature while in water bath on counter.
  9. Chill ramekins in refrigerator for at least 2 hours before serving.
  10. Right before serving, sprinkle 1 teaspoon granulated sugar evenly on each dessert.
  11. Use a kitchen torch to slightly brown and caramelize the granulated sugar. Let cool for ten minutes and serve.

Waste Not Want Not Potato Bread

potato bread b n

We don’t normally buy instant mashed potatoes, but when friends offered us a couple packets at the end of their Alaska camping trip last summer, we came up with a good use for them.

The packets of instant mashed red potatoes remained in our pantry for over a year – until the other day when I was thumbing through a friend’s bread machine recipe book and saw that potato bread could be easily made with instant mashed potatoes. Let the experimenting begin!

The potato bread recipes I came across included lard, butter, milk and salt. Since the pre-mixed potato packet already had many of these ingredients, I adjusted the recipe to fit packet at hand. If you make this recipe with plain instant potatoes, I’d recommend the addition of more butter and salt.

Mashed Potato Bread

Ingredients

  • 1 cup instant mashed potatoes
  • 1 tbsp unsalted butter
  • 1 cup milk
  • 1/2 cup water
  • 5 cups all-purpose flour
  • 1 tbsp granulated sugar
  • 1 tbsp yeast

Directions

  1. Rehydrate instant potatoes according to directions.
  2. Mix in butter.
  3. Place potato mixture, milk, water, flour, sugar and yeast into bread machine in the order recommended by the manufacturer. Turn on dough setting.
  4. Turn out dough onto floured surface.
  5. Split dough into two pieces and knead into loaf shapes that will fit into loaf pans.
  6. Bake in oven preheated to 350 degrees F for 30 minutes. Loaves will sound hollow when tapped.

Coconut Chocolate Chip Scones – Yes, Please!

coconut chocolate chip scones_nFry an egg, brew a cup of coffee and serve with these icing-laced coconut scones chock-full of mini chocolate chips. Fuel for a hike on the tundra, a morning downtown or whatever the weekend brings.

Shelf stable items are a staple in our Arctic pantry. Recently we have been experimenting with powdered coconut milk and are finding it to be easily reconstituted and packed with flavor. Friends recommended we add extra virgin coconut oil to our pantry, which ups the coconut flavor.

Armed with the coconut flavors I needed and an intriguing recipe I came across on MyBakingAddiction.com, I was ready to bake.

These scones have the essence of a chocolate dipped macaroon without being overly sweet. Using whole wheat for half the flour makes them more hearty than a traditional scone, while the baking powder helps them rise to epic scone proportions. The recipe is a perfect candidate for making dough the night before and popping in the oven the next morning for an impress-your-friends brunch.

Coconut Chocolate Chip Scones

Ingredients

  • 3/4 cup coconut milk
  • 1 egg
  • 1/4 cup granulated sugar
  • 2 tsp vanilla extract
  • 1 cup all-purpose flour
  • 1 cup whole wheat flour
  • 1 tbsp baking powder
  • 1/2 tsp salt
  • 3 tbsp unsalted butter, cold, cut into small pieces
  • 1 tbsp extra virgin coconut oil
  • 3/4 cup semi-sweet mini chocolate chips
  • 1/2 cup unsweetened coconut flakes
  • 2 tbsp coconut milk (to brush on top)

For the drizzle

  • 1 cup powdered sugar
  • 2 tbsp coconut milk

Directions

  1. Preheat oven to 375 degrees F. Line a baking sheet with parchment paper. Set aside.
  2. In a medium bowl, mix coconut milk, egg, sugar and vanilla. Set aside.
  3. In a large bowl, mix together flours, baking powder and salt.
  4. Mix butter and coconut oil into flour mixture using a pastry blender or your hands. Do this quickly to avoid melting the butter. Mixture should have pea-sized butter lumps that are evenly distributed in the flour.
  5. Mix wet ingredients into dry ingredients.
  6. Fold in chocolate chips and coconut flakes.
  7. Turn out dough onto lightly floured surface and knead 4 or 5 times.
  8. Shape dough into a 9-inch disk. Disk should be about 3/4 inch thick.
  9. Place disk on parchment-lined baking sheet.
  10. Slice disk into 12 wedges, pizza-style, leaving the dough in place.
  11. Brush disk with 2 tbsp of coconut milk.
  12. Bake for 18 – 20  minutes, till scones are slightly golden brown on edges.
  13. Cool scones in pan.
  14. While scones are cooling, create drizzle by mixing powdered sugar and coconut milk. Drizzle should be consistency of molasses.
  15. Place drizzle in a Ziploc bag. Snip a tiny bit off of one corner.
  16. With a sweeping motion, squeeze out drizzle over scones until you are satisfied with the amount of coverage.

Fall Harvest Cakes

fall harvest cakes_n

These delectable individual-sized cakes are packed with the flavors of autumn – honeycrisp apples, crunchy pecans, and caramel.

Taking advantage of fruit, vegetables, fish and wild game during times of seasonal abundance is a celebrated part of our kitchen, but it hasn’t always been easy to do so living in the Arctic bush. Back in California, between farmers’ markets and our own modest garden, our kitchen was stocked with ripe, heirloom tomatoes, freshly picked raspberries and peaches so ripe they had to be eaten over the sink (or outside under our peach trees).

Since moving to bush Alaska, we’ve been shipping up frozen fruits and vegetables during our annual summertime shopping. These have been supplemented with “keeper” produce such as  squashes, potatoes, onions and apples. We’ve managed to keep many of our traditions intact by pulling seasonal items from our pantry and freezers at the appropriate times, but we’ve missed enjoying fruits and vegetables freshly harvested from local farms.

This year, we decided to sign up with a CSA (community supported agriculture). Our “local” CSA, Full Circle Farms, is based in Carnation, Washington, nearly 2,100 miles away. Offering freshly harvested organic choices, Full Circle delivers to the San Francisco Bay Area, Idaho, Washington, and to Arctic Alaska! It has been a long time since we’ve had peaches and nectarines as perfectly ripe as the ones Full Circle has been sending, In fact, all their produce so far, from leafy greens to tomatoes to avocados have been spot on.

As part of our order last week, we received honeycrisp apples. This variety is sweet and crunchy with a pleasant tanginess – a balance that seemed begging to be paired with caramel. The pecan topping gives these cakes a savory crunch.

Fall Harvest Cakes

Ingredients

  • 1/4 cup unsalted butter, softened
  • 2 tbsp plain yogurt
  • 1 cup granulated sugar
  • 3 eggs
  • 1 cup all-purpose flour
  • 1 tsp baking powder
  • 1/2 tsp salt
  • 1 1/2 tsp ground cinnamon
  • 1/2 tsp mace
  • 2 cups shredded apple
  • 1/2 cup coarsely chopped pecans
  • 4-5 caramel candies, or 1/4 cup caramel sauce

Directions

  1. Preheat oven to 350 degrees F. Grease muffin tin.
  2. Cream butter and yogurt.
  3. Gradually add sugar to butter mixture. Beat well.
  4. Thoroughly mix in eggs, one at a time.
  5. In a separate bowl, sift together flour, baking powder, salt, cinnamon and mace.
  6. Gradually incorporate flour mixture to sugar mixture.
  7. Stir in apples.
  8. Spoon mixture into prepared muffin pan.
  9. Bake for 20 minutes.
  10. Sprinkle on pecans and caramel (sprinkle chopped candies or pour on sauce).
  11. Bake for 10 more minutes. Cakes are done when wooden pick inserted in center comes out clean.
  12. Cool on wire racks.