Individual Pizza Crusts: For Dinner, Breakfast, Camp and Galley

individual pizza crusts n

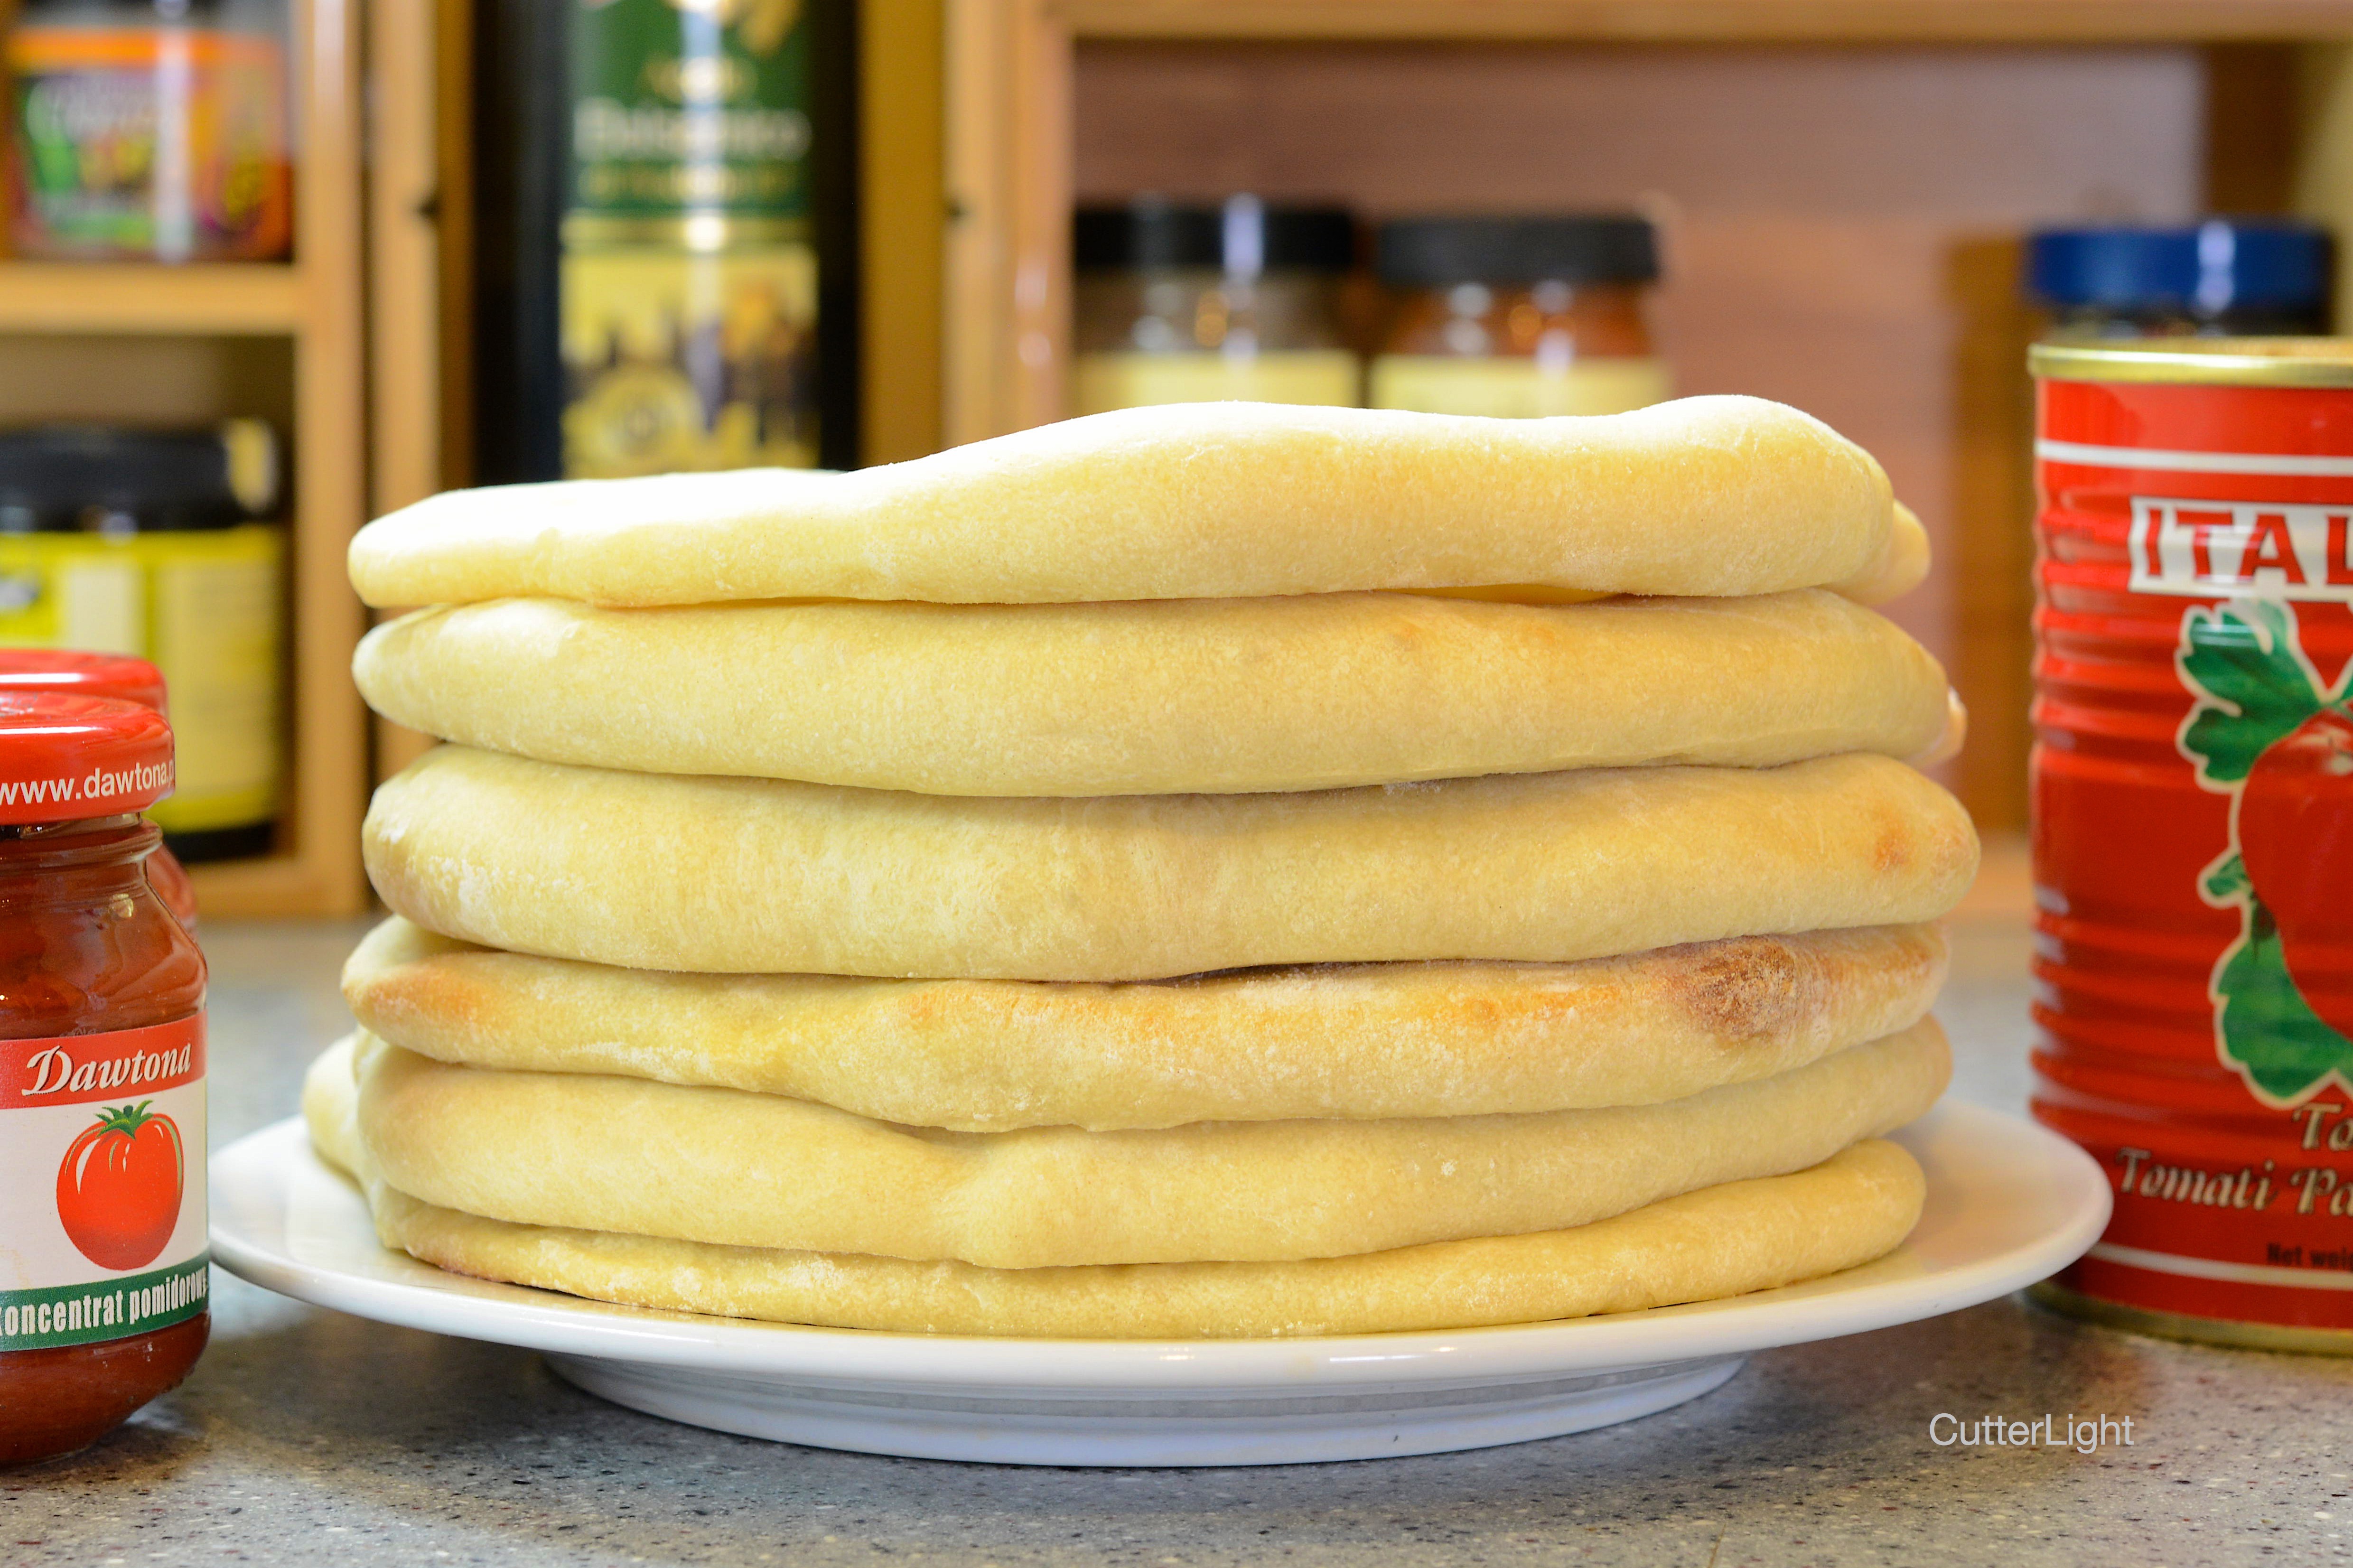
Tasty individual-sized pizza crusts ready to use for breakfast, lunch, dinner, or snacks. The size is perfect for the grill, for a galley, or the small oven we use here in Mongolia.

After trying many different recipes, I now have our go-to basic pizza crust recipe. The recipe can be easily modified by adding different spices or cheese into the crust. I’ve also substituted half of the all-purpose flour with wheat for a heartier crust that goes especially well with olive oil-based toppings. The best thing about the recipe is that it makes six crusts – two for now and four more for two more meals later. These crusts freeze well.

The crusts bake up best on a pizza stone, or, as I’ve recently learned, on an untreated clay tile from your local hardware store. The stone provides for even baking, giving the bottom a satisfying crispiness and leaving the top of the crust nice and chewy.

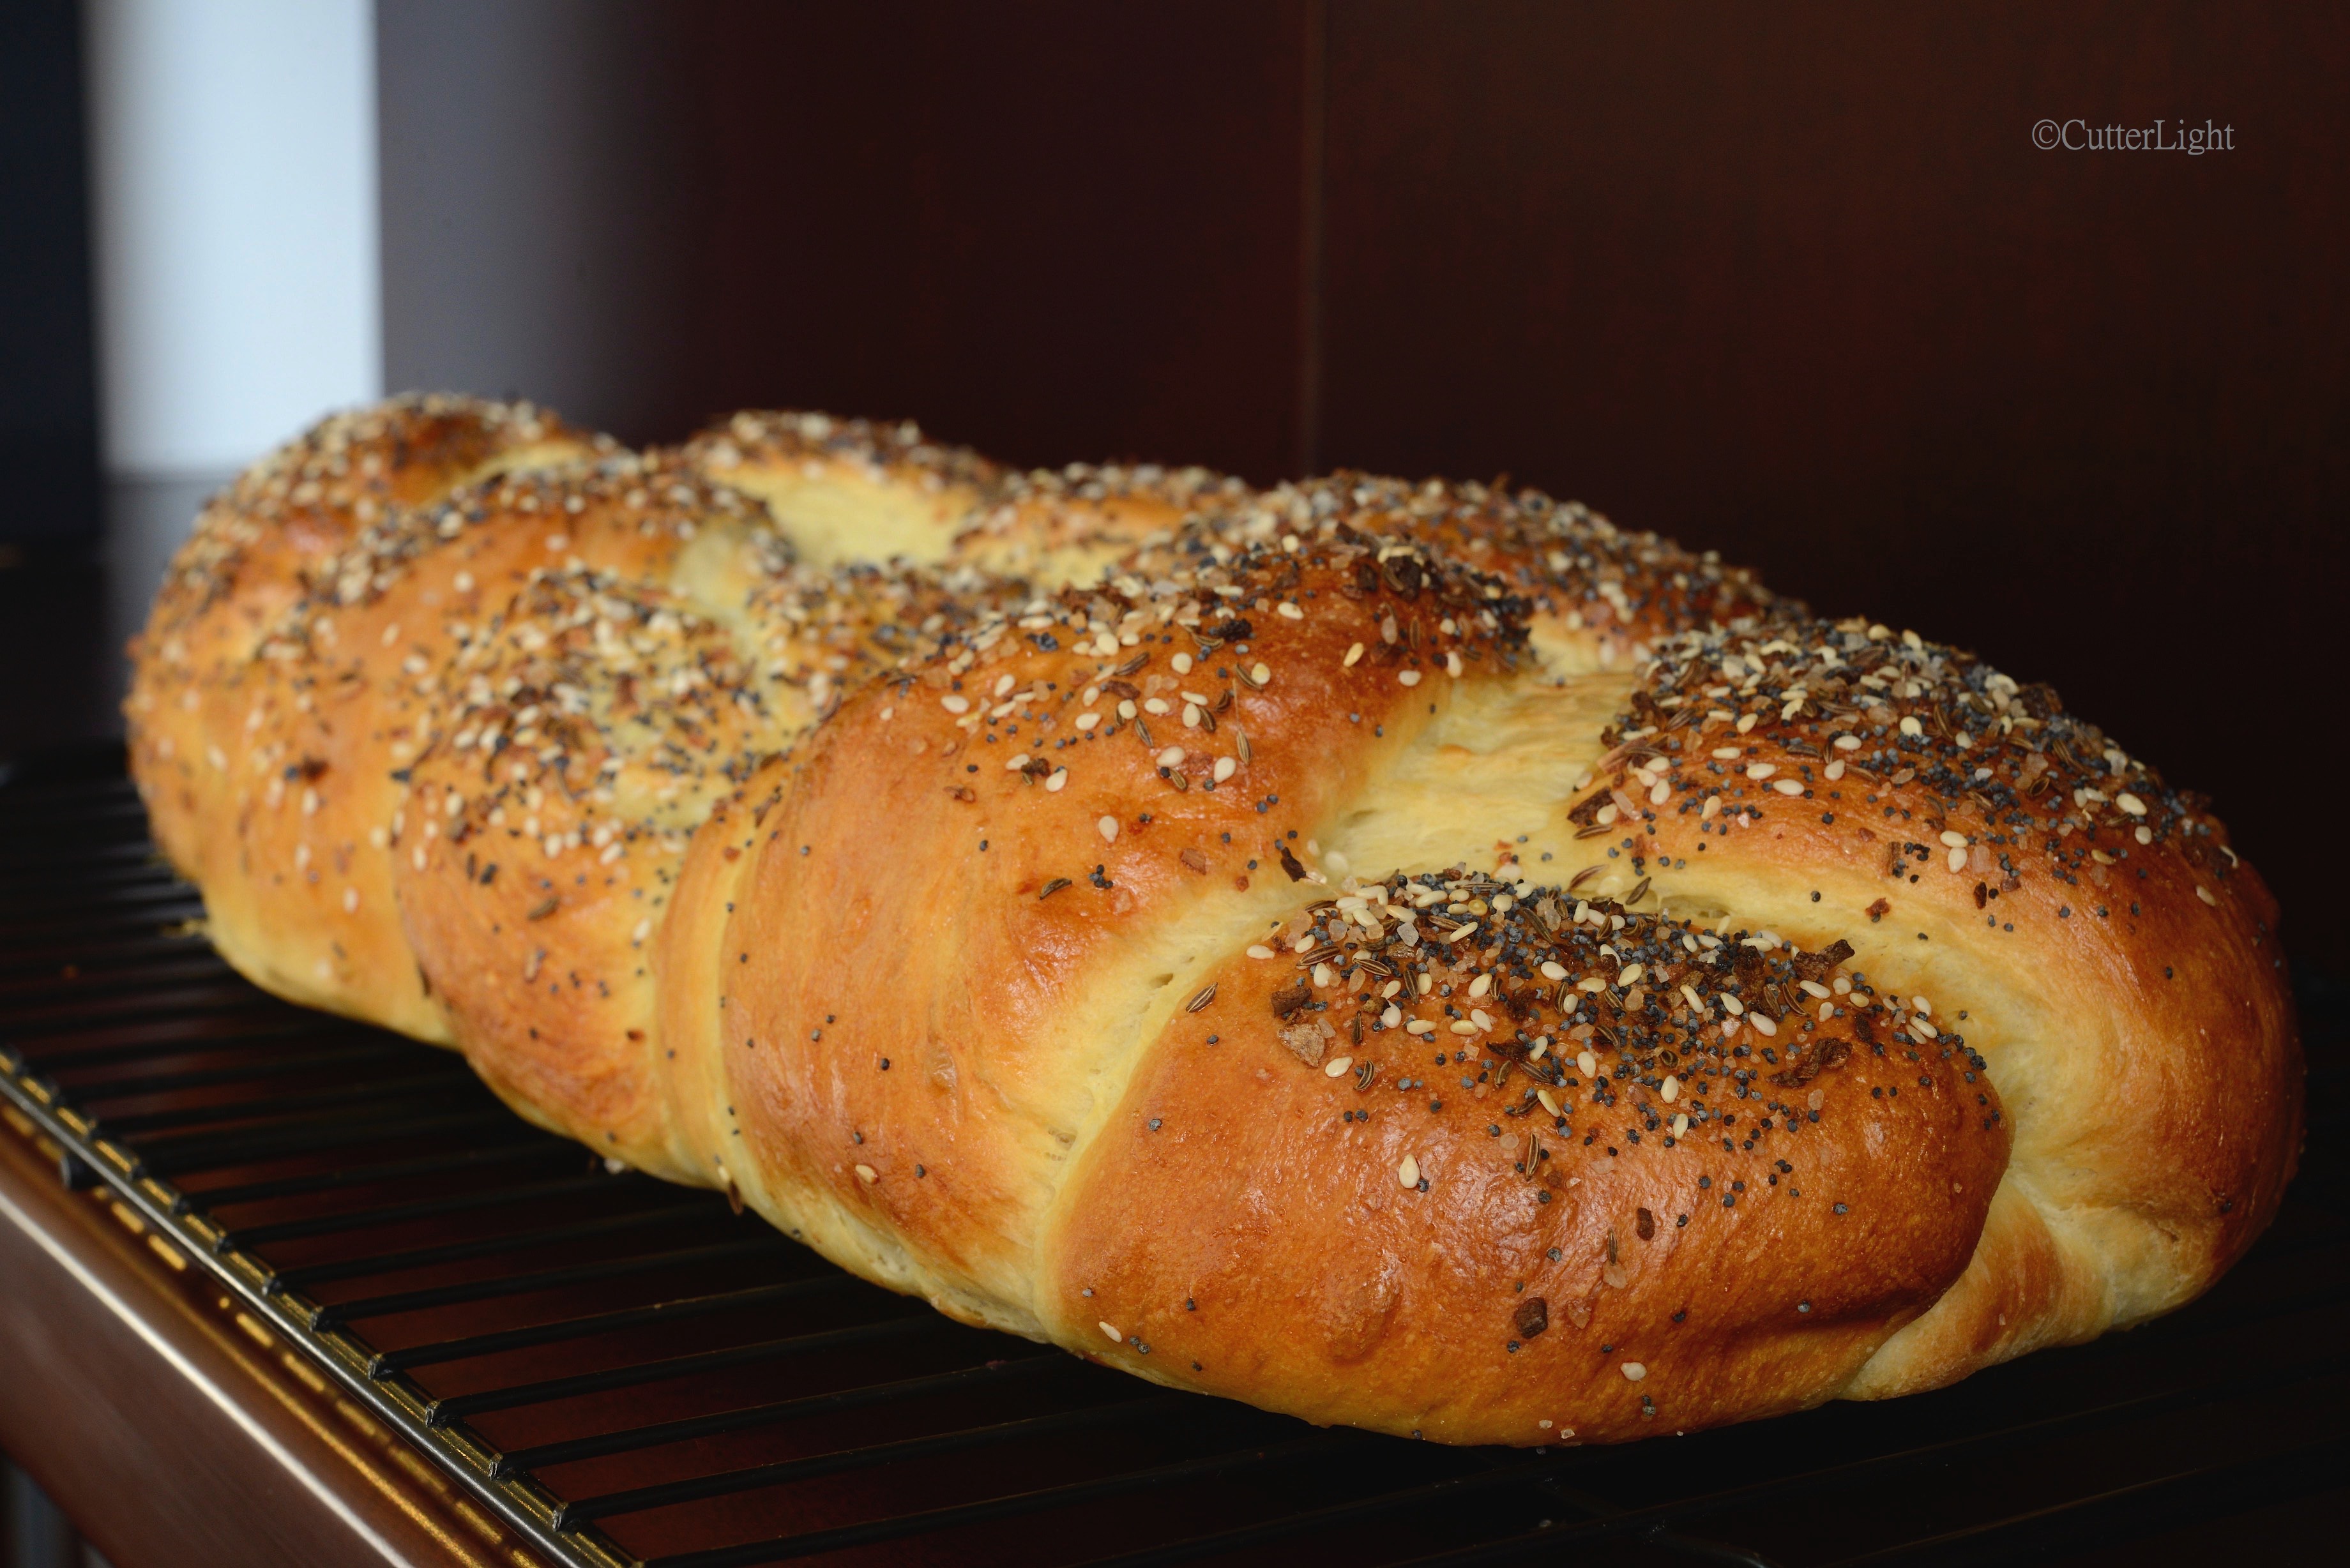
Our traditional dinner pizzas tend to be fully loaded, like our cheese and burger pizzas or smoked anchovy and salmon pizzas or our Alaska silver salmon pizzas. Pizza crusts can be loaded up for breakfast, too. How about a pepperonata and fried egg pizza? Or brush on some olive oil and grate some parmesan cheese on the crust, bake for 10 minutes and you have yourself a tasty appetizer. The possibilities are endless.

Individual-Sized Pizza Crusts

Ingredients

  • 1 1/4 cups water
  • 2 tbsp olive oil
  • 1 1/2 tsp active dry yeast
  • 1 1/2 tbsp granulated sugar
  • 3 3/4 cups all-purpose flour
  • 1 1/2 tsp salt

Directions

  1. Mix water, olive oil, yeast, and sugar together in a large bowl.
  2. Mix in salt and about half of the flour.
  3. Knead in more flour in increments of about 1/4 cup. (I actually knead the dough in the large bowl.)
  4. When all flour is incorporated, dough should no longer be sticky.
  5. Turn the dough out onto a lightly floured surface and clean the large bowl.
  6. Oil the bowl well and place the dough in the bowl. Cover with plastic wrap and let the dough rise until doubled, about an hour.
  7. Divide dough into six pieces. Stretch the dough into the shape of a plate. Let pizza-shaped crusts rest for 10 minutes while you preheat oven.
  8. Preheat oven to 400 degrees F (about 200 degrees C). Preheat with baking stone in oven. If you don’t have a baking stone, preheat baking sheet.
  9. Place two crusts on baking stone, pricking each generously with a fork.
  10. Bake for 10 minutes.
  11. Repeat with remaining crusts.
  12. Let cool completely before you keep in the freezer or refrigerator.
  13. When you are ready to use crusts, let them thaw slightly (if frozen) cover with desired toppings and bake at 400 degrees F (200 C) for about 10 minutes – cheese should be bubbly and slightly browned.

Need some tasty ideas to top these crusts?

Click here for silver salmon pizza.

Click here for smoked anchovy and salmon pizza.

Click here for pepperonata and fried egg pizza.

When You Cross a Monster Cookie with a Fudgy Brownie…

Monster Brownie n

A decadent, sweet confection stuffed with peanut butter and chocolate and decorated with the fun colors of M&Ms. This Monster Brownie is a rich, colorful dessert delicious for any age.

Once a month or so, I bake for my students. They earn tickets in the classroom and can spend the tickets on “bake sale” day. It’s a tasty incentive that allows me to bake, which I enjoy, and allows them to have a tasty reward for their hard work and good behavior. My bake sales have created monsters… cookie monsters! After the first couple of baking events, my students started to come up with ideas and challenges for me to bake. One of the first rewards was a fudgy brownie with a chocolate ganache frosting. Of course, this went over quite well. Several bake sales later, I brought in mini monster cookies… which were an instant hit. One day, my cookie monsters were arguing over the best baked treat I had brought them. It was fudgy brownies versus monster cookies. There was only one way to settle this argument… a confection made up of all the flavors of both of these confections. So, monster brownies were born.

As you might guess, the monster brownies came out fantastically. The fudginess of the original brownie recipe was retained. Swirling in a peanut butter mixture, instead of mixing in peanut butter, kept the peanut butter flavor as an upfront flavor. After mixing in the M&Ms, I reserved a few extra M&Ms to speckle the top to make sure there was no mistake that this was a monster brownie! My bake sale “customers” were extremely happy.

Monster Brownies

Ingredients

Brownie Batter

  • 10 tbsp unsalted butter, melted
  • 1 1/4 cups granulated sugar
  • 3/4 cup unsweetened Dutch-processed cocoa powder
  • 1/2 cup all-purpose flour
  • pinch salt
  • 1/2 tsp vanilla extract
  • 2 large eggs
  • 2/3 cup M&Ms

Peanut butter filling

  • 4 tbsp unsalted butter, melted (Use a quality brand made only of roasted peanuts or roasted peanuts and a dash of salt, such as Laura Scudder’s or Adams.)
  • 1/2 cup confectioner’s sugar
  • 3/4 cup natural peanut butter
  • pinch salt
  • 1/2 tsp vanilla extract

Directions

  1. Preheat oven to 325 degrees F (160 degrees C).
  2. Line an 8 x 8 inch glass baking dish with foil. Grease foil. Set aside.
  3. In a medium bowl, mix together melted butter and sugar.
  4. Sift in cocoa powder and flour to eliminate lumps.
  5. Mix well.
  6. Mix in vanilla and eggs.
  7. Fold in M&M pieces.
  8. Set aside and make peanut butter filling.
  9. In another medium bowl, mix filling ingredients together until mixture is smooth.
  10. Pour about 1/2 of the brownie batter evenly into prepared baking dish.
  11. Scoop tablespoons of peanut butter filling and drop onto brownie batter.
  12. Pour remaining batter on top of peanut butter filling.
  13. Gently drag a butter knife through all layers going from left to right and from top to bottom in order to slightly mix batter.
  14. Bake for about 50 minutes. A wooden stick inserted into brownies will have a few crumbs and not be wet. Check the brownies away from the edge and away for the middle for best results.
  15. Let cool slightly in pan. Finish cooling on wire rack.
  16. Cut when completely cooled.

Almond Bread Pudding with Cognac Caramel

bread pudding n

You don’t need to share an individual serving of sweet nutty bread pudding drizzled with cognac caramel sauce!

Heavy whipping cream is not readily available in Ulaanbaatar. This surprised me. Since the Mongolian culture is heavily tied to herding and to dairy, I assumed that whipping cream would be much easier to get than in remote Point Hope, Alaska, where we had to fly in this precious commodity. The plight of whipping cream difficulties has followed me across the globe. Well, that’s a bit overdramatic. I did come across heavy whipping cream in the one store that carries many western groceries here in UB. But at about $28 a liter, I decided it wasn’t worth it. Plus it was UHT (ultra heat temperature processed) in order to keep it shelf stable. My experience with UHT whipping cream is that it turns to butter with the slightest amount of whipping.

The other day, I noticed a box of a new product in the dairy section of a grocery store we frequently shop. Everything was in Korean, except for the words “whipping cream.” Since the price was reasonable and since I could not find anything that looked like “UHT” written anywhere, I took a chance. Boy, am I glad I did! Not only does this cream whip up beautifully, it is the best tasting whipping cream I have ever had.

As is often the case in Ulaanbaatar, a product is here one day and gone the next. Alas, I can no longer find this whipping cream, so I am using it sparingly. I hope it will show up again.

One of our favorites is bread pudding. Using pantry staples such as homemade French bread, toasted almonds, and good cognac, I baked a small batch of individual bread puddings. It was the perfect amount for us to enjoy and share with guests. And it was a delicious way to use some of the precious heavy whipping cream.

Almond Bread Pudding with Cognac Caramel

Ingredients

  • 1/4 cup almonds, chopped and toasted
  • 2 tbsp unsalted butter, melted
  • 1/2 cup milk
  • 1/2 cup heavy cream
  • 1/4 cup granulated sugar
  • 1/2 tsp cinnamon
  • 1/4 tsp freshly grated nutmeg
  • 1 tsp almond extract
  • 2 eggs, beaten
  • 2 1/2 cups French bread, cubed small

Ingredients for cognac caramel

  • 1/4 cup brown sugar
  • 3 tbsp heavy cream
  • 2 tbsp good quality cognac

Directions

  1. Preheat oven to 325 degrees F (160 degrees C). Grease 6 cups in a muffin tin. Set aside.
  2. Whisk together melted butter, milk, cream, sugar, cinnamon, nutmeg, almond extract and eggs in a medium bowl.
  3. Stir in bread cubes. Let sit for a few minutes to allow the bread to soak up egg mixture.
  4. Divide mixture equally into prepared muffin tin.
  5. Bake for 20 minutes.
  6. Add almonds to the tops of bread puddings and bake for 10 more minutes.
  7. Let the bread puddings cool in the tin for 10 minutes. While they are cooling, make the cognac caramel.
  8. Bring brown sugar and cream to a boil in a small pan and continue to cook for 2 more minutes. Sauce should thicken.
  9. Remove from hit and stir in cognac.
  10. Loosen the bread puddings from tin by cutting around the edges with a knife. Transfer puddings to individual plates.
  11. Drizzle cognac caramel sauce on each bread pudding and serve warm.

Two Monster-Sized Monster Cookies

Monster Size Monster Cookies n

Sometimes you need a big, soft, peanut buttery cookie stuffed with M&Ms and white chocolate chips.

OK, sometimes you need two. I love recipes measured in tablespoons and minutes, especially when they produce a soft cookie with an instant connection to childhood – and when there is enough to share with a friend.

Two Monster-Sized Monster Cookies

Ingredients

  • 2 tbsp unsalted butter, melted
  • 2 tbsp granulated sugar
  • 2 tbsp brown sugar
  • 1 large egg, beaten
  • 1/2 tsp vanilla extract
  • 2 tbsp peanut butter
  • 8 tbsp all-purpose flour
  • 4 tbsp quick oats
  • 1/4 tsp baking soda
  • pinch salt
  • 1/3 cup M&Ms
  • 2 tbsp white chocolate chips

Directions

  1. Preheat oven to 325 degrees F (160 C).
  2. Line baking sheet with parchment paper.
  3. In a large bowl, mix together first 6 ingredients.
  4. Stir in flour, oats, baking soda, and salt.
  5. Fold in M&Ms.
  6. Fold in chocolate chips.
  7. Divide dough in half. Scoop each half onto parchment-lined baking sheet. Flatten slightly.
  8. Bake for 20 – 22 minutes, until edges are slightly browned.
  9. Let cookies cool on baking sheet for about 10 minutes.

Recipe adapted from Sally’s Baking Addiction.


Double Flamed Coq au Vin on Homemade Pappardelle Pasta

Coq au vin n

With culinary roots tracing all the way back to the days of Julius Caesar, coq au vin remains one of the most savory dishes you can serve.

Popularized in America by Julia Child, coq au vin had been on our “to cook” list for quite some time. Fortunately, the ingredients for this dish are widely available. Even in Mongolia, we had no difficulty putting everything together.

Although not strictly necessary, flaming the chicken leg and thigh with a shot of cognac gives this dish an especially savory, umami flavor. Doing likewise with the vegetables makes it all the better. Thus, Double Flamed Coq a Vin.

Double Flamed Coq a Vin

Ingredients

  •  2/3 cup lardons or cubed, thick bacon
  • olive oil
  • 2 to 3 pounds chicken legs and thighs on the bone, patted dry. Preferably thigh and leg together.
  • 1/2 cup cognac, separated in half
  • smoked sea salt
  • cracked black pepper
  • 1 bay leaf
  • 1/2 tsp dried thyme, separated
  • 3 tbsp all purpose flour
  • 2 cups dry red wine such as Burgundy, Syrah, etc.
  • 2 cups chicken stock, canned or see recipe below
  • 4 garlic cloves, minced
  • 2 tbsp tomato paste
  • 1 lb fresh mushrooms such as crimini, chopped large
  • 2 tbsp unsalted butter
  • 2 medium carrots, chopped coarse
  • 2 medium onions, chopped coarse
  • 2 cups leaks chopped into generously thick (1 cm) cylinders

Directions

  1. Salt and pepper chicken. Let rest.
  2. Add olive oil and bacon to a sauté pan with high sides and heat over medium-high burner. When bacon is rendered, remove and set aside.
  3. Add the chicken to sizzling hot oil and bacon fat and sear on all sides, using tongs to move the chicken.
  4. When the chicken is seared brown, add 1/4 cup cognac. Make sure the area is cleared, your hair is tied back, and a lid is handy to smother the flames, if necessary. Light the cognac and let it burn itself out.
  5. Return bacon to pan and add red wine, chicken broth, bay leaf, 1/4 tsp of thyme and garlic. Simmer to allow liquids to cook down somewhat – about 1/2 hour.
  6. In a stock pot, add butter and olive oil and heat on medium-high burner. Add onions, carrots, salt, pepper, and 1/4 tsp thyme. Stir occasionally. When onions and carrots just begin to soften, add leaks and mushrooms and continue cooking till just tender.
  7. Add 1/4 cup cognac and flame.
  8. Vigorously stir in flour, adding more butter or olive oil, if necessary.
  9. Add liquid from chicken to the vegetables in the stockpot and stir together so that the flour mixes to thicken the liquid. Add chicken and additional seasonings to taste.
  10. Serve on a bed of wide pasta such as pappardelle.

Chicken Stock from Scratch

Ingredients

  • 2 lbs chicken bones and trimmings, chopped to expose marrow
  • smoked sea salt
  • 12 whole peppercorns
  • 1 bay leaf
  • 1 tbsp sage
  • 1 medium onion, chopped coarse
  • 1 medium carrot, chopped coarse
  • 2 large cloves garlic, chopped coarse
  • 1/2 cup dry white wine (optional)
  • water to cover all

Directions

  1. Use a meat tenderizer or heavy chopping knife to crack and break chicken bones so that marrow is exposed.
  2. Add ingredients to a stock pot. Bring to boil. Reduce to simmer. Cook for 20 minutes.
  3. Strain broth through a fine wire strainer. Use fresh or freeze.

Semolina Grissini – Italian Style Crunchy Breadsticks

semolina grissini n

Crunchy, savory sticks ready to be eaten plain, wrapped in prosciutto, or dipped in any savory sauce imagined. In addition to the rich flavor extra virgin olive oil provides, our grissini were peppered with black sesame seeds, poppy seeds, smoked rock salt, and charnushka.

semolina grissini in red bowl n

Grissini make a fabulous edible table centerpiece, and they are a cool prop to animate your dinner conversations!

Grissini, Italian-style crisp breadsticks, have long been on my list to make. They are a tasty and fun addition to so many meals. Imagine a romantic Italian meal where grissini are centered on the table alongside tapered lit candlesticks. How about enjoying grissini with a meal of crispy salad and hearty minestrone? The list could go on.

Any type of herbs or spices could be kneaded or pressed into the dough before baking. I experimented with poppy seeds, black sesame seeds, rock salt and charnushka. The smoked rock salt was the clear winner in the flavor category, but charnushka was a close second. If you haven’t experimented with this seed yet, now is the time. Charnushka has a moderately nutty, smoky, peppery flavor that I first enjoyed on one version of everything bagels. They worked perfectly on the grissini.

Semolina Grissini

Ingredients

  • 1 1/4 cups warm water (110 degrees F/43 degrees C)
  • 2 tsp granulated sugar
  • 1 tbsp active dry yeast
  • 2 tbsp extra virgin olive oil
  • 1 tsp salt
  • 1 3/4 cups all-purpose flour
  • 1 3/4 cups semolina flour
  • 2 tsp toppings of your choice (smoked rock salt, poppy seeds, charnushka, etc.)
  • additional extra virgin olive oil for brushing on sticks before they bake

Directions

  1. Stir water, sugar and yeast together in a large bowl. Let sit for about 5 minutes to ensure your yeast is bubbling and active.
  2. Stir in olive oil.
  3. Add 1/2 of both flours and the salt. Mix well.
  4. Stir in 1/2 of remaining flour.
  5. Turn dough out onto a lightly floured surface.
  6. Knead in the rest of the flour. Continue kneading until dough is smooth and flour is well-incorporated, about 5 minutes. Dough will have a slightly coarse texture due to the semolina flour.
  7. Lightly oil a large bowl. Place dough in bowl. Turn to coat.
  8. Cover bowl with plastic wrap. Let dough rise in a warm, draft-free location until doubled in size, about 1 1/2 hours.
  9. Cut the dough into 24 equal pieces.
  10. Roll each piece into dough sticks, about 12 inches long, or the length of your baking sheet.
  11. Brush both sides of dough sticks generously with olive oil.
  12. Press in toppings, if desired.
  13. Preheat oven to 375 degrees F (190 degrees C).
  14. Place 6 dough sticks on parchment-lined baking sheet.
  15. Bake for 10 minutes. Flip sticks over and bake for 5 more minutes. Sticks should be lightly browned and crispy.
  16. Repeat with remaining dough, baking batches of 6.

Scratch Pancakes for Two

pancakes from scratch n

Fluffy homemade pancakes served with perfectly ripe bananas, toasted almonds, pure maple syrup and rich, whipped cream. Serves two. Fantastique!

I don’t know how many times we’ve heard that scratch pancakes won’t come out as good as pancakes from a mix. In fact, we’d heard it so many times that for years we fell into blindly relying on Krusteaz pancake mix. Good stuff, but not as good as this…

Everything from scratch tastes better. So we thought it was time to put the pancake myth to the test. Armed with seven pantry staples – things you probably already have in your kitchen, on your camper or in your galley – I went to work. The verdict? Everything from scratch tastes better!

Scratch Pancakes for Two

Ingredients

  • 3/4 cup all-purpose flour
  • 1 3/4 tsp baking powder
  • 1/2 tsp salt
  • 1 1/2 tsp granulated sugar
  • 1/2 tsp vanilla extract
  • 1/2 cup milk
  • 1 large egg
  • 2 tbsp unsalted butter, melted

Directions

  1. In a large bowl, whisk together flour, baking powder, salt and sugar.
  2. In a small bowl, whisk together vanilla, milk, egg, and butter.
  3. In the large bowl, make a well in the center of the flour.
  4. Pour milk mixture into the well.
  5. Whisk milk mixture into flour mixture until smooth, do not overmix.
  6. Heat a lightly oiled medium frying pan over medium-high heat.
  7. Scoop about 1/4 cup of mixture onto frying pan. Brown both sides of pancakes.
  8. Serve hot pancakes with toasted nuts, syrup, fruit and whipped cream.

Twisted Sweet Adzuki Bean Roll

sweet buns w adzuki bean filling n

Stuffed sweet dough is fairly easy to make and yields delicious results. Sweet, nutritious adzuki beans burst from this roll sprinkled with black sesame seeds. 

I have happy memories of making both steamed and baked versions of sweet buns for New Year’s Eve in Alaska a few years ago. These Arctic anpan were enjoyed by everyone. Back in those days, I relied on my Zojirushi bread maker to mix and rise all the dough for me. Now that we are in Mongolia, I am determined to make all my dough from scratch without the aid of any kind of machine. I’ve found that my bread machine recipes need just a little tweaking in order to convert them to fully handmade.

This from-scratch sweet dough recipe is simple enough. In order to amp up the looks of this confection, I jelly-rolled sweet adzuki paste into the sweet dough, slashed the dough as you would miniature French bread loaves, brushed them with egg to give the finished product a golden brown sheen, and sprinkled black sesame seeds for added flavor and a dash of “wow.” A friend at work told me these confections reminded her of bakery goods she used to buy in fancy Vietnamese boulangeries.

Sweet Adzuki Bean Roll

Ingredients

  • 1/2 cup granulated sugar
  • 1 cup warm milk
  • 1 tbsp yeast
  • 4 cups all-purpose flour
  • 2 eggs, beaten (reserve 1 tbsp egg)
  • 6 tbsp oil
  • 1 tsp salt
  • 1 cup sweet adzuki paste*
  • 1 tsp black sesame seeds

Directions

  1. Whisk sugar, milk and yeast together in a large bowl. Let stand for a few minutes until yeast starts to foam.
  2. Stir in egg, oil, and salt.
  3. Stir in flour and mix until well combined.
  4. Turn dough out onto floured surface.
  5. Knead until smooth and elastic, about 10 minutes.
  6. Place dough in an oiled bowl, covered with plastic wrap. Let rise until doubled, about 2 hours.
  7. Line a baking sheet with parchment paper.
  8. Roll dough into a thick rope.
  9. Cut dough into 12 equal pieces.
  10. Roll each piece into a rectangle, about 5 inches by 6 inches.
  11. Spread adzuki bean paste (about 2 tbsp) onto rectangle, avoiding the edges.
  12. Roll the dough, jellyroll-style. Pinch to seal the seam.
  13. Place rolls, seam side down on baking sheet.
  14. Repeat with remaining rolls.
  15. Cover rolls and let rise for 30 minutes.
  16. Slash the rolls a few times with sharp knife.
  17. Brush all rolls with reserved egg. Sprinkle rolls with black sesame seeds.
  18. Preheat oven to 350 degrees F (175 degrees C).
  19. Bake for 20 minutes. Finished buns should be browned and shiny.

*I made adzuki bean paste using just dried adzuki beans, water and sugar following the excellent directions from Japanese Cooking 101.

Dough recipe adapted from allrecipes.com.

Matcha Adzuki Bean Glazed Rolls

adzuki bean glazed role n

Sweet adzuki bean paste rolled into matcha-flavored dough with a dollop of buttery frosting… a confection you might expect to find in a trendy coffee shop in San Francisco’s Mission District.

My culinary love affair with matcha green tea is deepening. Cookie dough was an easy place to start with the distinctive flavor of this Japanese tea. In the midst of sampling my matcha butter cookies, my mind was already racing to the next possible recipes that could feature matcha… and then I remembered the bag of dried adzuki beans sitting on the shelf. What about sweet adzuki bean paste rolled into a matcha green tea dough – an Asian fusion cinnamon roll? Brilliant! All the fun of unrolling breakfast and enough tasty sweetness to satisfy without the gooey sugar overload of a traditional cinnamon roll.

Thinking ahead to life in a tiny home, I created a small batch version of these rolls that are made in a 6-muffin tin. I made the rolls the night before and placed them in a buttered muffin tin in the fridge overnight. They rose in the fridge and were ready for breakfast with minimal time and minimal oven energy. All good aspects for a tiny home recipe.

Matcha Adzuki Bean Glazed Rolls

Ingredients

  • 1/3 cup milk
  • 2 tbsp unsalted butter, softened
  • 2 tsp yeast
  • 2 tbsp granulated sugar
  • 1 egg, beaten
  • 1 1/2 cups all-purpose flour
  • 1 tsp green matcha tea powder
  • pinch salt
  • 1 cup adzuki bean paste*

Glaze

  • 1/4 cup confectioner’s sugar
  • 1 tbsp unsalted butter, softened
  • 1 tsp milk

Directions

  1.  Warm milk and butter in a small saucepan until it reaches about 110 degrees F (43 degrees C).
  2. Place yeast and granulated sugar into a large bowl. Pour warmed milk mixture into bowl. Whisk together.
  3. Whisk in egg and salt.
  4. Mix in matcha powder.
  5. Stir in flour, 1/2 cup at a time.
  6. When dough has pulled together, turn it out onto a lightly floured surface and knead until smooth, about 5 minutes.
  7. Let dough rest for about 10 minutes.
  8. Roll out dough to about a 6 x 9 inch rectangle.
  9. Spread adzuki bean paste evenly onto dough.
  10. Take the 6-inch side and roll dough, jelly roll style. Pinch seam to seal.
  11. Cut into 6 equal pieces.
  12. Place pieces into buttered 6-muffin tin. Cover with plastic wrap and refrigerate overnight.
  13. Bring rolls out 30 minutes before baking. Preheat oven to 375 degrees F (190C).
  14. Bake rolls for 15 minutes. Top will be golden brown. Remove rolls from muffin tin to cool slightly.
  15. While rolls are baking, whisk together glaze ingredients until smooth.
  16. Dollop glaze onto slightly cooled rolls and enjoy. Leftovers are a good snack served at room temperature.

*I made adzuki bean paste using just dried adzuki beans, water and sugar following the excellent directions from Japanese Cooking 101.

Like Everything Bagels? You’ll Love Everything Bread!

everything bread n

Braided bread topped with anything you’d like! We topped ours with smoked sea salt, sesame seeds, caraway seeds, poppy seeds, and dried minced onion.

The beautiful photo on Taste of Home’s website grabbed my attention. With tasty success making everything bagels, I decided to tinker with their bread recipe and see what happened. Jack’s review – salty, hearty yet soft and perfect to go with a bean soup he whipped up. Oh yeah, he said “Magnificent!” too. My review – easy dough to work with with a delicious result. I really liked how the everything topping added layers and layers of flavors. I would agree with “Magnificent!”

Everything Braided Bread

Ingredients

  • 2 1/4 tsp yeast
  • 3/4 cup warm water
  • 1 cup warmed milk
  • 1/4 cup unsalted butter, melted
  • 2 tbsp sugar
  • 1 egg yolk
  • 1 1/2 tsp salt
  • 4 1/2 cups all-purpose flour
  • 1 egg white
  • 1 tsp coarse sea salt, or kosher salt
  • 1 tsp dried minced onion
  • 1 tsp caraway seeds
  • 1 tsp sesame seeds
  • 1 tsp poppy seeds

Instructions

  1. In a large bowl, whisk together warm milk, water, and yeast.
  2. Add butter, sugar, egg yolk, salt, and 2 cups of flour. Mix together well.
  3. Add another cup of flour and mix thoroughly.
  4. Add another cup of flour and mix thoroughly again.
  5. Knead in remaining 1/2 cup of flour until dough is smooth and elastic, about 6 minutes.
  6. Place dough in large oiled bowl. Make sure to roll the dough so that entire dough ball is lightly covered in oil.
  7. Cover bowl with plastic wrap and let rise until doubled, about 1 hour.
  8. Punch dough down. Turn dough onto lightly floured surface and divide into thirds.
  9. Roll each third into a long rope, about 20 inches long.
  10. Place ropes on a parchment-lined baking sheet.
  11. Pinch one end of ropes together and braid remaining strands. Pinch together both ends firmly, so that braid doesn’t come undone.
  12. Cover and let loaf rise until doubled, about 45 minutes.
  13. Preheat oven to 375 degrees F (about 190 degrees C).
  14. Combine salt, onion and seeds in a small bowl.
  15. Brush loaf with egg white.
  16. Sprinkle salt combination evenly over loaf.
  17. Bake loaf for about 22 minutes. Loaf will be golden brown. The smell will delight you.
  18. Let loaf cool on a wire rack before serving.