Ginger Pear Cranberry Sauce: Delicious on Roasted Turkey or Duck

cranberry sauce ginger pear n

Top row: pear butter, smoked salmon, cloudberry jam. Second row: Arctic blueberry jam, cranberry sauce, cloudberry jam. Third row: Arctic blueberry jam, pear butter, smoked salmon.

Small batch canning has become a perfect way to preserve many foods in our Arctic home. We anticipate that this skill will transfer nicely to our galley kitchen aboard the sailing vessel Bandon.

We recently read an article about items that are supposedly “not worth the time to make in your own kitchen.” The three items that topped this rather specious list were yogurt, pasta and jam. Of course, we heartily disagree on each count. The hands-on time for our delicious homemade yogurt is about 15 minutes, and while it takes a little longer to turn out a few servings of pasta, the time invested results in noodles that trump any store-bought variety. And jam can be made between dinnertime and bedtime – including the processing time in the water bath. Knowing where your hand-picked berries and self-harvested salmon come from: priceless. As those in-the-know can attest, the rewards go beyond even that. Our meals are infused with memories of mornings in berry fields as we dip into our jam and of days on water and of the friends we shared fishing experiences with as we open jars of beautifully cured salmon.

Just in time for the holidays, we’ve added ginger pear cranberry sauce to our home-canned collection. We adapted the recipe from Full Circle Farms, which was thoughtfully tucked into a box containing our order of organic cranberries and D’Anjou pears. The spicy ginger and sweet stewed fruit was the perfect complement to roasted turkey.

Ginger Pear Cranberry Sauce

Ingredients

  • 7 tbsp brown sugar
  • 4 tbsp red wine vinegar
  • 1 ½ tsp powdered ginger
  • pinch salt
  • 3 firm D’Anjou pears, seeded and cut into ½-inch cubes
  • 6 tbsp granulated sugar
  • 2 tsp dried lemon zest
  • 2 tsp dried orange zest
  • 1/3 cup lemon juice
  • 1/3 cup orange juice
  • ¾ lb organic cranberries

Directions

  1. In a medium saucepan, combine brown sugar, vinegar, ginger, and salt.
  2. Bring to a boil over moderate heat.
  3. Add pears. Cover and cook until pears are crisp-tender, about 10 minutes.
  4. Remove pears with slotted spoon and set aside, leaving liquid in pan.
  5. Add granulated sugar, zests, juices and cranberries to pan.
  6. Simmer over medium heat, stirring often, until cranberries pop.
  7. Reduce heat and add pears back to mixture.
  8. Cook for at least 5 minutes to allow flavors to mix. Cook longer if a thicker sauce is desired.

Makes about 4 cups of sauce.
Now THIS is an Ice Cream Sandwich!

brownie butter pecan ice cream sandwich_n

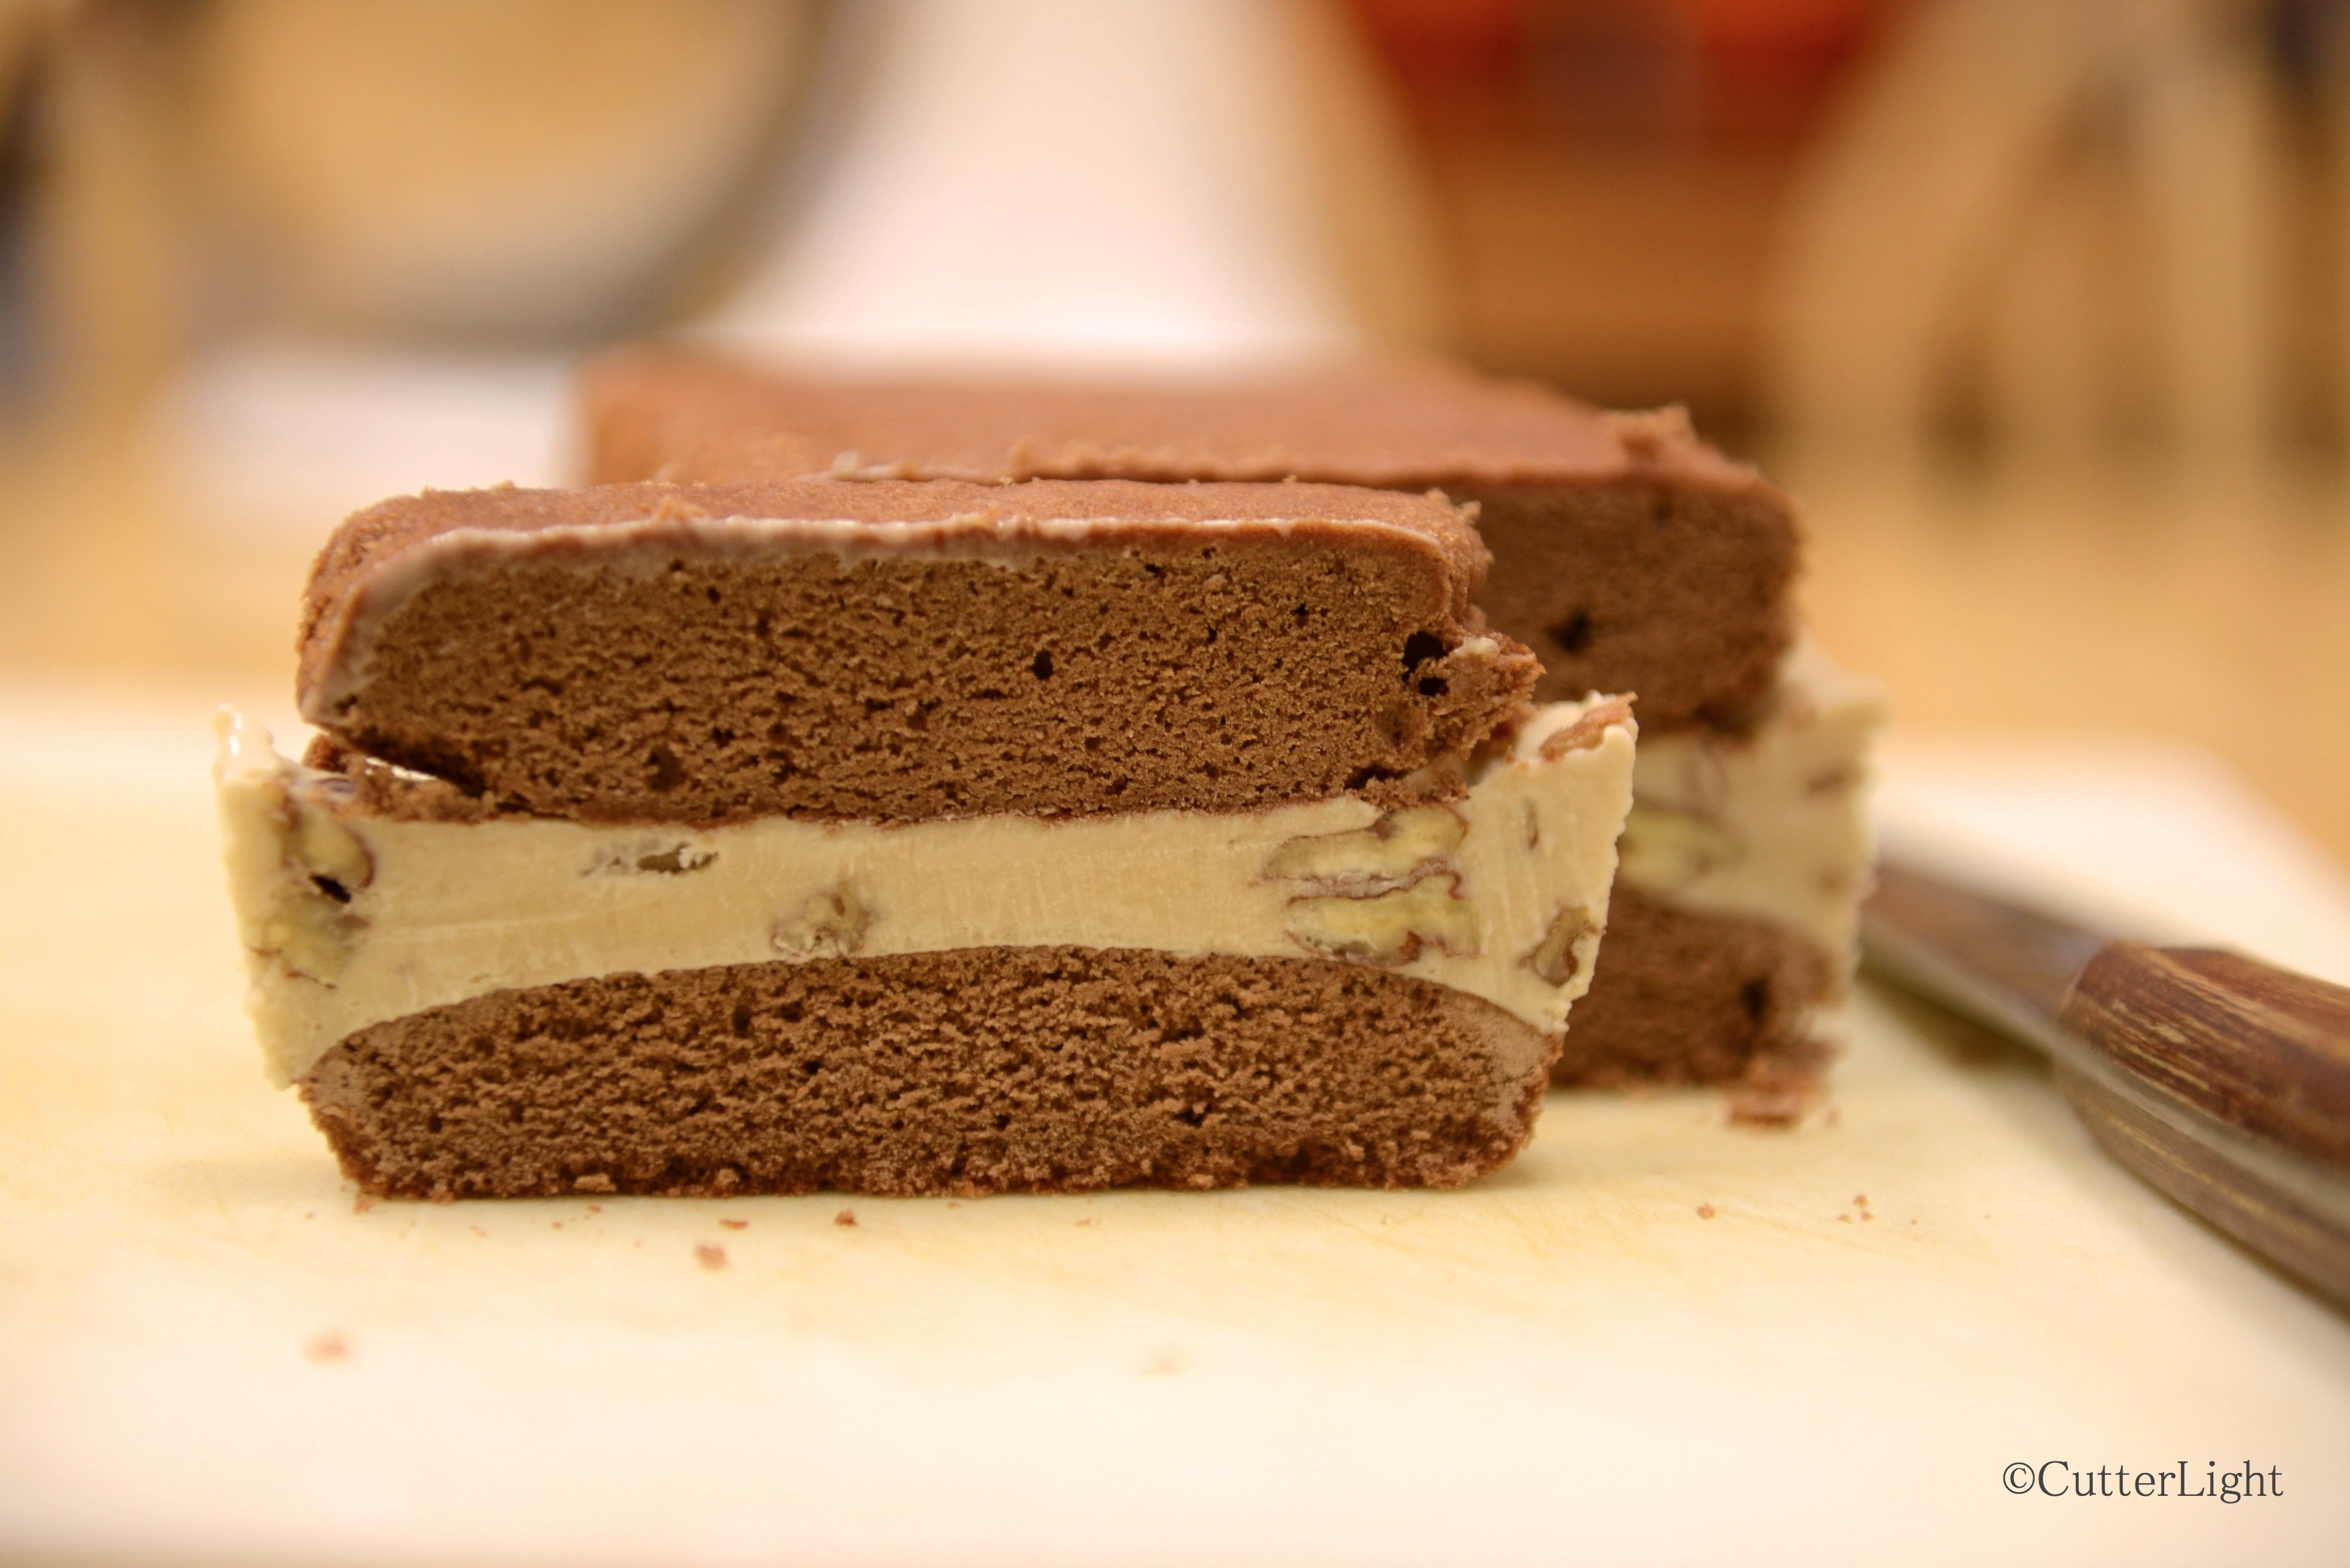
Creamy, homemade butter pecan ice cream sandwiched between chewy, chocolatey, frozen brownies – a guaranteed cure for winter-darkness doldrums! 

Store-bought ice cream sandwiches have the right idea – it’s fun to eat ice cream with your hands. The problem is that the outside layers of the store-bought variety leave much to be desired. We wanted a delicious brownie that would be more than just an edible barrier between ice cream and hands. So we created a not-too-thick brownie that retains its chewiness when it’s frozen. For the ice cream filling, we chose butter pecan to add the texture and flavor of the nuts we like best in brownies. Turned out to be the best ice cream sandwiches we’ve ever had!

Brownie & Butter Pecan Ice Cream Sandwiches

Ingredients

  • 2 oz. semi-sweet chocolate chips
  • 1/2 stick unsalted butter
  • 3 eggs
  • pinch salt
  • 1 3/4 cups granulated sugar
  • 1/2 tsp vanilla extract
  • 1/2 cup all-purpose flour
  • butter pecan ice cream (see recipe below)

Directions

  1. Preheat oven to 350 degrees F. Line two 9″ x 5″ x 3″ loaf pans with foil. Butter the foil. Set pans aside.
  2. Melt chocolate and butter in a double boiler over simmering water. Mix completely. Let mixture cool slightly.
  3. Beat eggs and salt in a mixing bowl.
  4. Gradually beat in sugar and vanilla.
  5. Mix in cooled chocolate.
  6. Mix in flour.
  7. Pour half of the batter in each loaf pan.
  8. Bake for 25 minutes. Brownies are done when a toothpick inserted in the center comes out clean. Let cool for about 15 minutes.
  9. Gently lift brownies with foil out of loaf pans and place in freezer.
  10. Place one of the empty loaf pans in freezer.
  11. Scoop out several scoops of butter pecan ice cream* into a bowl. We used about six.
  12. Stir ice cream with a rubber spatula to soften a little. You want ice cream to be spreadable, but not soupy.
  13. Retrieve one brownie and frozen loaf pan from freezer.
  14. Place brownie back into loaf pan.
  15. Spread all the ice cream evenly on brownie.
  16. Retrieve second brownie from freezer. Remove foil.
  17. Press second brownie atop the ice cream layer. Place sandwich in freezer to set, about 30 minutes.
  18. Remove sandwich from pan and place on cutting board. Using a sharp knife, slice sandwich into slices of desired size.
  19. Let sit for about 5 minutes to slightly thaw before serving.

*If you want a top notch filling for this sandwich, try making your own butter pecan! Here’s how:

Butter Pecan Ice Cream

Ingredients

  • 1 stick unsalted butter
  • 1 cup pecan halves, chopped slightly
  • 1/2 tsp salt
  • 2 large eggs
  • 3/4 cup granulated sugar
  • 2 cups heavy whipping cream
  • 1 cup whole milk

Directions

  1. Melt butter in a heavy pan over low heat.
  2. Add pecans and salt and sauté, stirring constantly until pecans start to brown.
  3. Set pecans aside to cool. Leave melted butter in pan.
  4. Whisk eggs until light and fluffy.
  5. Whisk in sugar a little at a time until completely blended.
  6. Pour in cream and milk and whisk to blend.
  7. Add reserved melted butter from pan. Mix well.
  8. Complete by following the directions of your ice cream maker or method. Add buttered pecans near the end of the ice cream maker’s cycle, when the ice cream has thickened.

Roasted Salted Pistachio and Cherry Biscotti

pistachio cherry biscotti_n

This crisp cookie bursts with the flavors of salty, roasted pistachios and tart, sweet cherries. Its attractive green and red colors would make it a welcome addition to this season’s offerings.

We picked up a bag of roasted and salted shelled pistachios last summer at Costco. The large bag of nuts was quickly opened, but we know that a rapidly expanding waistline can be the price for eating too many pistachios in too short a time. So, we put the bag in a mailing tub to be shipped north only partly consumed and forgot about it till recently. To our surprise, the nuts have remained amazingly tasty. Before they fall from grace, we wanted to make good use of them. Enter a biscotti recipe that celebrates their unique flavor. The roasted and salted aspect adds a delicious juxtaposition to the sweet tanginess of the dried cherries. We think these biscotti should be eaten all year ’round, in spite of their seasonal colors.

Roasted Salted Pistachio and Dried Cherry Biscotti

Ingredients

  • 1 3/4 cups all-purpose flour
  • 1 cup granulated sugar
  • 1/2 cup old-fashioned oats
  • 1 tsp baking powder
  • 1/2 tsp baking soda
  • 1/2 tsp salt
  • 2 large eggs
  • 3 tbsp light olive oil
  • 1 tbsp dried orange zest
  • 2 tsp dried lemon zest
  • 1 1/2 tsp vanilla extract
  • 1/2 tsp almond extract
  • 1 cup dried cherries, coarsely chopped
  • 1 cup roasted and salted pistachios, coarsely chopped

Directions

  1. Preheat oven to 350 degrees F. Line a baking sheet with parchment paper. Set aside.
  2. Combine first 6 ingredients in bowl of stand mixer fitted with a paddle.
  3. Mix on low speed until ingredients are well combined.
  4. In a separate bowl whisk eggs with next 5 ingredients.
  5. Add egg mixture to flour mixture. Beat on low until combined.
  6. Fold in cherries and pistachios.
  7. Transfer dough to a lightly floured surface.
  8. Divide dough in half.
  9. Using floured hands, shape each dough half into a 16″ long log.
  10. Place logs on parchment covered baking sheet, about 5″ apart.
  11. Flatten logs to a strip about 2″ wide, so you have two logs that are 16″ x 2″.
  12. Bake cookies until browned and set, about 30 minutes.
  13. Let cookies cool in pan placed on wire rack for about 15 minutes.
  14. Reduce oven temperature to 250 degrees F.
  15. On a cutting board, using a serrated knife, cut logs into slices, about 2/3″ thick.
  16. Place slices back on the parchment-lined baking sheets, cut side down and close together.
  17. Bake for 20 minutes.
  18. Flip the cookies to the opposite side and bake again for 20 minutes.
  19. Let cool completely before serving. Store in an airtight container at room temperature.

Recipe adapted from BON APPÉTIT

Homemade Dreamy Creamy Orange Vanilla Ice Cream

dreamy creamy orange vanilla ice cream n

Our young hand-models enjoyed orange peel halves stuffed with dreamy creamy orange ice cream in exchange for their work. (Hey, modeling is hard work!)

Today is winter solstice. Two-hundred miles north of the Arctic Circle it is 1 degree F, but the frigid breeze makes it feel like -13. The sun set fifteen days ago and hasn’t peeked above the horizon since. The official beginning of winter is the perfect day to enjoy a taste summer. This ice cream was inspired by the orange covered vanilla popsicles we enjoyed as kids.

Dreamy Creamy Orange Ice Cream

Ingredients

  • 2 large eggs
  • 3/4 cup granulated sugar
  • 2 cups heavy whipping cream
  • 1 cup whole milk
  • ⅓ cup frozen orange juice concentrate, thawed
  • 2 tsp vanilla extract

Directions

  1. Whisk eggs until light and fluffy.
  2. Whisk in sugar a little at a time until completely blended.
  3. Pour in cream and milk and whisk to blend.
  4. Add juice concentrate and vanilla and blend well.
  5. Complete by following the directions of your ice cream maker or method.

Pumpkin Ice Cream – For Pie, Lattes or Shakes!

pumpkin ice cream n

Perfectly spiced pumpkin ice cream adds another layer of delicious pumpkin to a classic fall dessert.

Fall is always accompanied by the need to satisfy pumpkin urges: pumpkin bread, pumpkin lattes, pumpkin risotto and even pumpkin pasta. As we add to our collection of ice cream recipes, pumpkin seemed an appropriate seasonal choice for a dessert that never seems too cold, even if the outside Arctic temperatures are plunging below zero. For this recipe, I turned to Ben and Jerry for advise. If the gurus of ice cream recommend using canned pumpkin, who am I to argue? The only change we made to the master recipe was the use of organic pumpkin from a box instead of non-organic from a BPA-lined can.  After following their recipe to the T, we were really pleased with the creamy texture and spiced-just-right flavor. We enjoyed a scoop atop a piece of freshly baked pumpkin pie and can also imagine it in coffee or in a milkshake.

Pumpkin Ice Cream

Ingredients

  • 2 large eggs
  • 3/4 cup granulated sugar
  • 2 cups heavy whipping cream
  • 1 cup whole milk
  • 1 cup unsweetened organic pumpkin purée
  • 1 tsp freshly grated nutmeg
  • 1 tsp ground cinnamon

Directions

  1. Whisk eggs until light and fluffy.
  2. Whisk in sugar a little at a time until completely blended.
  3. Pour in cream and milk and whisk to blend.
  4. In a large bowl, mix purée, nutmeg and cinnamon. Stir to blend.
  5. Stir half of cream mixture into pumpkin mixture. Mix well.
  6. Pour in remainder of cream mixture and mix well.
  7. Complete by following the directions of your ice cream maker or method.

Homemade Beautiful Beet Pasta with Prociutto-Wrapped Scallops

beet fettuccine w prosciutto n

Adding puréed roasted red beets to dough is an easy way to bring color to pasta such as this fettuccine topped with lightly broiled prosciutto-wrapped scallops.

Roasted beets have been among our favorite vegetables, perhaps as much for their earthy flavor as for their intense color. Beets naturally underscore the connection between the visual and the gustatory pleasures of dining. In addition to their nutritional qualities (in addition to being packed with nutrients, studies have linked beets to lower blood pressure and increased endurance among distance runners), beet juice has long been used as a natural dye. That’s where they feature in in this recipe.

To make four servings of pasta such as the fettuccine pictured above, only one third cup of  puréed beets is needed. The purée is made by simply wrapping an oil covered beet in foil and cooking until soft in a 350 degree F oven. After cooling the roasted beet slightly, purée in a blender  or food processor. Scallops, a fillet of white fish such as rockfish, walleye, porgy or snapper prepared a la meunière, sautéed shrimps or clams would all work nicely with this pasta. Add grated parmesan cheese, pine nuts or a few strips of nori cut thin and serve to smiles of surprise and anticipation.

Beet Pasta Dough

Ingredients

  • 2 cups semolina flour
  • 2 eggs
  • 1/3 cup roasted beet purée
  • 2 tbsp olive oil
  • water as needed

Directions

  1. Whisk together eggs and beet purée.
  2. Place semolina flour in a large bowl.
  3. Make a well in the middle of the semolina flour.
  4. Pour egg mixture and olive oil in well.
  5. Use a fork and scramble egg mixture into flour.
  6. Continue scrambling until dough resembles large curds. Add small amounts of water if needed.
  7. When all the dough looks like large curds, knead dough several times in order to form a dough ball.
  8. Cover dough tightly with plastic wrap and let rest for 20 minutes.
  9. Follow pasta machine manufacturer’s directions to form noodle shape of choice.

Prosciutto-Wrapped Sea Scallops (for two servings)

Ingredients

  • 4 large sea scallops
  • 4 strips prosciutto
  • 4 toothpicks
  • salt and Italian-style herbs to taste
  • light olive oil

Directions

  1. Position broiling tray just under broiler, brush with olive oil and preheat to high.
  2. Wrap scallops in prosciutto and secure prosciutto in place with a toothpick.
  3. Very lightly season scallops with salt and herbs such as fennel, marjoram, paprika or a blend such as Herbes de Provence.
  4. Broil for about 1 minute. Do not overcook.

Chocolate Mousse Cake – Chocolate, Chocolate, Chocolate!

chocolate mousse cake n

Alternate layers of moist, airy devil’s food cake and rich chocolate mousse are topped with chocolate ganache. This is the kind of cake that makes you want to skip straight to dessert!

The culminating task for The Great Courses baking classes, taught by Chef Stephen Durfee of the Culinary Institute of America, was a chocolate mousse cake. This “final exam” would test my cake, mousse and ganache making skills. After careful scrutiny and tasting, Jack gave this cake an A+. Being a bit of an overachiever, that’s the lowest grade I would accept. The recipes below did make extra mousse and ganache. Extra mousse keeps well in the refrigerator to be enjoyed later. We used the extra ganache on sundaes served in almond lace bowls.

One of the benefits to living in the Arctic is our Arctic entry. This tiny room is like a decompression chamber when coming in from icy weather outside. There are two heavy metal doors, one leading outside and one leading inside, which keeps the icy weather at bay. This time of year the temperature in the Arctic entry is warmer than outside and cooler than the house – effectively making it a refrigerator. So, it is a perfect place to chill dough, store vegetables, and cool a chocolate mousse cake before serving to dinner guests.

chocolate mousse cake w torch n

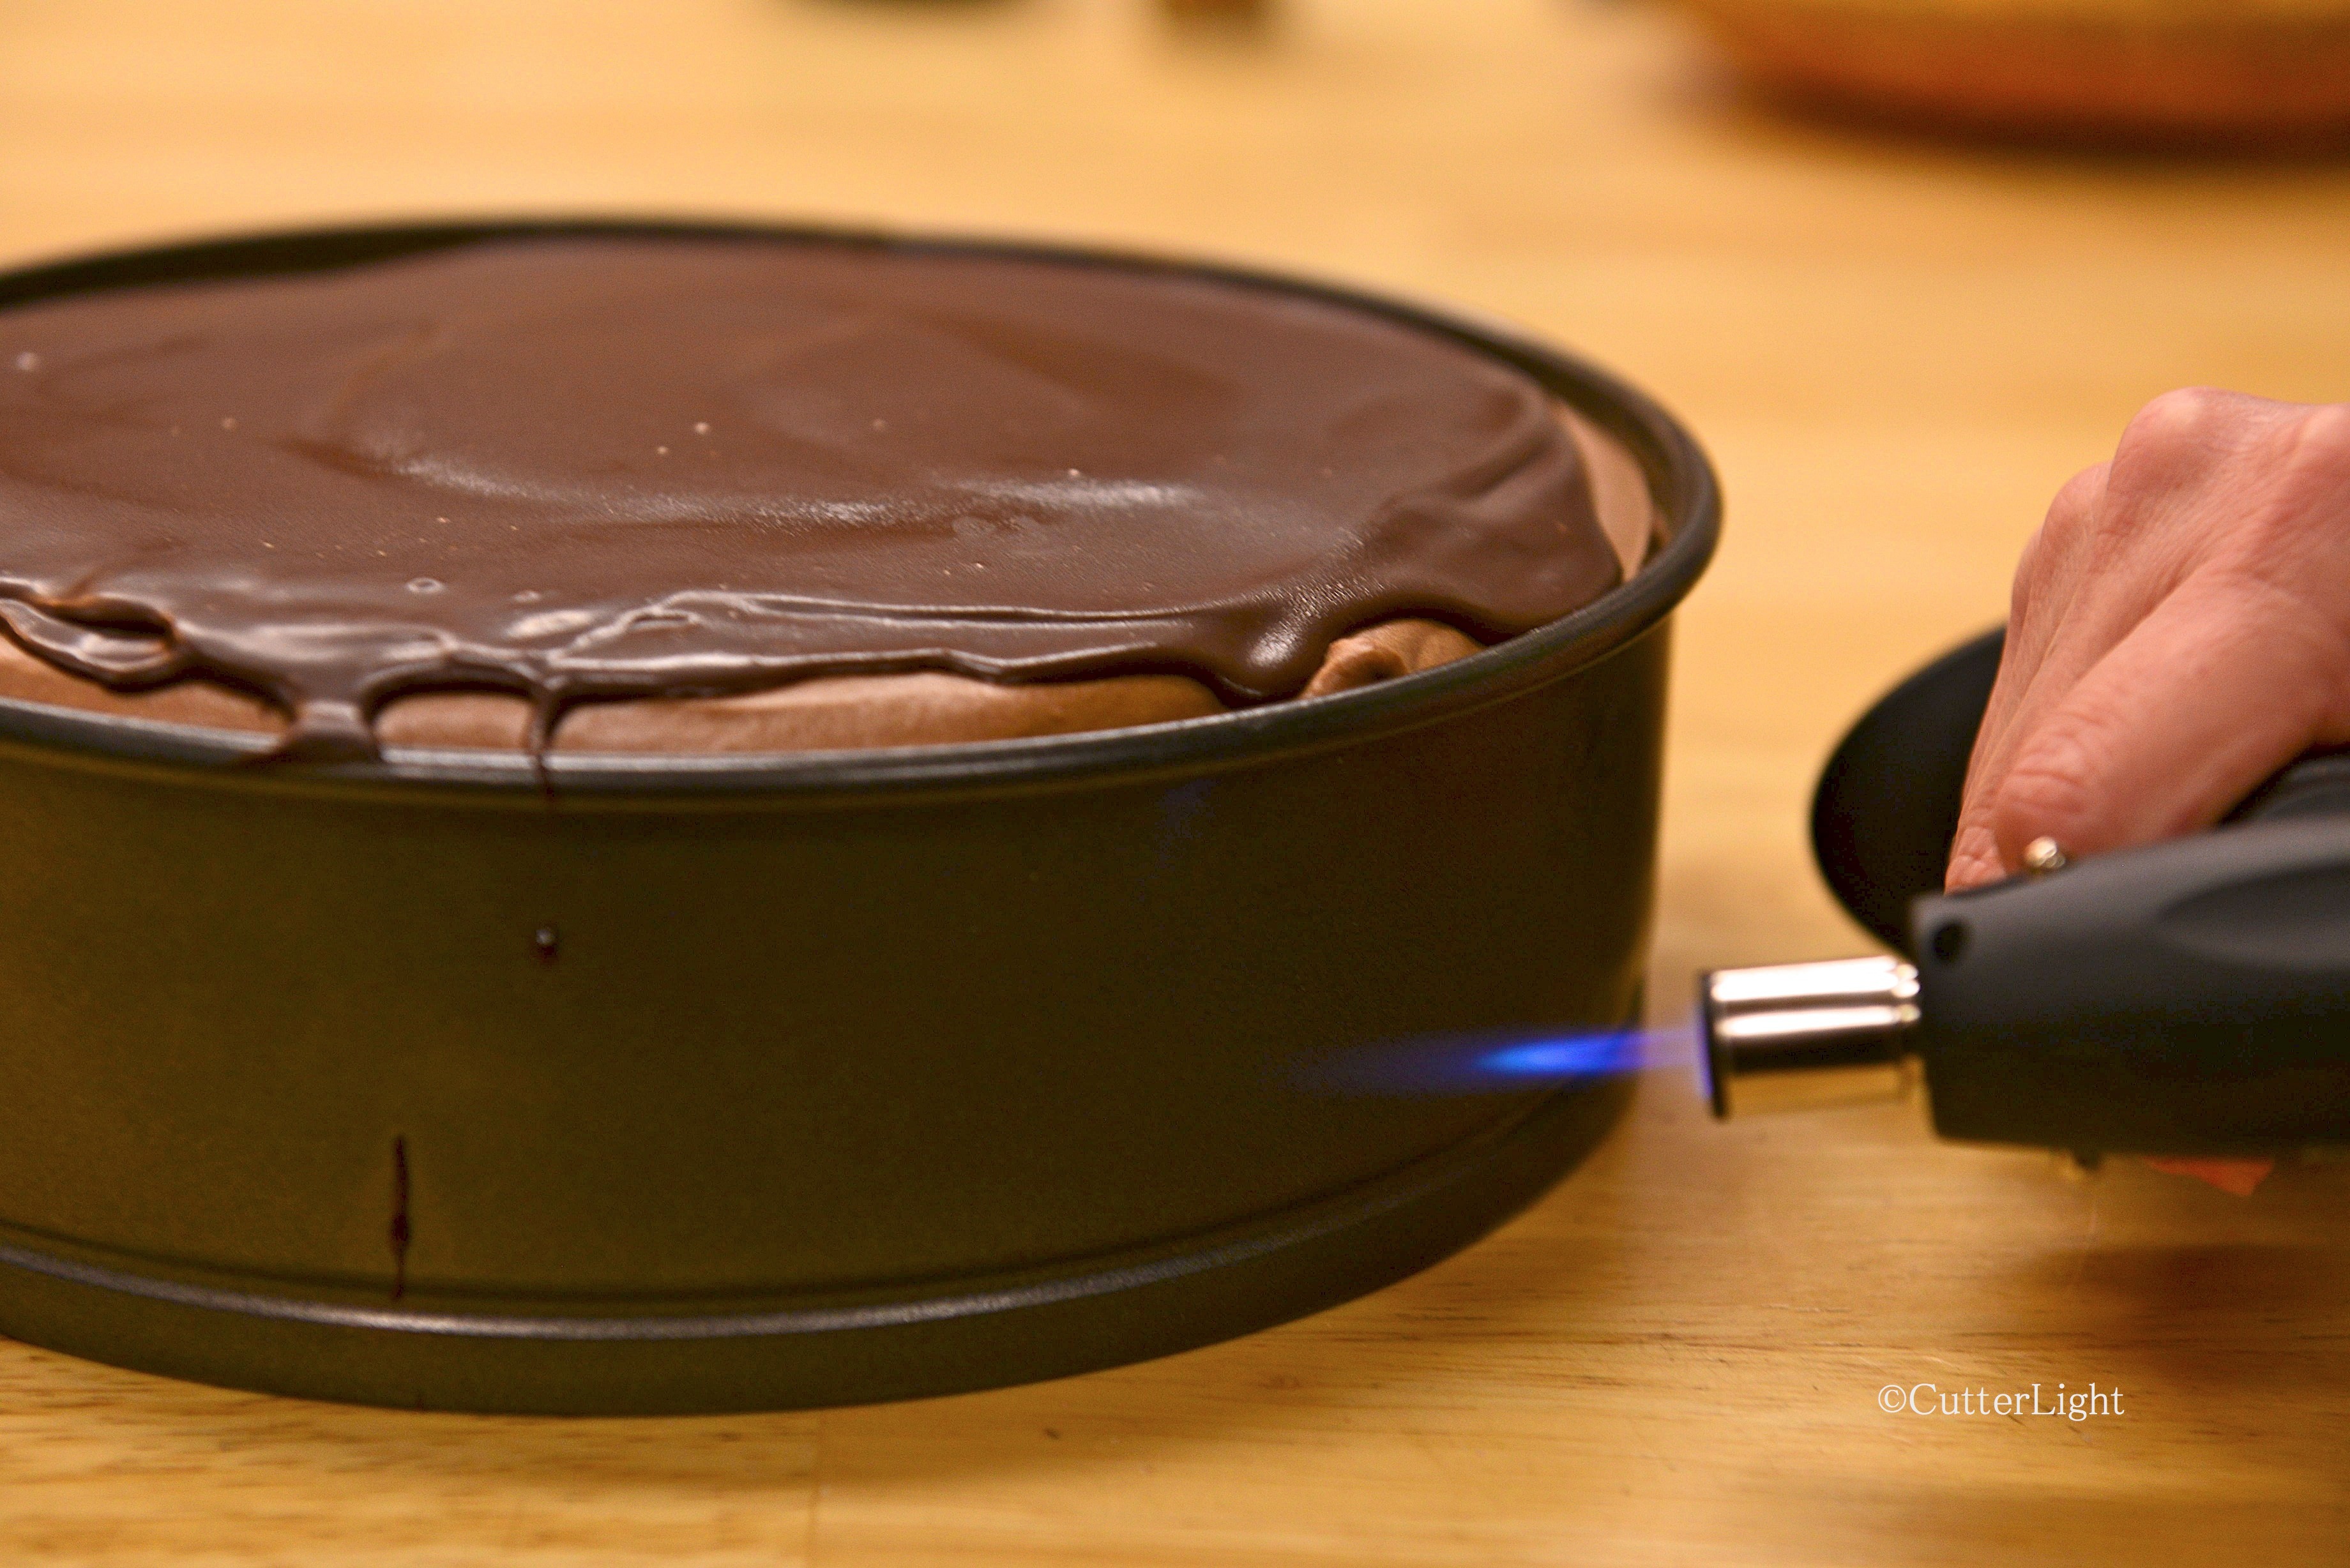
Chef Durfee instructed his class to give the outside of the pan a burst of torch heat in order to loosen the mousse without melting it. Good thing I have a handy kitchen torch.

Chocolate Mouse Cake

Devil’s Food Cake

Ingredients

  • 2.5 oz. cocoa powder
  • 14 oz granulated sugar
  • 14 oz boiling water
  • 5 oz canola oil
  • 3 eggs
  • 1 tsp vanilla extract
  • 10 oz all-purpose flour
  • 1.5 tsp baking soda
  • pinch salt

Directions

  1. Preheat oven to 350 degrees F.
  2. Sift cocoa powder into a bowl.
  3. Add some of the boiling water to cocoa powder and whisk it together. Continue adding boiling water and whisking until mixture is smooth.
  4. Let cocoa mixture cool to body temperature before adding eggs.
  5. Blend sugar, salt, and baking soda in medium bowl.
  6. Sift flour into dry ingredients. Mix well.
  7. To the cooled cocoa mixture add oil, vanilla and eggs. Mix well.
  8. Stir wet mixture into dry and blend well.
  9. Divide batter into two pans and place in preheated oven.
  10. Cake is done when it has a glossy sheen on surface, about 30 minutes.
  11. Allow cake to cool completely.

Chocolate Mousse

Ingredients

  • 16 oz heavy whipping cream
  • 8 oz half and half
  • 1 oz sugar
  • 3 egg yolks
  • 12 oz chocolate, chopped
  • 1 oz espresso or liqueur (optional)

Directions

  1. Heat half and half and sugar in a pan over medium heat until it is steaming, not boiling.
  2. Place egg yolks in a medium mixing bowl. Whisk yolks.
  3. Slowly pour hot half and half mixture into yolks, whisking the whole time. This will temper the eggs.
  4. Pour the egg mixture back in the pan over medium heat until custard thickens enough to coat the back of a spoon.
  5. Place chocolate in a large mixing bowl. Pour hot egg mixture over chocolate. Allow to rest for a few minutes so chocolate will begin to melt.
  6. Whisk mixture until smooth.
  7. Stir in optional espresso or liqueur.
  8. Beat heavy whipping cream with mixer to soft peaks. The cream should still be pourable.
  9. Fold whipped cream into chocolate mixture. Keep blending until it’s thoroughly mixed.

Chocolate Ganache

Ingredients

  • 5 oz heavy cream
  • 1 oz corn syrup
  • 8 ox finely chopped chocolate

Directions

  1. Bring heavy cream and corn syrup to a boil.
  2. Pour cream mixture over chopped chocolate in a bowl.
  3. Allow mixture to rest for about 30 seconds.
  4. Whisk mixture in the center of the bowl. Once the center is mixed, whisk in larger circles to incorporate more of the mixture.
  5. Ganache should be shiny and thick when it is finished.

Assembling the chocolate mousse cake

If you have a cake ring, retrieve it from your cupboards. If, like me, you don’t, then use a springform pan for a cake mold.

  1. Place one devil’s food cake at the bottom of your mold.
  2. Pour some of the chocolate mousse on top of the cake layer.
  3. Fit the next cake on top of the mousse layer.
  4. Pour the rest of the mousse on top of the cake, or as much as you can.
  5. Place the mousse cake into your Arctic entry (or your refrigerator) to set up.
  6. After the cake has set up, pour the ganache on the cake. Smooth with an offset spatula.
  7. Continue to chill cake until right before serving.
  8. It is helpful to give the mold short bursts of heat from a propane torch to unmold it. Otherwise, run a knife around the circumference of the cake to loosen mousse and cake from ring. Remove ring and enjoy!

Delicata Squash Soup with Spicy Smoked Chipotles

delicata squash soup n

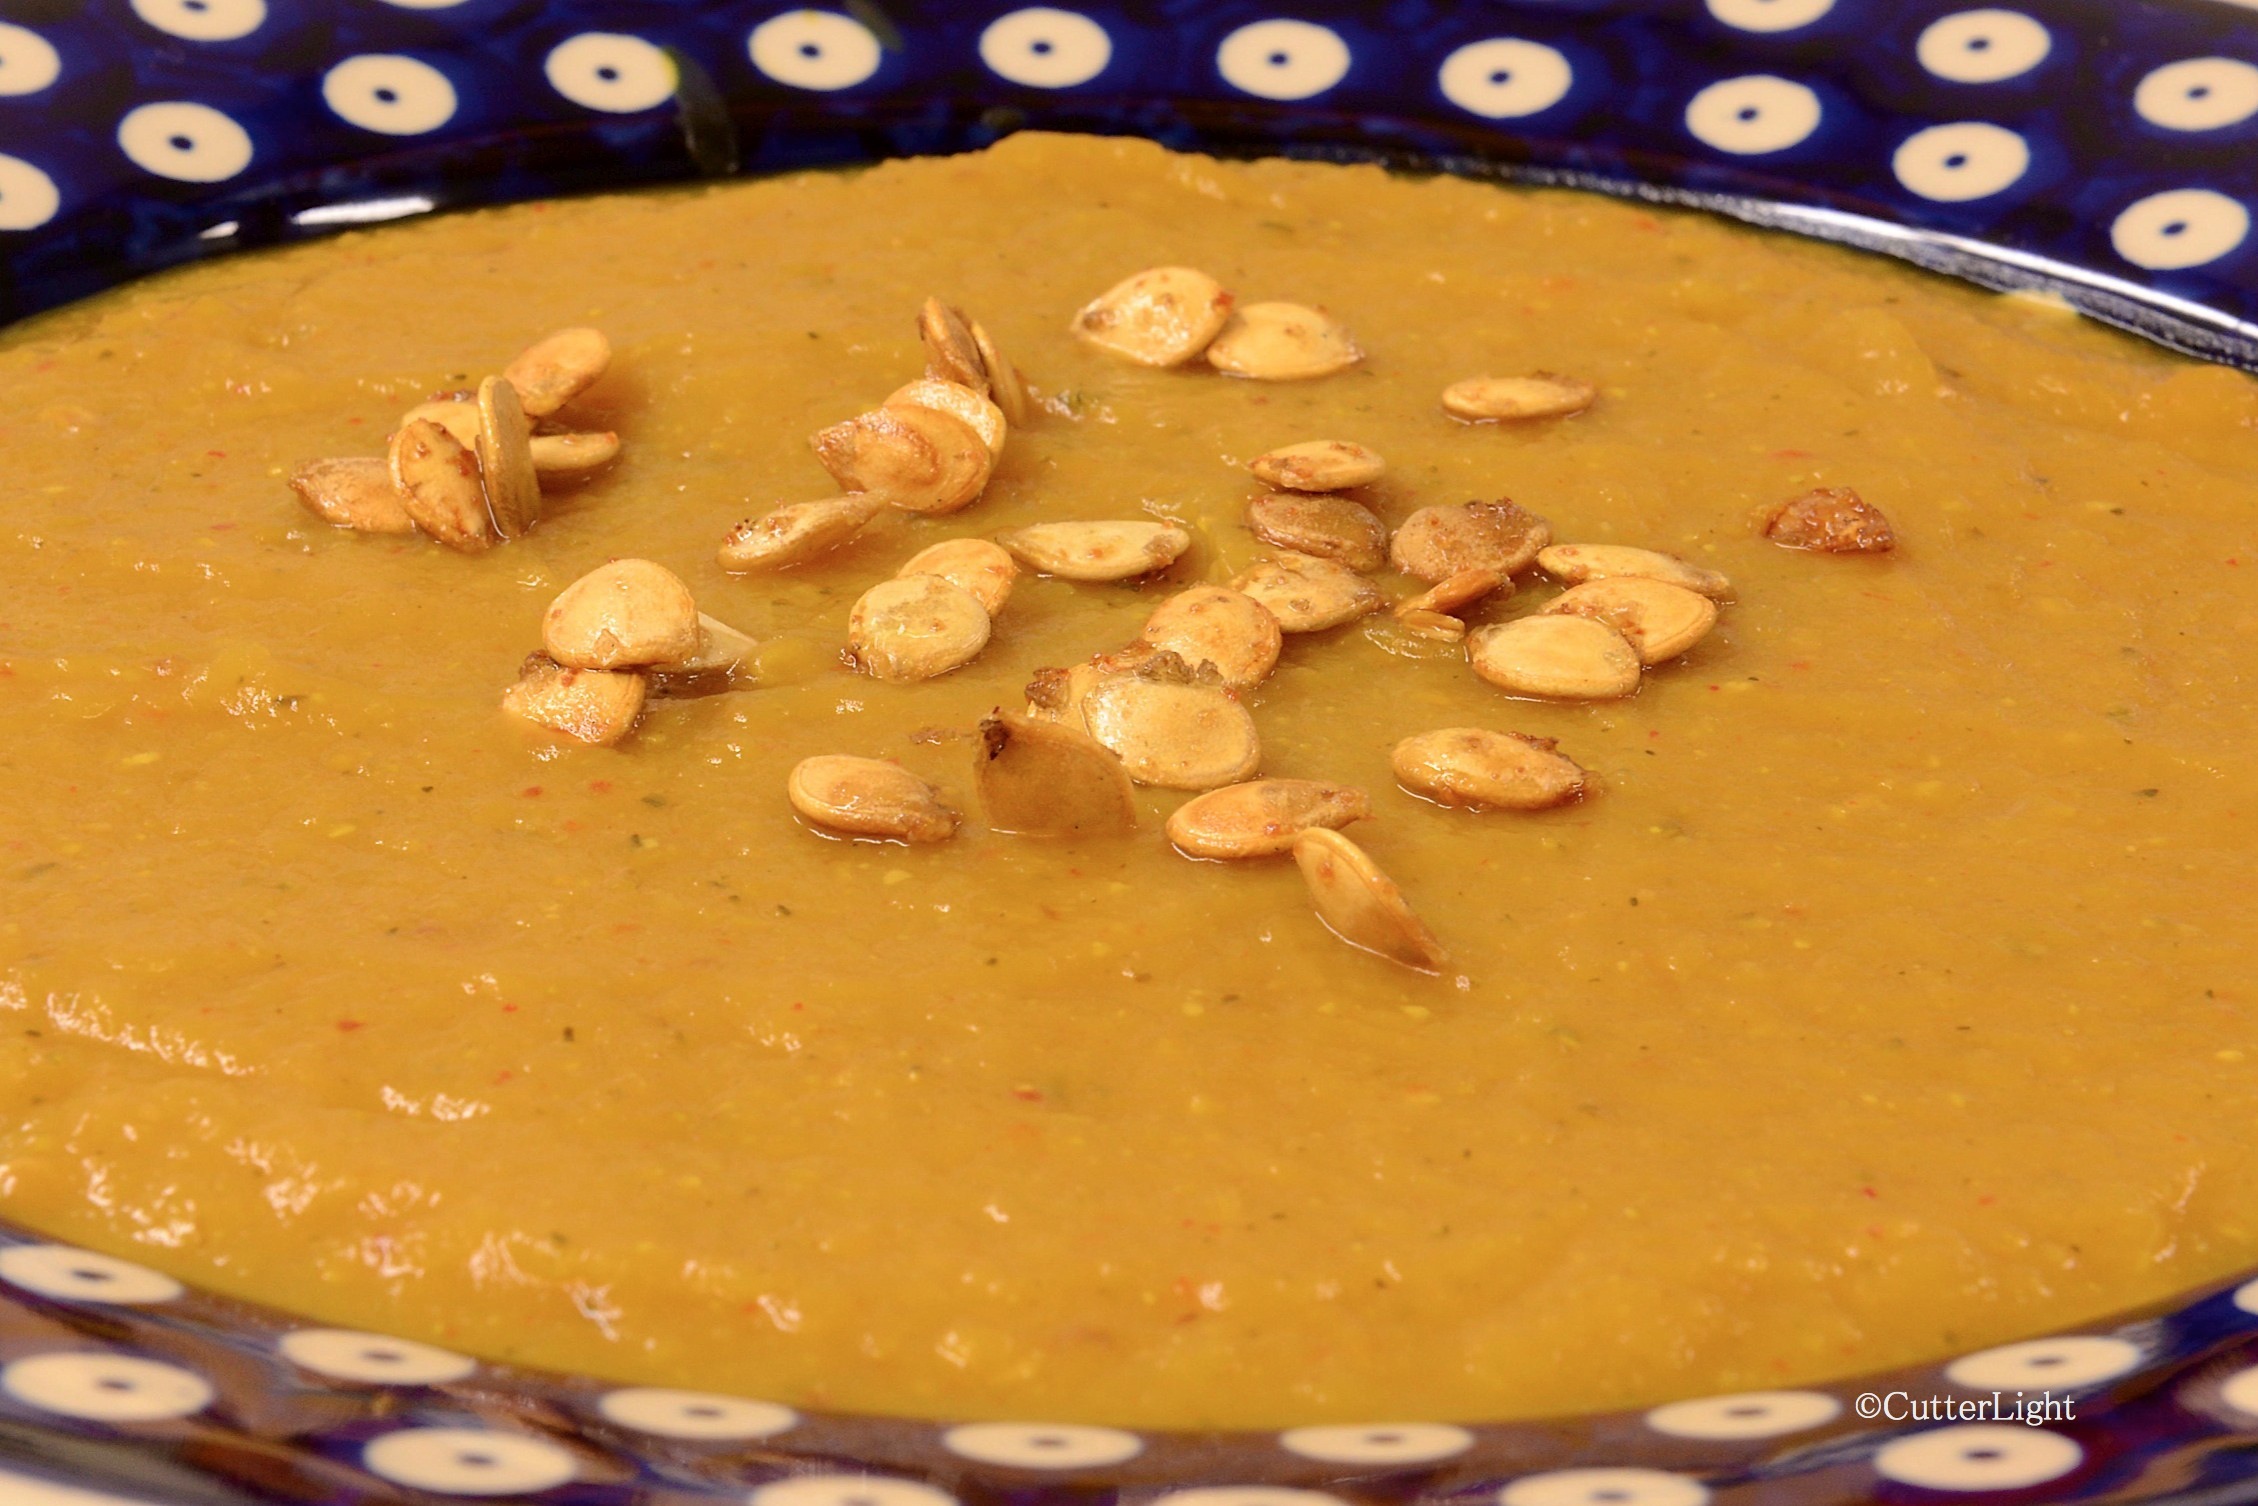
Spicy, tasty fall soup made from delicata squash skin and all and topped with its own roasted seeds.

Delicata squash was new to us this year. After roasting the first one with garlic and enjoying the second one in this soup, this squash has made it to our favorites list. The beauty of delicata squash lies not only in the warm, autumn color palette of its skin, but also in that the entire squash can be eaten. The skin is tender enough that when cooked it can easily be puréed, giving the soup colorful little fall-colored speckles. Although the seeds are small, they roast perfectly to complement the soup. The roasted seed recipe would work with any squash or pumpkin seeds, and any leftovers make a delicious snack or salad topping.

Delicata Squash Soup

Ingredients

  • 2 delicata squashes (about 2 lbs), halved and seeded (reserve seeds)
  • 1 tbsp butter
  • 1/2 large sweet onion, diced
  • 1 stalk celery, diced
  • 16 oz chicken broth
  • 1 tbsp ground smoked chipotle peppers
  • 1/2 tsp salt
  • 2 tbsp brown sugar
  • roasted squash seeds to garnish (see below)

Directions

  1. Preheat oven to 400 degrees F.
  2. Place squash, cut side down, in about 1/2 inch of water in a roasting pan. Cover pan with foil.
  3. Bake squash until tender, about 45 minutes.
  4. Remove from oven and let cool slightly. Chop into 1-inch cubes.
  5. Melt butter in a large pot.
  6. Sauté onion and celery in butter over medium heat until softened, about 10 min.
  7. Stir in squash, broth, peppers, and salt. Bring to a boil.
  8. Reduce heat to low and simmer until flavors blend, about 20 minutes.
  9. Blend soup with an immersion blender until smooth.
  10. Stir in brown sugar. Simmer for 5 more minutes.
  11. Pour into bowls, top with roasted seeds and enjoy with slices of freshly baked bread.

Roasted Delicata Seeds

Ingredients

  • 1/2 cup delicata squash seeds
  • 1/2 tbsp olive oil
  • 1/2 tsp artisan salt, or to taste

Directions

  1. Preheat oven to 275 degrees F.
  2. Line a baking sheet with parchment paper.
  3. Clean seeds in cold water to remove squash strings and bits.
  4. Pat seeds dry with a towel.
  5. Place seeds in a bowl and stir in olive oil and salt until all seeds are well covered.
  6. Spread seeds on parchment-lined baking sheet.
  7. Bake for 15 minutes or until seeds start to pop.
  8. Cool on baking sheet until ready to use.
  9. Seeds will remain crunchy in an air-tight container for several days.

Almond Lace Ice Cream Cups

almond lace ice cream cups n

Extra rich vanilla ice cream is a delicious accompaniment for these elegant, lacy almond ice cream cups.

Every fall we enjoy making homemade ice cream in a variety of interesting and delicious flavors. And thinking as photographers, we wanted to show off one of this year’s star creations with something less ordinary than a store-bought cone. So, continuing with the almond theme we seem to be on recently, we created a sweet, candy-like bowl featuring the flavor and crunchy texture of this very versatile nut.

The finished ice cream cups came out a beautiful golden brown, supremely crunchy and sturdy enough to handle multiple scoops of ice cream or mounds of fresh fruit and whipped cream. We already have plans to heap them with three flavors of ice cream, sliced bananas and toppings for tomorrow’s dinner – banana splits!

almond lace ice cream cup b n

This almond lace cup is in the final stages of cooling on an upside-down ramekin. 

Almond Lace Ice Cream Cups

Ingredients

  • 4 tbsp unsalted butter
  • ¼ cup light corn syrup
  • ¼ cup packed brown sugar
  • a few drops of almond extract
  • ½ cup sliced almonds
  • 6 tbsp all purpose flour

Directions

  1. Preheat the oven to 350 degrees F. Line a baking sheet with parchment paper. Have 6 teacups or small ramekins ready.
  2. Melt butter in a medium pan over low heat.
  3. Mix in corn syrup and brown sugar. Mix well.
  4. Turn heat off and stir in almond extract, sliced almonds, and flour.
  5. Pour batter onto a parchment-lined baking sheet. Spread evenly.
  6. Bake for 10-12 minutes. The finished product should be golden brown.
  7. Remove from oven and let sit on baking sheet for about 45 seconds.
  8. Cut the large cookie into 6 even rectangles (one slice lengthwise down the middle to create two long pieces. Cut the long pieces into thirds.
  9. Lift each cookie off with an offset spatula (or other long, thin spatula) and drape the cookie on an overturned ramekin or teacup to cool and set in the shape of a bowl.
  10. If the cookies are too firm to shape, you can return the cookies to the oven briefly while they are on the overturned cups in order to let them melt to the right shape. Make sure you watch them, because they will begin to melt quickly.

Almond Breakfast Crumb Cake

Image

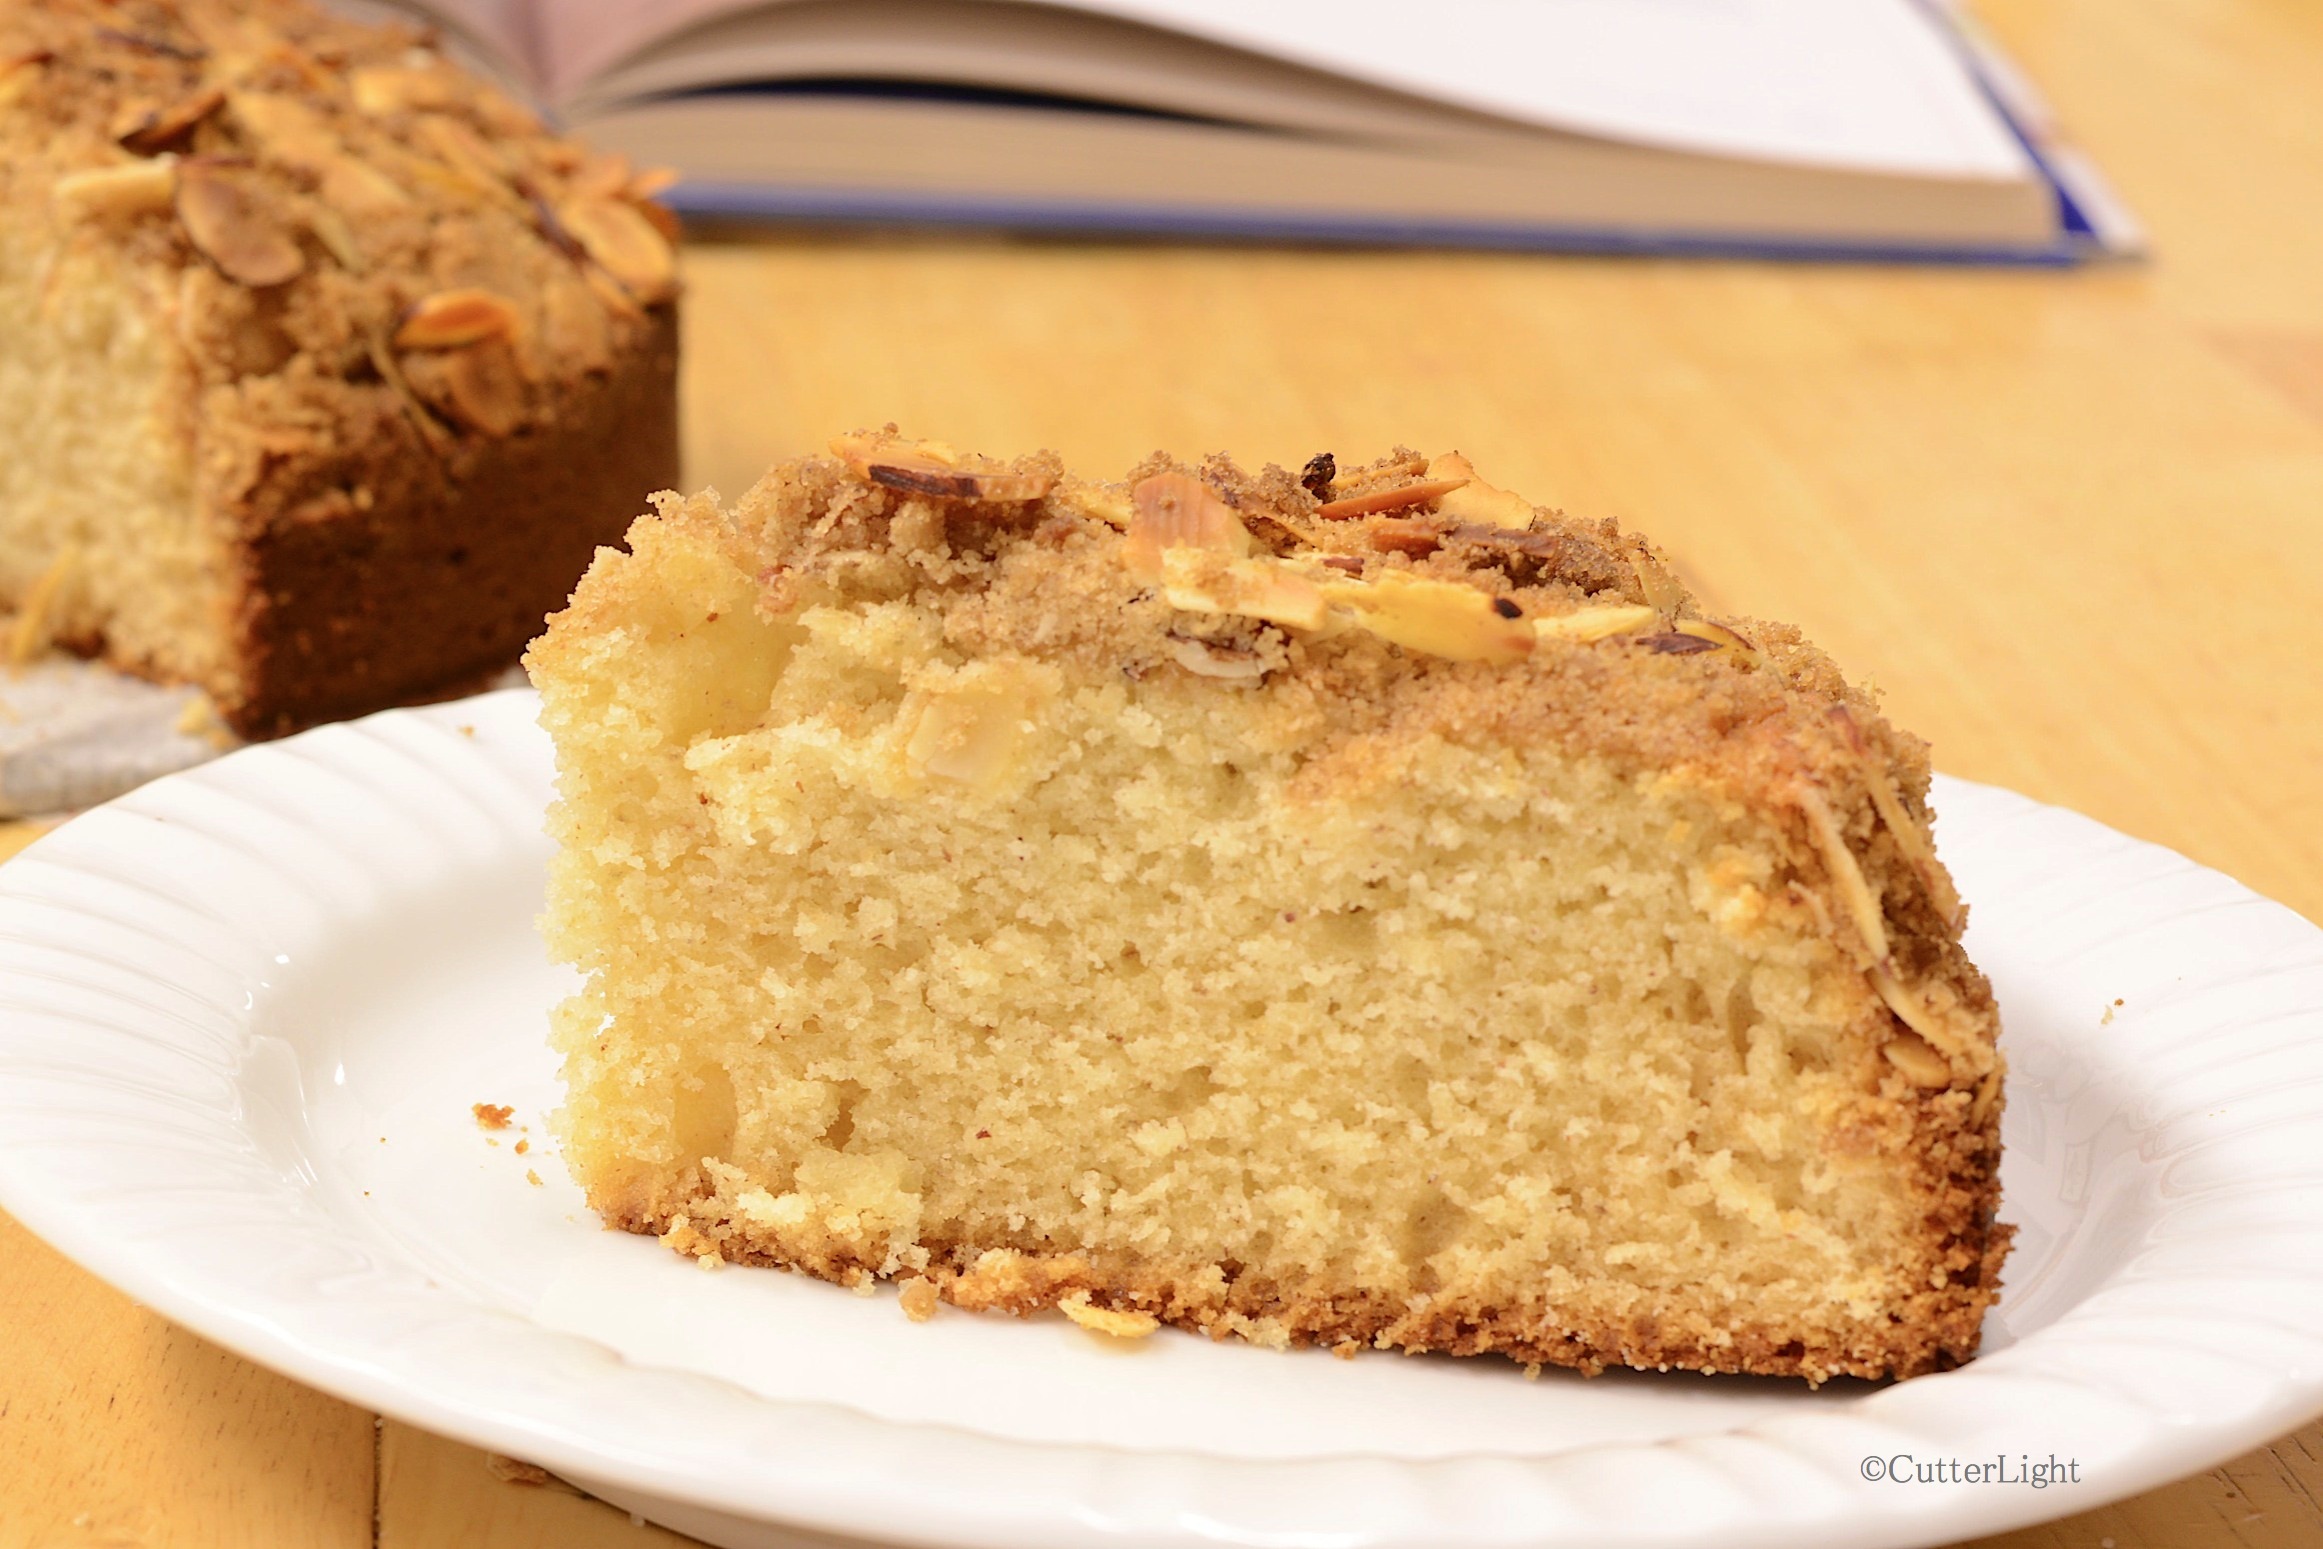
Moist cake loaded with almond flavor and a sweet, crunchy, crumbly top is guaranteed to make everyone in the house dash to the breakfast table. This cake is simple to make and delivers a triple dose of almond using almond paste, almond extract, and crunchy sliced almonds.

So, you’ve finished eating all ten polar bear claws and your appetite for almond flavored breakfast pastries is still not sated. You dip your finger into the leftover half-can of almond paste and quickly realize that this product is not intended to be eaten straight. The solution? Almond breakfast crumb cake. The beauty of this cake is that it can be eaten anytime, but since it has breakfast in the title there is no guilt about eating a slice or two first thing in the morning with your coffee. Or drizzle it with a berry syrup for a scrumptious dessert.

Almond Breakfast Crumb Cake

Ingredients

  • 2 cups all-purpose flour
  • 1 1/2 tsp baking powder
  • dash salt
  • 1/2 cup unsalted butter, softened
  • 1/2 cup almond paste
  • 1 cup granulated sugar
  • 2 eggs
  • 1 tsp vanilla
  • 1/2 tsp almond extract
  • 3/4 cup whole milk
  • crumb topping (see below)

Directions

  1. Preheat oven to 350 degrees F.
  2. Grease a 9-inch springform pan. Set aside.
  3. Sift together flour, baking powder and salt in a medium bowl.
  4. In bowl of a stand mixer, combine butter and almond paste. Beat on medium speed until smooth.
  5. Add sugar and mix until blended.
  6. Add eggs, vanilla and almond extract and mix until blended.
  7. Add half of the flour mixture and milk. Mix until blended.
  8. Add remainder of flour mixture and mix just until blended.
  9. Pour batter into prepared pan.
  10. Sprinkle crumb topping evenly over top of batter.
  11. Bake until toothpick inserted into center comes out clean, about 50 minutes.
  12. Let cool completely in pan on wire rack.
  13. Store at room temperature.

Crumb Topping Ingredients

  • 6 tbsp all purpose flour
  • 1/3 cup firmly packed brown sugar
  • 1/4 tsp ground cinnamon
  • 2 tbsp melted unsalted butter
  • 1 cup sliced almonds

Crumb Topping Directions

  1. Stir together first three ingredients.
  2. Add melted butter and stir mixture together until crumbly.
  3. Stir in almonds until mixed well.