Double Flamed Coq au Vin on Homemade Pappardelle Pasta

Coq au vin n

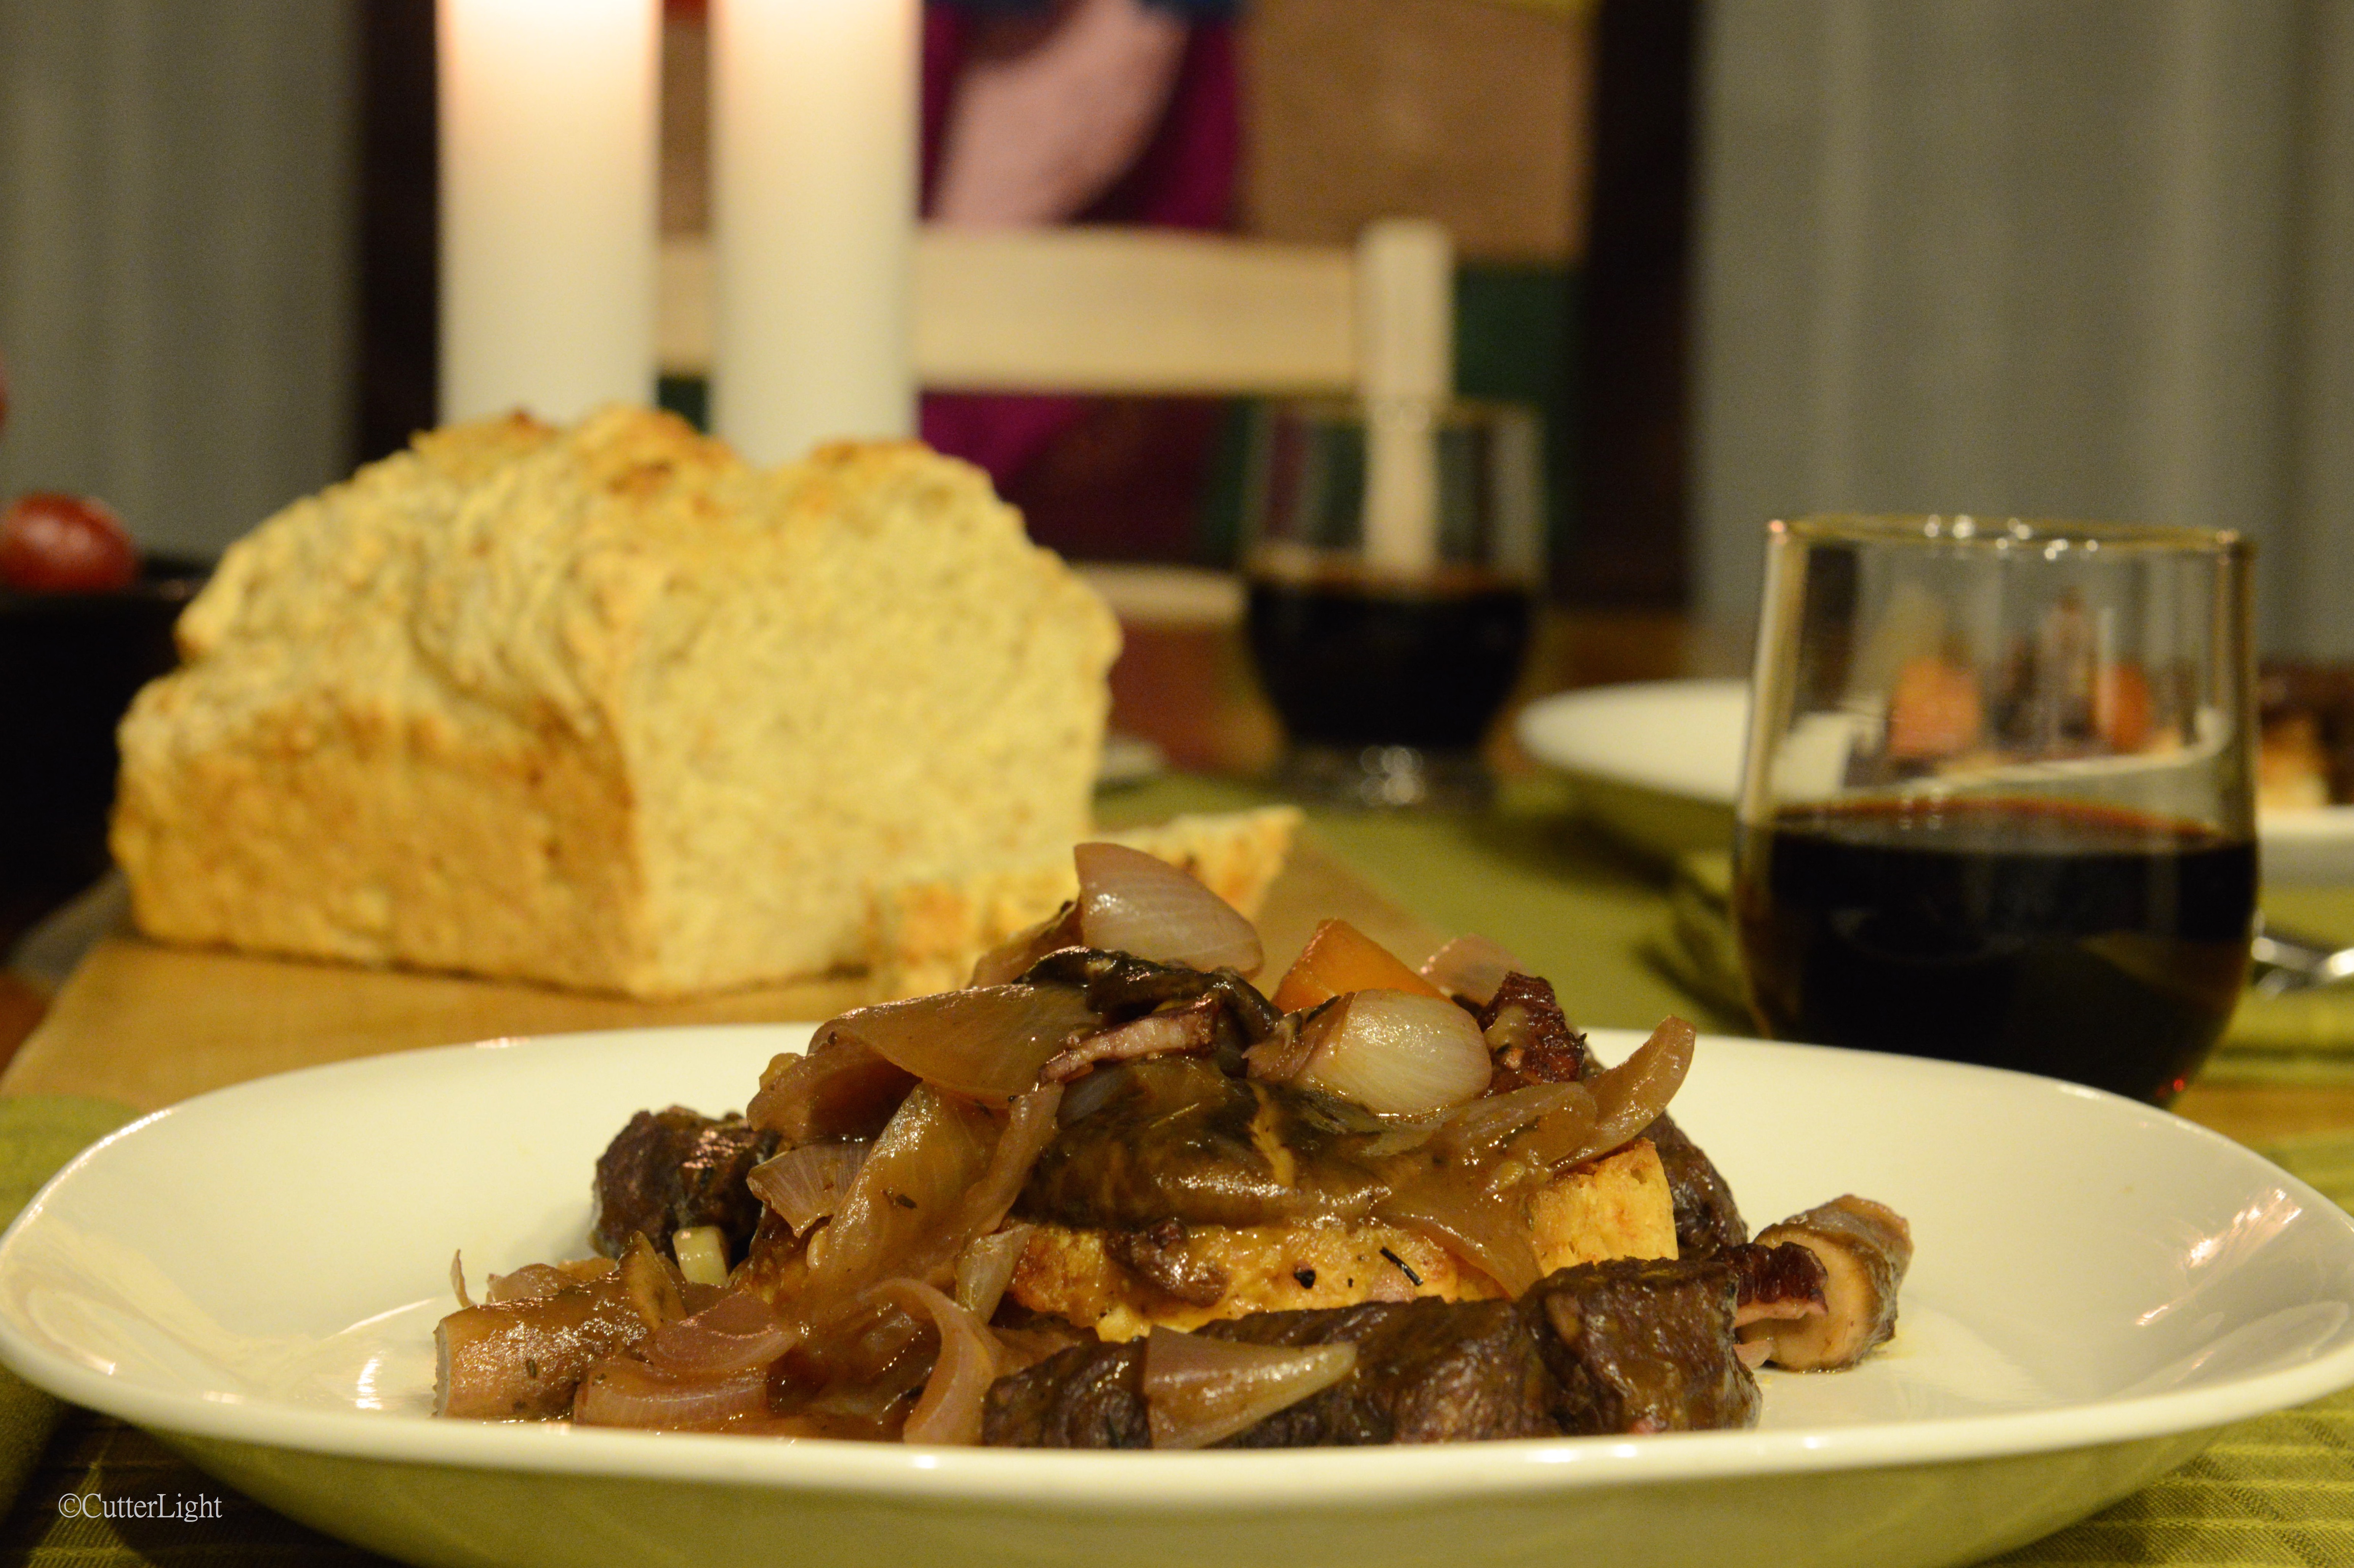
With culinary roots tracing all the way back to the days of Julius Caesar, coq au vin remains one of the most savory dishes you can serve.

Popularized in America by Julia Child, coq au vin had been on our “to cook” list for quite some time. Fortunately, the ingredients for this dish are widely available. Even in Mongolia, we had no difficulty putting everything together.

Although not strictly necessary, flaming the chicken leg and thigh with a shot of cognac gives this dish an especially savory, umami flavor. Doing likewise with the vegetables makes it all the better. Thus, Double Flamed Coq a Vin.

Double Flamed Coq a Vin

Ingredients

  •  2/3 cup lardons or cubed, thick bacon
  • olive oil
  • 2 to 3 pounds chicken legs and thighs on the bone, patted dry. Preferably thigh and leg together.
  • 1/2 cup cognac, separated in half
  • smoked sea salt
  • cracked black pepper
  • 1 bay leaf
  • 1/2 tsp dried thyme, separated
  • 3 tbsp all purpose flour
  • 2 cups dry red wine such as Burgundy, Syrah, etc.
  • 2 cups chicken stock, canned or see recipe below
  • 4 garlic cloves, minced
  • 2 tbsp tomato paste
  • 1 lb fresh mushrooms such as crimini, chopped large
  • 2 tbsp unsalted butter
  • 2 medium carrots, chopped coarse
  • 2 medium onions, chopped coarse
  • 2 cups leaks chopped into generously thick (1 cm) cylinders

Directions

  1. Salt and pepper chicken. Let rest.
  2. Add olive oil and bacon to a sauté pan with high sides and heat over medium-high burner. When bacon is rendered, remove and set aside.
  3. Add the chicken to sizzling hot oil and bacon fat and sear on all sides, using tongs to move the chicken.
  4. When the chicken is seared brown, add 1/4 cup cognac. Make sure the area is cleared, your hair is tied back, and a lid is handy to smother the flames, if necessary. Light the cognac and let it burn itself out.
  5. Return bacon to pan and add red wine, chicken broth, bay leaf, 1/4 tsp of thyme and garlic. Simmer to allow liquids to cook down somewhat – about 1/2 hour.
  6. In a stock pot, add butter and olive oil and heat on medium-high burner. Add onions, carrots, salt, pepper, and 1/4 tsp thyme. Stir occasionally. When onions and carrots just begin to soften, add leaks and mushrooms and continue cooking till just tender.
  7. Add 1/4 cup cognac and flame.
  8. Vigorously stir in flour, adding more butter or olive oil, if necessary.
  9. Add liquid from chicken to the vegetables in the stockpot and stir together so that the flour mixes to thicken the liquid. Add chicken and additional seasonings to taste.
  10. Serve on a bed of wide pasta such as pappardelle.

Chicken Stock from Scratch

Ingredients

  • 2 lbs chicken bones and trimmings, chopped to expose marrow
  • smoked sea salt
  • 12 whole peppercorns
  • 1 bay leaf
  • 1 tbsp sage
  • 1 medium onion, chopped coarse
  • 1 medium carrot, chopped coarse
  • 2 large cloves garlic, chopped coarse
  • 1/2 cup dry white wine (optional)
  • water to cover all

Directions

  1. Use a meat tenderizer or heavy chopping knife to crack and break chicken bones so that marrow is exposed.
  2. Add ingredients to a stock pot. Bring to boil. Reduce to simmer. Cook for 20 minutes.
  3. Strain broth through a fine wire strainer. Use fresh or freeze.

Beef Bourguignon on Rustic Pan Fried Toast

Cooking flame cognac n

It’s the flamed Cognac (not to mention the half bottle of red wine) that gives this savory dish it’s unique, caramelized flavor. When you light the Cognac, stand back! Can you see the horse head in the flames?

Deep in the heart of winter here in Mongolia, we find ourselves craving traditional cold-weather comfort foods. Beef Bourguignon (also known as Beef Burgundy) is a classic stew from France’s Burgundy region. As is true of many stews and chowders, this dish has its origins as peasant fare, but over time was refined into the not-overly-difficult crowd pleaser familiar today. Why not give it a try some cold winter’s night!

As a stew, ingredients can be substituted fairly freely. (The pearl onions this dish traditionally calls for are difficult to find where we live. Coarsely diced regular onions work fine.) It occurs to us that the addition of rutabaga, pumpkin, parsnips or hard squashes would add appropriate flavors to this dish. Also, remember the basic rule for cooking with wine: use one you’re happy to drink. A full-bodied, dry red is best.

beef bourguignon n

The finished beef bourguignon is traditionally served on toast and is a great excuse (if you need one) to pop the cork on a favorite red wine. The better the toast, the better the entrée. See our method, below.

Ingredients

  • 1 tbsp olive oil
  • 4 oz thick-cut bacon, diced into small pieces
  • 1 1/4 pounds beef cut into 1-inch cubes. Tri-tip or chuck work well, as do higher quality cuts.
  • smoked sea salt (or regular sea salt)
  • freshly ground pepper
  • 1/2 lb carrots, sliced thick
  • 1 lb onions, chopped coarse
  • 2 cloves garlic, chopped medium coarse
  • 1/4 cup Cognac
  • 2 cups quality dry, full-bodied red wine such as Syrah, Shiraz, Zinfandel, Merlot or Pinot Noir or a blend of similar wines
  • 1 cup beef broth – made from stock, canned or made from bullion
  • 1 tbsp tomato paste
  • 1 tsp thyme
  • 2 tbsp unsalted butter, divided
  • 1 to 2 tbsp all-purpose flour or rice flour
  • 1/2 pound mushrooms, stems removed, sliced into large chunks

Directions

  1. Preheat oven to 250 degrees F (120 C) and adjust rack to a low position.
  2. Dry the beef cubes with a paper towel and place them in a bowl. Add smoked sea salt and pepper and mix together. Set aside.
  3. In a large oven-safe pot or sautéing pan with high, straight sides, heat the olive oil over medium heat. Add the bacon and cook till edges just begin to crisp. Remove bacon to a plate, but reserve the oil and fat in the pan.
  4. Add beef to hot pan to sear. Do not overlap or crowd. Use tongs or a spatula to turn beef so that each side is browned. Remove seared beef to a plate.
  5. Add carrots and onions to the pan. Add additional olive oil, if necessary. Season to taste with salt and pepper and sauté till onions are slightly browned and carrots are just tender – about 10 minutes.
  6. Add the garlic and cook for an additional minute.
  7. Add the Cognac and exercising due caution, light it with a match. This will burn off the alcohol and create a rich, caramelized flavor.
  8. Stir the tomato paste into the beef broth.
  9. Place the beef and bacon in the pan. Add wine and enough beef broth/tomato paste mixture to almost cover all the ingredients. Add the thyme and bring everything to a simmer.
  10. Cover the pan with a lid and place in oven for about an hour and 15 minutes.
  11. Meanwhile, heat half the butter in a skillet over medium heat. Add the flour and mix together thoroughly.
  12. Remove pan from oven. Place on stove, stir in the butter and flour mixture and bring to a simmer.
  13. In a skillet over medium heat, sauté the mushrooms in the remaining butter. Add them to the stew. Continue cooking for about 10 minutes. Taste for seasonings.
  14. Serve piping hot on toast (see below).

Pan-Fried Toast – Use any hearty, rustic bread sliced fairly thick.

Heat about 2 tablespoons of olive oil in a large frying pan over medium to medium low heat. Mince two cloves of garlic (a fine cheese grater works well for this). Spread one side of bread with olive oil and a thin spread of minced garlic. Place bread garlic-side down in pan and fry, being careful not to let the garlic burn. When the garlic is golden brown, flip the bread and fry the other side. The finished bread should be beautifully browned and crisp on the outside.

Deep Fried Parsnips – World’s Best Bar Snack?

parsnips fried n

Crispy, salty, sweet, sprinkled with a little parmesan cheese and dusted with a couple of grinds of pepper, on a fry-crazy evening, we served these classic bar snacks along with deep-friend fish & chips. No one had to be scolded to eat their vegetables!

Bill Briwa, chef-instructor at the Culinary Institute of America at Greystone, calls deep fried parsnips “The World’s Best Bar Snack.” After frying up a batch, we think he’s got a good case!

We used a vegetable peeler to achieve the very thin ribbons of parsnips desired for this dish. In his instructional materials accompanying The Everyday Gourmet: Rediscovering the Lost Art of Cooking, (produced by The Great Courses) Chef Briwa employs a mandolin. A little care and a very sharp knife could achieve the same effect. The key is to cut the parsnips thin.

The other secret to ensuring that these snacks come out right every time is to make sure your oil isn’t too hot. It doesn’t matter whether you use canola, light olive oil, peanut oil or another oil suitable for deep frying, but don’t allow the temperature to climb above 300 degrees F. Parsnips have a lot of sugar; they’ll burn before they become tender at higher temperatures.

This makes them a logical appetizer to cook up with a meal of fish & chips. As the oil heats up to 300 degrees F, place the parsnips in. The temperature will drop a little at first, and that’s OK. It only takes a couple of minutes for them to become golden brown and crisp.

When they’re done, turn them out onto paper towels to drain off the oil and sprinkle a little salt over them. They’d be good served just like this, but to create a snack people can’t get enough of, add a little parmesan cheese. You can warm up a bowl in a countertop oven, place the drained, salted parsnip chips in the warm bowl, and gently toss them with grated parmesan, letting the warmth soften the cheese so it better adheres to the chips.

The final step is to turn the parsnips out onto serving plates in a nice, tall haystack. Hit it with a couple of grinds of pepper and serve. The cold beers should already be poured!

Individual-Sized Beef Wellingtons for Two

beef wellington sliced n

This classic presentation serves well as the entrée for any special meal. And where did the name originate?

There are two classic ways to serve Beef Wellington. Created from a cut of filet mignon weighed in pounds, it makes for a centerpiece as impressive as whole salmon, striped bass, loupe de mer, or a whole roasted turkey. There is a definite Wow factor with food done large. These are the kinds of presentations that prompt guests to spontaneously break into shared applause – gratifying to any chef.

beet goat cheese stacked salad n

This stacked beet salad, made from roasted beets and homemade goat cheese, goes nicely with beef. 

But equally appreciative responses can be elicited with individual-sized presentations. Just as a handsomely baked 15-pound salmon, perhaps stuffed with shrimp and garnished with sliced lemons and fresh fennel draws the focus to the center of the table, a perfectly poached 12 ounce trout adorned with fiddle heads and a side of freshly cut asparagus inspires individual applause and equally broad smiles. There is something wonderfully intimate about being served with an individually prepared whole fish, a cornish hen or small game bird, or a perfectly done melt-in-your mouth individual Beef Wellington.

beef wellington whole

Living in a “dry” (no alcohol permitted) village in Arctic Alaska is a considerable hardship at times. A Malbec, a Malbec, our kingdom for a Malbec! We made do with wild cherry sparklers from our SodaStream.

And the origins of this dish? Arthur Wellesley, First Duke of Wellington, was reputedly a big fan of beef, mushrooms and pâté cooked in pastry. Another claim is that the dish was named in honor of Wellington, New Zealand. To us, the theory that this dish was named for the Duke of Wellington seems the more plausible. Arthur Wellesley was a field marshall whose troops defeated the army of Napoleon Bonaparte resulting in the collapse of Napoleon’s empire and his exile. Wellesley’s status as a conquering hero earned him royalty status as the First Duke of Wellington. Chefs sometimes name their creations after people they admire, and there was a similar French dish at the time that British chefs may have felt merited appropriate modification and renaming.

Beef Wellington for Two

Ingredients

  • 2 cuts of filet mignon, about 3/4 lb. each, brought to room temperature. The better the grade of beef, the better this dish will be.
  • duxelles – (a mushroom paste: see recipe below)
  • enough puff pastry to wrap each filet
  • enough prosciutto to completely wrap each filet
  • flour
  • whole grain Dijon mustard
  • 1 egg, lightly beaten
  • 2 sheets of plastic wrap large enough to wrap each Beef Wellington
  • parchment paper

Preparing the Filet MIgnon

  1. Place filets in a bowl one at a time. Drizzle with olive oil and turn to completely coat filet while adding pinches of salt and pepper so that all sides are seasoned. Set filets on cutting board.
  2. Add light olive oil to a heavy pan over medium-high heat. Use tongs to sear all sides of filets. This takes about 20 – 30 seconds per side – a total of about 2 – 3 minutes. Do not overcook, but make sure all surface areas are seared.
  3. Save the remaining oil to sauté the duxelles.
  4. Let filets cool.

Duxelles

Ingredients

  • 1/2 lb. shitake mushrooms chopped fine (or any firm mushroom). We use dried shitakes which reconstitute nicely, store forever, and retain lots of flavor.
  • 1 shallot, chopped fine (Penzeys dried shallots work well)
  • 2 cloves garlic, chopped fine (Penzeys dried garlic is excellent)
  • 1 tbsp whole grain Dijon mustard
  • 1 tsp dried thyme
  • 2 tsp dried sage
  • 1 tbsp butter and 1 tbsp olive oil (Or sear the filet first and use the remaining oil to sauté the duxelles in the same pan)
  • salt & pepper to taste

Directions

  1. Place mushrooms, shallot, garlic, thyme and sage in a food processor and pulse till finely chopped.
  2. Place butter and olive oil in a pan over medium heat till butter is melted or add butter to oil remaining from searing beef and use that. Add mushroom mixture, reduce heat and sauté for approximately 8 minutes, until most of the liquid is evaporated and mixture is the consistency of a damp paste. Mix in salt and pepper and set aside to cool.

Prepare the Beef Wellington

  1. On cutting boards or table, lay out two sheets of plastic wrap sufficiently large to wrap each Beef Wellington.
  2. Arrange prosciutto on plastic wrap making sure there is plenty of extra plastic wrap all around. Overlap prosciutto as necessary to ensure that it will completely cover the filets.
  3. Use a spatula to cover prosciutto with duxelles.
  4. Cover each rested filet with a 1/2 – 1 tablespoon of whole grain mustard – a sparse coating.
  5. Place filets atop prosciutto. Using plastic wrap to keep things tight, wrap beef in prosciutto, making sure everything is tight and sealed.
  6. Place prosciutto-wrapped filets in refrigerator for at least 30 minutes. This will help the prosciutto to stay in place when the plastic is removed.
  7. After 30 minutes, remove filets from refrigerator.
  8. Preheat over to 400 degrees F.
  9. Lightly dust cutting boards with flour and arrange puff pastry sheets sufficient to wrap each filet.
  10. Remove plastic from filets. (This may be easiest done with scissors.) Place filets on puff pastry and fold or roll up pastry so that filet is completely encased. Brush egg wash onto pastry edges to help get a good seal.
  11. Place parchment paper on baking sheet. Turn encased Beef Wellingtons seam side down and place on baking sheet. Make 2 slashes on top of pastry to allow steam to escape.
  12. Brush egg wash on pastry and place in pre-heated oven.
  13. Bake for approximately 40 minutes, checking toward the end to make sure pastry does no overcook. Beef should have an internal temperature of 125 degrees F.
  14. Remove from oven and allow to rest for a few minutes before serving.

Enjoy with a fine Malbec, Zinfandel or Cabernet!

Rustic Pear Gallette with Whole Wheat Blend Crust

gallette pear n

The sweet secret to this gallette is a generous layer of homemade cloudberry jam beneath the pears No cloudberries? Try raspberry, blackberry or apricot jam.

A gallette is a beautiful dessert that can whipped up on short notice – a perfect answer to a seasonal abundance of fresh fruit. During the summer, we made a delicious strawberry-port gallette with sliced almonds in the galley of our sailboat. Since it is wintertime, we decided to make the gallette a bit more full-bodied by adding wheat flour and some cornmeal to the crust. We happened to have pears on hand, but many other fruits readily lend themselves to this recipe. Enjoy a slice of pear gallette with a side salad, a favorite cheese and a freshly brewed cup of tea for a satisfying lunch in any season.

Rustic Pear Gallette

Ingredients

  • 1  cup all-purpose flour
  • 3/4 cup whole wheat flour
  • 1/3 cup granulated sugar
  • 1/4 cup coarse cornmeal
  • 1/4 tsp salt
  • 1/2 cup cold butter, cut into small pieces
  • 1/3 cup buttermilk (we made this from powdered)
  • 2 tablespoons cloudberry jam, or jam of your choice
  • 2 D’Anjou pears, thinly sliced
  • 1 egg, beaten
  • 2 tbsp granulated sugar mixed with a pinch of ground cinnamon

Directions

  1. Mix together flours, sugar, cornmeal and salt in a medium bowl.
  2. Using a pastry blender, mix in cold butter. Continue mixing until cold butter is the size of peas.
  3. Slowly mix in buttermilk. Stir with rubber spatula until dough forms into a ball.
  4. Wrap dough in plastic and chill for about 30-45 minutes in refrigerator.
  5. Preheat oven to 350 degrees F.
  6. Cut a piece of parchment paper to fit the size of a baking sheet.
  7. Place chilled dough on center of parchment paper.
  8. Roll dough to about a 15-inch circle. This is a rustic dessert, so no need to be a perfectionist here.
  9. Brush the entire rolled dough with jam.
  10. Arrange pear slices atop dough, leaving a 2-inch border.
  11. Fold border over pears, pressing down any folds of dough.
  12. Brush dough with egg.
  13. Sprinkle dough and pears with sugar and cinnamon mixture.
  14. Bake gallette 40 – 45 minutes, until dough is golden brown and pears are soft.
  15. Serve warm or at room temperature.

Rich, Custardy Eggnog Ice Cream: A Christmas Tradition

eggnog ice cream n

A big mug of freshly brewed coffee and a couple scoops of eggnog ice cream dressed up with shaved nutmeg: Bring it on, Winter!

This ice cream is divine.

Rich Eggnog Ice Cream

Ingredients

  • 2 cups heavy cream
  • 1 cup whole milk
  • 1 tsp ground cinnamon
  • 1/2 tsp freshly grated nutmeg
  • 1/2 tsp ground cloves
  • 8 egg yolks
  • 3/4 cup sugar

Directions

  1. Heat cream and milk in a medium saucepan over medium heat.
  2. Add cinnamon, nutmeg and cloves and heat until mixture almost boils, about 5 – 8 minutes.
  3. Reduce heat to low, using a heat diffuser if necessary.
  4. Meanwhile, beat yolks and sugar until the mixture is light yellow and smooth.
  5. Add 4 tbsp of hot cream mixture to egg mixture and stir until combined. This will temper the eggs.
  6. Slowly add warmed yolk mixture to warm cream. Stir continuously in order to not cook/curdle eggs.
  7. Cook entire mixture over low heat until slightly thickened and mixture coats the back of a spoon. Cool completely. I put the mixture in the refrigerator overnight before I use it.
  8. Pour into freezer bowl of ice cream machine. Turn machine on and mix until mixture thickens, about 20 minutes.
  9. Transfer to airtight container and place in freezer until firm, about 2 hours.

Ginger Pear Cranberry Sauce: Delicious on Roasted Turkey or Duck

cranberry sauce ginger pear n

Top row: pear butter, smoked salmon, cloudberry jam. Second row: Arctic blueberry jam, cranberry sauce, cloudberry jam. Third row: Arctic blueberry jam, pear butter, smoked salmon.

Small batch canning has become a perfect way to preserve many foods in our Arctic home. We anticipate that this skill will transfer nicely to our galley kitchen aboard the sailing vessel Bandon.

We recently read an article about items that are supposedly “not worth the time to make in your own kitchen.” The three items that topped this rather specious list were yogurt, pasta and jam. Of course, we heartily disagree on each count. The hands-on time for our delicious homemade yogurt is about 15 minutes, and while it takes a little longer to turn out a few servings of pasta, the time invested results in noodles that trump any store-bought variety. And jam can be made between dinnertime and bedtime – including the processing time in the water bath. Knowing where your hand-picked berries and self-harvested salmon come from: priceless. As those in-the-know can attest, the rewards go beyond even that. Our meals are infused with memories of mornings in berry fields as we dip into our jam and of days on water and of the friends we shared fishing experiences with as we open jars of beautifully cured salmon.

Just in time for the holidays, we’ve added ginger pear cranberry sauce to our home-canned collection. We adapted the recipe from Full Circle Farms, which was thoughtfully tucked into a box containing our order of organic cranberries and D’Anjou pears. The spicy ginger and sweet stewed fruit was the perfect complement to roasted turkey.

Ginger Pear Cranberry Sauce

Ingredients

  • 7 tbsp brown sugar
  • 4 tbsp red wine vinegar
  • 1 ½ tsp powdered ginger
  • pinch salt
  • 3 firm D’Anjou pears, seeded and cut into ½-inch cubes
  • 6 tbsp granulated sugar
  • 2 tsp dried lemon zest
  • 2 tsp dried orange zest
  • 1/3 cup lemon juice
  • 1/3 cup orange juice
  • ¾ lb organic cranberries

Directions

  1. In a medium saucepan, combine brown sugar, vinegar, ginger, and salt.
  2. Bring to a boil over moderate heat.
  3. Add pears. Cover and cook until pears are crisp-tender, about 10 minutes.
  4. Remove pears with slotted spoon and set aside, leaving liquid in pan.
  5. Add granulated sugar, zests, juices and cranberries to pan.
  6. Simmer over medium heat, stirring often, until cranberries pop.
  7. Reduce heat and add pears back to mixture.
  8. Cook for at least 5 minutes to allow flavors to mix. Cook longer if a thicker sauce is desired.

Makes about 4 cups of sauce.

Homemade Dreamy Creamy Orange Vanilla Ice Cream

dreamy creamy orange vanilla ice cream n

Our young hand-models enjoyed orange peel halves stuffed with dreamy creamy orange ice cream in exchange for their work. (Hey, modeling is hard work!)

Today is winter solstice. Two-hundred miles north of the Arctic Circle it is 1 degree F, but the frigid breeze makes it feel like -13. The sun set fifteen days ago and hasn’t peeked above the horizon since. The official beginning of winter is the perfect day to enjoy a taste summer. This ice cream was inspired by the orange covered vanilla popsicles we enjoyed as kids.

Dreamy Creamy Orange Ice Cream

Ingredients

  • 2 large eggs
  • 3/4 cup granulated sugar
  • 2 cups heavy whipping cream
  • 1 cup whole milk
  • ⅓ cup frozen orange juice concentrate, thawed
  • 2 tsp vanilla extract

Directions

  1. Whisk eggs until light and fluffy.
  2. Whisk in sugar a little at a time until completely blended.
  3. Pour in cream and milk and whisk to blend.
  4. Add juice concentrate and vanilla and blend well.
  5. Complete by following the directions of your ice cream maker or method.

Delicata Squash Soup with Spicy Smoked Chipotles

delicata squash soup n

Spicy, tasty fall soup made from delicata squash skin and all and topped with its own roasted seeds.

Delicata squash was new to us this year. After roasting the first one with garlic and enjoying the second one in this soup, this squash has made it to our favorites list. The beauty of delicata squash lies not only in the warm, autumn color palette of its skin, but also in that the entire squash can be eaten. The skin is tender enough that when cooked it can easily be puréed, giving the soup colorful little fall-colored speckles. Although the seeds are small, they roast perfectly to complement the soup. The roasted seed recipe would work with any squash or pumpkin seeds, and any leftovers make a delicious snack or salad topping.

Delicata Squash Soup

Ingredients

  • 2 delicata squashes (about 2 lbs), halved and seeded (reserve seeds)
  • 1 tbsp butter
  • 1/2 large sweet onion, diced
  • 1 stalk celery, diced
  • 16 oz chicken broth
  • 1 tbsp ground smoked chipotle peppers
  • 1/2 tsp salt
  • 2 tbsp brown sugar
  • roasted squash seeds to garnish (see below)

Directions

  1. Preheat oven to 400 degrees F.
  2. Place squash, cut side down, in about 1/2 inch of water in a roasting pan. Cover pan with foil.
  3. Bake squash until tender, about 45 minutes.
  4. Remove from oven and let cool slightly. Chop into 1-inch cubes.
  5. Melt butter in a large pot.
  6. Sauté onion and celery in butter over medium heat until softened, about 10 min.
  7. Stir in squash, broth, peppers, and salt. Bring to a boil.
  8. Reduce heat to low and simmer until flavors blend, about 20 minutes.
  9. Blend soup with an immersion blender until smooth.
  10. Stir in brown sugar. Simmer for 5 more minutes.
  11. Pour into bowls, top with roasted seeds and enjoy with slices of freshly baked bread.

Roasted Delicata Seeds

Ingredients

  • 1/2 cup delicata squash seeds
  • 1/2 tbsp olive oil
  • 1/2 tsp artisan salt, or to taste

Directions

  1. Preheat oven to 275 degrees F.
  2. Line a baking sheet with parchment paper.
  3. Clean seeds in cold water to remove squash strings and bits.
  4. Pat seeds dry with a towel.
  5. Place seeds in a bowl and stir in olive oil and salt until all seeds are well covered.
  6. Spread seeds on parchment-lined baking sheet.
  7. Bake for 15 minutes or until seeds start to pop.
  8. Cool on baking sheet until ready to use.
  9. Seeds will remain crunchy in an air-tight container for several days.

Almond Lace Ice Cream Cups

almond lace ice cream cups n

Extra rich vanilla ice cream is a delicious accompaniment for these elegant, lacy almond ice cream cups.

Every fall we enjoy making homemade ice cream in a variety of interesting and delicious flavors. And thinking as photographers, we wanted to show off one of this year’s star creations with something less ordinary than a store-bought cone. So, continuing with the almond theme we seem to be on recently, we created a sweet, candy-like bowl featuring the flavor and crunchy texture of this very versatile nut.

The finished ice cream cups came out a beautiful golden brown, supremely crunchy and sturdy enough to handle multiple scoops of ice cream or mounds of fresh fruit and whipped cream. We already have plans to heap them with three flavors of ice cream, sliced bananas and toppings for tomorrow’s dinner – banana splits!

almond lace ice cream cup b n

This almond lace cup is in the final stages of cooling on an upside-down ramekin. 

Almond Lace Ice Cream Cups

Ingredients

  • 4 tbsp unsalted butter
  • ¼ cup light corn syrup
  • ¼ cup packed brown sugar
  • a few drops of almond extract
  • ½ cup sliced almonds
  • 6 tbsp all purpose flour

Directions

  1. Preheat the oven to 350 degrees F. Line a baking sheet with parchment paper. Have 6 teacups or small ramekins ready.
  2. Melt butter in a medium pan over low heat.
  3. Mix in corn syrup and brown sugar. Mix well.
  4. Turn heat off and stir in almond extract, sliced almonds, and flour.
  5. Pour batter onto a parchment-lined baking sheet. Spread evenly.
  6. Bake for 10-12 minutes. The finished product should be golden brown.
  7. Remove from oven and let sit on baking sheet for about 45 seconds.
  8. Cut the large cookie into 6 even rectangles (one slice lengthwise down the middle to create two long pieces. Cut the long pieces into thirds.
  9. Lift each cookie off with an offset spatula (or other long, thin spatula) and drape the cookie on an overturned ramekin or teacup to cool and set in the shape of a bowl.
  10. If the cookies are too firm to shape, you can return the cookies to the oven briefly while they are on the overturned cups in order to let them melt to the right shape. Make sure you watch them, because they will begin to melt quickly.