Razors: The Perfect Fry

razor clams 30 a_n

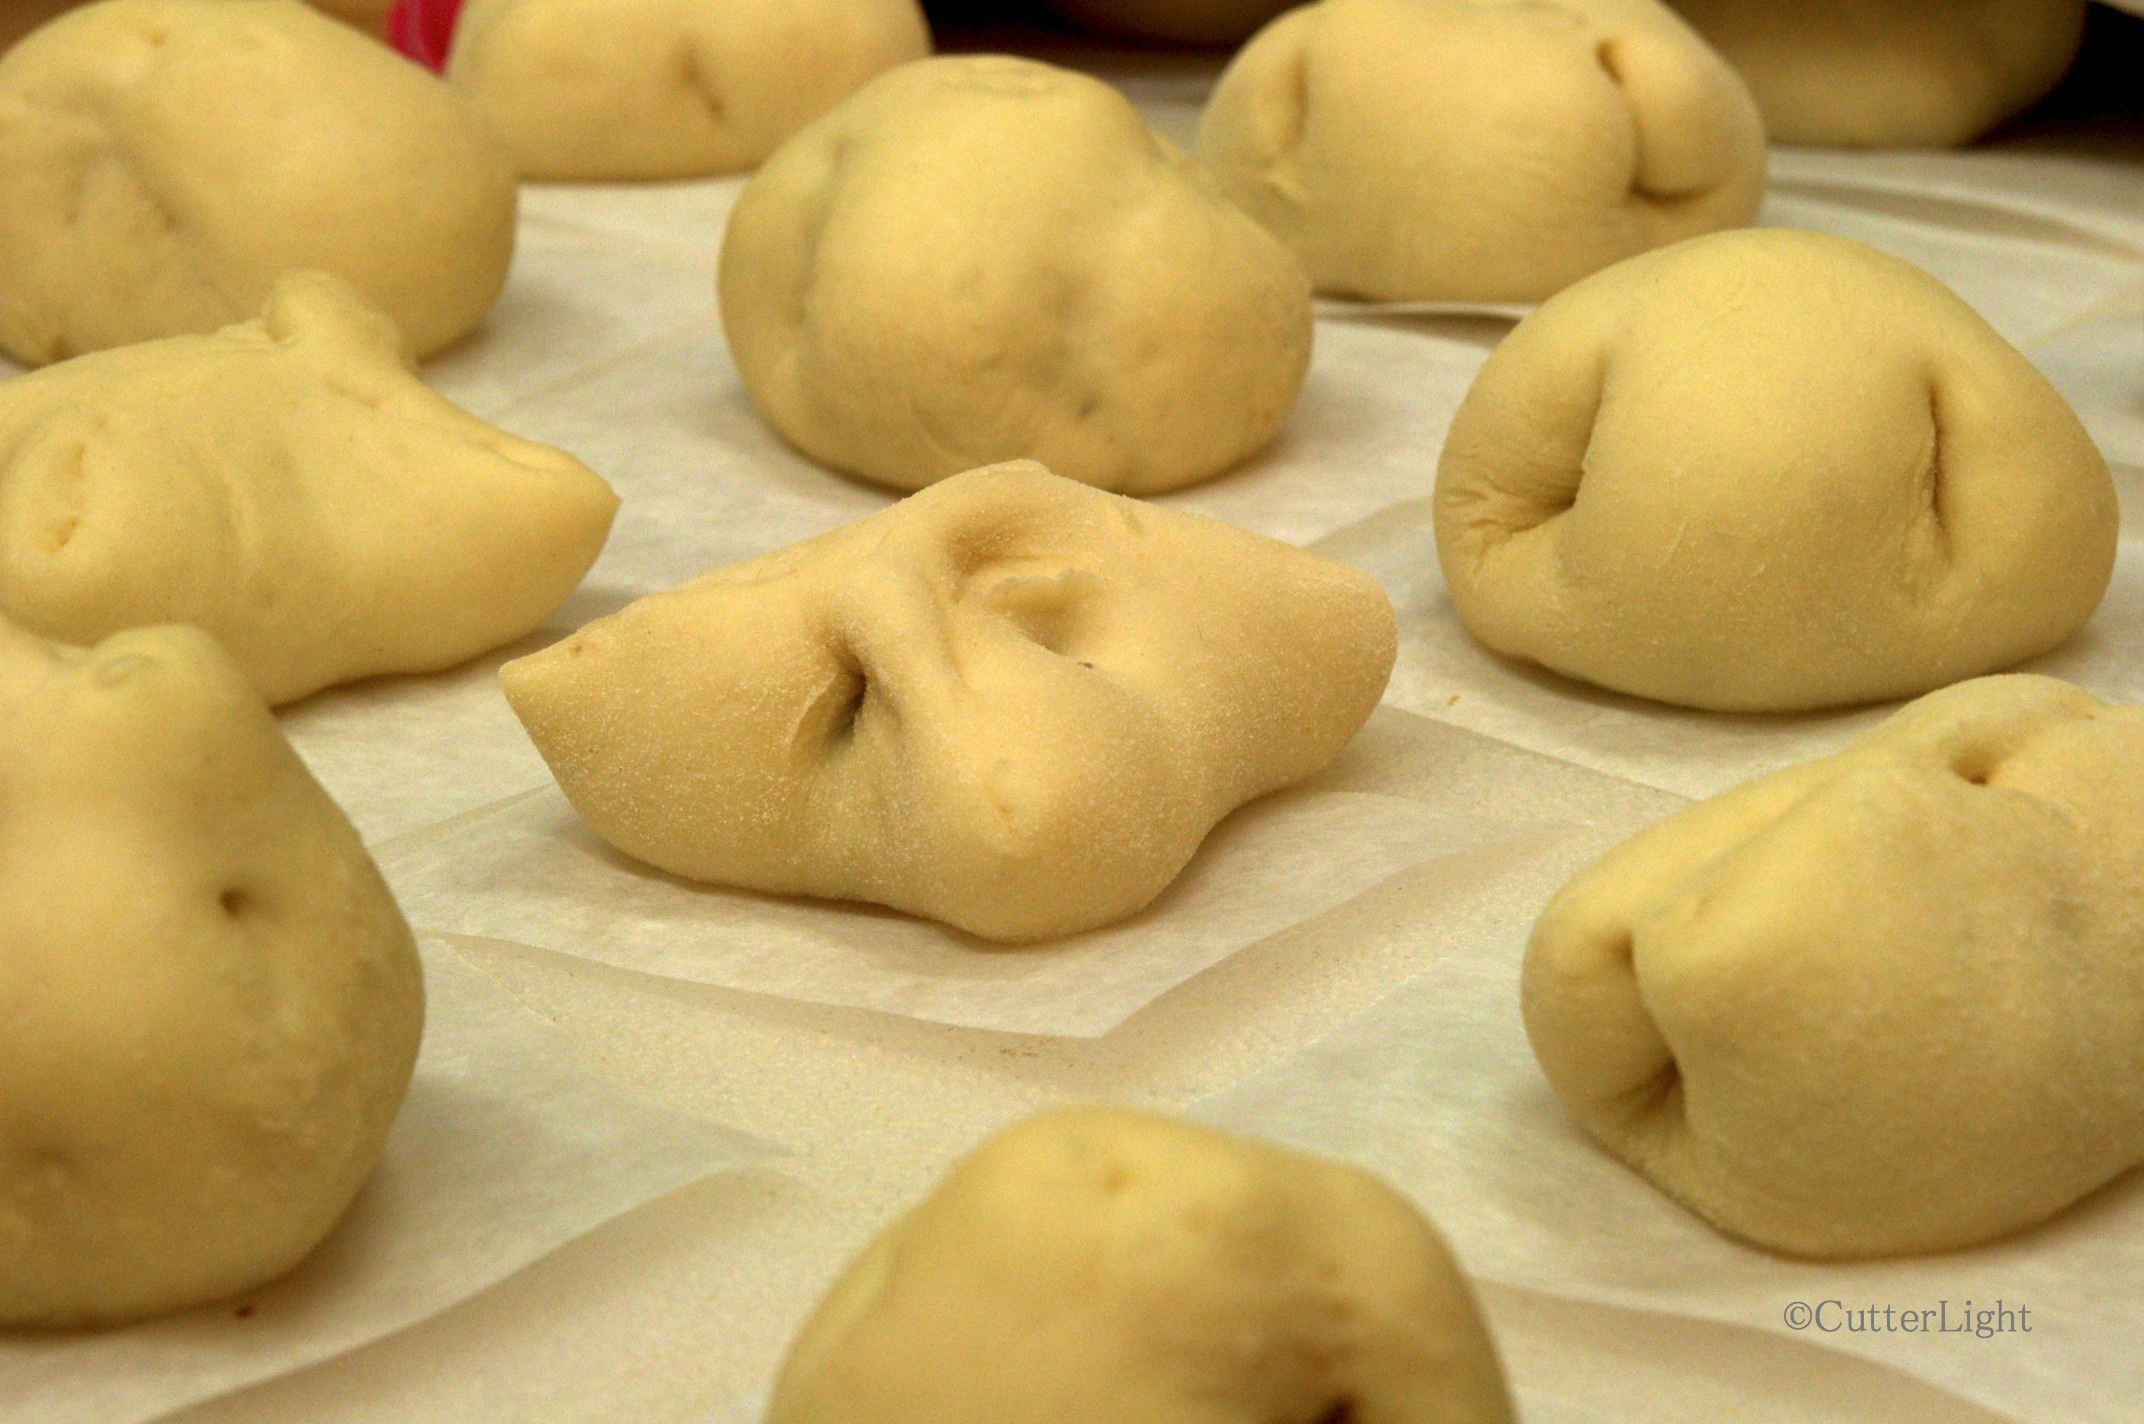
These Pacific razor clams freshly dug from an Alaskan beach are ready to be cleaned for New England style clam chowder, a fry (see recipe below), fritters, or sautéed with garlic and served on pasta.

Two summers ago on our favorite clamming beach we couldn’t dig ’em fast enough. Each time we spotted a tell-tale dimple and sunk our shovel or clam gun into the wet sand, the disturbance would cause a half dozen other clams to show. The beds were dense and we sometimes dug up prized razors two at a time. It took us barely an hour to each fill our 60-clam limit – and a good bit of the afternoon that day to clean those 120 clams.

razor clam in hand_n

This year the digging was considerably slower. Heavy winter storms had wreaked havoc on the beaches, washing out beds and decimating populations. The Alaska Department of Fish and Wildlife lowered the limit from 60 clams to 25 per person, but few clammers are finding even those numbers. Still, with low tides exceeding -5 feet and a morning in late May filled with sunshine, there was no reason not to go. It was warm enough to dig in nothing more than sandals, shorts and a a short-sleeved shirt – clamming attire I hadn’t worn since the days when I used to dig in Oregon.

With king salmon fishing closed or limited on the Kenai Peninsula, our “secret” beach had a few more fellow clammers than we’d seen in the past but it still wasn’t at all crowded. And there were the usual assortment of bald eagles, sandpipers, gulls and a whimbrel with its long, beautifully curved bill prying the sand for worms and silvery little sand lances that had been left exposed by the neap tide.

There were clams, too, but we had to work for them. We arrived at our spot about two hours before dead low and dug till the tide turned and began coming back in. Thirty clams between the two of us. Thirty-one counting the stray butter clam we added. Barbra had the eye for the shows on this morning, allowing us to do considerably better than most of our fellow clammers. The state’s decision to reduce the razor clam limit to 25 seemed both wise and in a way unnecessary, as we suspect very few clammers found anywhere close to 25 clams.

clam chowder bowl_n

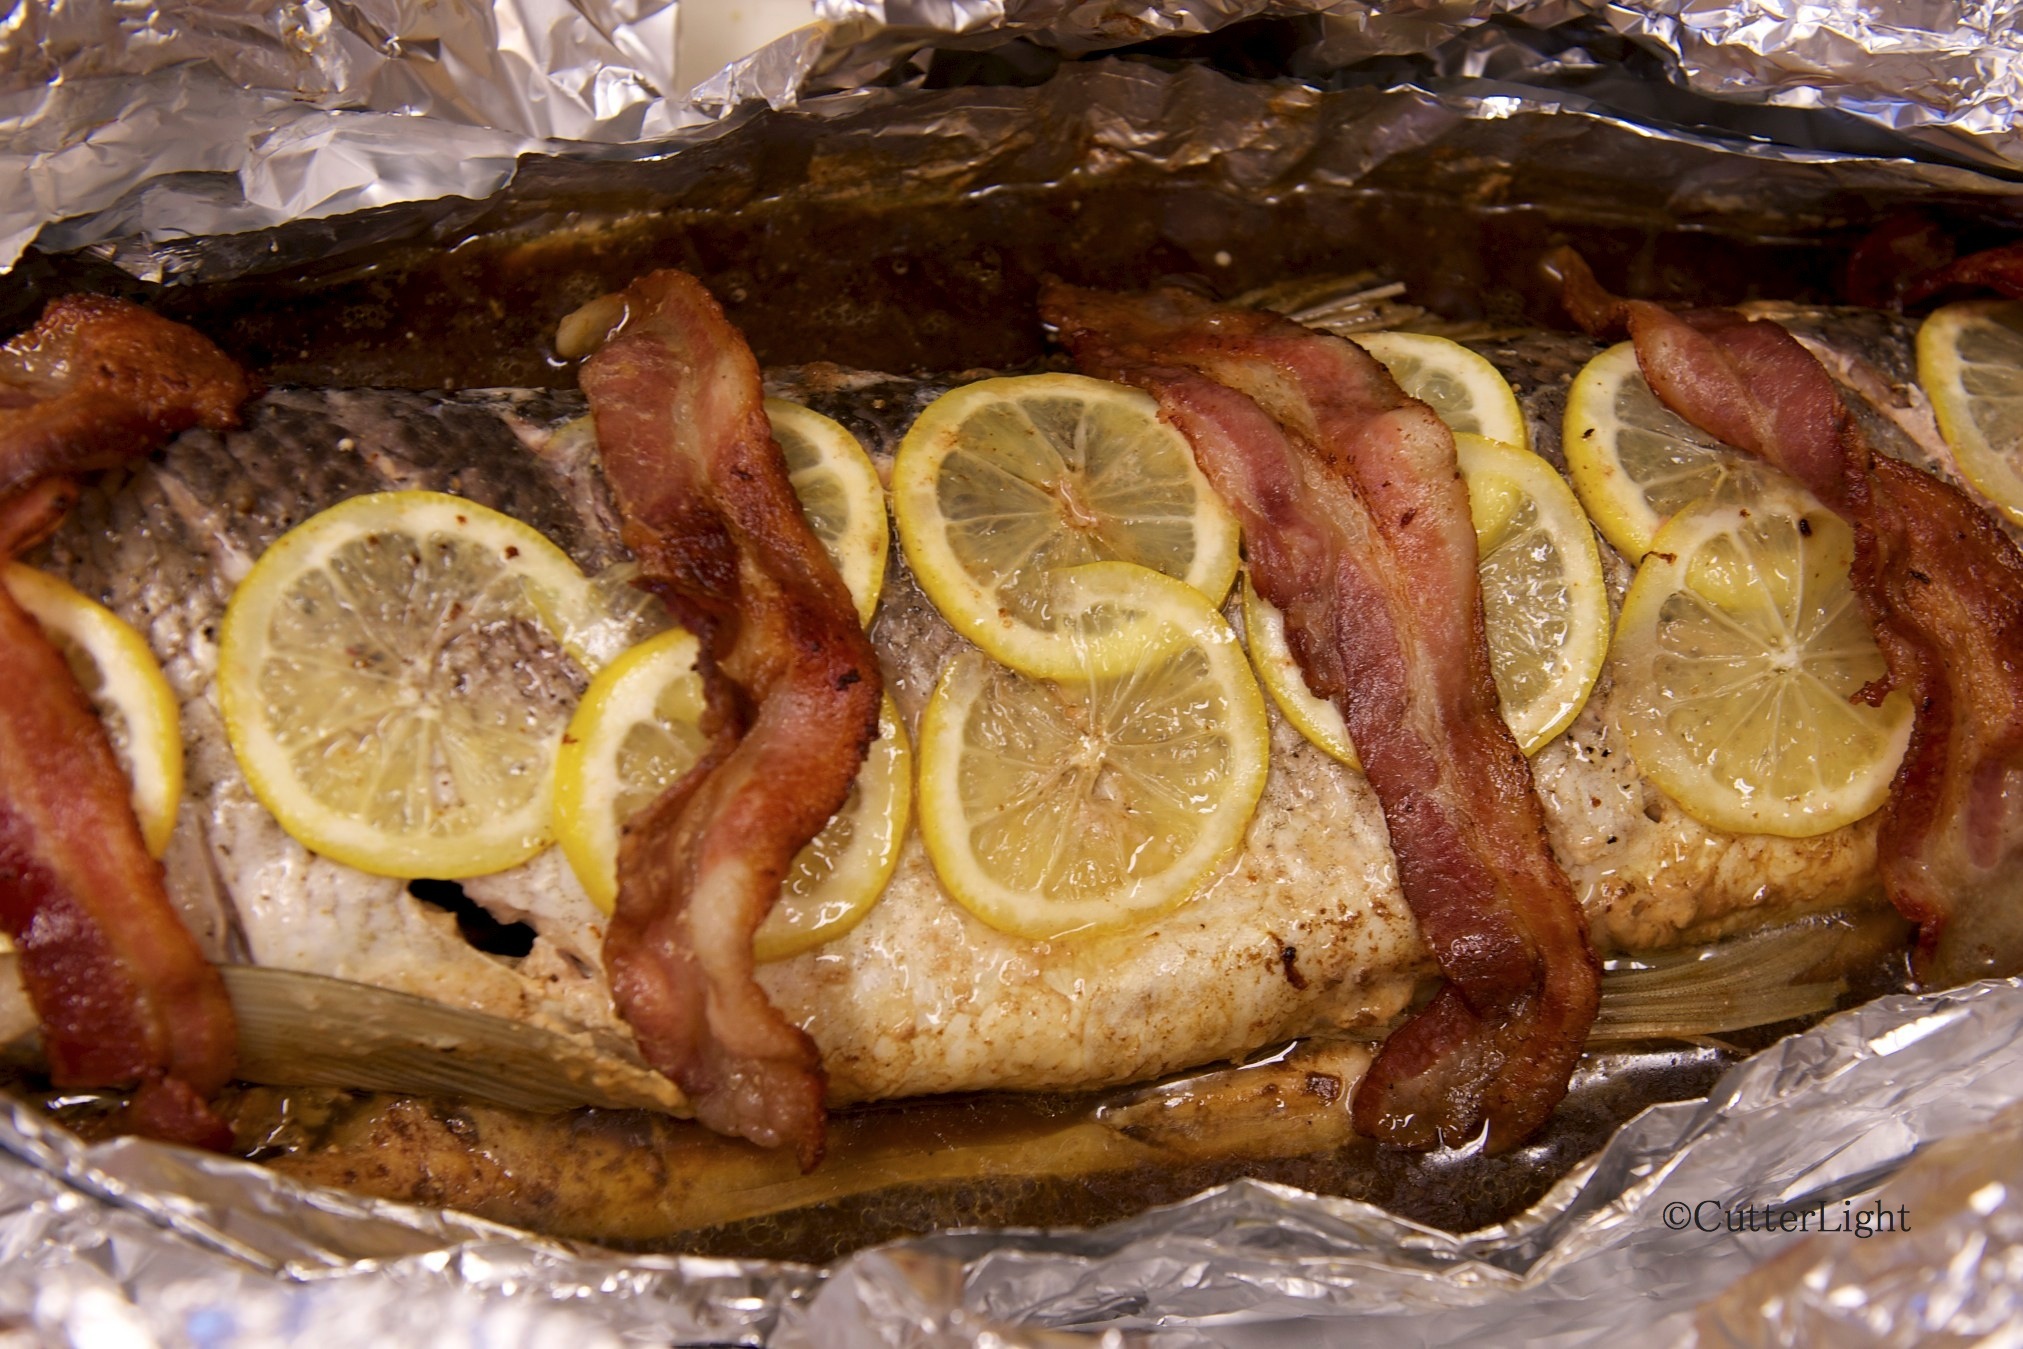
Overall, the size of the clams was good and the reward for our morning of digging was a feast of fried razors and New England Style Clam Chowder. We paired this meal with three different premium sakes, the first wines of this summer’s wine appreciation course we and another couple are taking.

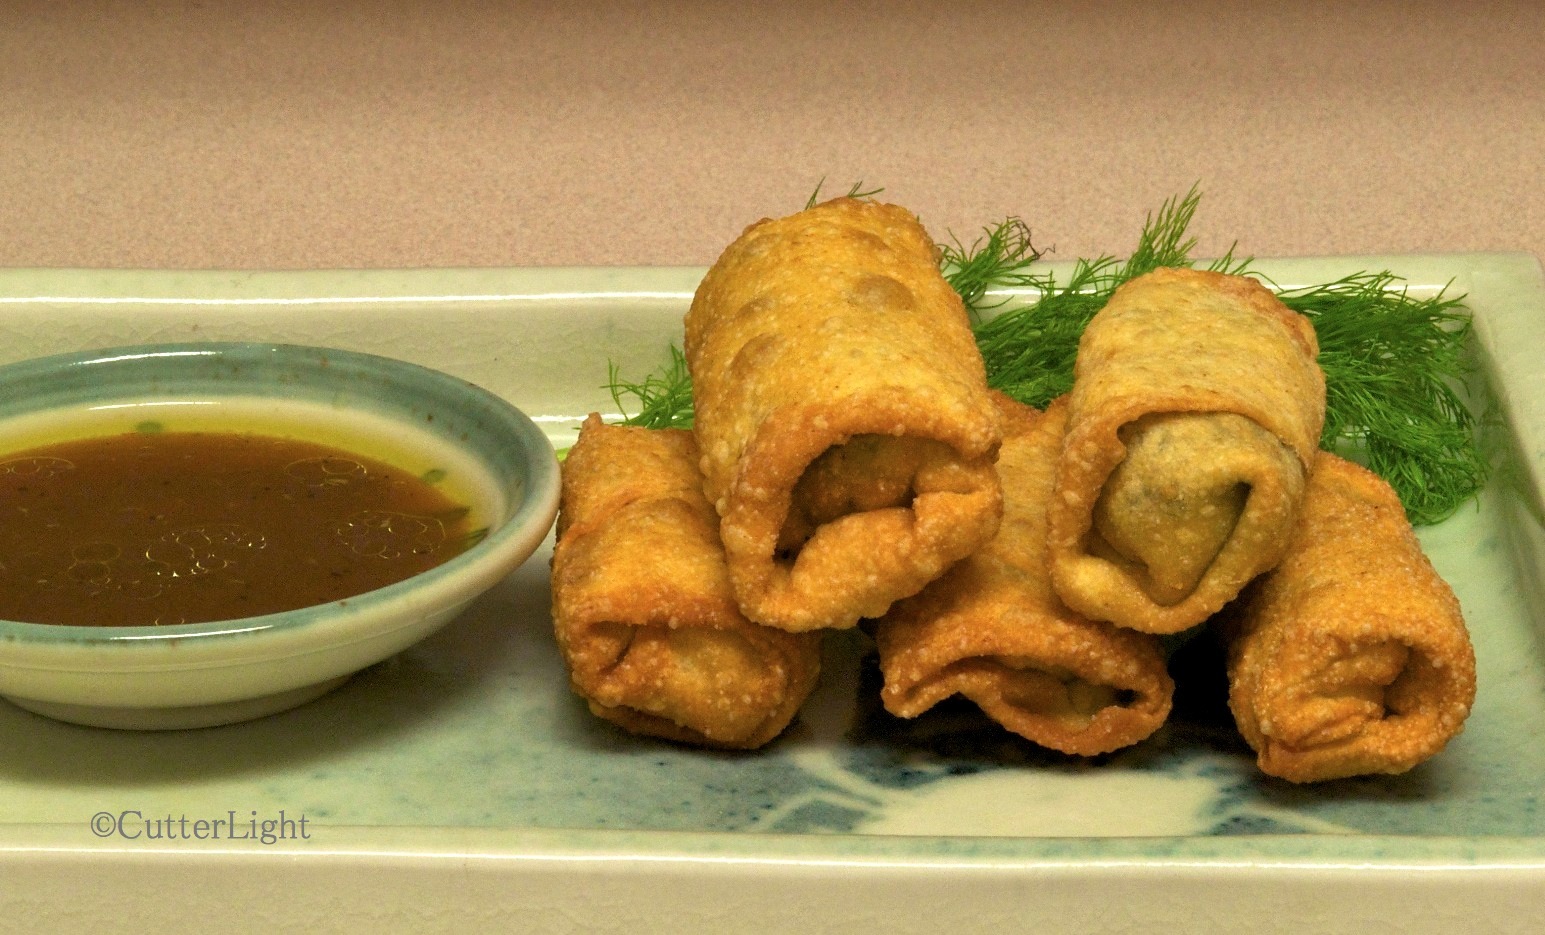
You can follow this link to our Alaskan Clam Chowder Recipe. After years of making fried razors a number of different ways, following is the recipe that gets the most frequent requests. (Incidentally, this is also an excellent recipe for onion rings.)

Fried Razors (Serves four with two medium to large clams per person)

Ingredients: Have ready a cutting board or plate on which to position breaded clams, and another plate with paper towels to drain fried clams.

  • 8 medium to large razor clams, shucked, gilled and cleaned. It does not matter if the “foot” of the clam remains attached or is separated. (See note below.)
  • 1 or 2 packets Saltine crackers, crushed medium-fine
  • 1/2 cup all purpose flour
  • 4 eggs
  • 1/2 tbsp Cholula sauce or similar chili-pepper-based hot sauce
  • healthy pinch salt
  • 1/8 tsp freshly ground pepper
  • 1/2 tsp rub/seasoning such as a Southwest rub, mesquite rub, or other rub featuring chili peppers. Our own blend features smoked chipotles, smoked paprika, oregano, and arbol chilis.
  • 2 quarts light olive oil or other frying oil (This can be reused.)
  • lemon wedges and tarter sauce

Directions:

  1. In a Ziploc bag, mix flour, salt, pepper and seasoning to taste.
  2. Place crushed Saltines on a plate.
  3. Place eggs in a wide bowl. Add Cholula and thoroughly whisk together. Position in this order: cleaned clams, flour mixture, egg mixture, Saltines, plate or cutting board for breaded clams.
  4. In a deep fryer or on the stove in a deep pot, heat olive oil to 350 degrees F or slightly hotter.
  5. Use tongs to drop clams one-at-a-time into flour bag. Shake so that clam is thoroughly coated. Next, coat clam with egg mixture. Lift clam from mixture and let excess egg drip off, then roll in cracker crumbs. Set breaded clam on cutting board to rest. Repeat till all clams are breaded.
  6. Oil is ready when a few cracker crumbs bubble when placed in oil. Use tongs to place clams two-at-a-time in oil. Do not overload. Breaded clams should bubble fairly vigorously. Cook for one minute. Remember, clams will continue cooking even after they are removed from oil. Do not overcook. Place cooked clam on paper towels to drain. Repeat till all clams are cooked.
  7. Add a squirt of lemon and dip in tartar sauce. (Beaver tartar sauce is our favorite.)

Serve clams with a quality daigingo or junmai ginjo sake, a crisp Oregon Pinot Gris, or your favorite Alaskan craft beer.

Note about cleaning clams: Even if you crack a few shells when digging, the cleaning can go quickly and it should be possible to serve sand-free clams and clam chowder. Here’s how to do it.

  1. Rinse clams in very cold water.
  2. Have an ice bath ready for clams: salted ice water in a large pot
  3. Meanwhile, in a medium-sized pot, bring salted water to a boil.
  4. Use tongs to place clams one or two at a time into boiling water. The instant the shell pops open, remove the clam and plunge it into the ice bath. The shell and most of the sand will now easily come off. Additional rinsing after cleaning will remove residual sand.

Honeymoon Crabs: Dungeness Crabs in Miso and Beer with Lime, Soy, Olive Oil, Butter and Garlic Sauce

crabs honeymoon clase d800By themselves, freshly caught Dungeness crabs make the Pacific Northwest a worthy food destination. Steam boiling them in a large, covered frying pan results in a gourmet meal for two. This recipe works equally well with both fresh and pre-cooked crabs.

Growing up, a highlight of every summer was our vacations on North Carolina’s Outer Banks where a kettle of freshly boiled blue crabs were spread out on a newspaper tablecloth, crab crackers were passed out, and lunch was served. Blue crabs are relatively small, but their succulent meat makes the pickin’ totally worth the effort. In those days, we dipped chunks of crab in straight melted butter or somewhat fancier drawn butter if we were at a restaurant.

crabs honeymoon d800

A large 12.5 inch skillet is perfect for two Dungeness crabs as each can fully sit in the simmering liquid. Your choice of bread with this meal may be as important as your choice of wine. It’s hard to beat a loaf of good sourdough bread and a buttery Chardonnay. La Crema has proven year in and year out to produce just such a wine at a reasonable price.

Years later I moved to Oregon and discovered Dungeness crabs. Weighing in at around a pound-and-three-quarters each, there’s enough meat in one Dungeness to satisfy a hearty eater. And their flavor? We’ve eaten all kinds of of crabs; our favorites are Dungeness and blues, but other types are delicious as well. This is our favorite cooking method, and after years of experimenting with different dipping sauce combinations, we’ve perfected a combination of lime, soy sauce, olive oil, butter and garlic.

Honeymoon Dungeness Crabs

Ingredients: (You will need a large frying pan with a lid. We use a Swiss Diamond 12.5 inch pan.)

  • 2 whole Dungeness crabs, preferably fresh but pre-cooked is absolutely fine
  • 12 ounces of a good beer such as a red amber
  • 3 – 4 tablespoons miso paste
  • 2 cups of water
  • 1 tsp sea salt

Directions: (A general rule is to cook Dungeness crabs for about 15 – 18 minutes – roughly 7 – 8 minutes per pound.)

  1. Rinse crabs. Use a brush to remove any mud.
  2. Over high heat, mix ingredients thoroughly and position crabs bottom side down.
  3. Bring to a low boil, reduce to a simmer and cook for about 7 minutes.
  4. Use tongs to flip crabs onto their backs and continue simmering for 7 minutes.
  5. Remove crabs from skillet and let them rest on their backs for a few minutes before flipping over and serving belly side down.

Lime, Soy, Olive Oil, Butter and Garlic Dipping Sauce

Ingredients: (measurements are approximate)

  • 6 tbsp butter
  • 3 tbsp extra virgin olive oil
  • 2 – 3 tbsp soy sauce
  • a few cloves of garlic either chopped fine or minced
  • juice from 1 large lime or 2 small limes

Directions:

  1. In small pan over medium-low heat, melt 2 tbsp butter. Add the garlic and lightly sauté for a minute or two.
  2. Reduce heat to low and add the rest of the butter and completely melt.
  3. Add the remaining ingredients, mix and heat through thoroughly.
  4. Pour into separate dipping bowls and serve.

Waiter! There’s a Whale in my Soup! Beluga Chowder

beluga chowder spoonful_n

Not your everyday ingredient, beluga whale has a firm, slightly crunchy texture and delicious flavor making it a perfect ingredient in traditional seafood chowders. 

When a friend who is on a whaling crew recently offered us a few pounds of fresh beluga, we jumped at the opportunity to work with what for us is a new ingredient. The beluga chowders we’d sampled till this point had all started with beluga being added to canned clam chowder. We couldn’t wait to try beluga with our own recipe. The result was a rich, creamy, flavorful chowder.

We view all seafood through the lens of sustainability. Although commercial whaling and environmental factors have endangered a few of the world’s 29 separate beluga populations, in Arctic Alaska’s Chukchi Sea the species is abundant and appears to be unaffected by the relatively few numbers harvested for subsistence by Inupiat hunters. Typical belugas range in size from about 10 to 18 feet long and weigh between half a ton and two tons. Salmon and cod are among their preferred prey, but they feed opportunistically on a long list of other sea creatures. Interestingly, beluga’s closest relatives are narwhales.

Beluga soups and chowders are very popular among Eskimos. The skin and a little bit of the attached blubber is cut into slices about 1/16 – 1/4 inch thick (.25 – .5 cm) and about 1/2 – 1 inch in width and length. We cut ours thin – about 1/6 inch. Chunks this size become tender after about 10 minutes of simmering, with the skin retaining just the right amount of subtle crunch to it – a bit like conch or whelk. Using our favorite clam chowder recipe as a base, our beluga chowder had guests mopping their bowls with fresh-baked bread and asking for more. See recipe below.

beluga chowder bowl_n

Sweet corn, potatoes, bacon, butter, olive oil, sautéed onions, garlic, salt and pepper are a great base for all kinds of seafood chowder recipes. After that, whether the featured ingredient is razor clams, beluga whale or the assorted catch of the day is up to you. A little tarragon is nice, too.

Beluga and Clam Chowder

Ingredients:

  • 2 pounds beluga whale (skin with blubber), cut into slices 1/16 inch thick and abut 1 inch x 3/4 inch. Each piece should have skin plus about 1/4 inch to 1/2 inch of blubber attached.
  • 1 pound razor clams or other clams, chopped coarse (This is the weight of clams after they have been drained. But save and set aside their juice.)
  • clam juice you’ve set aside. The more, the better.
  • 4 1/2 pounds Yukon Gold or yellow potatoes. (These cook up creamier than than Russets)
  • 2 sweet onions, chopped coarse
  • 1/2 pound bacon, cut into small pieces
  • 4 cups milk
  • 2 cups heavy cream
  • 6 cloves of garlic, chopped fine
  • 1 1/2 pound sweet corn (optional)
  • 1/2 cup flour
  • 4 tablespoons olive oil
  • 4 tablespoons butter
  • 2 tablespoons sea salt
  • 1/2 tablespoon Italian seasoning (The Spice Hunter’s Italian blend is excellent)
  • 1 teaspoon freshly ground pepper (either black or rainbow)
  • 1 teaspoon dry tarragon, crushed (optional)
  • 1/2 teaspoon nutmeg (optional)
  • 6 – 8 very thin slices of lemon

Directions:

  1. Place sliced beluga in a pot. Add just enough water or clam juice to cover. Add a little salt. Over high heat, bring to a boil then reduce to simmer. Cook till beluga is tender (skin is easily pierced by a fork) but still a bit crunchy. About 10 minutes. Use a colander and a bowl to drain water, but keep water. Set beluga aside.
  2. Fry bacon pieces till tender. Do not crisp. Drain the grease and set bacon aside.
  3. Wash potatoes and remove any eyes, but do not remove the skins. Cut into ½ inch cubes and place in a large bowl. Cover with cold water, rinse and drain.
  4. Return water used for cooking beluga to pot. Add potatoes. If necessary, add additional water or clam juice to cover potatoes. Bring to a boil over high heat. Reduce heat and simmer till potatoes are tender.
  5. Meanwhile, place olive oil in a large skillet and heat over medium heat. Add onions, flour and seasoning (optional). Reduce heat and stir frequently for about five minutes until onions begin to turn translucent. Add garlic and bacon and stir again, cooking for about 1 minute.
  6. Add onion mixture, milk, cream, beluga, cream, salt and pepper to potatoes and water. Heat thoroughly, but do not boil.

Serve piping hot with sourdough bread.

See also: Alaska Razor Clam Chowder

Manhattan-Style Razor Clam Chowder

Alaska Seafood Chowder

Whole Sheefish (or any fish) Poached in Foil

sheefish whole poached in foil_n

A large fish poached and served whole makes for a dramatic presentation and a first-class dining experience. You don’t need a fancy fish poacher to pull this off. Aluminum foil works beautifully in the galley, on the grill, over a campfire, or in the kitchen. Here are the basics. 

Sheefish whole poach_n

This past winter, we’ve been dining on sheefish (inconnu) in the six-to-eight-pound class. Measuring 25 – 30 inches, these fish of the far north are just small enough to fit into our oven and serve whole. Because sheefish is bony and not easily filleted, they are well-suited to this cooking method; when served, the meat comes easily off the bones. With firm white meat in large, sweet, flakey chunks, sheefish are comparable to striped bass, European seabass, Japanese seabass (suzuki) and similar fish. Here in Alaska, foil poaching works beautifully with salmon, rockfish, char and small halibut.

Poaching and steaming recipes need not be complicated. Although we generally start with a court bouillon or dashi and add Chardonnay when we have it, equal parts of water and Chardonnay alone make a perfectly acceptable basic poaching stock. No wine on hand? A little water – enough to keep the fish bathed in steam – is sufficient. Anything else is a matter of taste. We’ve found it difficult to improve on a combination of sea salt, freshly cracked pepper, lemon, butter and bacon. Olive oil makes a good substitution for butter and bacon.

One of the beautiful things about this recipe is that the ingredients can be prepared beforehand so that they’re ready for a shore lunch or camp dinner to celebrate a special catch.

Incidentally, wakame (dried kelp) and dried bonito flakes are an ideal base for fish stock for campers and sailors. These ingredients are light, easy to store, and last indefinitely. This dashi-style stock can be enhanced with salt, soy sauce, white wine, sherry or sake.sheefish

See more of Detlef Buettner’s beautiful art at: http://home.gci.net/~lifesize.fish/salmonids.htm

Poached fish is an excellent meal to serve with freshly baked French bread or sourdough bread. We and our guests enjoyed the above sheefish served on saffron rice cooked in a clam juice broth, spooning the poaching broth onto our rice and fish.

Ingredients:

  • 1 whole fish, scaled, gutted, gilled, rinsed off and patted dry.
  • aluminum foil sufficient to entirely wrap around the fish. We double wrap to prevent leaking.
  • poaching/steaming liquid – approximately 1/3 cup per pound of fish. (About 2 1/2 cups for an 8-pound fish.) See below for easy poaching liquid recipe.
  • 1 tbsp butter per pound of fish. (An 8-pound fish takes 1 stick of butter.)
  • very thin slices of lemon to cover one side of fish
  • strips of bacon to cover one side of fish. (about 5 strips for an 8-pound fish)
  • lemon juice to rinse stomach cavity – approximately 2 tbsp for an 8-pound fish
  • sea salt and freshly cracked pepper to rub into cavity and both sides of fish – approximately 2 – 3 tbsp sea salt for an 8-pound fish

Directions:

  1. Place large baking sheet in oven and preheat to 450 °F.
  2. Arrange aluminum foil on flat surface. Thoroughly coat foil with butter where fish will be placed.
  3. Rub lemon juice into fish’s stomach cavity. 
  4. Use a very sharp knife to make shallow diagonal slashes spaced about 1 inch apart from the head of the fish to the tail. Do this on both sides.
  5. Rub salt and pepper mixture onto both sides of fish and into cavity.
  6. Place fish onto buttered foil.
  7. Rub butter into fish’s cavity. Rub remaining butter on top side of fish.
  8. Arrange lemon slices on top side of fish.
  9. Arrange bacon slices atop fish.
  10. Pour poaching liquid along the sides of fish, taking care not to rinse the off the top of the fish.
  11. Close foil around fish and place on baking sheet (or on grill, etc.) Cook until a few dorsal fin rays can be easily pulled from fish. Total time will be approximately 5 – 6 minutes per pound. An 8-pound fish will cook for 40 minutes.
  12. Note: We like to remove the bacon when the fish is finished cooking, crisp it up in a pan, and return the bacon to the top of the fish prior to serving. The bacon drippings can be drizzled atop the fish as well.

Poaching Liquid Recipe:

Ingredients:

  • 3 cups water
  • 5 inch square of wakame (dried kelp – available in Asian grocers.)
  • 5 grams (0.17 ounces) dried bonito flakes
  • 1/4 teaspoon sea salt (or 1/2 teaspoon soy sauce)
  • 1 tbsp miso paste (optional)
  • Optional: replace 1/2 cup water with white wine or sake

Directions:

  1. Place water in pan and heat over high heat. Add wakame and salt, stir occasionally and continue heating but do not boil.
  2. When Wakame is soft, add bonito flakes. Cook briefly in steaming water and stir gently. Do not boil.
  3. Pour mixture through wire strainer into pan or bowl.
  4. If desired, return strained soup to low heat and stir in miso paste till dissolved.

Smoked Anchovy and Salmon Pizza

Smoked Anchovy & Sage-Seared Salmon Pizza_n

Salmon seasoned with sage and briefly seared, smoked anchovies, shitake mushrooms and mozzarella cheese top a whole wheat crust brushed with garlic-infused olive oil.

The base for this elegant, satisfying pizza is a baked crust brushed with olive oil. This year, we’ve been experimenting with whole wheat crusts, and in this particular recipe it is perfect. Baked on a pizza stone, the whole wheat comes out light and crisp. The sage adds a wonderful aroma and flavor to this dish. This would be a great pizza to cook on a charcoal grill or in a cast iron frying pan with a lid in camp.

Ingredients:

  • 1 pizza crust, pre-baked
  • 2 cups shredded mozzarella cheese
  • 1/2 pound salmon fillet, skin on or off, cook’s choice. We prefer skin on.
  • 1 tin (2 oz) smoked anchovy fillets, oil drained and fillets separated
  • 2 tbsp tbsp pine nuts
  • garlic cloves. Small cloves can be left whole, large cloves cut into smaller pieces to make about 20 pieces of garlic.
  • two or three shitake mushrooms, sliced thin
  • 1 tsp dried sage
  • 1/2 tsp Italian seasoning
  • ground pepper
  • 3 very thin onion slices, cut in half
  • 2 tbsp extra virgin olive oil, preferably infused with garlic, but plain olive oil is fine
  • 1/2 tsp powdered garlic
  • additional Italian seasoning, to taste

Directions:

  1. Place a pizza stone on oven’s center rack and preheat to 400 degrees F.
  2. Ensure all bones are removed from salmon fillet. Rub sage into skinless side of fillet and set aside.
  3. In a medium-sized frying pan, heat a tablespoon of olive oil over medium heat. Add the onions, shitake slices, 1/2 tsp of Italian seasoning and ground pepper and briefly sauté. Onions should still be slightly crisp. Remove mixture to a plate to stop cooking.
  4. Return pan to medium heat and add garlic cloves and pine nuts. Sauté until garlic just turns soft and edges are light brown. Remove mixture to a plate to cool.
  5. Return pan to medium heat. Place salmon fillet sage side down and sear for 30 seconds. Use your hand or a spatula to apply light pressure to the fillet to ensure that it is evenly seared. Turn fillet over and sear the other side for 30 seconds. Remove to a cutting board to cool.
  6. Place 2 tablespoons extra virgin olive oil and 1/2 tsp powdered garlic in a small bowl and mix together. Using a pastry brush, brush olive oil onto the pizza crust.
  7. Sprinkle mozzarella cheese on the crust.
  8. Evenly sprinkle the mushrooms and onions atop the cheese.
  9. Arrange the anchovy fillets in a pinwheel on the pizza.
  10. Use very sharp knife to cut/separate the salmon along the grain of the fillet. Pieces should be 1 or 2 inches long. Arrange these pieces on the pizza.
  11. Add the pine nuts and garlic, and finish with a sprinkle of Italian seasoning.
  12. Bake for 10 minutes. Crust should be browned and the bottom should be crisp. Rest pizza for a few minutes before slicing to allow toppings to set.

Enjoy this pizza with a lightly-chilled Chardonnay or a cold Amber Ale.

Zaru Soba: Chilled Buckwheat Noodles with Seared Scallops and Ikura

Buckwheat soba w seared scallops & ikura_n

Chilled buckwheat noodles topped with whatever imagination and taste comes up with and served with tsuyu dipping sauce combines the terms “gourmet” with “healthful.” Recipes follow.

A favorite food memory from the days I spent in Japan is the combination of sultry summer afternoons and lunches of refreshingly chilled buckwheat noodles. The first time I was served zaru soba in a Japanese restaurant, I knew I’d begun a life-long love affair.

Soba refers to thin noodles made from buckwheat, which in Japan is mainly grown in Hokkaido. Zaru refers to a seive-like bambo tray the soba is often served on, although these days it is popular to drain the soba in a colander and to then place the noodles on a tray or dish. Often served plain or with thin strips of nori and perhaps toasted sesame seeds, the noodles are almost always served with tsuyu, dashi, mirin and sweetened soy sauce mixture. The mixture is typically refrigerated or chilled with ice, and just prior to serving wasabi and scallions can be mixed in. Chopsticks are used to gather up a portion of soba which is then dipped into the tsuyu and, at least in Japan, the noodles are eaten with loud, appreciative slurps.

Buckwheat soba w seared scallops & ikura close_n

In addition to being tasty and very simple to make, soba is an especially healthful food. Easy to digest and packed with energy, soba contains all eight essential amino acids as well as antioxidants and important nutrients such as thiamine.

Soba and tsuyu are available at Asian grocers and in the Asian sections of many grocery stores. Tsuyu can be fairly easily made from scratch, provided you have on hand the necessary kombu, katsuo (bonito) flakes, mirin and soy sauce. Cooking up a serving or two of zaru soba – or several – for lunch or a light dinner is a breeze.

Zaru Soba with Seared Scallops and Ikura (for 2 servings)

Soba Ingredients:

  1. Two serving’s worth of soba (It generally comes packages with ribbons used to tie off serving-sized bundles.)
  2. Water to boil the soba
  3. Salt

Prepare according to package instructions much as you would pasta. Drain cooked soba in a colander and rinse thoroughly with cold water, using your hand or tongs to toss. Place rinsed, drained soba on plates, top with seared scallops, ikura and strips of nori and serve.

Seared Scallop Medallions

Directions:

  1. Select 4 large sea scallops. Cut them into medallions (approximately 1/8 inch (o.3 cm) thick.
  2. Dust medallions with seasonings of your choice. (We like a mixture of sesame seeds, chili pepper, powdered garlic, cinnamon and nutmeg. Commercially prepared Thai seasoning blends work very well.)
  3. In a frying pan, heat a tablespoon or two of olive oil over medium heat till a drop of water placed in the pan sizzles. Sear medallions on each side for just a few seconds. Use tongs or chopsticks to flip.
  4. Immediately remove medallions to a cool plate. Cover and refrigerate if they are to be used later.

ikura cured salmon eggs_nTo create sushi grade ikura in your own kitchen, see our article Ikura: Curing Salmon Eggs

Readers might also be interested in:

Alaskan Shrimp Harumaki with Lime-Infused Ponzu Dipping Sauce

Arctic Anpan Two Ways: Sweet Azuki and Caribou Cha Sui

Alaskan Shrimp Harumaki with Lime-Infused Ponzu Dipping Sauce

Harumaki w shrimp 2_n

Harumaki (spring rolls) are a fun, tasty, easy-to-make appetizer or side dish. Both the wrappers and the filling can be modified to suit just about any taste. Recipes follow.

So named because they were a traditional part of Chinese New Year and a celebration of the coming spring, originally spring rolls were filled with vegetables and shaped like gold bars; thus they were a symbol of prosperity and good fortune. When Chinese immigrants brought this popular food to Japan, the name was directly translated to haru (spring) maki (roll). These days spring rolls are part of menus the world over, in part because they easily lend themselves to fusion cooking.

Our contribution to a recent dinner party was harumaki filled with sweet Alaskan shrimp, shitake mushrooms and fennel, which we’d recently been presented as a gift. These ingredients were arranged on a piece of nori (dried seaweed) and rolled up in thin squares of one of our favorite pasta doughs. Served hot from the deep fryer along with a lime-infused Ponzu dipping sauce, they were a big hit.

The Alaskan shrimp we use in our recipes are usually pink, coon stripe or side stripe shrimp – species often served in sushi restaurants as ama-ebi (sweet shrimp). The pinks and side stripes in particular have a distinctively sweet flavor.

Alaska Shrimp Harumaki (for eight, two-bite rolls)

Ingredients:

  • 2 to 4 shitake mushrooms
  • nori (dried seaweed) rectangles approximately 2 1/2″ x 3 “
  • 8 wrappers 3″ x 3″ (we used pasta dough). (Ready-made egg roll wrappers are available in most grocery stores.)
  • 8 ounces shrimp, shelled and veins removed
  • fresh fennel leaves – enough for each roll
  • 1 tbsp lime juice
  • sea salt
  • freshly ground pepper
  • olive oil
  • water (to help seal the wrappers)

Directions:

  1. Cut the mushrooms into 1/4 inch slices.
  2. If shrimp are small, use whole. Otherwise cut into 1 to 2 inch pieces
  3. In a bowl, toss together the mushrooms, shrimp, lime juice, ground pepper and sea salt.
  4. Place 1 tbsp olive oil in a frying pan and heat over medium heat till oil sizzles when a drop of water is added. Add the shrimp mixture, stirring frequently for about 90 seconds. Remove from heat and return mixture to bowl to avoid overcooking.
  5. Place one piece of nori in center of each wrapper. (Prevent nori from breaking by first dipping in water.) Place shrimp mixture and fennel in center of nori.
  6. To wrap: Position square so that one corner is toward you. Fold this corner over the filling. Next fold the right and left corners over the filling. Then roll wrapper toward top (remaining) corner as you would a burrito.
  7. Seal by slightly moistening the last corner and gentle pressing closed. Seal well to prevent oil from leaking in during deep frying.
  8. In a deep fryer or sufficiently large pot: Add enough frying oil (we use light olive oil or canola oil) so that rolls will be completely submersed. Bring oil to 350°F. Place rolls into oil and cook until wraps are golden brown. Do not overcrowd. Remove and drain on a plate covered with paper towel.
  9. Serve immediately with ponzu dipping sauce.

Harumaki w shrimp 1_n

Lime-Infused Ponzu Dipping Sauce

Ingredients:

  • 1/4 cup soy sauce
  • 1/2 cup rice vinegar
  • 1/4 cup lime juice
  • small square (about 3/4 inch) konbu (dried kelp)

Directions:

  1. Mix the ingredients together in a non-reactive container and let rest for 8 hours.
  2. Remove konbu.
  3. Combine the following dried ingredients to make 1 tbsp: onion, garlic, chili pepper, cilantro. Or use fresh ingredients.

Pasta Wrappers

Ingredients:

  • 1 cup semolina
  • 1 egg
  • 1 tbsp olive oil
  • water

Directions:

  1. In a bowl, combine the ingredients with a fork.
  2. Add 1 tbsp water. Continue combining. Consistency of dough should be as dry scrambled eggs. Add more water 1 tbsp at a time as necessary.
  3. Kneed dough by hand till it forms a ball. Wrap ball in plastic (or cover container tightly) and let rest for 20 minutes.
  4. Finish processing into squares using a manual pasta machine.

Alaska Salmon Seafood Chowder with Fennel Sheefish Stock (and a Brief History of the Tomato)

Salmon & seafood tomato chowder_n

Pink salmon and sweet shrimp from the cold, clean seas of Alaska along with a terrific fish stock are key ingredients in this hearty, tomato-based seafood chowder. Made from a little of this, a little of that, and a lot of whatever the catch-of-the-day may have been, in many kitchens and galleys no two chowders are exactly the same. This one was especially tasty, and so we’ve provided the recipe, below.

Native to the Americas, tomatoes didn’t find their way to Europe until Spanish explorers took the fruit back in the late 1400’s or early 1500’s. Even after tomatoes found their way to Britain, leading horticulturalists there believed them to be poisonous. And so this versatile, luscious fruit was not generally consumed in Britain or her American colonies until the mid 1800’s.

It was in the 1800’s that Portuguese immigrants introduced tomato-based seafood chowders such as Manhattan clam chowder to New York and other American cities. Among the endless variations of this soup is the national dish of Bermuda: Bermuda fish chowder is built around a sumptuous combination of fish, tomato purée, onions, a healthy dollop of dark rum and sherry pepper sauce. 

See also: Manhattan-style Razor Clam Chowder

New England-style Alaska Clam Chowder

Alaska Salmon Seafood Chowder 

Ingredients: (makes about

  • 4 cups fish stock (see recipe below)
  • 1 1/2 pounds salmon, cut into 1/2″ or 3/4″ cubes (skin removed or not, chef’s choice)
  • 4 potatoes, diced into cubes smaller than the salmon cubes
  • 1 large onion, chopped semi-coarse
  • 1 cup carrots, chopped into discs
  • 3/4 cup celery, chopped coarse
  • 3/4 lb. shrimp, peeled and veins removed. Leave whole or cut to smaller pieces, depending on size of shrimp.
  • 3/4 lb. shellfish such as razor clams, other types of clams or oysters. Reserve juice to add to fish stock. (We used equal portions of clams and oysters)
  • 1 bay leaf
  • 1/2 tbsp oregano (dry)
  • ground pepper to taste
  • olive oil
  • smoked sea salt (to taste)
  • 1 lb. diced tomatoes (fresh or canned)
  • 6 oz tomato paste
  • 2 cups spinach leaves, chopped large (or use 1/2 cup frozen)
  • 5 cloves garlic, chopped into thin slivers
  • 1/4 cup good sherry or white wine (optional)

Directions:

  1. In a large kettle: Add fish stock, clam or oyster juice, bay leaf, oregano, ground pepper and tomato paste. Stir till paste is thoroughly mixed in.
  2. Add potatoes and tomatoes, ensuring that there is sufficient liquid to cover them. Add additional water, as necessary.
  3. Bring to a boil and then reduce heat to simmer. Continue cooking just until potatoes are tender.
  4. Meanwhile, in a large skillet: Add enough olive oil to cover skillet bottom. Add onions and cook for about 1 minute, stirring frequently. Add carrots and celery and continue stirring for about 3 minutes. Stir in garlic and continue cooking and stirring for 1 more minute – about 5 minutes total. Onions should be just turning translucent. Place in a bowl to prevent over-cooking and set aside.
  5. When the potatoes have just become tender, add sautéed onion mixture to soup. Add sherry or wine, if desired. Return soup to a simmer.
  6. Add salmon, shrimp and shellfish. At this point, we remove the pot from heat – the ambient temperature will cook the seafood sufficiently. (Seafood should be fresh or fresh-frozen.)
  7. Serve piping hot. This soup needs nothing, but a little freshly grated parmesan cheese, a few pieces of nori (dried seaweed), crackers or croutons make nice condiments.

Fennel Fish Stock

Ingredients:

  • 1 1/2 lbs. fish bones & head, cleaned, scaled, gills removed (preferably a white-meated fish such as striped bass, sea bass, snapper, porgy, rock fish, halibut, walleye, etc. We used sheefish.) It is important that the fish is fresh.
  • fennel – leaves and stalks from 2 stalks, chopped coarse (or use 1/2 tbsp fennel seeds or powdered fennel)
  • 1/2 tbsp thyme
  • 1 tsp rosemary
  • 1 bay leaf
  • 8 whole pepper corns
  • 1 tsp smoked sea salt
  • 1/2 cup coarsely chopped carrots
  • 1/2 cup coarsely celery
  • 1 sweet onion, coarsely chopped
  • 1/4 cup good sherry or white wine (optional)
  • water

Directions:

  1. Cut up fish bones and split fish head butterfly style so that everything can be lain as flat as possible in the bottom of a large kettle. 
  2. Place all other ingredients on top of the fish bones and head, arranging so that ingredients are fairly compact so that as little water as possible is needed to cover them.
  3. Cover ingredients with cold water. Bring to a boil over medium heat.
  4. As soon as pot is boiling, reduce heat to simmer. You may need to use a flame shield if stock is boiling too vigorously.
  5. Gently simmer for 20 minutes.
  6. Remove from heat and allow to stand an additional 15 minutes.
  7. Strain through a wire mesh colander and set stock aside.
  8. Stock can be placed into containers and frozen for later used, or used immediately.

Alaska Salmon Lox or Gravlax

Lox on onion bagel_n

With a history dating back to the European Middle Ages, a number of methods for preparing lox and gravlax (or gravad lax) have evolved. We’ve settled on a dry-brining method that produces beautifully colored, deliciously flavored salmon fillets ready to be sliced translucently thin as on the above freshly made onion bagel.

Many cultures have a tradition of salting and burying fish, a technique that results in both preservation and fermentation. In fact, the origins of sushi can be traced back to fish prepared in this method. The grav of gravlax derives from the Scandinavian word for grave, and lax, salmon, has cognates in many old European languages. Thus gravlax literally means “buried salmon.”

Although preparing lox is somewhat labor intensive (the fillets are packed in salt under light pressure and liquid must be drained every 24 hours or so over a period of several days), since it isn’t smoked, anyone with a refrigerator can make it. Both sea salt and kosher salt produce good results, and we like to add a little brown sugar and black pepper. The dry brining method we prefer is known as “Scottish-style.” Other styles call for a wet brine. Dill, juniper berries and other seasonings are traditionally used in some recipes, but we prefer to add seasonings, if any, when the lox is being served.

In addition to traditional lox on a bagel with cream cheese, capers and a thin slice of onion, it’s also excellent on scrambled eggs, as a colorful finishing touch to deviled eggs, or as a wrap around any number of vegetables or other seafoods and served as an hors d’oeuvre.

Silver salmon head n

Always look for the freshest fish. Salmon should be bright with clear eyes and a pleasant smell reminiscent of the sea.

While historically lox was made with Atlantic salmon, these days, with Atlantic salmon populations in severe decline almost everywhere, the Atlantic salmon available in stores is farmed in places such as Norway, Scotland, British Columbia and Chile. For reasons rooted in flavor, sustainability and environmental impact, we prefer wild Pacific salmon. The salmon in the above photo is Coho (silver salmon), but any Pacific salmon species works well, as do large char. If you leave the skin on the fillets, it can later be used to create a crispy fried appetizer.

For the best presentation, lox should be sliced very thin. The best tool we’ve found for this job is a yanagiba – a Japanese sashimi knife. Our yanagiba has an extraordinarily sharp, nine-and-a-half inch blade. Both the sharpness and the length are important for slicing – not sawing – ultra thin pieces of salmon.

For a great recipe for smoked salmon, see:

Smoked Salmon with Soy Sauce and Brown Sugar Brine

For excellent homemade bagels, see: Bagels 3 Ways

———————————————————-

Homemade Lox

Ingredients

  • 1 lb. fresh salmon fillets, skin on. The fillets need not be scaled, but do take pains to ensure that all bones are removed.
  • ¼ cup coarse sea salt
  • ¼ cup brown sugar
  • 1 tbsp freshly ground black pepper

Directions

  1. Rinse fish and dry thoroughly.
  2. Remove any pin bones in fillet with tweezers or needle nose pliers.
  3. Mix together salt, sugar and pepper. (This recipe works well when multiplied. Our last batch was 5 pounds of fish.)
  4. Pack salt mixture around fish. You can do this skin side down.
  5. Sandwich two pieces of fish together, skin side out.
  6. Pack any leftover sugar mixture onto exposed fillet.
  7. Wrap sandwiched pieces tightly with plastic wrap. Leave sides slightly open so liquid can drain while the salmon cures.
  8. I use a poacher with a draining tray for the next step. Another method would be to place a steamer basket at the bottom of a plastic box. The idea is to create a raised place for the fish to set while being pressed from the top. This will allow the juice to drain away from the fish.
  9. Place sandwiched salmon in poacher.
  10. Place weight on top of all salmon pieces. I use large jars of jam or large containers of salt. I have seen pictures of people using bricks.
  11. Place poacher in refrigerator.
  12. For 7 days, every 24 hours pour off liquid from the bottom of the poacher and flip the fillet sandwiches.
  13. At the end of 7 days, take the salmon out of the plastic wrap and thoroughly rinse using really cold tap water.
  14. Thoroughly pat dry.
  15. Slice very thin and enjoy!
  16. Store leftovers in refrigerator or freeze in airtight containers.

Arctic Anpan 2 Ways: Azuki and Caribou Cha Sui (Sweetened Red Bean and Marinated Caribou)

Anpan with Sweet Azuki Paste_n

Delicious steamed buns filled with sweetened red bean paste were the finishing touch to an Asian-inspired meal. All that was lacking was a cold Sapporo Beer… The beer will have to wait until summer.*

Wintertime fishing, birding or just bike riding with my daughter Maia in Japan is indelibly linked with one of my happiest food memories: stopping by a local bakery and purchasing piping hot steamed buns filled with sweetened bean filling (anpan) or marinated pork (nikuman). The filling was so hot we’d have to be careful not to burn our tongues. Those steamed buns were the perfect on-the-go snack on chilly days.

Anpan ready for the steamer_n

Filled with bean paste or marinated meat and ready for the steamer…

Known as bao or baozi in China, steamed buns were on our list of items to try making this year. With Maia in Point Hope visiting over winter break from Berkeley, the anpan and nikuman Barbra created turned out just like the ones we’d enjoyed back in Japan. After devouring anpan with sweet red bean filling, we all could imagine the buns stuffed with a variety of other fillings: vegetable mixtures, curry, barbequed caribou, fruit, or even chocolate!

Anpan freshly steamed_n

Light, freshly steamed, piping hot and ready to be lifted out of our fish poacher, anpan definitely fit the category “comfort food.”  The ones we made were about the size of tangerines.

Because we rely on our Zojirushi bread machine to regulate the temperature for consistently rising dough, the following recipe has been created for the dough cycle of a bread machine. As an alternative to steaming, the dough can be given an egg wash and baked at 350 degrees F for 15 minutes. A recipe for Caribou Cha Sui follows the anpan recipe below. Click here to see a recipe for sweetened red bean filling.

Anpan

Ingredients

  • 1 cup water
  • 1 tbsp extra light olive oil
  • 1  3/4 cups all purpose flour
  • 1  1/2 tbsp granulated sugar
  • 1/4 tsp salt
  • 1 tbsp dry yeast
  • 1/2 tsp baking powder
  • 1 tbsp white vinegar

Directions

  1. Place first 6 ingredients into pan of bread machine in the order recommended by the manufacturer.
  2. Set machine to dough cycle. Start.
  3. After cycle is complete, punch down dough on a lightly floured surface.
  4. Sprinkle baking powder evenly over surface of dough.
  5. Knead dough for 5 minutes.
  6. Divide dough in half. Place half of dough in a covered bowl.
  7. Cut the remaining dough into 12 equal pieces.
  8. Roll dough pieces into balls and then flatten. Make sure that edges are thinner than the center.
  9. Fill dough with 1 teaspoon of desired filling. Bring edge of circle up to pinch closed so that none of the filling is showing.
  10. Place filled dough on a small piece of waxed or parchment paper. Continue with remaining dough balls.
  11. Repeat process with dough that has been covered in the bowl.
  12. Let all filled dough balls stand covered for another 30 minutes.
  13. Steaming process could be done in a steamer basket or a wok. I have a fish poacher with a raised grate and used this to steam the buns.
  14. Bring water and 1 tbsp vinegar to a boil in steamer.
  15. Place as many buns as will fit in steamer, allowing for about an inch between buns so that they don’t stick together as they cook.
  16. Cover with lid. Steam over boiling water for 15 minutes.

———————————————————————————————————————

Caribou Cha Sui (Works well with venison, moose, elk, lean beef or similar meat)

The first step is to create a marinade and let the tenderized caribou absorb the flavors overnight in the refrigerator. The next day, make a filling with the marinated caribou and stuff the anpan. The filling will make enough for 6 steamed buns (nikuman). This recipe is best started a day in advance to ensure the meat is properly marinated.

Ingredients (Makes 6 nikuman)

Filling:

Ingredients

  • 1/4 lb caribou, pounded/tenderized till 1/2 inch thick or thinner
  • cha sui marinade (see below)
  • 1/4 cup finely diced onions
  • 2 tbsp soy sauce
  • 1 tbsp honey
  • 1 tsp sesame oil
  • 1/4 cup beef stock (we use Better than Bouillon)
  • 1 tsp cornstarch
  • extra light olive oil

Directions:

  1. Place tenderized caribou in a glass bowl or container and completely cover with marinade.
  2. Cover glass container and place in refrigerator overnight.
  3. The following day…
    1. In a medium-sized frying pan, heat 1/2 tbsp oil over medium-high heat until a drop of water sizzles in pan.
    2. Sear caribou on each side to seal in the juices.
    3. Reduce heat to medium and cover pan. Continue cooking for 3 minutes on each side. Meat should be cooked to “medium.”
    4. Remove pan from heat and place cooked meat on a cutting board to rest a few minutes.
    5. Dice cooked caribou into 1/4 inch cubes and set aside.
    6. In a small bowl, mix cornstarch and beef stock and set aside
    7. Wipe out the pan used to cook the caribou. Heat 1/2 tbsp oil over medium heat.
    8. Add diced caribou and onion to pan. Cook for about 1 minute, stirring occasionally.
    9. Add soy sauce, honey and sesame oil to pan. Stir fry for another minute.
    10. Add cornstarch and stock mixture to pan and continue cooking until sauce thickens, about 2 minutes.
    11. Place caribou in bowl to cool prior to filling anpan rolls.
    12. See above directions for anpan to complete recipe.

Cha Sui Marinade:

Combine the following ingredients in a glass bowl:

  • 4 large cloves garlic, minced or chopped fine
  • 1/2 tsp dried ginger
  • 1 tbsp honey
  • 2 tbsp soy sauce
  • 1/4 tsp white pepper
  • 1/4 tsp dry fennel
  • 1/4 tsp ground cinnamon
  • 1/2 tsp sesame oil
  • pinch salt

*Point Hope, like many bush villages in Alaska, is dry. Every now and again a certain meal calls for a special adult beverage. At these times we miss being able to enjoy an alcoholic beverage. Most of the time we are content to wait until summer, which we spend in the “wet” town of Seward, Alaska or traveling.