Moist Mocha Cake with Chocolate Drizzle (and a Powdered Sugar Experiment)

mocha cake_n

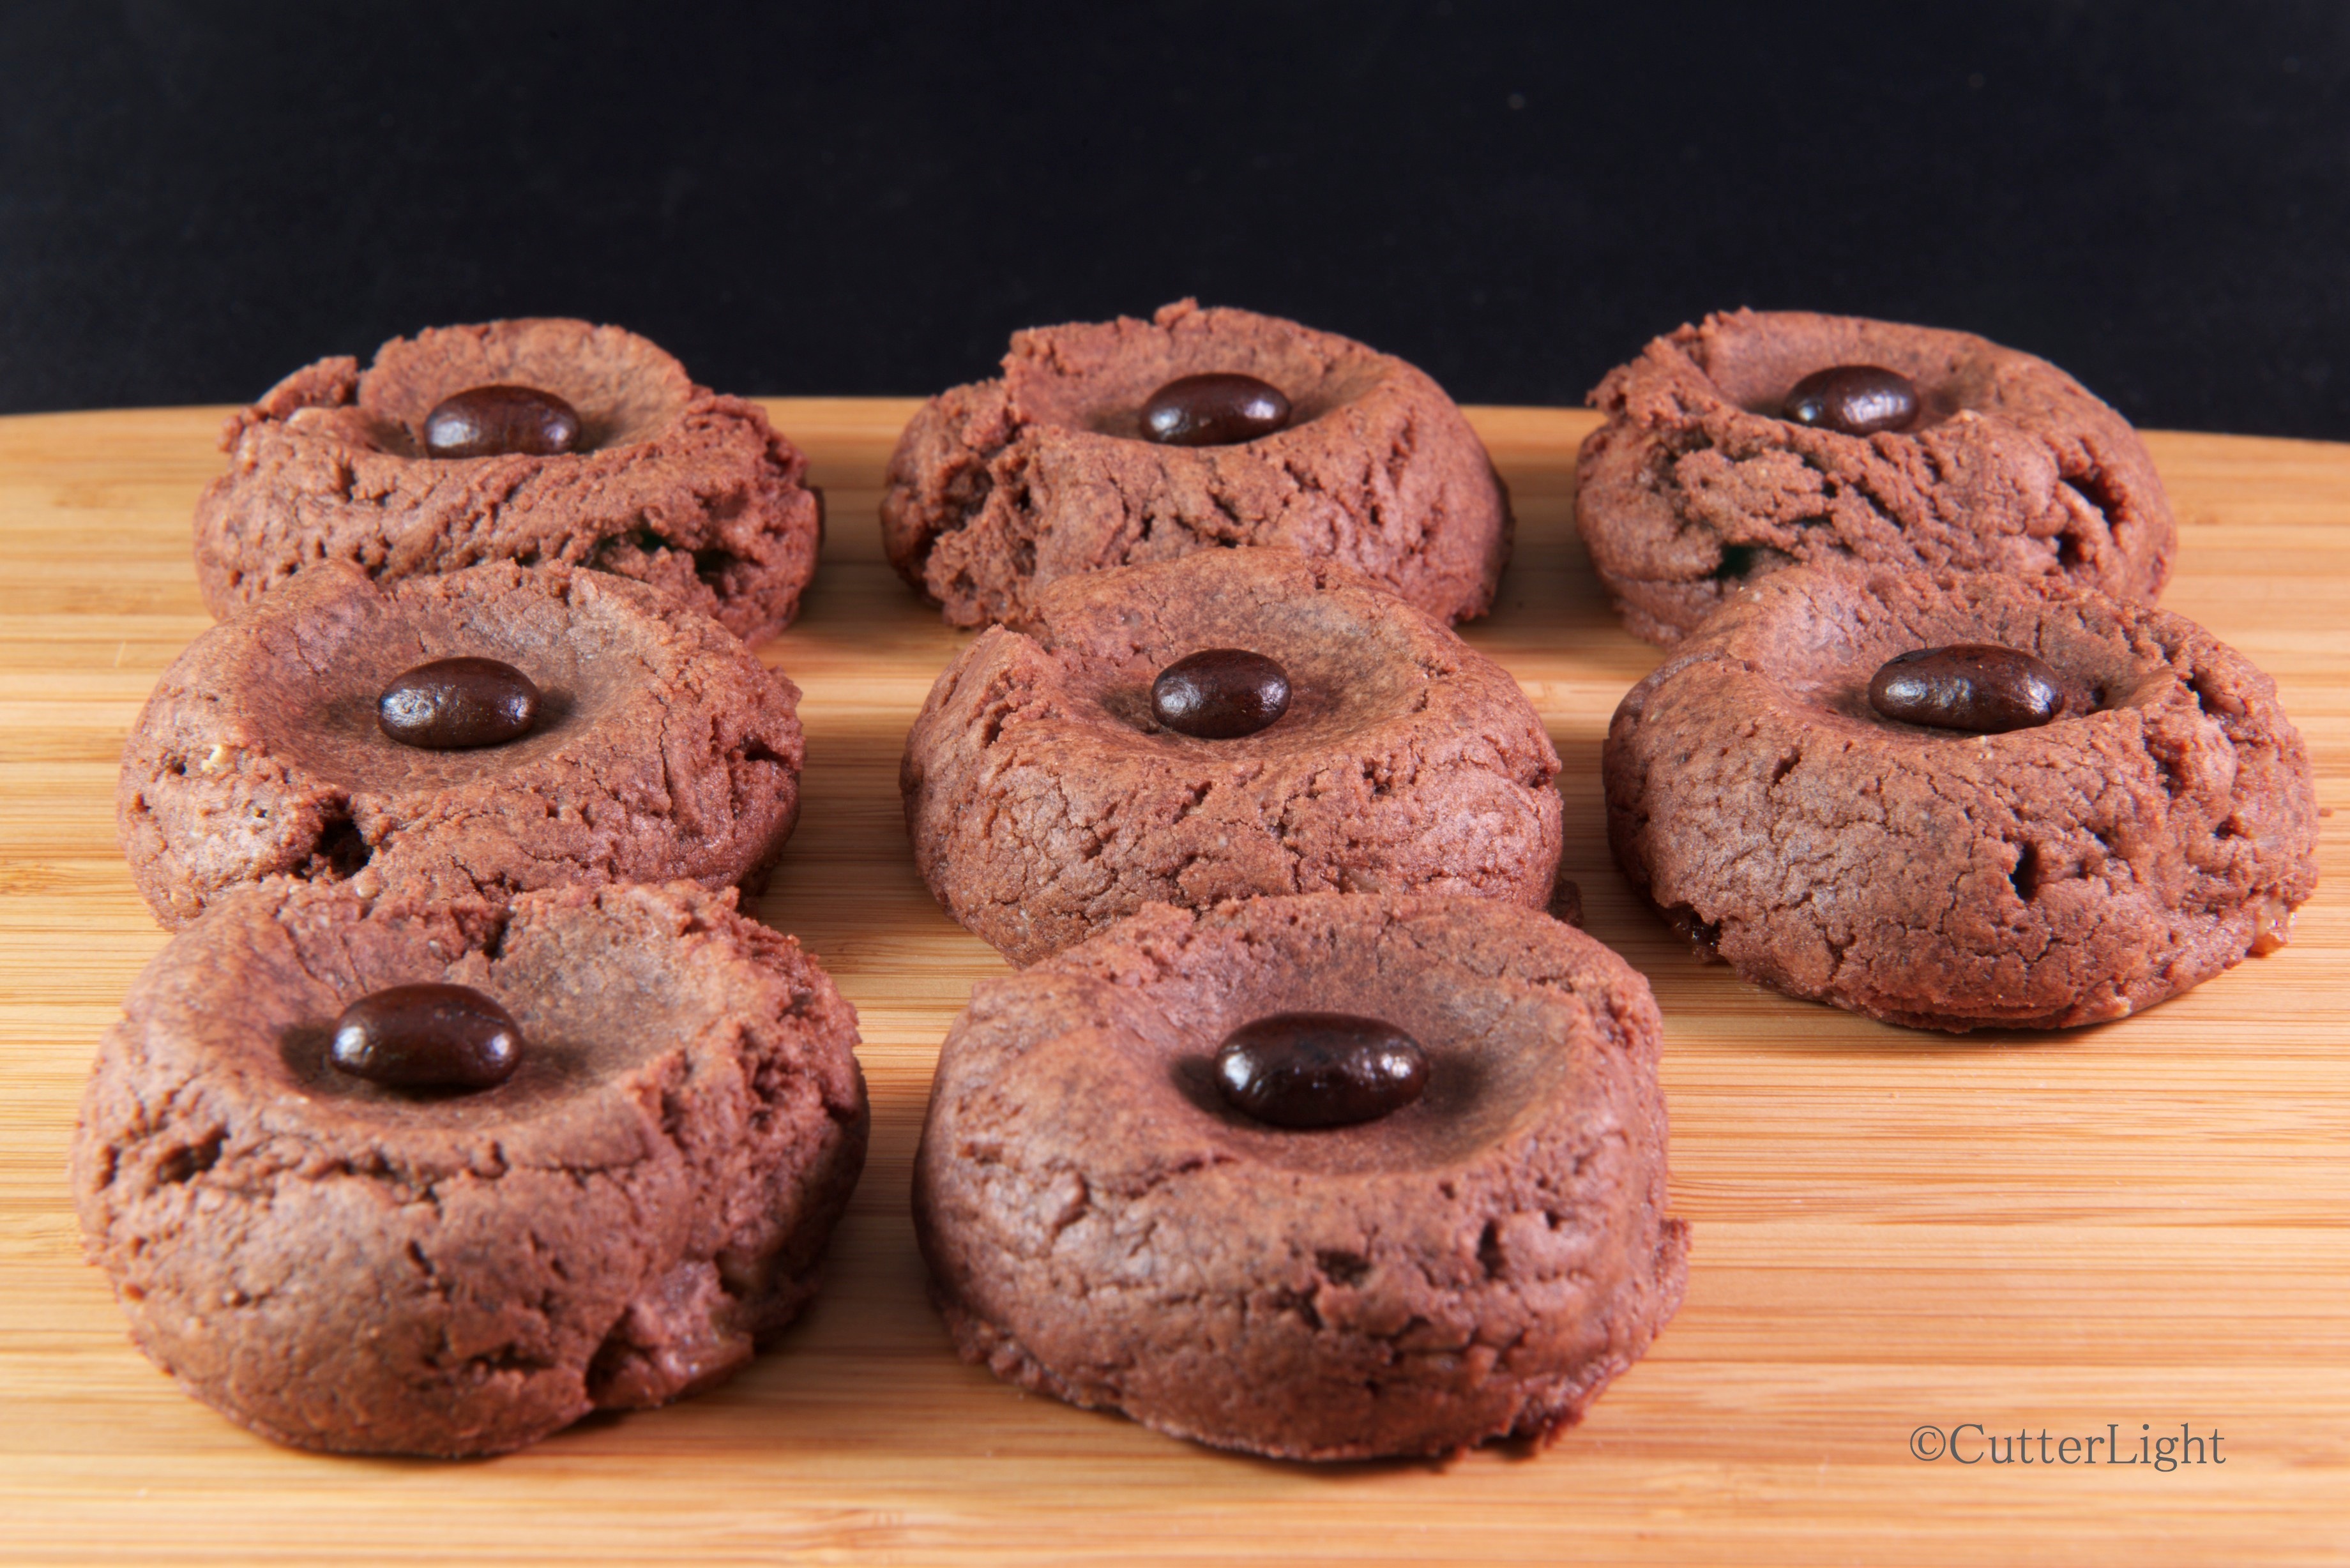
Both the chocolate cake batter and the frosting have an essence of coffee which adds an element of complexity. Eggs and buttermilk make this cake moist and rich. 

The frosting for this decadent cake included an experimental element inspired by the fact that we’d run out of powdered sugar. Based on Internet research, I found  that powdered sugar could be created by putting granulated sugar and a little cornstarch in a blender for 15 minutes. We employ an immersion blender with a nut grinder attachment for these kinds of jobs. After about seven minutes, I decided the sugar looked powdered. The flavor of the frosting was spot on, but the slight graininess proved otherwise. Next time, I’ll muscle through the whole 15 minutes – or ship up enough powdered sugar to last the whole season in the bush.

Mocha Cake

Ingredients

  • Butter for greasing the pans
  • 1  3/4 cups all-purpose flour, plus more for pans
  • 2 cups granulated sugar
  • 3/4 cups dutch processed cocoa powder
  • 2 tsp baking soda
  • 1 tsp baking powder
  • 1 tsp kosher salt
  • 1 cup buttermilk, shaken
  • 1/2 cup vegetable oil
  • 3 eggs, at room temperature
  • 1 tsp pure vanilla extract
  • 3 tsp coffee extract
  • Mocha Buttercream Frosting, recipe follows

Directions

  1.  Preheat oven to 350 degrees F.
  2. Line two 9-inch springform pans with parchment paper. Butter and flour pans. Set aside.
  3. Sift flour, sugar, cocoa powder, baking soda, baking powder and salt into mixing bowl of a stand mixer fitted with a paddle attachment.
  4. Mix on low speed until combined.
  5. In a second bowl, mix together buttermilk, oil, eggs, vanilla and coffee extract.
  6. With mixer on low speed, slowly pour wet ingredients in with dry.
  7. Pour batter into two pans, evenly divided.
  8. Bake for 35 minutes, or until cake tester comes out clean.
  9. Cool cakes in pans for 30 minutes.
  10. Finish cooling completely on wire racks.
  11. Place one cake, flat side up, on a cake pedestal or flat plate.
  12. Spread top of cake with frosting.
  13. Place second cake, flat side down, on first frosted cake.
  14. Spread remaining frosting evenly on top and sides of cake.

Buttercream Frosting

Ingredients

  • 6 oz. semi-sweet chocolate chips
  • 2 sticks (1/2 lb.) unsalted butter, room temperature
  • 1 egg yolk, room temperature
  • 1 tsp. vanilla extract
  • 1  1/4 sifted confectioner’s sugar
  • 3 tsp coffee extract

Directions

  1. Melt chocolate chips in a double boiler. Stir until smooth. Set aside to cool.
  2. Cream the butter in the bowl of a stand mixer with a paddle attachment, about 3 minutes.
  3. Add egg yolk and vanilla. Continue beating for about 3 minutes.
  4. Turn the mixer to low and gradually stir in confectioner’s sugar.
  5. Beat until smooth and creamy.
  6. Mix in melted chocolate.
  7. Add coffee extract and mix until smooth.
  8. Spread immediately on cooled cake.

Recipe adapted from Food Network

Whole Sheefish (or any fish) Poached in Foil

sheefish whole poached in foil_n

A large fish poached and served whole makes for a dramatic presentation and a first-class dining experience. You don’t need a fancy fish poacher to pull this off. Aluminum foil works beautifully in the galley, on the grill, over a campfire, or in the kitchen. Here are the basics. 

Sheefish whole poach_n

This past winter, we’ve been dining on sheefish (inconnu) in the six-to-eight-pound class. Measuring 25 – 30 inches, these fish of the far north are just small enough to fit into our oven and serve whole. Because sheefish is bony and not easily filleted, they are well-suited to this cooking method; when served, the meat comes easily off the bones. With firm white meat in large, sweet, flakey chunks, sheefish are comparable to striped bass, European seabass, Japanese seabass (suzuki) and similar fish. Here in Alaska, foil poaching works beautifully with salmon, rockfish, char and small halibut.

Poaching and steaming recipes need not be complicated. Although we generally start with a court bouillon or dashi and add Chardonnay when we have it, equal parts of water and Chardonnay alone make a perfectly acceptable basic poaching stock. No wine on hand? A little water – enough to keep the fish bathed in steam – is sufficient. Anything else is a matter of taste. We’ve found it difficult to improve on a combination of sea salt, freshly cracked pepper, lemon, butter and bacon. Olive oil makes a good substitution for butter and bacon.

One of the beautiful things about this recipe is that the ingredients can be prepared beforehand so that they’re ready for a shore lunch or camp dinner to celebrate a special catch.

Incidentally, wakame (dried kelp) and dried bonito flakes are an ideal base for fish stock for campers and sailors. These ingredients are light, easy to store, and last indefinitely. This dashi-style stock can be enhanced with salt, soy sauce, white wine, sherry or sake.sheefish

See more of Detlef Buettner’s beautiful art at: http://home.gci.net/~lifesize.fish/salmonids.htm

Poached fish is an excellent meal to serve with freshly baked French bread or sourdough bread. We and our guests enjoyed the above sheefish served on saffron rice cooked in a clam juice broth, spooning the poaching broth onto our rice and fish.

Ingredients:

  • 1 whole fish, scaled, gutted, gilled, rinsed off and patted dry.
  • aluminum foil sufficient to entirely wrap around the fish. We double wrap to prevent leaking.
  • poaching/steaming liquid – approximately 1/3 cup per pound of fish. (About 2 1/2 cups for an 8-pound fish.) See below for easy poaching liquid recipe.
  • 1 tbsp butter per pound of fish. (An 8-pound fish takes 1 stick of butter.)
  • very thin slices of lemon to cover one side of fish
  • strips of bacon to cover one side of fish. (about 5 strips for an 8-pound fish)
  • lemon juice to rinse stomach cavity – approximately 2 tbsp for an 8-pound fish
  • sea salt and freshly cracked pepper to rub into cavity and both sides of fish – approximately 2 – 3 tbsp sea salt for an 8-pound fish

Directions:

  1. Place large baking sheet in oven and preheat to 450 °F.
  2. Arrange aluminum foil on flat surface. Thoroughly coat foil with butter where fish will be placed.
  3. Rub lemon juice into fish’s stomach cavity. 
  4. Use a very sharp knife to make shallow diagonal slashes spaced about 1 inch apart from the head of the fish to the tail. Do this on both sides.
  5. Rub salt and pepper mixture onto both sides of fish and into cavity.
  6. Place fish onto buttered foil.
  7. Rub butter into fish’s cavity. Rub remaining butter on top side of fish.
  8. Arrange lemon slices on top side of fish.
  9. Arrange bacon slices atop fish.
  10. Pour poaching liquid along the sides of fish, taking care not to rinse the off the top of the fish.
  11. Close foil around fish and place on baking sheet (or on grill, etc.) Cook until a few dorsal fin rays can be easily pulled from fish. Total time will be approximately 5 – 6 minutes per pound. An 8-pound fish will cook for 40 minutes.
  12. Note: We like to remove the bacon when the fish is finished cooking, crisp it up in a pan, and return the bacon to the top of the fish prior to serving. The bacon drippings can be drizzled atop the fish as well.

Poaching Liquid Recipe:

Ingredients:

  • 3 cups water
  • 5 inch square of wakame (dried kelp – available in Asian grocers.)
  • 5 grams (0.17 ounces) dried bonito flakes
  • 1/4 teaspoon sea salt (or 1/2 teaspoon soy sauce)
  • 1 tbsp miso paste (optional)
  • Optional: replace 1/2 cup water with white wine or sake

Directions:

  1. Place water in pan and heat over high heat. Add wakame and salt, stir occasionally and continue heating but do not boil.
  2. When Wakame is soft, add bonito flakes. Cook briefly in steaming water and stir gently. Do not boil.
  3. Pour mixture through wire strainer into pan or bowl.
  4. If desired, return strained soup to low heat and stir in miso paste till dissolved.

Farmed Atlantic Salmon: The Deadliest Catch

If you believe that farmed salmon are part of a solution, to anything, we hope you’ll watch Salmon Confidential. If you believe farmed salmon are a healthy food choice, we hope you’ll watch this video.

The setting is British Columbia, Canada. The protagonists are wild salmon, river keepers, and scientists. The film is a fast-paced hour that will leave anyone who watches it and who cares about the food they eat, about our planet’s wild places, and about government transparency and its proper role in mega-farming of all descriptions with serious questions.

“…and the kid looks at you and says, how could there have been thousands of salmon here, you’re just an old man exaggerating. And then I have to correct him, not thousands, tens of thousands.” Russell Chatham in Rivers of a Lost Coast talking about one small west coast river

Apricot Pecan Rugelach

rugelach_n

The tang of apricot, the crunch of pecan and the richness of cream cheese come together in this delightful, satisfying cookie.

This time of year puts our creativity to the test as our pantry begins to empty. Dwindling food stores bring to mind cooking shows where random ingredients are selected and presented to the contestants with the challenge to create something magnificent. My challenge ingredients were a bag of dried apricots, a bag of pecans and a desire to nosh on something sweet. I made the dough in the evening and let it rest overnight in the refrigerator. The next day, the cookies were quick and easy to make. A quick batch was ready for an after-lunch dessert with mugs of freshly steeped tea.

Apricot Pecan Rugelach

Ingredients

  • 4 oz. cream cheese, room temperature
  • 1/4 lb. unsalted butter, room temperature
  • 1/4 cup granulated sugar
  • 1/8 tsp. salt
  • 1 tsp. vanilla extract
  • 1 cup all-purpose flour
  • 1/4 cup brown sugar, packed
  • 1 tsp. cinnamon
  • 1 cup finely chopped dried apricots
  • 1/2 cup finely chopped pecans
  • 1 egg beaten
  • 1 tsp cinnamon mixed with 3 tbsp granulated sugar for topping

Directions

  1. Cream the cheese and butter together in the bowl of a stand mixer fitted with paddle attachment.
  2. Add 1/4 cup granulated sugar, salt, and vanilla to butter mixture. Mix well.
  3. Mix in flour on low speed. Mix until just incorporated.
  4. Divide the dough into two parts. Quickly roll into balls and flatten.
  5. Wrap each flattened ball in plastic wrap and refrigerate for at least one hour.
  6. To make filling, combine brown sugar, cinnamon, apricots and pecans. Mix well.
  7. On a well-floured surface, roll each flattened ball of dough into a 9-inch circle.
  8. Spread half of the filling evenly on each 9-inch circle of dough.
  9. Press the filling into dough slightly, so it will roll easier.
  10. Cut each circle into 12 equal wedges. First cut each circle in half. Cut those halves in half. Cut all the quarters into three even wedges.
  11. Starting with outside edge, roll wedge toward middle, forming a crescent-type shape.
  12. Place cookies on a parchment-lined baking sheet, point side down.
  13. Brush cookies with beaten egg. Sprinkle cookies with a little of the cinnamon-sugar mixture.
  14. Bake for 15 – 20 minutes in a 350 degree F oven. Cookies will be lightly browned.
  15. Let cool on a wire rack.

Overfishing and the Non-Solution of Aquaculture

This four-minute video presents the clearest, most accurate explanation of issues close to our hearts we’ve found: overfishing and the peril of aquaculture. We are emptying our seas at an unsustainable rate. But there are real solutions at hand:

  • Our governments need to follow science-based harvest recommendations.
  • Understand why aquaculture (fish farming) merely robs Peter to pay Paul, and for most species is not a solution.
  • Purchase local, wild fish whenever and wherever possible – even if it costs more.
  • Write a note to the FDA (click here) urging them to follow the American Fisheries Society’s names for fish species so that restaurants and retailers have to honestly tell consumers what we are purchasing.
  • Use your dollars to show commercial fishermen that you are willing to pay for responsibly harvested fish as opposed to farmed fish and fish harvested by nonselective, rapacious factory ship fishing.
  • Become educated and talk with your friends.
  • Forward or share this blog post/video.
  • Join Trout Unlimited or another conservation group that works to protect fish habitat. (Check Charity Navigator to ensure that the organization you choose spends its dollars responsibly.)
  • Learn to fish. A single person selectively targeting fish from local waters for personal/family consumption is still the most ecologically sustainable method of fish harvest.

Thanks for reading. Jack & Barbra

Mocha Toffee Bites

mocha toffee_n

A coffee lover’s must! These coffee-infused chocolate cookies have a wonderful chewy texture with a surprise toffee crunch. Serve with a hot beverage or a scoop of rich vanilla ice cream for a decadent dessert.

After a very successful try at coffee-flavored ice cream, I had wanted to use coffee in other desserts, but to achieve a really rich coffee flavor, I learned that I had to steep a lot of beans. The problem is we had shipped up just enough beans for our required morning brew. So, coffee flavors were put on hold until a recent trip to Anchorage where I had an opportunity to pick up some organic coffee extract. I was hoping it would provide the same rich flavor as steeped beans. It did! Just one and a half teaspoons of extract turned really good cookies into great cookies. The addition of the toffee crunch sent the confection over the top. These cookies could be gussied up with a dusting of powdered sugar or a drizzle of melted chocolate. But those additions are unnecessary in an already perfect recipe.

Mocha Toffee Bites

Ingredients

  • 1/4 cup butter, softened
  • 1/4 cup semisweet chocolate chips
  • 1 1/2 tsp coffee extract
  • 1/3 cup granulated sugar
  • 1/3 cup packed brown sugar
  • 1 egg
  • 1 tsp vanilla extract
  • 1  1/2 tsp coffee extract
  • 2 tbsp plus 2 tsp dutch processed cocoa
  • 1/8 tsp salt
  • 1 cup all-purpose flour
  • 1/4 tsp baking powder
  • 1/3 cup English toffee bits

Directions

  1. Preheat oven to 350 degrees F. Line a baking sheet with parchment paper.
  2. In a double boiler, melt chocolate and butter. Stir until smooth. Set aside.
  3. In the bowl of a stand mixer, mix together sugars and egg. Beat until smooth.
  4. Add vanilla and coffee extracts. Beat until well mixed.
  5. Add cocoa powder and salt, beat until well mixed.
  6. Mix in chocolate-butter mixture from double boiler.
  7. Mix in flour and baking powder.
  8. Stir in toffee bits.
  9. Drop dough by rounded tablespoons onto parchment-lined sheet, at least an inch apart.
  10. Bake in preheated oven for 8 – 10 minutes.
  11. Let cool for a couple of minutes on sheet. Then transfer to wire rack to completely cool.

Yield: about 15 cookies

Smoked Anchovy and Salmon Pizza

Smoked Anchovy & Sage-Seared Salmon Pizza_n

Salmon seasoned with sage and briefly seared, smoked anchovies, shitake mushrooms and mozzarella cheese top a whole wheat crust brushed with garlic-infused olive oil.

The base for this elegant, satisfying pizza is a baked crust brushed with olive oil. This year, we’ve been experimenting with whole wheat crusts, and in this particular recipe it is perfect. Baked on a pizza stone, the whole wheat comes out light and crisp. The sage adds a wonderful aroma and flavor to this dish. This would be a great pizza to cook on a charcoal grill or in a cast iron frying pan with a lid in camp.

Ingredients:

  • 1 pizza crust, pre-baked
  • 2 cups shredded mozzarella cheese
  • 1/2 pound salmon fillet, skin on or off, cook’s choice. We prefer skin on.
  • 1 tin (2 oz) smoked anchovy fillets, oil drained and fillets separated
  • 2 tbsp tbsp pine nuts
  • garlic cloves. Small cloves can be left whole, large cloves cut into smaller pieces to make about 20 pieces of garlic.
  • two or three shitake mushrooms, sliced thin
  • 1 tsp dried sage
  • 1/2 tsp Italian seasoning
  • ground pepper
  • 3 very thin onion slices, cut in half
  • 2 tbsp extra virgin olive oil, preferably infused with garlic, but plain olive oil is fine
  • 1/2 tsp powdered garlic
  • additional Italian seasoning, to taste

Directions:

  1. Place a pizza stone on oven’s center rack and preheat to 400 degrees F.
  2. Ensure all bones are removed from salmon fillet. Rub sage into skinless side of fillet and set aside.
  3. In a medium-sized frying pan, heat a tablespoon of olive oil over medium heat. Add the onions, shitake slices, 1/2 tsp of Italian seasoning and ground pepper and briefly sauté. Onions should still be slightly crisp. Remove mixture to a plate to stop cooking.
  4. Return pan to medium heat and add garlic cloves and pine nuts. Sauté until garlic just turns soft and edges are light brown. Remove mixture to a plate to cool.
  5. Return pan to medium heat. Place salmon fillet sage side down and sear for 30 seconds. Use your hand or a spatula to apply light pressure to the fillet to ensure that it is evenly seared. Turn fillet over and sear the other side for 30 seconds. Remove to a cutting board to cool.
  6. Place 2 tablespoons extra virgin olive oil and 1/2 tsp powdered garlic in a small bowl and mix together. Using a pastry brush, brush olive oil onto the pizza crust.
  7. Sprinkle mozzarella cheese on the crust.
  8. Evenly sprinkle the mushrooms and onions atop the cheese.
  9. Arrange the anchovy fillets in a pinwheel on the pizza.
  10. Use very sharp knife to cut/separate the salmon along the grain of the fillet. Pieces should be 1 or 2 inches long. Arrange these pieces on the pizza.
  11. Add the pine nuts and garlic, and finish with a sprinkle of Italian seasoning.
  12. Bake for 10 minutes. Crust should be browned and the bottom should be crisp. Rest pizza for a few minutes before slicing to allow toppings to set.

Enjoy this pizza with a lightly-chilled Chardonnay or a cold Amber Ale.

Country-Style Apple Brioche

Apple Brioche_n

Slices of this apple-filled brioche served with cups of freshly brewed French roast coffee sent our spirits overseas to a sidewalk table at a cafe in France.  

Baking projects tend to be inspired by a single ingredient. Last week, two students gave me the biggest Granny Smith apples I have ever seen. They were a little bumped and bruised and seemed to be begging to be baked into something sweet. I remembered an apple brioche recipe I had wanted to try in one of the cookbooks we have in our library, Beth Hensperger’s Bread. Brioche is an egg-and-butter rich pastry-type bread dough which can be used in both savories and sweets. It produces a soft, moist bread and the dough is easy to make and easy to work with.

Apple Brioche

Ingredients

  • 2 giant Granny Smith apples (or 4 regular-sized apples), peeled, cored and sliced into 1/4 inch pieces
  • 1  1/2 tbsp lemon juice
  • 1/4 cup granulated sugar
  • 1 tbsp water
  • 1 tsp ground cinnamon
  • 1 recipe chilled brioche dough (see below)

Topping

  • 1/4 cup granulated sugar
  • 1/6 cup all-purpose flour
  • 4 tbsp chilled unsalted butter
  • 1 egg, beaten

Directions

  1. Toss apple slices with lemon juice. Let sit for 1 hour, occasionally stirring.
  2. Place apples, sugar, water, and cinnamon in a heavy skillet and sauté until liquid is reduced and sugar is dissolved.
  3. Cool apple mixture to room temperature.
  4. Turn chilled brioche dough out to a lightly floured surface.
  5. Roll dough into a 10 x 15 inch rectangle.
  6. Spread cooled apple mixture down the center third of the dough rectangle.
  7. Cut strips 1.5 to 2 inches apart diagonally, almost touching filling.
  8. Starting at one end, fold strips over filling, alternating each side. You will have somewhat of a braided look when finished.
  9. Transfer bread to a parchment-lined baking sheet.
  10. Make topping by combining sugar and flour until blended. Cut in cold butter with a pastry blender (or food processor) until coarse crumbs are formed.
  11. Brush dough generously with beaten egg.
  12. Sprinkle topping on egg-washed dough.
  13. Cover loosely with plastic wrap and let rise at a cool room temperature until puffy and not quite doubled, about 40 minutes.
  14. Bake in preheated 350 degree F oven for 40 minutes. Bread will be browned and filling will be bubbly.
  15. Cool completely on a wire rack before serving.

Brioche Dough

Ingredients

  • 2  1/4 cups all-purpose flour
  • 1/2 tbsp active dry yeast
  • 1/4 cup sugar
  • 1 tsp salt
  • 3 eggs, at room temperature
  • 1/4 cup hot water (120 degrees F)
  • 1 stick unsalted butter, cut into small pieces and softened

Directions

  1. In a bowl of a stand mixer fitted with a paddle attachment, combine 1/2 cup flour, yeast, sugar and salt.
  2. Add hot water and beat at medium speed for 2 minutes.
  3. Add eggs, one at a time, beating well after each addition.
  4. Gradually add 1 cup more flour.
  5. When well-blended, add butter, a few pieces at a time.
  6. Gradually add 3/4 cup flour. Beat until thoroughly blended. Dough will be very soft and have a thick batter-like consistency.
  7. Scrape dough into a greased bowl.
  8. Cover tightly with plastic wrap and let rise at room temperature until doubled, about 3 hours.
  9. Refrigerate dough for at least 2 hours. Can be refrigerated longer or frozen for up to 2 weeks.

Yummy Homemade Cheddar Cheese Crackers

Cheddar Crackers_n

Warning: These crackers are highly addictive. 

Last year, I made graham crackers from scratch with excellent results. That success started a whole serious of “I-wonder-if-I-could-make…” questions. The graham crackers I made at home were far more delicious than any store-bought, boxed variety. Armed with the right recipe, it seemed anything made from scratch had to taste better. Time seemed to be the limiting factor. As wonderful as the graham crackers were, a batch of a dozen took quite a bit of time to create. Saltines? We use a lot of them for breading fried clams and fish, but it seemed like a waste to bake a batch only to smash them to bits for a single recipe. The next cracker I contemplated was Cheez-Its.

Cheddar cheese crackers are tiny, with lovely ridged edges and cute little holes. I researched several recipes and discovered that these tasty little snacks required only five ingredients and a couple of hours total, most of which is chilling time in the refrigerator.

We have noticed a huge difference in the flavor of our food when we use excellent ingredients. The addictive quality of these crackers came from the combination of high quality flour, cheese, and butter. The flour was Bob’s Red Mill unbleached all-purpose. Everything we’ve baked with this flour tastes noticeably better. The butter was Tillamook’s unsalted organic, and the cheese was Kerrygold Dubliner sharp cheddar cheese.

We’ve used these crackers as croutons on salads and can imagine they would be perfect alongside a homemade bowl of soup or chili. We may have to keep imagining this, as the crackers are disappearing by the handfuls!

Cheddar Cheese Crackers

Ingredients

  • 8 oz. shredded sharp cheddar cheese
  • 1/2 cup unsalted butter, melted
  • 1 tsp. kosher salt
  • 1 cup unbleached all-purpose flour
  • 2 tbsp ice cold water

Directions

  1. In a stand mixer (fitted with paddle attachment), mix cheese, butter, and salt on medium speed until well-incorporated.
  2. Add flour.
  3. Mix on low speed.
  4. Slowly add ice water. Dough should form into a ball.
  5. Wrap dough in plastic and refrigerate for an hour.
  6. Preheat oven to 375 degrees F. Line two baking sheets with parchment paper.
  7. Split dough in half.
  8. Roll one half into a rectangle, about 10 x 12 inches. Dough should be thin, about 1/8 inch.
  9. Use a fluted pastry cutter and cut dough into 1-inch strips. Cut strips into 1-inch squares.
  10. Place squares on baking sheets, they can be close together, but not touching.
  11. Prick center of each cracker with end of a pointed chopstick.
  12. Bake for 15 minutes, or until golden brown.
  13. Cool on wire rack.

Zaru Soba: Chilled Buckwheat Noodles with Seared Scallops and Ikura

Buckwheat soba w seared scallops & ikura_n

Chilled buckwheat noodles topped with whatever imagination and taste comes up with and served with tsuyu dipping sauce combines the terms “gourmet” with “healthful.” Recipes follow.

A favorite food memory from the days I spent in Japan is the combination of sultry summer afternoons and lunches of refreshingly chilled buckwheat noodles. The first time I was served zaru soba in a Japanese restaurant, I knew I’d begun a life-long love affair.

Soba refers to thin noodles made from buckwheat, which in Japan is mainly grown in Hokkaido. Zaru refers to a seive-like bambo tray the soba is often served on, although these days it is popular to drain the soba in a colander and to then place the noodles on a tray or dish. Often served plain or with thin strips of nori and perhaps toasted sesame seeds, the noodles are almost always served with tsuyu, dashi, mirin and sweetened soy sauce mixture. The mixture is typically refrigerated or chilled with ice, and just prior to serving wasabi and scallions can be mixed in. Chopsticks are used to gather up a portion of soba which is then dipped into the tsuyu and, at least in Japan, the noodles are eaten with loud, appreciative slurps.

Buckwheat soba w seared scallops & ikura close_n

In addition to being tasty and very simple to make, soba is an especially healthful food. Easy to digest and packed with energy, soba contains all eight essential amino acids as well as antioxidants and important nutrients such as thiamine.

Soba and tsuyu are available at Asian grocers and in the Asian sections of many grocery stores. Tsuyu can be fairly easily made from scratch, provided you have on hand the necessary kombu, katsuo (bonito) flakes, mirin and soy sauce. Cooking up a serving or two of zaru soba – or several – for lunch or a light dinner is a breeze.

Zaru Soba with Seared Scallops and Ikura (for 2 servings)

Soba Ingredients:

  1. Two serving’s worth of soba (It generally comes packages with ribbons used to tie off serving-sized bundles.)
  2. Water to boil the soba
  3. Salt

Prepare according to package instructions much as you would pasta. Drain cooked soba in a colander and rinse thoroughly with cold water, using your hand or tongs to toss. Place rinsed, drained soba on plates, top with seared scallops, ikura and strips of nori and serve.

Seared Scallop Medallions

Directions:

  1. Select 4 large sea scallops. Cut them into medallions (approximately 1/8 inch (o.3 cm) thick.
  2. Dust medallions with seasonings of your choice. (We like a mixture of sesame seeds, chili pepper, powdered garlic, cinnamon and nutmeg. Commercially prepared Thai seasoning blends work very well.)
  3. In a frying pan, heat a tablespoon or two of olive oil over medium heat till a drop of water placed in the pan sizzles. Sear medallions on each side for just a few seconds. Use tongs or chopsticks to flip.
  4. Immediately remove medallions to a cool plate. Cover and refrigerate if they are to be used later.

ikura cured salmon eggs_nTo create sushi grade ikura in your own kitchen, see our article Ikura: Curing Salmon Eggs

Readers might also be interested in:

Alaskan Shrimp Harumaki with Lime-Infused Ponzu Dipping Sauce

Arctic Anpan Two Ways: Sweet Azuki and Caribou Cha Sui