For us, late summer in Alaska means harvest time. This is the time of year for berry picking and fishing for Sockeyes and Silver Salmon in the Chignik River system. Only a short walk away from our home, there is a lovely patch of feral raspberries with plenty of ripe berries. And not so far away in the other direction is a place we call the blueberry bog, where, as you’ve already guessed, we can pick low bush blueberries to our hearts’ content.
Now that I’ve finally mastered the Buttery Flaky Pie Crust (a culinary goal checked off last winter), I am confident when Jack requests pie for dessert. Today’s request – Alaskan Wild Blueberry Pie. Jack and our houseguest Isabel knew what they had to do while I was busy teaching my students. Armed with bear spray and berry collecting containers, they hiked the mile or so to the bog. Their efforts were rewarded with fresh slices of pie topped with scoops of extra rich homemade vanilla ice cream.
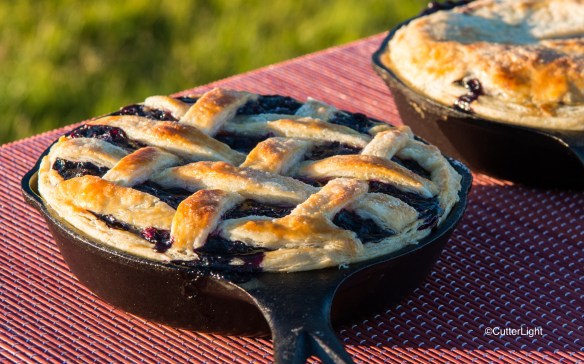
Alaska Wild Blueberry Skillet Pies
(Makes 2 6-inch skillet pies)
Ingredients
- 1 double pie crust
- 3/4 cup sugar
- 3 tablespoons cornstarch
- 1/8 teaspoon salt
- 1/4 cup cold water
- 5 cups fresh blueberries, divided
- 1 tablespoon butter
- 1 tablespoon lemon juice
Directions
- In a saucepan over medium heat, combine sugar, cornstarch, salt and water until smooth. Add 3 cups blueberries. Bring to a boil; cook and stir for 2 minutes or until thickened and bubbly.
- Remove from the heat. Add butter, lemon juice and remaining berries; stir until butter is melted. Cool.
- Preheat your oven to 350 degrees F.
- Cut four circles out of of pie dough. Each dough circle should be about 1/2 inch larger than the mini skillet you’re using as your guide. Place the dough circle into the skillet, being careful not to stretch the dough. With a knife trim off any excess dough.
- Ball up all of the extra dough and roll it out on a lightly floured surface. Cut out four more circles large enough to cover the top of a mini skillet.
- Next, evenly divide the blueberry filling among the skillets. Top each with approximately 1/2 tablespoon of cubed, cold butter.
- Cover each skillet with a piece of dough. Using your fingers, crimp the edge of dough all the way around to seal. Brush with egg wash and sprinkle lightly with sugar. Place skillets onto a cookie sheet for baking.
- Bake for 35-40 minutes or until crust is golden and the filling is bubbly. (If the top crust starts to get brown before the inside is hot, cover with aluminum foil.)
- Cool before serving. Top with ice cream.