The Year-End Pantry: Applesauce Caramel Cookies

Applesauce carmel cookies_n

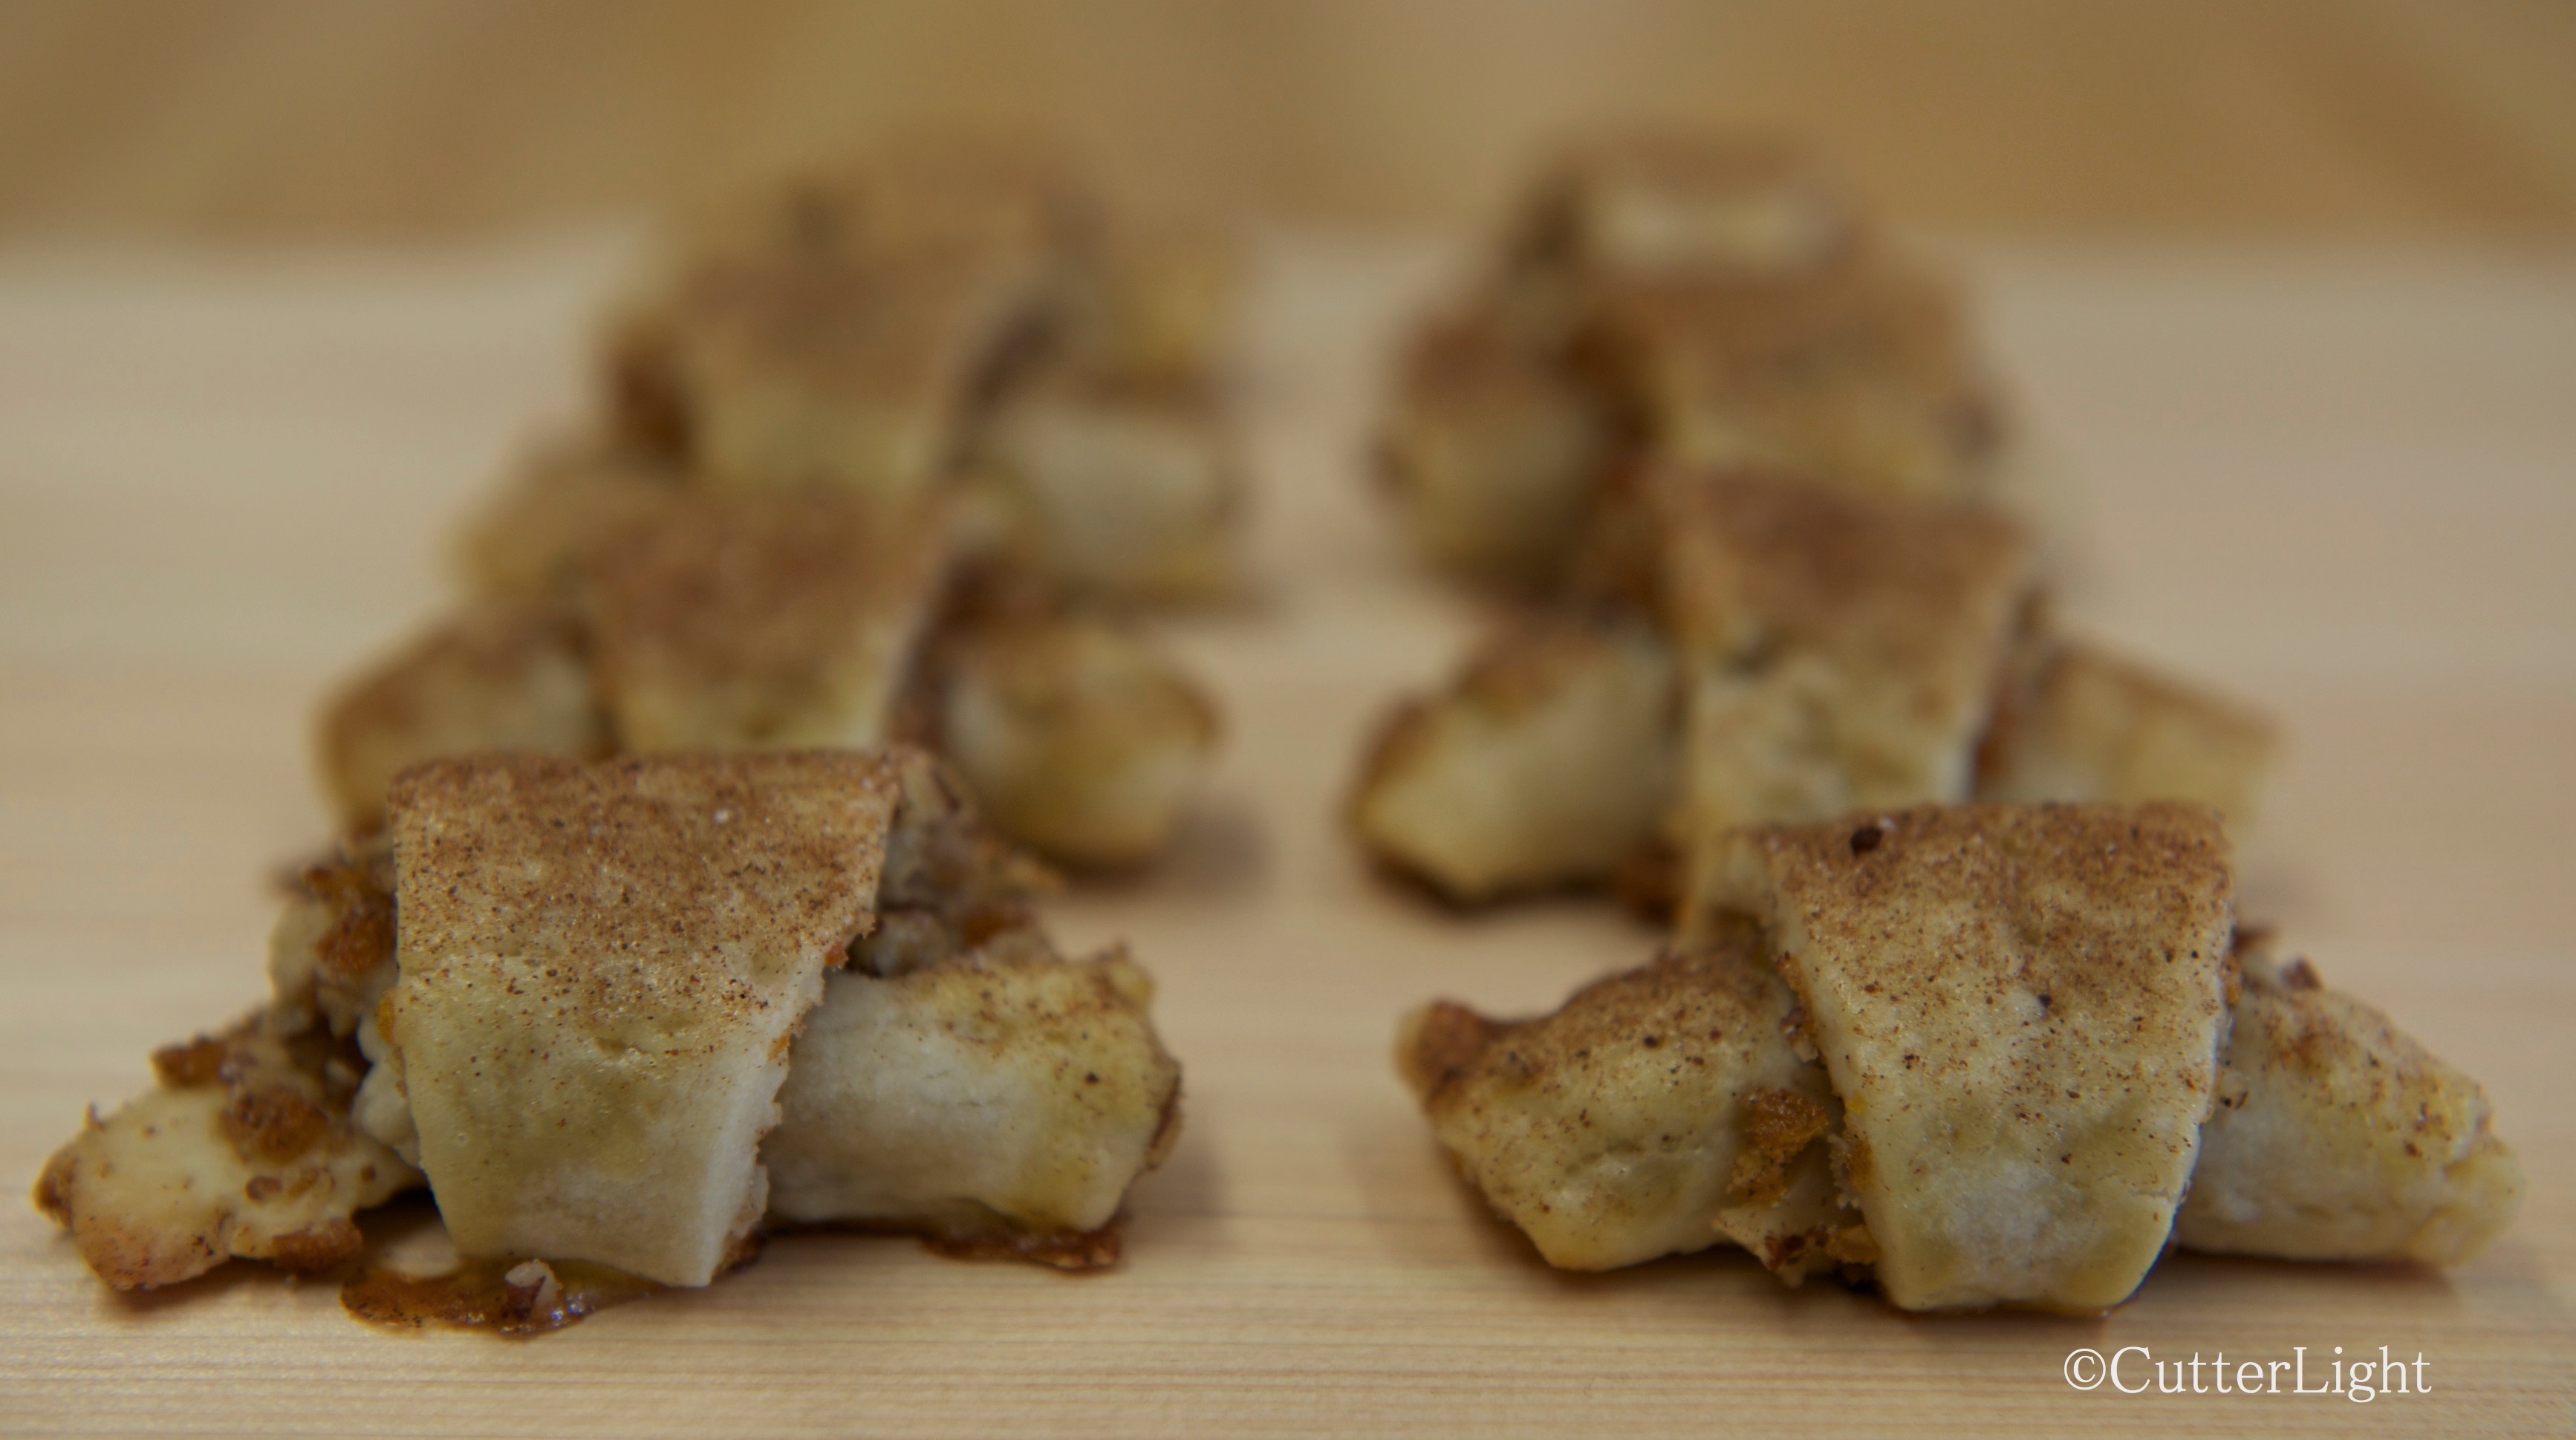
Wrapping up another year in the Arctic before we go to our summer home in Seward, these caramel-topped applesauce cookies were a terrific way to work through the last of our supply of applesauce. 

A few lonely jars, bottles and boxes remain atop the cabinetry that lines the walls off our kitchen. Over five meters (sixteen-and-a-half feet) of uninterrupted shelf space that in August was packed tight to the ceiling with everything from chocolate to olives to nuts to jarred jalapenos is now mostly space. The remaining jars of salsa, soy sauce, sun dried tomatoes, Cholula and assorted other items stand like lonely sentinels overlooking our kitchen. It is the same throughout our house as freezers and pantries that had once been packed and piled with nine months worth of food are now nearly empty. And while our spice racks look full, it’s a deception. Many of the bottles are empty or nearly so. Our bulk order for next year went in to Penzeys Spices last week.

Applesauce is a healthful moistening agent in a number of baking recipes. It’s also terrific in oatmeal, as a blintz topping and in pancake batter, and makes for a light snack on its own. When we lived within driving distance of Northern California’s Apple Hill and the numerous orchards there, we made our own applesauce. Up here, we annually purchase a couple of cases of Tree Top Organic from Costco. The cookies in this recipe feature the fall flavor of applesauce in a light, soft cookie. The crunchy carmel-flavored topping adds another layer of sweetness and texture.

Applesauce Caramel Cookies

Ingredients

  • 2  1/2 cups all purpose flour
  • 1 tsp baking soda
  • 1 tsp baking powder
  • 1 tsp cinnamon
  • 1/4 tsp ground mace
  • 1 cup granulated sugar
  • 1/2 cup unsalted butter, room temperature
  • 2 eggs
  • 1 cup applesauce
  • caramel topping (see below)

Directions

  1. Preheat oven to 375 F.
  2. In a large bowl, sift together flour, baking soda, baking powder, cinnamon, and mace.  Set aside.
  3. Cream sugar and butter together.
  4. Add eggs and applesauce and mix well.
  5. Add in dry ingredients and mix until well incorporated.
  6. Drop tablespoons of batter onto parchment-lined baking sheets, 1 – 2 inches apart.
  7. Bake for 8 – 10 minutes, until edges of cookies begin to become golden brown.
  8. While cookies are cooling, prepare topping.

Caramel Topping

Ingredients

  • 3 tbsp unsalted butter
  • 1/4 cup heavy cream
  • 1/2 cup packed brown sugar
  • 3/4 cup granulated sugar
  • 1 tsp vanilla extract

Directions

  1. In a medium saucepan over medium heat, combine butter, heavy cream, brown sugar and granulated sugar.
  2. Cook, stirring occasionally until mixture just begins to boil and the sugars are melted.
  3. Remove from heat.
  4. Stir in vanilla.
  5. Scoop caramel mixture from pan with a teaspoon and drip onto cookies.
  6. Let caramel topped cookies fully cool before enjoying them.

Makes 3 dozen cookies.

Recipe adapted from Chef In Training

Inspired by Rice Flour and Cardamom

cardamom rice cookies_n

Light rice cookies with a pinch of cardamom give zest to your afternoon tea or coffee.

Dreaming about the fun of making udon noodles and mochi stuffed with adzuki bean paste caused me to impetuously purchase 25 pounds of rice flour during last year’s annual shopping trip… without having first researched how to make these items. Turns out, udon is made with wheat flour and the rice flour used to make mochi is a sweet rice flour. I now had 25 pounds of flour with no inspiration! A “no inspiration item” often transforms itself into an inspiration in our kitchen. We’ve learned that rice flour is a much better thickener in stews and soups than wheat flour or corn starch. We’ve also learned that rice flour makes light and airy cookies. When matched with the exotic flavor of cardamom, you’ve got a trip to India during your afternoon tea!

The original recipe was for Persian rice cookies. The recipe came out way too crumbly. I set the dough in the refrigerator and contemplated how to fix it. With the addition of a couple more eggs, the cookie dough was very soft and looked like scoops of vanilla ice cream while it waited to be baked. Our initial test for the cookie is dough flavor… yum. Again, it was very light with a punch from the cardamom. After they were baked and fully cooled, they were as delightful.

Cardamom Rice Cookies

Ingredients

  • 1  1/2 cups granulated sugar
  • 1/2 cup water
  • 1 tbsp orange extract
  • 3 cups rice flour
  • 5 eggs
  • 1 cup unsalted butter, room temperature
  • 1/2 cup vegetable oil
  • 2 tbsp superfine sugar
  • 1 tsp ground cardamom
  • 2 tbsp poppy seeds

Directions

  1. Combine granulated sugar and water in small pot over medium heat.
  2. Bring mixture to a boil, stirring well to dissolve sugar.
  3. Reduce heat and summer for 7 – 10 minutes. Mixture should thicken and reduce to about one cup.
  4. Remove from heat. Stir in orange extract and set aside.
  5. In a medium bowl, stir together rice flour and cardamom. Set aside.
  6. In a bowl of a stand mixer, whisk eggs with superfine sugar until smooth.
  7. Add butter and oil to eggs and beat until fluffy.
  8. Add flour to butter mixture, mix until incorporated.
  9. Gradually add in one cup of the sugar syrup and beat well with mixer.
  10. Place the dough in a container, cover with a plastic wrap and refrigerate for about six hours.
  11. Pre-heat the oven to 350 degrees F and line two baking sheets with parchment paper.
  12. Use a cookie scoop to drop out rounds of dough onto baking sheets. Flatten drops slightly with the back of the cookie scoop.
  13. Sprinkle poppy seeds on top of each cookie.
  14. Bake for 12-15 minutes. Bottoms of cookies will be lightly browned.
  15. Remove from the oven and gently place on the cooling racks.

Makes 4 dozen cookies.

Easy Wheat Bread with Complex Flavors of Coffee, Cocoa and Honey

brown wheat_n

Tasty wheat bread with subtle flavors of coffee and chocolate goes well with both savory and sweet accompaniments.

While the all-purpose flour stores in our pantry are diminishing, we still have an abundance of wheat flour. The exceptional wheat bread we made earlier this year was fabulous, but it is time and labor intensive. This weekend called for a loaf with more “auto-pilot” in the directions – and more of the work being done by our trusty Zojirushi bread machine. We found a well-reviewed recipe that included wheat flour. After sampling a slice of the finished product with butter and honey, we both agreed it was a delicious addition to our bread rotation.

Infused Wheat Bread

Ingredients

  • 1 1/4 cup water
  • 1 tsp coffee extract
  • 1/4 cup honey
  • 2 cups all-purpose flour
  • 1 1/4 cups whole wheat flour
  • 1 1/2 tbsp unsalted butter, room temperature
  • 3/4 tsp salt
  • 1 tbsp unsweetened Dutch processed cocoa powder
  • 1 tbsp granulated sugar
  • 2 tsp yeast

Directions

  1. Place ingredients in the bread machine pan in the order recommended by the manufacturer and select regular bread setting.
  2. Start machine and relax while the machine does the work!

Recipe adapted from Allrecipes.com.

Rocky Road Ice Cream

rocky road_nRich chocolate ice cream coupled with homemade marshmallows put this ice cream flavor in a top-two tie with Cloudberry Sorbet among our all-time favorites.

Really good chocolate ice cream can be made with really good Dutch processed cocoa. But great chocolate ice cream adds in depth of flavor with quality semi-sweet chocolate. This recipe topped the charts by not adding ordinary marshmallows, but adding extraordinary homemade marshmallows to the ingredients.

Rocky Road Ice Cream

Ingredients

  • 2 cups heavy cream
  • 3 tbsp unsweetened Dutch-process cocoa powder
  • 5 oz. semisweet chocolate chips
  • 1 cup whole milk
  • ¾ cup sugar
  • pinch of salt
  • 5 egg yolks
  • ½ tsp vanilla extract
  • 1 cup marshmallow pieces
  • 1 cup chopped almonds

Directions

  1. Warm 1 cup of the cream with the cocoa powder in a medium saucepan, whisking to thoroughly blend the cocoa.
  2. Bring to almost a boil (mixture will steam) and whisk in chocolate chips, whisking until smooth.
  3. Remove from heat and stir in remaining cup of whipping cream. Pour mixture into bowl and set aside.
  4. Warm the milk, sugar, and salt in the original saucepan.
  5. In a separate medium bowl, whisk together the egg yolks.
  6. Slowly pour the warm milk into the egg yolks, whisking constantly, then scrape the warmed egg yolks back into the saucepan.
  7. Stir the mixture constantly over medium heat with a heatproof spatula, scraping the bottom as you stir, until the mixture thickens and coats the spatula and creates a custard (and reaches 170 degrees F on an instant-read thermometer).
  8. Pour the custard into the chocolate mixture  and stir until smooth.
  9. Then stir in the vanilla.
  10. Chill the mixture thoroughly in the refrigerator.
  11. Freeze it in your ice cream maker according to the manufacturer’s instructions.
  12. During the last 10 minutes of churning, add in almonds and marshmallow pieces.

Recipe adapted from The Brown Eyed Baker.

Moist Mocha Cake with Chocolate Drizzle (and a Powdered Sugar Experiment)

mocha cake_n

Both the chocolate cake batter and the frosting have an essence of coffee which adds an element of complexity. Eggs and buttermilk make this cake moist and rich. 

The frosting for this decadent cake included an experimental element inspired by the fact that we’d run out of powdered sugar. Based on Internet research, I found  that powdered sugar could be created by putting granulated sugar and a little cornstarch in a blender for 15 minutes. We employ an immersion blender with a nut grinder attachment for these kinds of jobs. After about seven minutes, I decided the sugar looked powdered. The flavor of the frosting was spot on, but the slight graininess proved otherwise. Next time, I’ll muscle through the whole 15 minutes – or ship up enough powdered sugar to last the whole season in the bush.

Mocha Cake

Ingredients

  • Butter for greasing the pans
  • 1  3/4 cups all-purpose flour, plus more for pans
  • 2 cups granulated sugar
  • 3/4 cups dutch processed cocoa powder
  • 2 tsp baking soda
  • 1 tsp baking powder
  • 1 tsp kosher salt
  • 1 cup buttermilk, shaken
  • 1/2 cup vegetable oil
  • 3 eggs, at room temperature
  • 1 tsp pure vanilla extract
  • 3 tsp coffee extract
  • Mocha Buttercream Frosting, recipe follows

Directions

  1.  Preheat oven to 350 degrees F.
  2. Line two 9-inch springform pans with parchment paper. Butter and flour pans. Set aside.
  3. Sift flour, sugar, cocoa powder, baking soda, baking powder and salt into mixing bowl of a stand mixer fitted with a paddle attachment.
  4. Mix on low speed until combined.
  5. In a second bowl, mix together buttermilk, oil, eggs, vanilla and coffee extract.
  6. With mixer on low speed, slowly pour wet ingredients in with dry.
  7. Pour batter into two pans, evenly divided.
  8. Bake for 35 minutes, or until cake tester comes out clean.
  9. Cool cakes in pans for 30 minutes.
  10. Finish cooling completely on wire racks.
  11. Place one cake, flat side up, on a cake pedestal or flat plate.
  12. Spread top of cake with frosting.
  13. Place second cake, flat side down, on first frosted cake.
  14. Spread remaining frosting evenly on top and sides of cake.

Buttercream Frosting

Ingredients

  • 6 oz. semi-sweet chocolate chips
  • 2 sticks (1/2 lb.) unsalted butter, room temperature
  • 1 egg yolk, room temperature
  • 1 tsp. vanilla extract
  • 1  1/4 sifted confectioner’s sugar
  • 3 tsp coffee extract

Directions

  1. Melt chocolate chips in a double boiler. Stir until smooth. Set aside to cool.
  2. Cream the butter in the bowl of a stand mixer with a paddle attachment, about 3 minutes.
  3. Add egg yolk and vanilla. Continue beating for about 3 minutes.
  4. Turn the mixer to low and gradually stir in confectioner’s sugar.
  5. Beat until smooth and creamy.
  6. Mix in melted chocolate.
  7. Add coffee extract and mix until smooth.
  8. Spread immediately on cooled cake.

Recipe adapted from Food Network

Apricot Pecan Rugelach

rugelach_n

The tang of apricot, the crunch of pecan and the richness of cream cheese come together in this delightful, satisfying cookie.

This time of year puts our creativity to the test as our pantry begins to empty. Dwindling food stores bring to mind cooking shows where random ingredients are selected and presented to the contestants with the challenge to create something magnificent. My challenge ingredients were a bag of dried apricots, a bag of pecans and a desire to nosh on something sweet. I made the dough in the evening and let it rest overnight in the refrigerator. The next day, the cookies were quick and easy to make. A quick batch was ready for an after-lunch dessert with mugs of freshly steeped tea.

Apricot Pecan Rugelach

Ingredients

  • 4 oz. cream cheese, room temperature
  • 1/4 lb. unsalted butter, room temperature
  • 1/4 cup granulated sugar
  • 1/8 tsp. salt
  • 1 tsp. vanilla extract
  • 1 cup all-purpose flour
  • 1/4 cup brown sugar, packed
  • 1 tsp. cinnamon
  • 1 cup finely chopped dried apricots
  • 1/2 cup finely chopped pecans
  • 1 egg beaten
  • 1 tsp cinnamon mixed with 3 tbsp granulated sugar for topping

Directions

  1. Cream the cheese and butter together in the bowl of a stand mixer fitted with paddle attachment.
  2. Add 1/4 cup granulated sugar, salt, and vanilla to butter mixture. Mix well.
  3. Mix in flour on low speed. Mix until just incorporated.
  4. Divide the dough into two parts. Quickly roll into balls and flatten.
  5. Wrap each flattened ball in plastic wrap and refrigerate for at least one hour.
  6. To make filling, combine brown sugar, cinnamon, apricots and pecans. Mix well.
  7. On a well-floured surface, roll each flattened ball of dough into a 9-inch circle.
  8. Spread half of the filling evenly on each 9-inch circle of dough.
  9. Press the filling into dough slightly, so it will roll easier.
  10. Cut each circle into 12 equal wedges. First cut each circle in half. Cut those halves in half. Cut all the quarters into three even wedges.
  11. Starting with outside edge, roll wedge toward middle, forming a crescent-type shape.
  12. Place cookies on a parchment-lined baking sheet, point side down.
  13. Brush cookies with beaten egg. Sprinkle cookies with a little of the cinnamon-sugar mixture.
  14. Bake for 15 – 20 minutes in a 350 degree F oven. Cookies will be lightly browned.
  15. Let cool on a wire rack.

Smoked Anchovy and Salmon Pizza

Smoked Anchovy & Sage-Seared Salmon Pizza_n

Salmon seasoned with sage and briefly seared, smoked anchovies, shitake mushrooms and mozzarella cheese top a whole wheat crust brushed with garlic-infused olive oil.

The base for this elegant, satisfying pizza is a baked crust brushed with olive oil. This year, we’ve been experimenting with whole wheat crusts, and in this particular recipe it is perfect. Baked on a pizza stone, the whole wheat comes out light and crisp. The sage adds a wonderful aroma and flavor to this dish. This would be a great pizza to cook on a charcoal grill or in a cast iron frying pan with a lid in camp.

Ingredients:

  • 1 pizza crust, pre-baked
  • 2 cups shredded mozzarella cheese
  • 1/2 pound salmon fillet, skin on or off, cook’s choice. We prefer skin on.
  • 1 tin (2 oz) smoked anchovy fillets, oil drained and fillets separated
  • 2 tbsp tbsp pine nuts
  • garlic cloves. Small cloves can be left whole, large cloves cut into smaller pieces to make about 20 pieces of garlic.
  • two or three shitake mushrooms, sliced thin
  • 1 tsp dried sage
  • 1/2 tsp Italian seasoning
  • ground pepper
  • 3 very thin onion slices, cut in half
  • 2 tbsp extra virgin olive oil, preferably infused with garlic, but plain olive oil is fine
  • 1/2 tsp powdered garlic
  • additional Italian seasoning, to taste

Directions:

  1. Place a pizza stone on oven’s center rack and preheat to 400 degrees F.
  2. Ensure all bones are removed from salmon fillet. Rub sage into skinless side of fillet and set aside.
  3. In a medium-sized frying pan, heat a tablespoon of olive oil over medium heat. Add the onions, shitake slices, 1/2 tsp of Italian seasoning and ground pepper and briefly sauté. Onions should still be slightly crisp. Remove mixture to a plate to stop cooking.
  4. Return pan to medium heat and add garlic cloves and pine nuts. Sauté until garlic just turns soft and edges are light brown. Remove mixture to a plate to cool.
  5. Return pan to medium heat. Place salmon fillet sage side down and sear for 30 seconds. Use your hand or a spatula to apply light pressure to the fillet to ensure that it is evenly seared. Turn fillet over and sear the other side for 30 seconds. Remove to a cutting board to cool.
  6. Place 2 tablespoons extra virgin olive oil and 1/2 tsp powdered garlic in a small bowl and mix together. Using a pastry brush, brush olive oil onto the pizza crust.
  7. Sprinkle mozzarella cheese on the crust.
  8. Evenly sprinkle the mushrooms and onions atop the cheese.
  9. Arrange the anchovy fillets in a pinwheel on the pizza.
  10. Use very sharp knife to cut/separate the salmon along the grain of the fillet. Pieces should be 1 or 2 inches long. Arrange these pieces on the pizza.
  11. Add the pine nuts and garlic, and finish with a sprinkle of Italian seasoning.
  12. Bake for 10 minutes. Crust should be browned and the bottom should be crisp. Rest pizza for a few minutes before slicing to allow toppings to set.

Enjoy this pizza with a lightly-chilled Chardonnay or a cold Amber Ale.

Country-Style Apple Brioche

Apple Brioche_n

Slices of this apple-filled brioche served with cups of freshly brewed French roast coffee sent our spirits overseas to a sidewalk table at a cafe in France.  

Baking projects tend to be inspired by a single ingredient. Last week, two students gave me the biggest Granny Smith apples I have ever seen. They were a little bumped and bruised and seemed to be begging to be baked into something sweet. I remembered an apple brioche recipe I had wanted to try in one of the cookbooks we have in our library, Beth Hensperger’s Bread. Brioche is an egg-and-butter rich pastry-type bread dough which can be used in both savories and sweets. It produces a soft, moist bread and the dough is easy to make and easy to work with.

Apple Brioche

Ingredients

  • 2 giant Granny Smith apples (or 4 regular-sized apples), peeled, cored and sliced into 1/4 inch pieces
  • 1  1/2 tbsp lemon juice
  • 1/4 cup granulated sugar
  • 1 tbsp water
  • 1 tsp ground cinnamon
  • 1 recipe chilled brioche dough (see below)

Topping

  • 1/4 cup granulated sugar
  • 1/6 cup all-purpose flour
  • 4 tbsp chilled unsalted butter
  • 1 egg, beaten

Directions

  1. Toss apple slices with lemon juice. Let sit for 1 hour, occasionally stirring.
  2. Place apples, sugar, water, and cinnamon in a heavy skillet and sauté until liquid is reduced and sugar is dissolved.
  3. Cool apple mixture to room temperature.
  4. Turn chilled brioche dough out to a lightly floured surface.
  5. Roll dough into a 10 x 15 inch rectangle.
  6. Spread cooled apple mixture down the center third of the dough rectangle.
  7. Cut strips 1.5 to 2 inches apart diagonally, almost touching filling.
  8. Starting at one end, fold strips over filling, alternating each side. You will have somewhat of a braided look when finished.
  9. Transfer bread to a parchment-lined baking sheet.
  10. Make topping by combining sugar and flour until blended. Cut in cold butter with a pastry blender (or food processor) until coarse crumbs are formed.
  11. Brush dough generously with beaten egg.
  12. Sprinkle topping on egg-washed dough.
  13. Cover loosely with plastic wrap and let rise at a cool room temperature until puffy and not quite doubled, about 40 minutes.
  14. Bake in preheated 350 degree F oven for 40 minutes. Bread will be browned and filling will be bubbly.
  15. Cool completely on a wire rack before serving.

Brioche Dough

Ingredients

  • 2  1/4 cups all-purpose flour
  • 1/2 tbsp active dry yeast
  • 1/4 cup sugar
  • 1 tsp salt
  • 3 eggs, at room temperature
  • 1/4 cup hot water (120 degrees F)
  • 1 stick unsalted butter, cut into small pieces and softened

Directions

  1. In a bowl of a stand mixer fitted with a paddle attachment, combine 1/2 cup flour, yeast, sugar and salt.
  2. Add hot water and beat at medium speed for 2 minutes.
  3. Add eggs, one at a time, beating well after each addition.
  4. Gradually add 1 cup more flour.
  5. When well-blended, add butter, a few pieces at a time.
  6. Gradually add 3/4 cup flour. Beat until thoroughly blended. Dough will be very soft and have a thick batter-like consistency.
  7. Scrape dough into a greased bowl.
  8. Cover tightly with plastic wrap and let rise at room temperature until doubled, about 3 hours.
  9. Refrigerate dough for at least 2 hours. Can be refrigerated longer or frozen for up to 2 weeks.

Yummy Homemade Cheddar Cheese Crackers

Cheddar Crackers_n

Warning: These crackers are highly addictive. 

Last year, I made graham crackers from scratch with excellent results. That success started a whole serious of “I-wonder-if-I-could-make…” questions. The graham crackers I made at home were far more delicious than any store-bought, boxed variety. Armed with the right recipe, it seemed anything made from scratch had to taste better. Time seemed to be the limiting factor. As wonderful as the graham crackers were, a batch of a dozen took quite a bit of time to create. Saltines? We use a lot of them for breading fried clams and fish, but it seemed like a waste to bake a batch only to smash them to bits for a single recipe. The next cracker I contemplated was Cheez-Its.

Cheddar cheese crackers are tiny, with lovely ridged edges and cute little holes. I researched several recipes and discovered that these tasty little snacks required only five ingredients and a couple of hours total, most of which is chilling time in the refrigerator.

We have noticed a huge difference in the flavor of our food when we use excellent ingredients. The addictive quality of these crackers came from the combination of high quality flour, cheese, and butter. The flour was Bob’s Red Mill unbleached all-purpose. Everything we’ve baked with this flour tastes noticeably better. The butter was Tillamook’s unsalted organic, and the cheese was Kerrygold Dubliner sharp cheddar cheese.

We’ve used these crackers as croutons on salads and can imagine they would be perfect alongside a homemade bowl of soup or chili. We may have to keep imagining this, as the crackers are disappearing by the handfuls!

Cheddar Cheese Crackers

Ingredients

  • 8 oz. shredded sharp cheddar cheese
  • 1/2 cup unsalted butter, melted
  • 1 tsp. kosher salt
  • 1 cup unbleached all-purpose flour
  • 2 tbsp ice cold water

Directions

  1. In a stand mixer (fitted with paddle attachment), mix cheese, butter, and salt on medium speed until well-incorporated.
  2. Add flour.
  3. Mix on low speed.
  4. Slowly add ice water. Dough should form into a ball.
  5. Wrap dough in plastic and refrigerate for an hour.
  6. Preheat oven to 375 degrees F. Line two baking sheets with parchment paper.
  7. Split dough in half.
  8. Roll one half into a rectangle, about 10 x 12 inches. Dough should be thin, about 1/8 inch.
  9. Use a fluted pastry cutter and cut dough into 1-inch strips. Cut strips into 1-inch squares.
  10. Place squares on baking sheets, they can be close together, but not touching.
  11. Prick center of each cracker with end of a pointed chopstick.
  12. Bake for 15 minutes, or until golden brown.
  13. Cool on wire rack.

Exceptionally Delicious Whole-Grain Bread

Whole Wheat Bread_n

Moist, soft, flavorful and with a crunchy, hearty crust, this is easily the best 100% whole wheat bread recipe we’ve found – the quintessential “lightly toast and slather with butter” bread!

Far away from large grocery stores brimming with aisle upon aisle of reasonably-priced selections, we live a quasi-homesteading life here in Arctic Alaska. We stock most of our dry goods during our annual three-day shopping run in Anchorage in late summer. In late August, an order for spices goes out to Penzeys. Coolers jammed with salmon, halibut and rockfish fillets from the summer’s fishing come with us on the plane north – enough for us, and to reciprocate when we’re given caribou. Once we arrive in the village, we begin picking berries in earnest. We make our soups, chili, stews – and our ice cream – gallons at a time.

Our interest in self-sufficient living has led us to Mother Earth News magazine which we read cover-to-cover despite the fact that many of the articles don’t directly apply to our lives. Under the title Homemade Whole-Grain Bread: You Have to Try This Amazing Recipe, the December/January issue boasted a whole wheat “homemade bread you have to try.” We bake all of our own bread products and include mixed-whole-wheat-and-white-flour bread in our repertoire. But straight whole wheat? Past trials have come out dense and crumbly, so we were skeptical. However, our trust in Mother is high, and when they devoted five pages to the bread and included the science behind why this whole wheat loaf is different, our curiosity was piqued.

After finishing the article and discussing it, our conclusion was a shared, “That sounds like a lot of work for a loaf of bread!” Still, we’d sent up 25 pounds of Bob’s Red Mill whole wheat flour with every intention of feathering more whole wheat into our diet. So after procrastinating for a couple of weekends I decided to go for it.

As it turned out, the extra work is actually fun and quite satisfying. With two very successful loaves under my belt (in more ways than one), we both agree with Mother Earth News – this is an “exceptionally delicious whole-grain bread.”

I’ve simplified the directions for this post, but full credit for the following recipe goes to the staff of Mother Earth News. Their full-length article is highly recommended reading.

Exceptionally Delicious Whole-Grain Bread

Ingredients

Sponge:

  • 1 3/4 cups whole-wheat flour
  • 1/4 tsp instant yeast
  • 3/4 cup cool water

Soaker:

  • 1 cup whole-wheat flour
  • 1/2 tsp salt
  • 2/3 cup plain yogurt
  • 2 tbsp orange juice

Final Dough:

  • all of sponge recipe
  • all of soaker recipe
  • 2 1/4 tsp instant yeast
  • 1 tbsp unsalted butter, softened
  • 2 tbsp honey
  • extra whole-wheat flour and water for adjustments

Directions

The day before baking, make the sponge and the soaker:

  1. Mix the sponge ingredients together to form a ball of dough.
  2. Knead for about 2 minutes.
  3. Let dough rest for 10 minutes.
  4. Knead again for about a minute.
  5. Immediately cover and refrigerate for at least 6 hours.
  6. Mix the soaker ingredients together to form a loose, wet ball.
  7. Cover soaker dough and leave at room temperature for 6 to 24 hours.

The day of baking:

  1. An hour before making bread, remove the soaker from the refrigerator and let it come to room temperature.
  2. Tear sponge into about a dozen pieces.
  3. Roll each sponge piece with a piece of soaker. Place bowl of a stand mixer.
  4. Attach dough hook.
  5. Sprinkle in 2  1/4 tsp of yeast.
  6. Mix on first speed for 2 minutes. Increase to second speed and continue mixing for 2 more minutes.
  7. Add in honey and butter. Mix for another 2 minutes.
  8. Let dough rest in mixing bowl for 10 minutes.
  9. On a floured work surface, knead dough by hand for a few minutes, add extra flour or water if necessary to make a soft, slightly sticky dough.
  10. Form dough into a ball and transfer it to oiled bowl, turning ball to coat it.
  11. Let rise for 45 minutes. It should be 1 1/2 times its original size.
  12. Transfer dough to floured work surface and form it into a loaf to fit a 9″ x 5″ or 8.5″ x 4.5″ loaf pan.
  13. Grease loaf pan and place dough into pan.
  14. Cover and allow to rise for 45 minutes. Dough should be 1 1/2 times its original size.
  15. While loaf rises, preheat oven to 450 degrees F.
  16. For most consistent heat, place baking stone on bottom rack and a cast-iron pan on top rack while preheating.
  17. Brush top of loaf with water.
  18. Slash top of bread down the middle or with diagonal cuts.
  19. Place loaf on stone in center of oven.
  20. Immediately add 1/2 cup of hot water to heated cast-iron pan (be careful of steam burns!).
  21. Lower the temperature to 375 degrees F.
  22. Bake bread for 20 minutes.
  23. Rotate pan in oven and add another 1/2 cup of hot water to cast-iron pan.
  24. Bake for another 15 – 20 minutes.
  25. Bread is done when top is golden brown and bottom sounds hollow when thumped. Another method to check for doneness is the internal temperature of the bread is 195 degrees or more.
  26. Remove loaf from pan immediately and transfer it to a cooling rack.
  27. As tempting as the loaf will be, allow bread to cool at least an hour before slicing!