Alaska Salmon Lox or Gravlax

Lox on onion bagel_n

With a history dating back to the European Middle Ages, a number of methods for preparing lox and gravlax (or gravad lax) have evolved. We’ve settled on a dry-brining method that produces beautifully colored, deliciously flavored salmon fillets ready to be sliced translucently thin as on the above freshly made onion bagel.

Many cultures have a tradition of salting and burying fish, a technique that results in both preservation and fermentation. In fact, the origins of sushi can be traced back to fish prepared in this method. The grav of gravlax derives from the Scandinavian word for grave, and lax, salmon, has cognates in many old European languages. Thus gravlax literally means “buried salmon.”

Although preparing lox is somewhat labor intensive (the fillets are packed in salt under light pressure and liquid must be drained every 24 hours or so over a period of several days), since it isn’t smoked, anyone with a refrigerator can make it. Both sea salt and kosher salt produce good results, and we like to add a little brown sugar and black pepper. The dry brining method we prefer is known as “Scottish-style.” Other styles call for a wet brine. Dill, juniper berries and other seasonings are traditionally used in some recipes, but we prefer to add seasonings, if any, when the lox is being served.

In addition to traditional lox on a bagel with cream cheese, capers and a thin slice of onion, it’s also excellent on scrambled eggs, as a colorful finishing touch to deviled eggs, or as a wrap around any number of vegetables or other seafoods and served as an hors d’oeuvre.

Silver salmon head n

Always look for the freshest fish. Salmon should be bright with clear eyes and a pleasant smell reminiscent of the sea.

While historically lox was made with Atlantic salmon, these days, with Atlantic salmon populations in severe decline almost everywhere, the Atlantic salmon available in stores is farmed in places such as Norway, Scotland, British Columbia and Chile. For reasons rooted in flavor, sustainability and environmental impact, we prefer wild Pacific salmon. The salmon in the above photo is Coho (silver salmon), but any Pacific salmon species works well, as do large char. If you leave the skin on the fillets, it can later be used to create a crispy fried appetizer.

For the best presentation, lox should be sliced very thin. The best tool we’ve found for this job is a yanagiba – a Japanese sashimi knife. Our yanagiba has an extraordinarily sharp, nine-and-a-half inch blade. Both the sharpness and the length are important for slicing – not sawing – ultra thin pieces of salmon.

For a great recipe for smoked salmon, see:

Smoked Salmon with Soy Sauce and Brown Sugar Brine

For excellent homemade bagels, see: Bagels 3 Ways

———————————————————-

Homemade Lox

Ingredients

  • 1 lb. fresh salmon fillets, skin on. The fillets need not be scaled, but do take pains to ensure that all bones are removed.
  • ¼ cup coarse sea salt
  • ¼ cup brown sugar
  • 1 tbsp freshly ground black pepper

Directions

  1. Rinse fish and dry thoroughly.
  2. Remove any pin bones in fillet with tweezers or needle nose pliers.
  3. Mix together salt, sugar and pepper. (This recipe works well when multiplied. Our last batch was 5 pounds of fish.)
  4. Pack salt mixture around fish. You can do this skin side down.
  5. Sandwich two pieces of fish together, skin side out.
  6. Pack any leftover sugar mixture onto exposed fillet.
  7. Wrap sandwiched pieces tightly with plastic wrap. Leave sides slightly open so liquid can drain while the salmon cures.
  8. I use a poacher with a draining tray for the next step. Another method would be to place a steamer basket at the bottom of a plastic box. The idea is to create a raised place for the fish to set while being pressed from the top. This will allow the juice to drain away from the fish.
  9. Place sandwiched salmon in poacher.
  10. Place weight on top of all salmon pieces. I use large jars of jam or large containers of salt. I have seen pictures of people using bricks.
  11. Place poacher in refrigerator.
  12. For 7 days, every 24 hours pour off liquid from the bottom of the poacher and flip the fillet sandwiches.
  13. At the end of 7 days, take the salmon out of the plastic wrap and thoroughly rinse using really cold tap water.
  14. Thoroughly pat dry.
  15. Slice very thin and enjoy!
  16. Store leftovers in refrigerator or freeze in airtight containers.

Pre-Workout Almond, Craisin, Chocolate, Honey Granola Bars

Granola Almond Energy Bars_n

Soft and chewy granola bars packed with helpful protein and complex carbohydrates are a tasty, energy-packed pre-workout snack.

At this time of year, many people are re-tooling their workout program or starting a new one. Two hundred miles north of the Arctic Circle, that part of life is no different. We mostly confine ourselves to the weight room and gym at our school for workouts. With typical days featuring windchill below zero, running means treadmill workouts. Jack likes running workouts on the treadmill. I am slowly becoming accustomed to them. Running gives us a little cushion in terms of burning calories so we can enjoy all the sumptuous meals we cook, and it keep us in shape for our active lifestyle.

The most convenient time for our workouts is after school – a time of day when we often need an energy boost. I thought about making some kind of cookie that was filled with nuts and raisins, envisioning something soft and chewy. I also wanted to use up some of the staples in our pantry. What resulted was a chewy bar stuffed with craisins, coconut, nuts, peanut butter and honey. A homemade version of sweetened condensed milk is the binding agent. We snacked on them before our workout today and thought they came out great: tasty and energy boosting!

I imagine that any dried berries or nuts could be used in this recipe. I’m already planning on baking up a few batches to take with us on our summer adventures hiking, fishing and boating around the Kenai Peninsula.

Granola Bars

Ingredients

  • 3 cups rolled oats
  • 1 cup chopped almonds
  • 1 cup dried cranberries
  • 1/2 cup semi-sweet chocolate chips
  • 1/2 cup unsweetened coconut
  • 1/4 cup peanut butter
  • 1/2 cup boiling water
  • 1 cup powdered non-fat milk
  • 2/3 cup granulated sugar
  • 3 tbsp unsalted butter, softened
  • honey

Directions

  1. Preheat oven to 350 degrees F.
  2. Line a 13 x 9-inch glass baking dish with parchment paper. Paper should go all the way up the sides of the dish.
  3. In a large bowl, mix together oats, nuts, cranberries, chocolate chips and coconut. Set aside.
  4. Using a blender, (I prefer an immersion blender), blend sugar, boiling water, and non-fat milk powder.
  5. Add butter and peanut butter to milk mixture. Blend until fully mixed.
  6. Add enough honey to bring liquid mixture to 16 ounces. Blend until fully mixed.
  7. Pour milk mixture into oat mixture and thoroughly mix.
  8. Press dough into baking dish.
  9. Bake for 20 minutes.
  10. Allow bars to cool for 5 minutes in pan.
  11. Lift bars out of pan by holding parchment paper. Set on a wire rack to continue cooling.
  12. Allow the bars to cool completely on parchment paper on a wire rack before cutting.
  13. Store cut bars in an airtight container.

The Galangal Experiment: Orange Pecan Galangal Scones

Galangal, Pecan, Orange Scones

Scones are easy to make and always a favorite with a cup of coffee or tea.

Penzeys Spices is one of our grown up toy catalogues. Last spring, we pored over every page as we created a list of the spices and seasonings we thought we might want for the following year. During this perusal, a number of unfamiliar spices piqued our interest. One such item was galangal. Also known as blue ginger, galangal is indeed a member of the ginger family, but has a more intense, flowery taste not much at all like the ginger we’re familiar with. Perhaps cardamom is a closer comparison.

Recently, we came across a lemon-ginger scone recipe that seemed ripe for a makeover. In the following recipe, pecans and orange zest meld with the pleasantly flowery galangal to create a new classic. The yogurt gave the scone a moister texture that traditional recipes.

Orange Pecan Galangal Scones

Ingredients

Scone:

  • 2  1/4 cups all purpose flour
  • 1/4 cup granulated sugar
  • 1 tbsp baking powder
  • 2 tsp galangal
  • finely grated zest of one orange
  • healthy pinch of salt
  • 3/4 cup chopped pecans
  • 3/4 cup plain yogurt
  • 1/4 cup orange juice

Icing:

  • 1 cup powdered sugar
  • 1 tbsp orange juice

Directions

  1. Preheat oven to 375 degrees F.
  2. Line a baking sheet with parchment paper. Set aside.
  3. In a medium bowl, sift together flour, baking powder and galangal.
  4. Stir in sugar, salt and zest.
  5. Stir in pecans.
  6. Using wooden spoon or rubber spatula, stir in orange juice. Then stir in yogurt.
  7. On a lightly floured surface, gently knead dough until it comes together. Do not over-knead.
  8. Press dough into a circle, about one inch thick.
  9. Cut circle into 8 wedges.
  10. Arrange wedges on baking sheet so there is about 1 inch in between each one.
  11. Bake scones for 20 minutes. Scones will be lightly browned on the bottom and pale on the top.
  12. Let cool in pan for 5 minutes, then transfer to wire rack to continue cooling.
  13. Meanwhile, whisk powdered sugar and orange juice together to make drizzle icing. Consistency should be like honey.
  14. To drizzle icing, fill  a pastry bag with a small tip or a small Ziplock bag with a corner snipped, or simply use a spoon. Drizzle icing evenly over scones.
  15. Serve warm or room temperature.

Arctic Anpan 2 Ways: Azuki and Caribou Cha Sui (Sweetened Red Bean and Marinated Caribou)

Anpan with Sweet Azuki Paste_n

Delicious steamed buns filled with sweetened red bean paste were the finishing touch to an Asian-inspired meal. All that was lacking was a cold Sapporo Beer… The beer will have to wait until summer.*

Wintertime fishing, birding or just bike riding with my daughter Maia in Japan is indelibly linked with one of my happiest food memories: stopping by a local bakery and purchasing piping hot steamed buns filled with sweetened bean filling (anpan) or marinated pork (nikuman). The filling was so hot we’d have to be careful not to burn our tongues. Those steamed buns were the perfect on-the-go snack on chilly days.

Anpan ready for the steamer_n

Filled with bean paste or marinated meat and ready for the steamer…

Known as bao or baozi in China, steamed buns were on our list of items to try making this year. With Maia in Point Hope visiting over winter break from Berkeley, the anpan and nikuman Barbra created turned out just like the ones we’d enjoyed back in Japan. After devouring anpan with sweet red bean filling, we all could imagine the buns stuffed with a variety of other fillings: vegetable mixtures, curry, barbequed caribou, fruit, or even chocolate!

Anpan freshly steamed_n

Light, freshly steamed, piping hot and ready to be lifted out of our fish poacher, anpan definitely fit the category “comfort food.”  The ones we made were about the size of tangerines.

Because we rely on our Zojirushi bread machine to regulate the temperature for consistently rising dough, the following recipe has been created for the dough cycle of a bread machine. As an alternative to steaming, the dough can be given an egg wash and baked at 350 degrees F for 15 minutes. A recipe for Caribou Cha Sui follows the anpan recipe below. Click here to see a recipe for sweetened red bean filling.

Anpan

Ingredients

  • 1 cup water
  • 1 tbsp extra light olive oil
  • 1  3/4 cups all purpose flour
  • 1  1/2 tbsp granulated sugar
  • 1/4 tsp salt
  • 1 tbsp dry yeast
  • 1/2 tsp baking powder
  • 1 tbsp white vinegar

Directions

  1. Place first 6 ingredients into pan of bread machine in the order recommended by the manufacturer.
  2. Set machine to dough cycle. Start.
  3. After cycle is complete, punch down dough on a lightly floured surface.
  4. Sprinkle baking powder evenly over surface of dough.
  5. Knead dough for 5 minutes.
  6. Divide dough in half. Place half of dough in a covered bowl.
  7. Cut the remaining dough into 12 equal pieces.
  8. Roll dough pieces into balls and then flatten. Make sure that edges are thinner than the center.
  9. Fill dough with 1 teaspoon of desired filling. Bring edge of circle up to pinch closed so that none of the filling is showing.
  10. Place filled dough on a small piece of waxed or parchment paper. Continue with remaining dough balls.
  11. Repeat process with dough that has been covered in the bowl.
  12. Let all filled dough balls stand covered for another 30 minutes.
  13. Steaming process could be done in a steamer basket or a wok. I have a fish poacher with a raised grate and used this to steam the buns.
  14. Bring water and 1 tbsp vinegar to a boil in steamer.
  15. Place as many buns as will fit in steamer, allowing for about an inch between buns so that they don’t stick together as they cook.
  16. Cover with lid. Steam over boiling water for 15 minutes.

———————————————————————————————————————

Caribou Cha Sui (Works well with venison, moose, elk, lean beef or similar meat)

The first step is to create a marinade and let the tenderized caribou absorb the flavors overnight in the refrigerator. The next day, make a filling with the marinated caribou and stuff the anpan. The filling will make enough for 6 steamed buns (nikuman). This recipe is best started a day in advance to ensure the meat is properly marinated.

Ingredients (Makes 6 nikuman)

Filling:

Ingredients

  • 1/4 lb caribou, pounded/tenderized till 1/2 inch thick or thinner
  • cha sui marinade (see below)
  • 1/4 cup finely diced onions
  • 2 tbsp soy sauce
  • 1 tbsp honey
  • 1 tsp sesame oil
  • 1/4 cup beef stock (we use Better than Bouillon)
  • 1 tsp cornstarch
  • extra light olive oil

Directions:

  1. Place tenderized caribou in a glass bowl or container and completely cover with marinade.
  2. Cover glass container and place in refrigerator overnight.
  3. The following day…
    1. In a medium-sized frying pan, heat 1/2 tbsp oil over medium-high heat until a drop of water sizzles in pan.
    2. Sear caribou on each side to seal in the juices.
    3. Reduce heat to medium and cover pan. Continue cooking for 3 minutes on each side. Meat should be cooked to “medium.”
    4. Remove pan from heat and place cooked meat on a cutting board to rest a few minutes.
    5. Dice cooked caribou into 1/4 inch cubes and set aside.
    6. In a small bowl, mix cornstarch and beef stock and set aside
    7. Wipe out the pan used to cook the caribou. Heat 1/2 tbsp oil over medium heat.
    8. Add diced caribou and onion to pan. Cook for about 1 minute, stirring occasionally.
    9. Add soy sauce, honey and sesame oil to pan. Stir fry for another minute.
    10. Add cornstarch and stock mixture to pan and continue cooking until sauce thickens, about 2 minutes.
    11. Place caribou in bowl to cool prior to filling anpan rolls.
    12. See above directions for anpan to complete recipe.

Cha Sui Marinade:

Combine the following ingredients in a glass bowl:

  • 4 large cloves garlic, minced or chopped fine
  • 1/2 tsp dried ginger
  • 1 tbsp honey
  • 2 tbsp soy sauce
  • 1/4 tsp white pepper
  • 1/4 tsp dry fennel
  • 1/4 tsp ground cinnamon
  • 1/2 tsp sesame oil
  • pinch salt

*Point Hope, like many bush villages in Alaska, is dry. Every now and again a certain meal calls for a special adult beverage. At these times we miss being able to enjoy an alcoholic beverage. Most of the time we are content to wait until summer, which we spend in the “wet” town of Seward, Alaska or traveling.

Sweet, Smooth, Delicious Azuki Bean Paste

Azuki paste and azuki beans_n

Popular in Japan, sweetened azuki beans are a key ingredient in sumptuous desserts and baked goods. (The above photo marks the debut of our new Nikon D800.)

Many years ago, I lived in San Francisco. Walking along shopping streets lined with boutiques, a waft of warm vanilla  drew me into a tiny shop with just two tables. Behind the counter was very large crepe pan and a chalkboard menu filled with tempting daily specials. I was drawn to the vanilla crepe stuffed with red bean paste and topped with green tea ice cream. The textures, sweetness and interplay of flavors made for a satisfying dessert for a die-hard sweet tooth.

Many years later, 200 miles north of the Arctic Circle, supplied with dried azuki beans from a speciality shop in Anchorage, I was ready to try my hand at homemade azuki bean paste. It came out perfect and was featured in anpan (Japanese-style steamed rolls) to rave reviews. We can’t wait to try this paste in our own crepes.

Azuki Bean Paste

Ingredients

  • 1 cup dried adzuki beans
  • 5 cups water
  • 1  1/2 cups granulated sugar
  • pinch salt

Directions

  1. Soak dried beans overnight. Make sure beans are generously covered in several inches of water, as the water will be absorbed.
  2. The following morning, pour beans into a colander and rinse thoroughly with cold water.
  3. Place beans in a large pot along with 5 cups of water.
  4. Bring water to a boil over high heat.
  5. Reduce heat to low, cover and simmer for 1  1/2 hours. Beans should be soft.
  6. Put a wire strainer over a bowl.
  7. Pour beans and liquid into strainer. Strainer should be low enough that beans are partially immersed in water.
  8. Using a wooden spoon, smash beans through strainer into water. Skins should remain in the strainer.
  9. Line a bowl with cheesecloth and pour strained beans and liquid into cheesecloth.
  10. Draw up edges of cheesecloth and squeeze out excess liquid.
  11. Put squeezed out bean paste back into pot.
  12. Add sugar and salt to the beans and stir mixture over low heat. Continue stirring until mixture is glossy and has the consistency of mashed potatoes.
  13. Store in refrigerator.

See also: Arctic Anpan 2 Ways: Sweet Azuki Paste and Caribou Cha Sui

Chocolate Pots for Two

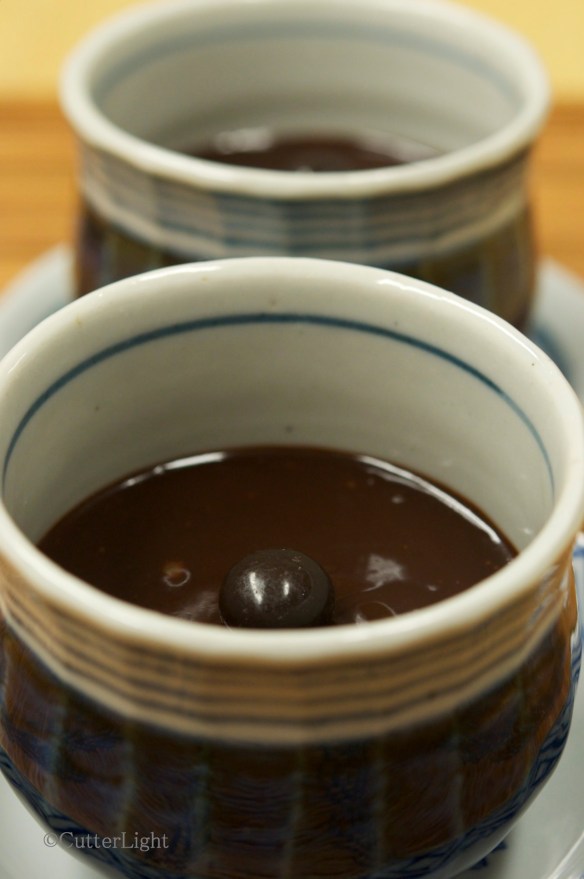
Chocolate Pots for Two_n

Creamy dark chocolate pots with an almond essence are an elegant dessert, perfect for two.

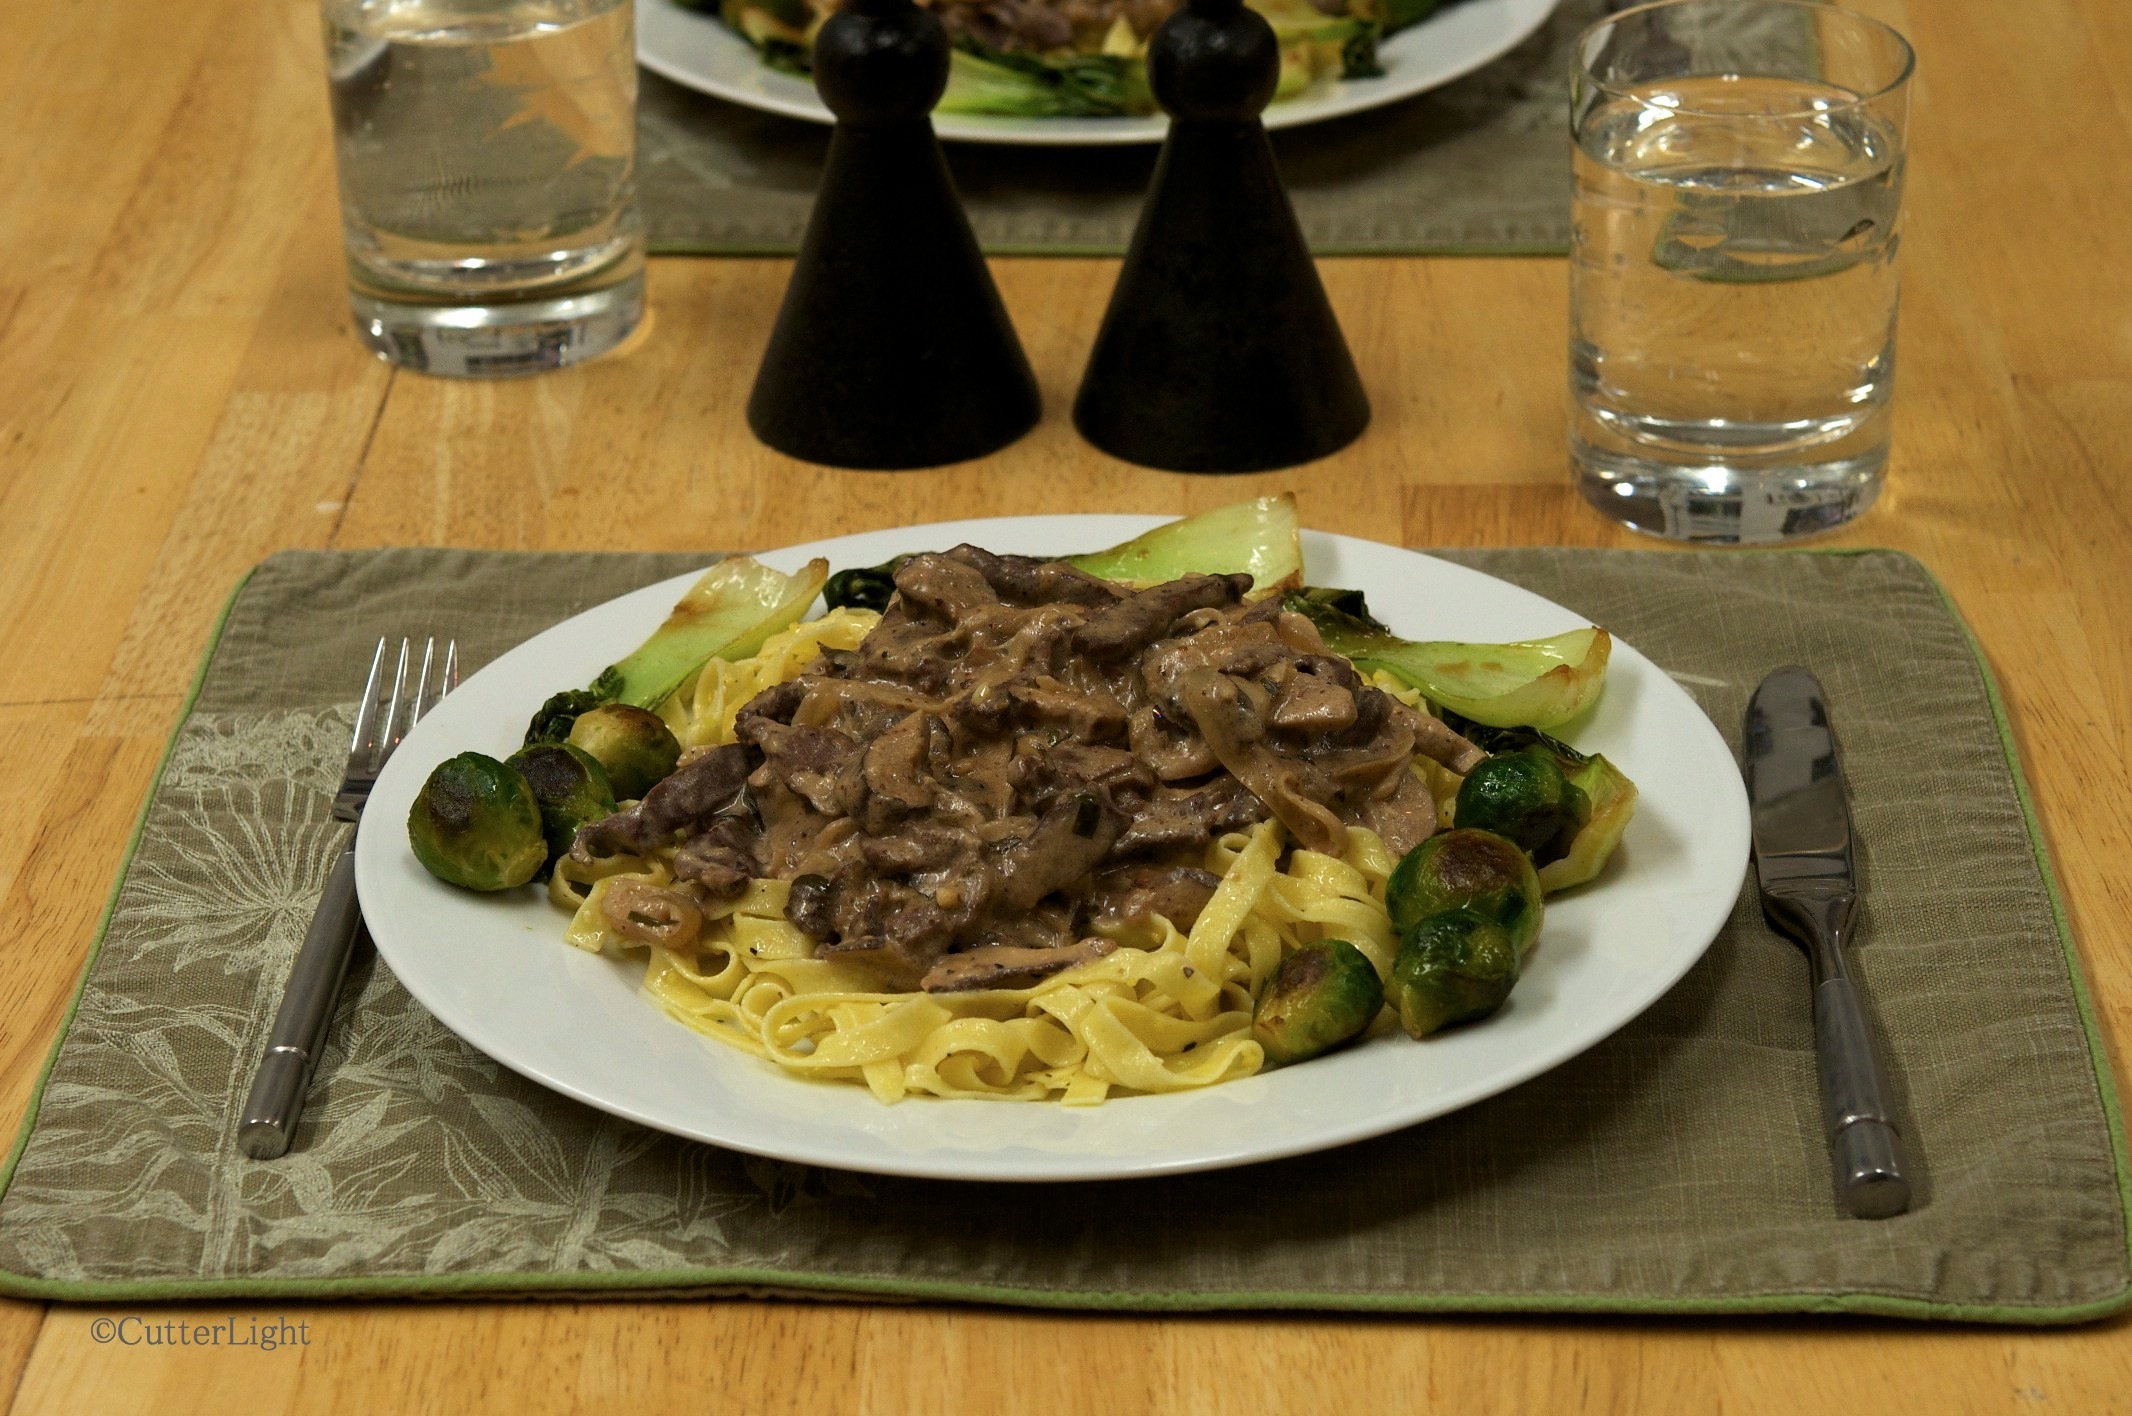
Our holiday guest has left and we are back to just the two of us in our home in the Arctic. I like to scale down recipes so that Jack and I can enjoy freshly made sweets without having too many around to tempt us. These chocolate pots are rich and delicious, and half-cup servings provided a gourmet finish to a meal of caribou stroganoff. While I flavored these with a hint of almond, adding orange zest, a sprig of mint, or a very thin curl of lime peel would be among numerous other delectable variations. We topped the pots with a chocolate covered pomegranate.

Chocolate Pots

Ingredients: (For two 1/2 cup servings)

  • 1/2 cup semi-sweet chocolate chips
  • 1 tbsp granulated sugar
  • 1/3 cup heavy cream
  • 2 egg yolks
  • 1 tsp vanilla extract
  • 1 tsp almond extract

Directions

  1. Place chocolate chips, sugar and cream in a small pot.
  2. Heat chocolate mixture over low heat. Stir continuously until mixture is smooth. Turn off heat.
  3. Whisk yolks and extracts in a small bowl.
  4. Slowly pour half of the melted chocolate mixture into egg yolks while whisking to temper eggs.
  5. Pour egg mixture back into small pot.
  6. Heat pot over low heat while stirring continuously for 3 – 5 minutes. Mixture should thicken slightly.
  7. Pour chocolate into two decorative ramekins.
  8. Let chill in refrigerator uncovered. Serve fully chilled and topped with something fun – a candied nut or a chocolate covered espresso bean.

Pumpkin Pancakes: A Tasty, Healthy Way to Start the Day

Pumpkin Pancakes

Give your pancakes a tasty nutritional boost by stirring in some pumpkin purée left over from baking pies. Hot off the grill, these especially light pancakes are served with chopped pecans and a slice of smoked Alaskan salmon.

Pumpkin pie is practically a staple at our Thanksgiving and Christmas meals. Easy to make and inexpensive (pumpkins can generally be had for pennies per pound), pumpkin is also one of the more healthful pies. In fact, we sometimes have a slice sans whipped cream along with an egg for breakfast. But what to do with the leftover pumpkin purée, particularly if all you have is a cup or so? One of our favorite solutions is pumpkin pancakes. Use the same spices you would with pumpkin pie, hold the sugar, and you’ve got a great start to your day!

Pumpkin Pancakes 

Ingredients (4 medium-sized pancakes):

  • 1/2 cup pumpkin purée (or use butternut squash)
  • 1 cup your favorite pancake mix (we use Krusteaz buttermilk mix, which we buy in bulk at Costco)
  • approximately 3/4 cup cold water
  • 2 tbsp light olive oil
  • 1 – 2 tbsp butter
  • a healthy dash of nutmeg
  • a healthy dash of ginger
  • 1/4 tsp cinnamon

Directions:

  1. Place purée and pancake mix in a small bowl or large measuring cup. Add cold water and stir. Mixture should be thick but pourable. Do not overstir. Batter should have lumps. This ensures for better rising pancakes.
  2. Meanwhile, heat a griddle or large frying pan over medium heat. Place the olive oil and butter onto the griddle. When oil is hot enough to sizzle when a small drop of batter is added, it’s ready. Pour batter onto the griddle in 4 separate portions and reduce heat to medium-low.
  3. When the surface of the pancakes have formed bubbles and the bottoms are golden brown, turn them over with a spatula.
  4. Reduce heat further, if necessary, and continue cooking pancakes till golden brown.

Once the griddle or pan is hot and the batter has been poured, reducing the heat will allow the pancakes to rise better. A fairly thick, heavy griddle or pan works best.

See also:

Big, Fluffy Blueberry One-Pan Pancakes

Smoked Salmon with Soy Sauce and Brown Sugar Brine

Maple Pecan Pumpkin Pie

Pumpkin and Pecan Pies

Fluffy Hamburger Buns

Fluffy Hamburger Buns_n

Tempting to eat straight from the oven, these soft rolls are perfect for any savory filling. The dough can be shaped to accommodate big burgers, sliders, or even hot dogs. Most recently, we enjoyed them with barbecued turkey sandwiches made from Christmas dinner leftovers.

I first made these soft and delicious buns to go with Jack’s Bison Sloppy Joes with Roasted Bell Peppers.  They came out perfectly soft and fluffy with no trace of doughiness. I’ve since made variations by adding dried onions into the dough as well as different toppings, such as sesame seeds. This recipe is now the go-to recipe for buns in our home.

Perfect Hamburger Buns

Ingredients

  • 1 cup warm water
  • 2 tbsp extra light olive oil
  • 2 cups all purpose flour
  • 1 tbsp granulated sugar
  • 3/4 tsp salt
  • 2  1/4 tsp yeast

Directions

  1. Place all the dough ingredients into the bread machine pan in the order recommended by the manufacturer.
  2. Set machine to dough setting. Start machine.
  3. Line a baking sheet with parchment paper.
  4. Turn finished dough onto a lightly oiled work surface.
  5. Knead for 2 – 3 minutes.
  6. Cut dough into 8 equal pieces.
  7. Take each piece and roll into ball using cupped hands.
  8. Place dough balls onto baking sheet.
  9. Flatten each dough ball into bun-size and shape. Dough balls should be about an inch thick.
  10. Cover with a cloth and let dough rise for 30 minutes.
  11. Preheat oven to 350 degrees F.
  12. Bake rolls for 12 minutes, or until tops are golden.
  13. Cool on wire rack before slicing.

Adapted from Allrecipes.com.

Winter Sunshine – Honey Almond Cherry Nougat

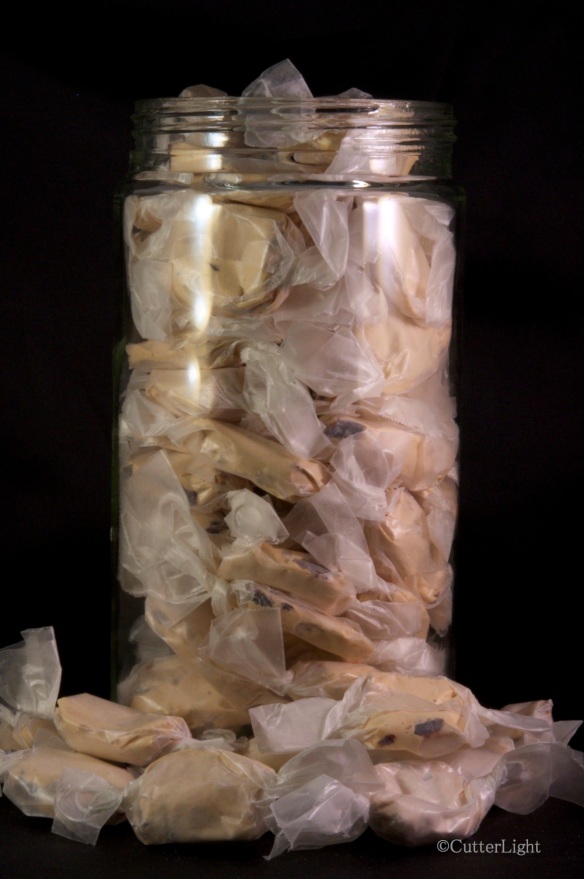
Honey Almond Cherry Nougat_n

Chewy honey-flavored candy flecked with bits of cherries and almonds provides for fun in the kitchen and tasty results.

Locked in the heart of winter, it’s dark most of the day north of the Arctic Circle. Cold, too. And if the dark and cold don’t make you want to stay inside with a good book or movie, the infamous Point Hope wind will. (It’s 9° F and blowing 40 miles an hour for a windchill of about -20° F as I write this – and that’s not particularly cold for this time of year.) Some people suffer from the lack of sunshine up here. Our kitchen is our winter sunshine. It fills our home with warmth, good smells, and lots of entertainment. Today’s entertainment – honey almond cherry nougat.

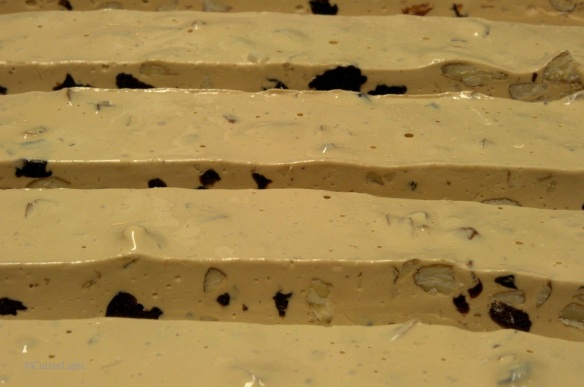
Honey Almond Cherry Nougat pre-cut_n

Ready to be cut and wrapped into bite-size candies.

These reminded us of the Bit O Honey candies that we both loved as kids – although they were agreeably softer and more complex in flavor.

Honey Almond Cherry Nougat

Ingredients

  • 2 cups granulated sugar
  • 1  1/2 cups honey
  • pinch salt
  • 1/4 cup water
  • 2 egg whites
  • 2 sticks butter, at room temperature
  • 1 cup chopped almonds
  • 1 cup chopped dried cherries

Directions

  1. Combine sugar, honey, salt and water in a medium saucepan.
  2. Stir over medium heat until sugar is dissolved.
  3. Continue cooking without stirring until sugar reaches hard ball stage (250 degrees F).
  4. Place egg whites in a stand mixer bowl. Fit mixer with whisk attachment. Whip egg whites until they are stiff.
  5. While mixer is running, very slowly pour 1/4 of hot sugar mixture into whipped egg whites. Continue mixing until egg whites hold their shape.
  6. Return saucepan to stovetop with the remaining hot sugar mixture and continue cooking until mixture reaches hard crack stage (300 degrees F).
  7. Turn stand mixer on again. Pour remaining sugar mixture into egg mixture in a slow stream. Continue mixing until egg white mixture holds it shape.
  8. Add butter, one tablespoon at a time, and continue mixing. Mixture should look thick and satiny.
  9. Turn off mixer and fold in almonds and cherries.
  10. Pour mixture onto a buttered baking sheet. Let stand until totally cooled.
  11. Turn out cooled mixture onto cutting board. I coated mine with rice flour.
  12. Cut into 1 x 1.5 inch pieces and wrap in waxed paper.

Recipe adapted from foodnetwork.com.

Light, Crunchy Pecan Pralines

Pecan Pralines_n

A yummy homemade gift or a favorite snack – either way, these pralines are easy to make and great to have around.

There is something particularly satisfying about making candy. Put the right ingredients together, add the right amount of heat, and suddenly chemistry takes over and a pot of nondescript stuff is transformed into an irresistible confection. It is magical. The process is especially satisfying when the creation results in “wow” or “amazing” accompanied by smiles from those who get to taste the samples. These Pecan Pralines will do just that. The following recipe, which uses sour cream, results in pralines that are especially light and crunchy.

Pecan Pralines

Ingredients

  • 1  1/2 cups pecan halves
  • 2 tbsp unsalted butter
  • 1/2 cup granulated sugar
  • 1/2 cup brown sugar
  • 1/2 tsp coarse salt
  • 1/4 cup sour cream
  • 1  1/2 tsp vanilla extract

Directions

  1. Pan toast pecans by continuously stirring nuts over medium heat for 3 minutes. They should start to emit a toasted scent and be barely browned. Remove from heat and set aside.
  2. Line a baking sheet with parchment paper. Set aside.
  3. Melt butter in a medium saucepan over low heat.
  4. Stir in sugars, salt, and sour cream.
  5. Increase heat to medium-low. Whisk ingredients until sugars have melted.
  6. Increase to medium high. Stir frequently until mixture reaches 240 degrees F.
  7. Remove from heat and stir in vanilla.
  8. Let mixture cool for 2 minutes, then stir in pecans until they are fully coated.
  9. Drop spoonfuls onto baking sheet.
  10. Let stand until set, about 30 minutes.

Adapted from Southern Sour-Cream Pralines.