Honey Glazed Polar Bear Claws – Grrrr, Grrrr

bear claw n

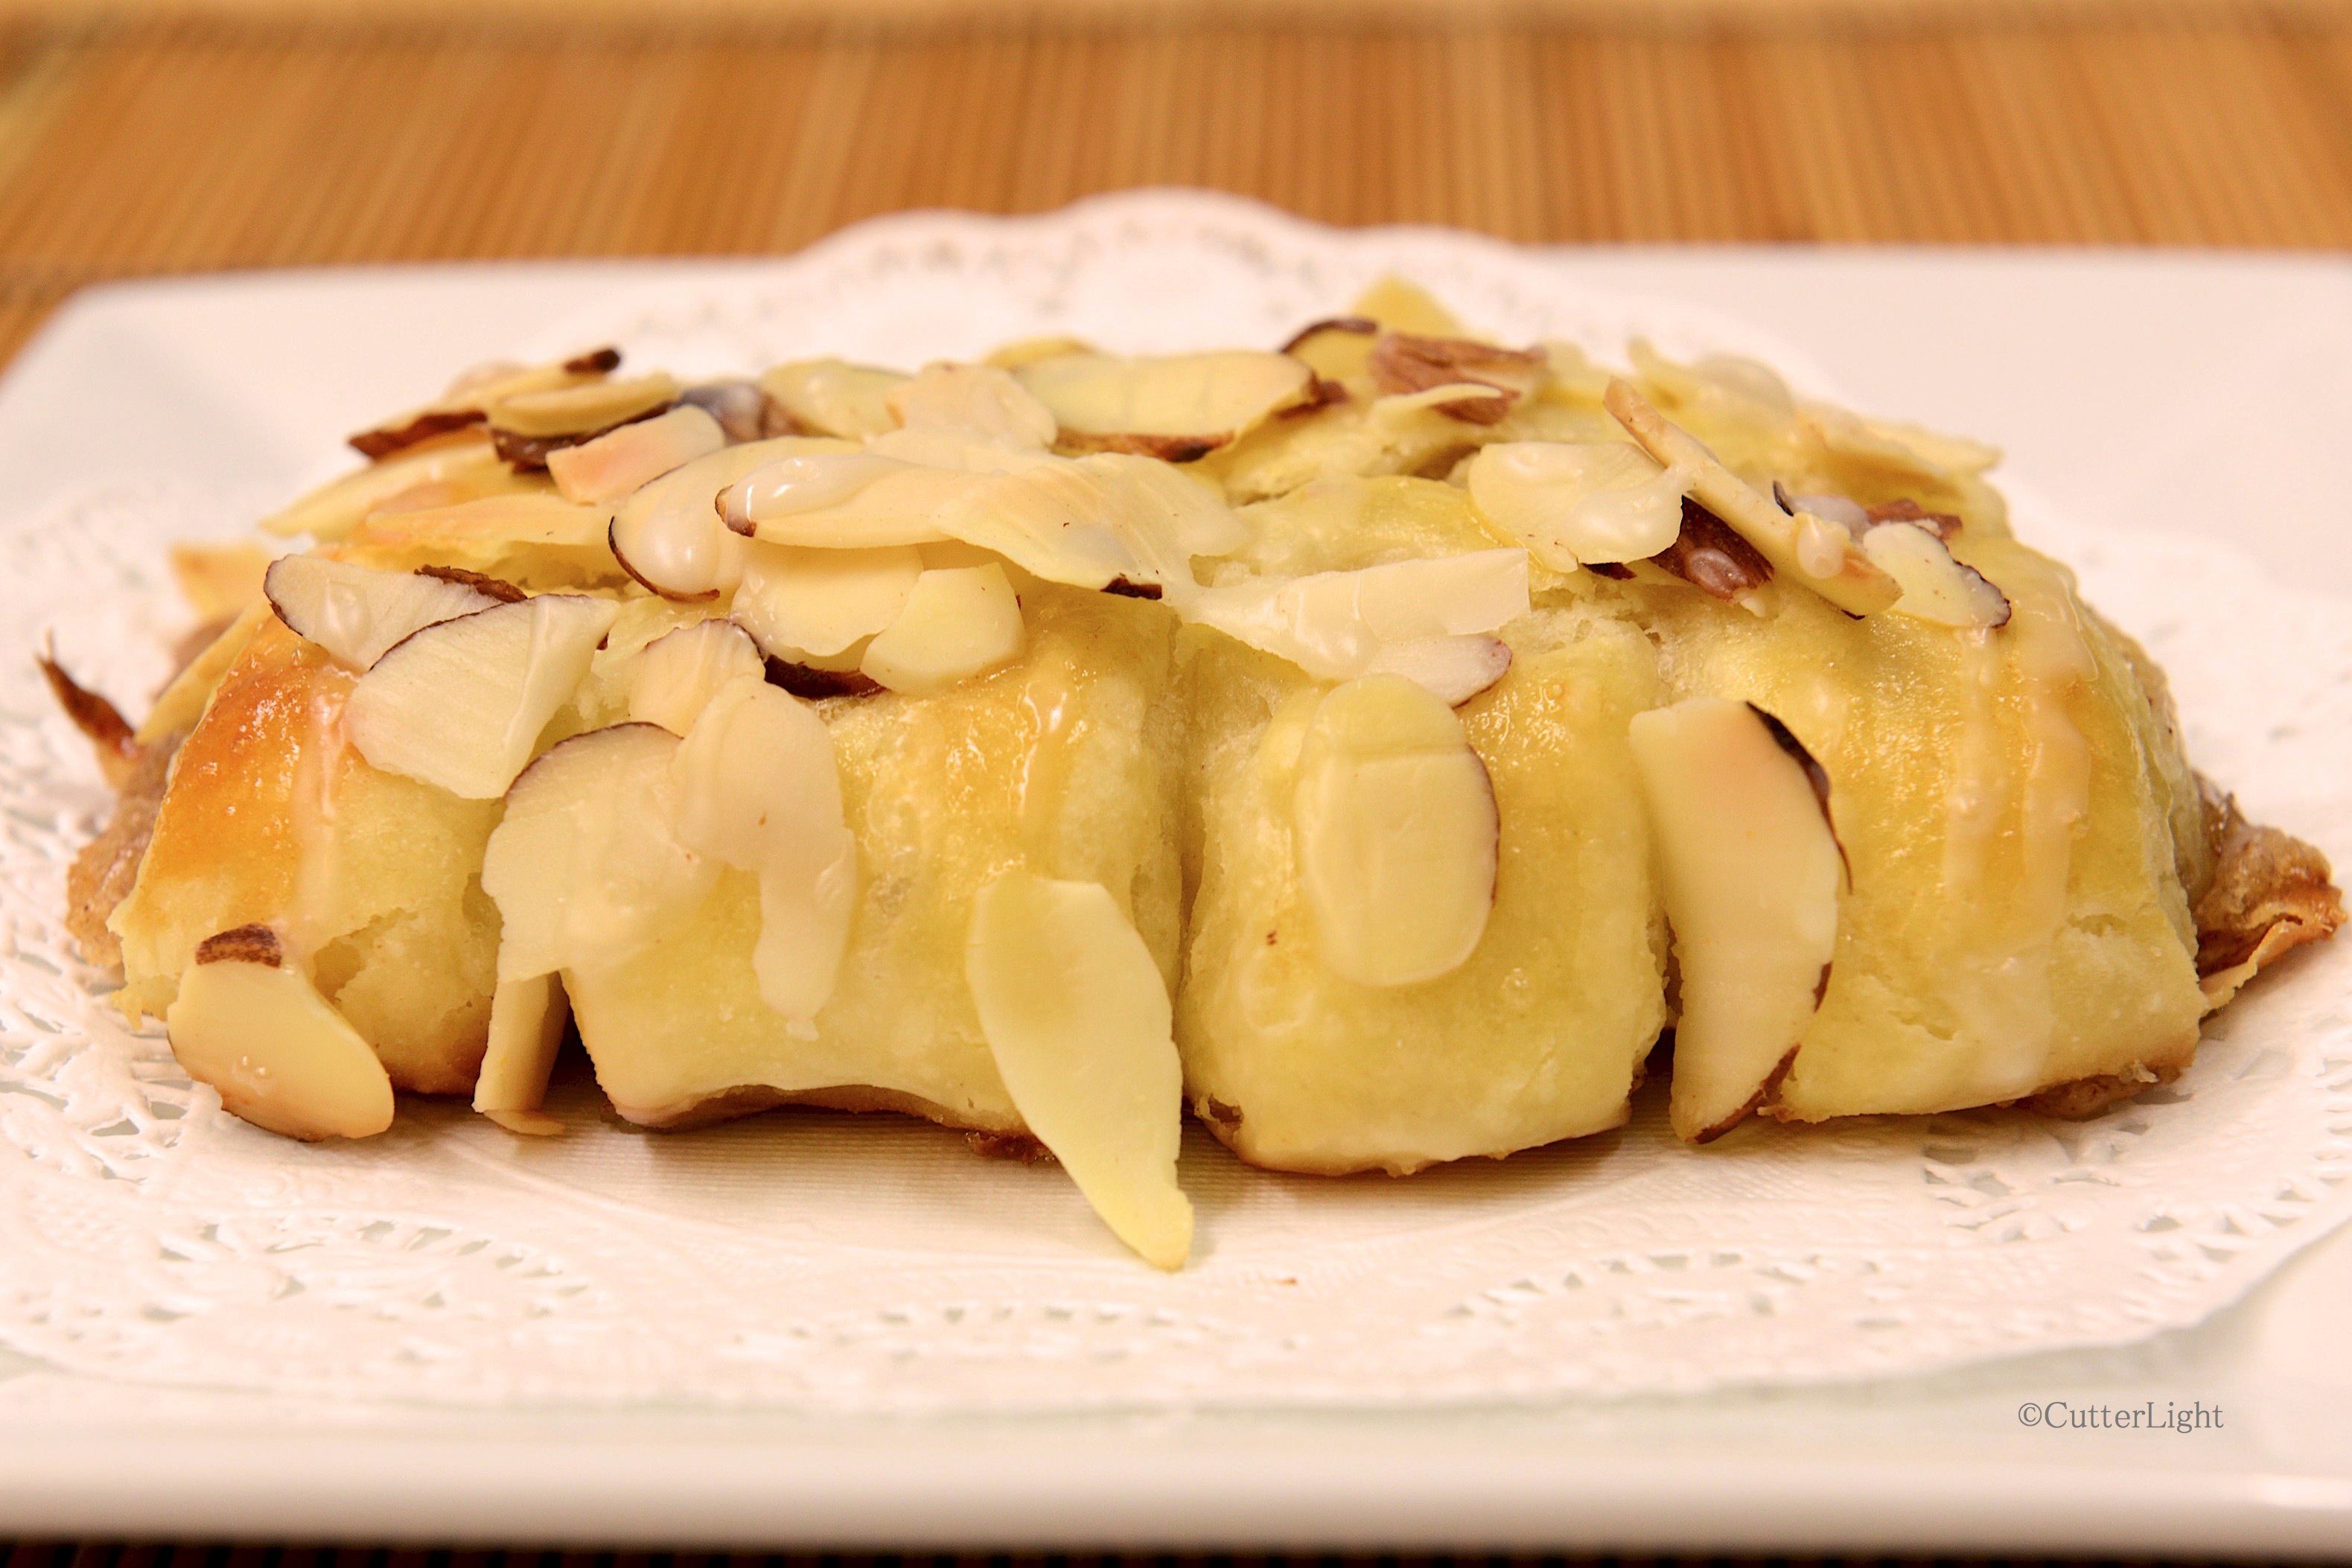
A tempting polar bear claw from our Arctic bakery. No bears were harmed in the making of this pastry!

Topping my baking to-do list this winter were bear claws. There is something about the sweet almond filling that makes these a mainstay of bakery shops – or perhaps it’s their cool name. Jack and I usually pass on these confections because most bakeries prepare them with an overload of sweetness. In researching recipes, I found a plethora of styles, from giant grizzly-sized pastries smothered in sliced nuts to tiny paws with a perfectly manicured almond on the end of each claw, and everything in between.

The recipe I settled on took a bit of time and effort. I wanted a medium-sized confection that emphasized not sweetness but almond flavor.The resulting pastry was superb – a little lighter than standard bakeshop fare and with a nicely balanced taste of almond.

Polar Bear Claws

Ingredients

Dough:

  • 1 3/4 cups all purpose flour
  • 3/4 cup unsalted butter, cold
  • 1/4 cup warm water (105 – 115 degrees F)
  • 2 1/4 tsp yeast
  • 1/4 cup heavy whipping cream
  • pinch salt
  • 1 egg
  • 1/8 cup sugar
  1. Place flour and butter in a medium bowl. Mix together using a pastry blender until well blended and butter pieces are no larger than kidney beans.
  2. In a large bowl, dissolve yeast in warm water. Let stand 5 minutes.
  3. Stir cream, salt, egg, and sugar into yeast mixture.
  4. Pour flour mixture into cream mixture. Stir with a rubber spatula until ingredients are just moistened.
  5. Place dough in plastic wrap and chill overnight in the refrigerator.
  6. Turn dough out onto lightly floured surface. Dust dough with flour. Roll out dough to 14 x 18 inch rectangle. Fold into thirds, making three layers. Roll out again. Fold into thirds once more and place back into refrigerator while you make the filling.

Filling:

  • 1 egg white
  • 1/2 cup almond paste
  • 1/4 cup confectioners sugar
  • 1 tsp cinnamon
  1. Add all filling ingredients to bowl of a stand mixer. Mix on medium speed until all ingredients are well mixed and filling is smooth.

Assembling the pastries:

  1. On a lightly floured surface, roll the chilled dough to a 12 x 16 inch rectangle.
  2. Cut the dough in half, length-wise.
  3. Spread half of the filling down the middle of one piece of dough. Repeat with other piece of dough.
  4. Roll each dough rectangle jelly-roll style from the long side.
  5. Tuck seam under roll.
  6. Cut each long roll into 5 pieces.
  7. Cut three slits into each piece to make the toes.
  8. Place each pastry on a parchment-lined baking sheet, curving them slightly (to spread the toes).
  9. Allow pastries to rise in a warm place for about 20 minutes. They should puff up.
  10. Preheat oven to 400 degrees F.
  11. Brush each pastry with beaten egg.
  12. Generously sprinkle pastries with sliced almonds.
  13. Bake 12 minutes. Pastries should be lightly browned.
  14. Let cool slightly on wire rack. Drizzle with honey glaze.

Glaze:

  • 1/2 cup confectioners sugar
  • 1 tbsp honey
  • 1 tbsp milk
  1. Stir together ingredients until smooth. Add more confectioners’ sugar if too thin, or add more milk if too thick.  Drizzle over warm pastries.

Cherry Almond Bagels

Cherry almond bagel_n

Laced with the essence of cherry and the crunch of toasted almonds, these bagels were chewy perfection waiting for a favorite schmear, cheese or creamy nut spread .

Every week or so I make a batch of yogurt for our breakfasts. Usually there’s nothing to it: I a bit of the previously made yogurt as the starter for the next batch, and in this way yogurt begets yogurt. And even though I use powdered milk (a blend of whole and nonfat) the flavor is excellent.

The ability to easily whip up a batch of yogurt from powdered milk is handy since our little Native store in the Arctic bush doesn’t stock plain yogurt and since milk goes for about four times what it does in places connected by roads. But last week, something strange happened. The yogurt came out, for lack of a better word, weird. It separated into yogurt and way too much whey. The yogurt tasted fine, but the consistency was off-putting. Always loathe to toss out food, I strained the entire batch through cheesecloth overnight, hoping for yogurt cheese. The next morning, we had a taste and agreed it had turned out delicious. So, add another culinary feat to the list: homemade yogurt cheese.

At this point, we needed bagels.

This week’s cherry almond bagels were inspired by our desire to spread yogurt cheese onto a bagel leaning slightly more toward sweet than savory. Dried cherries and almond extract seemed like a perfect combination to mix into the bagel dough. A 20 minute baking time is just right to toast the almond slices which added a very satisfying crunch to each bite – and no, the almond slices did not crumble off; they adhered quite well and were there till the last bite. These bagels are the sweet counterpart to savory favorites such as onion bagels or “everything” bagels.

Cherry Almond Bagels

Ingredients

  • 1  1/2 cups water
  • 4 tbsp honey
  • 1 tbsp almond extract
  • 4 cups all purpose flour
  • 1 1/2 tsp salt
  • 1 tbsp active dry yeast
  • 1/2 cup dried cherries, chopped
  • 3 quarts boiling water
  • 3 tbsp granulated sugar
  • 1 egg, beaten
  • sliced almonds for topping

Directions

  1. Place first 7 ingredients into bread machine pan in the order recommended by the manufacturer. Select dough setting.
  2. When cycle is complete, turn dough out onto a lightly floured surface and let rest.
  3. Bring 3 quarts of water to a boil. Add 3 tbsp of sugar.
  4. While water is coming to a boil, cut dough into 8 pieces. Roll each piece into a ball. Flatten balls into discs about 1/2 inch thick. Poke a hole in each disc and twirl the disk around your finger to enlarge the hole. Place bagels back on the lightly floured surface to rest until the water boils.
  5. Cover a baking sheet with parchment paper.
  6. Preheat oven to 375 degrees F.
  7. When water is boiling, place bagels in water. Boil for 1 minute, then flip to boil for an additional minute. (I fit 4 bagels at a time in my pot.)
  8. After bagels have boiled, remove them from the water with a slotted spoon or strainer spoon made for frying. Place bagels on a clean, dry towel.
  9. Arrange bagels on baking sheet. Brush tops of bagels with beaten egg. Sprinkle with sliced almonds.
  10. Bake for 20 – 25 minutes, until well browned.

Try bagels 3 ways if you’d rather have a savory version.

Arctic Amaretti

amaretti_nA perfect little cookie – crispy on the outside, chewy and sweet on the inside and accented with the wonderful flavor of almond.

I love to read blogs and look at food photos in order to hone my baking and photography  skills. Time and again, I find myself on David Lebovitz’s blog admiring  his well-staged photographs and interesting recipes. A few days ago, he posted a recipe for Italian almond cookies. I’ve never made these, but have fond memories of snacking on these delicious, crunchy treats straight out of the red tin from Cost Plus. The commercially sold cookies had a bit of a chewiness inside and a nice crunch on the outside and I  loved the almond flavor.

When I saw David’s post, I put it at the top of my “must bake” list, in spite of the fact I had neither the almond flour nor apricot jam his recipe called for. Nonetheless, the credit for the basic recipe goes to David. His idea of using jam to enhance the cookie’s chewiness and moisture is terrific.  But I did adapt the recipe to my pantry, which included swapping regular old apricot jam for fantastic Arctic cloudberry (aqpik) jam. Too good to keep for ourselves, we gave most of the batch to our  hard-working office staff who had them finished before lunch.

Arctic Amaretti

Ingredients

  • 2 cups sliced almonds, ground as fine as you can in a food processor (reserve a few slices to decorate cookies)
  • 2/3 cup granulated sugar
  • 2 egg whites
  • 2 tbsp cloudberry jam (any smooth jam would work)
  • pinch of salt
  • 1/2 tsp almond extract

Directions

  1. Preheat oven to 325 degrees F. Cover two baking sheets with parchment paper. Set aside.
  2. In a large bowl, mix together ground almonds and sugar. A whisk makes this job easy.
  3. In the bowl of a stand mixer, whisk egg whites and salt until they form soft peaks.
  4. Fold beaten eggs into almond mixture.
  5. Fold jam and almond extract into mixture. It’s OK if mixture loses volume.
  6. Mix dough until it forms a smooth ball. You may need to knead it a little with your hands.
  7. With a cookie scoop, scoop out dough balls and set them on parchment-lined baking sheets.
  8. Top cookies with reserved almond slices.
  9. Bake for 25 minutes. Cookies will be a light golden brown when done.
  10. Let cool in pans and transfer to wire racks to finish cooling.
  11. Store at room temperature.

Pecan Persimmon Upside Down Cakes

pecan persimmon upside down_nCrunchy on the outside, moist in the middle, and topped with a mixture of caramel and persimmon, this small batch of individual-sized cakes will warm up a chilly fall afternoon.

Hachiya persimmons can be tannic and astringent, according to Full Circle Farms. After eating two raw with breakfast, Jack and I were not excited about the lingering mouthfeel, a term we’ve adopted from our culinary professors. They were beautiful and tasty on the first encounter, but left an acidic dryness. I thought the process of baking the fruit would retain the delicious flavor and eye appeal, and that by releasing sugars, the acidity might be reduced.  Since we only had one persimmon remaining, I opted for mini-cakes baked in a muffin tin. The result was six perfectly-sized individual cakes with a crunchy texture on the outside, a moist and flavorful inside, and caramel-glazedl baked persimmons on the top.

Pecan Persimmon Upside Down Cakes

Ingredients

  • 6 tbsp unsalted butter, room temperature, divided
  • 1/2 cup brown sugar
  • 6 whole half pecans
  • 1 persimmon, sliced and then quartered
  • 1/2 cup granulated sugar
  • 1/2 tsp vanilla
  • 1 egg
  • 1/4 cup whole milk
  • 3/4 cup all-purpose flour
  • 3/4 tsp baking powder
  • pinch salt
  • generous 1/4 cup chopped pecans

Directions

  1. Grease a six muffin tin (regular sized).
  2. Melt 2 tbsp of butter in a pan over medium heat.
  3. Add brown sugar. Stir until sugar is melted and begins to bubble.
  4. Divide sugar mixture into bottom of muffin tin.
  5. Place a half of a pecan into center of sugar mixture, upside down.
  6. Place sliced persimmon quarters in a circular fashion on top of the sugar and pecan. Set aside.
  7. Preheat oven to 350 degrees F.
  8. Beat 4 tbsp butter and granulated sugar until fluffy.
  9. Add in vanilla. Mix thoroughly.
  10. Mix in egg.
  11. Mix in milk. Continue mixing until fully blended.
  12. Sift together flour, baking powder and salt.
  13. Pour sifted mixture into wet ingredients.
  14. Mix until just blended, do not overmix.
  15. Fold in chopped pecans by hand.
  16. Scoop 1/6 of batter on top of each persimmon layer.
  17. Bake for 25 minutes. Cakes are done when they pull away from sides and an inserted toothpick comes out clean.
  18. Let cool for 5 minutes in baking pan.
  19. Invert cakes to present. Enjoy with mugs of steaming hot tea.

Yam, Goat Cheese and Shallot Tart

yam goat cheese tart_n

The sweetness of yams and sautéed shallots, the creamy tartness of goat cheese, the zip of parmesan, and a sprinkle of thyme make this savory, aromatic tart perfect served as an appetizer, as a light meal, or as a side dish.

Our CSA (Full Circle Farm) sends a regular delivery of fruits and vegetables to our remote home in Arctic Alaska. In addition to the fresh, organic produce, they insert a recipe flyer into each box. Every recipe we’ve tried has been fantastic. And just in time for Thanksgiving, their test kitchen absolutely nailed a savory vegetable tart. Although we used yams, a number of substitutes came to mine as we were enjoying this tart with falling-off-the-bone tender pork ribs that Jack had slow cooked in the oven. Carrots, turnips, and especially parsnips would all work well. We love parsnips!

Yam, Goat Cheese and Shallot Tart

Ingredients

  • 3 tbsp olive oil
  • 1/4 cup shallots, finely chopped
  • 1 1/4 lb yams, peeled and thinly sliced
  • 1 tbsp thyme
  • 3/4 tsp salt
  • 1/2 cup parmesan cheese, freshly grated
  • 1 cup goat cheese, crumbled

Directions

  1. Preheat oven to 400 degrees F.
  2. In a medium pan, heat olive oil over medium-high heat. Add shallots and sauté until soft (about 2-3 minutes). Remove from heat and set aside.
  3. Grease a springform pan.
  4. Place yam slices in overlapping layers, starting at outer edge and spiraling inwards to make one layer.
  5. Sprinkle some of the thyme, shallots, cheeses, salt and pepper.
  6. Repeat process 3 times to create 3 layers.
  7. Cover top of tart with cheese.
  8. Bake until top is golden brown and tart is easily pierced with a fork, about 45 minutes.
  9. Let cool in pan for 10 minutes.
  10. Remove from pan and cut into wedges to serve.

Pesto Pine Nut Bread

pesto bread_n

Pesto gives this bread a subtle tint with basil speckles, the aroma of parmesan and a pleasant pine nut crunch. 

A previous version of this bread I made was really tasty, but I wanted more pizzazz. So I upped the amount of pesto and added additional chopped pine nuts for more flavor and a subtle layer of texture. The mixture went into my Zojirushi bread machine and came out with the desired taste and texture but still light and airy. It was so tempting, half the loaf didn’t survive till the photo shoot!

Pesto Pine Nut Bread Machine Loaf

Ingredients

  • 1 cup water
  • 1/3 cup prepared pesto sauce
  • 3/4 tsp salt
  • 3/4 tsp granulated sugar
  • 1/4 cup whole wheat flour
  • 2 3/4 cups all-purpose flour
  • 2 1/4 tsp dry yeast
  • 1/3 cup chopped pine nuts

Directions

  1. Place ingredients in bread machine in the order recommended by the manufacturer. Start machine.
  2. Remove baked loaf at the end of cycle and cool on a wire rack for at least an hour before slicing.

Really Righteous Rye for Reubens

Rye bread_nWith a golden-brown crust and a soft inside, this flavorful combination of rye flour and caraway seeds is the perfect loaf to be sliced thick for home-made reuben sandwiches. 

One of our favorite sandwiches is an East Coast style reuben with the rye sliced thick and everything piled high. Up here in the Arctic, the only way to get a sandwich like that is to make it ourselves. So, based on several recipes and my own calculations, I created a rye bread recipe for my Zojirushi “dough machine.” After four years of fairly heavy use (we bake all our own breads), this built-like-a-tank bread machine is still going strong. After it had done its magic, I kneaded the dough once more by hand and shaped it into an oval for one last rise.

I gave the dough two quick slashes, brushed it with egg, popped it in the oven and 35 minutes later our kitchen was filled with the delicious aroma of freshly baked rye bread – the final ingredient for our “up-town” Arctic lunch of hot tomato soup and reubens! Our recipe for DIY sauerkraut to follow.

Bread Machine Rye Bread

Ingredients

  • 3 tbsp melted unsalted butter
  • 1 egg
  • 1 cup whole milk
  • 1 tsp extra virgin olive oil
  • 1 1/2 cups all-purpose flour
  • 1 cup rye flour
  • 1 tbsp caraway seeds (a few more for the top)
  • 1 envelope active dry yeast
  • 1 tbsp granulated sugar
  • 1  1/2 tsp salt
  • 1 egg (to brush the top of the loaf)

Directions

  1. Place all items except the last egg in the bread machine in the order recommended by the manufacturer.
  2. Set machine to dough setting.
  3. Start machine.
  4. Remove dough from machine and place onto lightly floured board. Knead dough a few times and shape into ball.
  5. Place dough ball on a parchment-lined baking sheet and cover with a damp cloth. Let rise until almost doubled in size.
  6. Preheat oven to 350 degrees F.
  7. Slash a big X on top of loaf.
  8. Brush loaf with egg and sprinkle a few more caraway seeds on top of loaf.
  9. Bake for 35 minutes. Finished loaf should should have a golden brown crust and sound hollow when tapped.

Lighter than Air: Cream Puffs and Eclairs

cream puffs_n

Friends who share a love of baking and cream-filled pastries dipped in chocolate ganache warmed up a rainy afternoon in our kitchen north of the Arctic Circle.

Perfectly turned out pastry puffs filled with delectable cream and dipped in chocolate ganache are the the stuff of home bakers’ dreams. Cream puffs and eclairs require a special dough called pâte à choux. Worked to exactly the right consistency, this dough bakes up light and flaky and leaves a hollow space in the center of the confection. Although we used traditional vanilla-flavored pastry cream, we also imagined filling these airy profiteroles with fresh whipped cream, homemade ice cream and even savories such as smoked salmon cream.

Making cream puffs and eclairs can’t be rushed. The pâte à choux dough requires time and attention in order to get it to the correct consistency as it cooks on the stove top. Next, it must be carefully piped onto a baking sheet and placed in the oven where it will finish. Creating the pastry cream is fairly easy, and making chocolate ganache is magical.

All that work, and between three bakers, three tasters and steaming mugs of of rooibos almond tea, our eclairs and puffs disappeared in short order.

Pâte à Choux

Ingredients

  • 1/2 cup water
  • 1/2 cup whole milk
  • 1/2 tsp salt
  • 1/2 tsp sugar
  • 4 oz. unsalted butter, softened
  • 1 cup all-purpose flour
  • up to 4 eggs

Directions

  1. Line two baking sheets with parchment paper. Preheat oven to 400 degrees F.
  2. Pour milk and water into medium pan.
  3. Stir in salt and sugar.
  4. Add butter.
  5. Bring mixture to a boil over medium heat.
  6. Take mixture off heat and stir in all the flour. Mixture should look like mashed potatoes.
  7. Return pan to low heat and stir continuously. This will dry out the dough a little.
  8. Dough should come together to form a ball.
  9. Starchy residue at the bottom of the pan is an indicator that the dough is dried out enough.
  10. Take dough off stove and place it in the mixing bowl of a stand mixer. Turn it to low to allow the dough to be cooled off by the mixer.
  11. Mix in eggs one at a time, watching that the dough does not become too thin. The dough should be soft, creamy, and shiny.
  12. Transfer the dough to a piping bag with a large tip.
  13. Pipe ball shapes onto parchment-lined baking sheets, leaving plenty of room for these puffs to double in size.
  14. Bake puffs for 10 minutes.
  15. Turn oven down to 325 degrees F and continue to bake for 15 minutes.
  16. Fill with chilled whipping cream or pastry cream – savory or sweet.

These will freeze nicely.

Lattice Top Apple Pie with Baked-On Cinnamon Sauce

apple pie lattice top n

Cinnamon sauce baked into the lattice-top crust makes this apple pie irresistible. The only debate was whether to enjoy it with a slice of sharp cheddar cheese or a scoop of homemade vanilla bean ice cream. 

Last week’s baking lesson was all about baking with butter: buttery cranberry scones, fluffy butter biscuits, and two kinds of pie – lemon meringue and a lattice-topped apple. After learning how to create the lattice top, which was surprisingly easy, we took a basic apple filling and poured the liquid you would normally mix into the apples over the top of the pie, allowing the flavors to bake into the lattice and surround the apples inside. This apple pie was served hot out of the oven to friends with cinnamon vanilla ice cream as fortification against a chilly day north of the Arctic Circle.

Apple Pie with Baked-on Cinnamon Sauce

Ingredients

  • 5 Granny Smith apples, cored, peeled, and sliced
  • 2 tbsp lemon juice
  • 1/2 cup unsalted butter
  • 3 tbsp all-purpose flour
  • 1/4 cup water
  • 1/2 cup granulated sugar
  • 1/2 cup brown sugar
  • 1 tsp ground cinnamon
  • pastry crust for 9-inch double crust pie

Directions

  1. Preheat oven to 425 degrees F (220 degrees C).
  2. Toss apples in lemon juice. Set aside.
  3. Melt the butter in a saucepan.
  4. Stir in flour to form a paste.
  5. Add water, granulated sugar, brown sugar and cinnamon, and bring to a boil. Reduce temperature and let simmer.
  6. Place the bottom crust in your pan.
  7. Fill with apples, mounded slightly.
  8. Cover with a lattice work crust.
  9. Gently pour the sugar and butter mixture over the crust. Pour slowly so that it does not run off.
  10. Bake 15 minutes in the preheated oven. Reduce the temperature to 350 degrees F (175 degrees C). Continue baking for 35 to 45 minutes, until apples are soft.
  11. Let cool slightly. Serve warm with vanilla ice cream or a slice of sharp cheddar cheese.

Waste Not Want Not Potato Bread

potato bread b n

We don’t normally buy instant mashed potatoes, but when friends offered us a couple packets at the end of their Alaska camping trip last summer, we came up with a good use for them.

The packets of instant mashed red potatoes remained in our pantry for over a year – until the other day when I was thumbing through a friend’s bread machine recipe book and saw that potato bread could be easily made with instant mashed potatoes. Let the experimenting begin!

The potato bread recipes I came across included lard, butter, milk and salt. Since the pre-mixed potato packet already had many of these ingredients, I adjusted the recipe to fit packet at hand. If you make this recipe with plain instant potatoes, I’d recommend the addition of more butter and salt.

Mashed Potato Bread

Ingredients

  • 1 cup instant mashed potatoes
  • 1 tbsp unsalted butter
  • 1 cup milk
  • 1/2 cup water
  • 5 cups all-purpose flour
  • 1 tbsp granulated sugar
  • 1 tbsp yeast

Directions

  1. Rehydrate instant potatoes according to directions.
  2. Mix in butter.
  3. Place potato mixture, milk, water, flour, sugar and yeast into bread machine in the order recommended by the manufacturer. Turn on dough setting.
  4. Turn out dough onto floured surface.
  5. Split dough into two pieces and knead into loaf shapes that will fit into loaf pans.
  6. Bake in oven preheated to 350 degrees F for 30 minutes. Loaves will sound hollow when tapped.