Halibut with Smoked Chipotle Blue Cheese and Pine Nuts

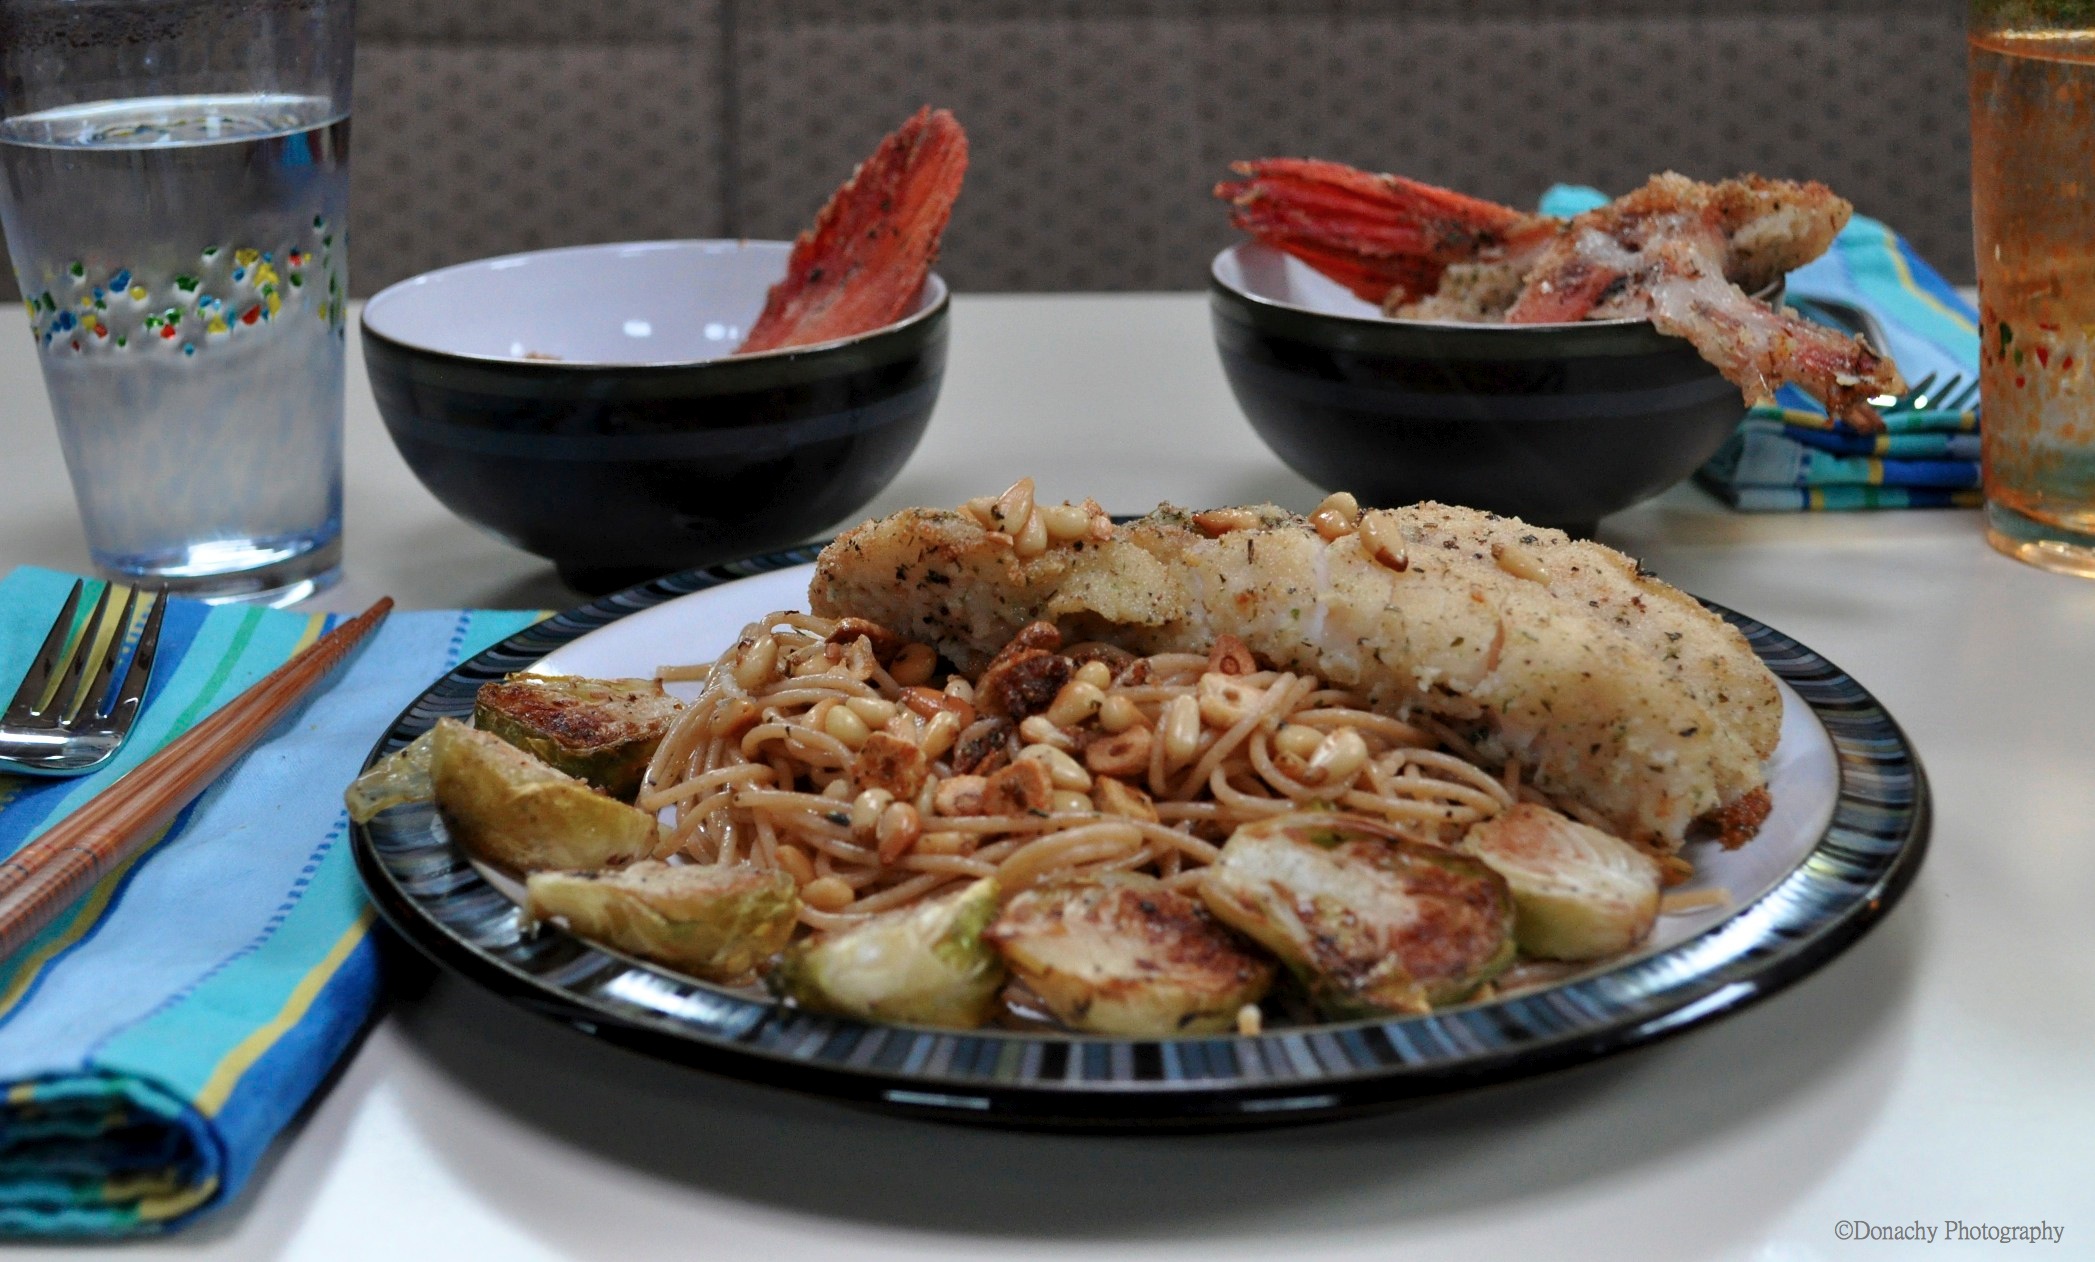
Smothered in a mixture of tangy blue cheese, crunchy pine nuts and fiery, smokey peppers, a fillet of halibut, rockfish, snapper or walleye has no chance when placed in front of hungry diners. Here a fillet of black rockfish is served on a bed of black rice.

This year we brought up several wedges of Rogue Caveman Bleu Cheese to Point Hope. This is good stuff, thick and creamy with complex flavors ranging from smoked bacon and butter to sweet fruit. I’ve been eager to use it in cooking, and last night it made its debut on a thick fillet of perfectly flaky black rockfish – one of our favorite fish. Substitute the more traditional halibut for this bleu cheese recipe, or try it with walleye, snapper, porgy or red drum (redfish). Luck into some nice-sized crappie? This twist on the standard bleu cheese topping is just the ticket.

While cayenne pepper powder alone works fine, the wood-smoked chipotles (available from Penzeys Spices) in the following recipe gave this dish a delectable aroma and flavor. Leaving the seeds in the arbol chili kicked up the heat.

Ingredients (Serves 2 to 4):

  • 1 pound halibut fillet, cut into 2 to 4 pieces
  • 1/2 cup bleu cheese, crumbled
  • 1/3 cup chopped pine nuts (or pecans, almonds or walnuts)
  • 1 whole, dried arbol chili pepper, crushed (or 1/2 tsp cayenne powder)
  • 2 smoked, dried chipotle chili peppers, seeds removed, crushed (or use unsmoked chili peppers)
  • 1 tsp dried tarragon, crushed
  • 1 tsp dried marjoram, crushed
  • a few grind of black pepper
  • 1 tsp sugar
  • 2 cloves garlic, minced
  • 2 tbsp lemon juice
  • 1 tbsp extra virgin olive oil
  • additional olive oil for sautéing the mixture

Directions:

  1. Rinse fillets, pat dry with paper towels and set aside.
  2. Set oven on broil and preheat a broiling pan.
  3. In a non-reactive bowl (glass works well) mix together the bleu cheese, pine nuts, spices, herbs and sugar.
  4. Add some olive oil to a small frying pan and heat over medium-low to low heat. Add bleu cheese & pine nut mixture, stirring and turning until cheese is melted.
  5. Add minced garlic and lemon juice to the mixture, cooking for about 1 minute while combining thoroughly. Remove pan from heat and cover with a lid.
  6. Place fillets on broiling pan. Fillets should sizzle when they touch the pan. Broil for about 5 to 7 minutes, depending on thickness of fish. Fish should just be turning opaque when cooked through.
  7. Cover fillets with bleu cheese mixture and continue to broil for 2 to 3 minutes.
  8. Serve piping hot.

We served the fillets on black rice. It was a coin flip between that or saffron rice. This would pair well with a chilled, slightly sweet Gewürztraminer.

Salt Encrusted Whole Fish Stuffed with Shrimp

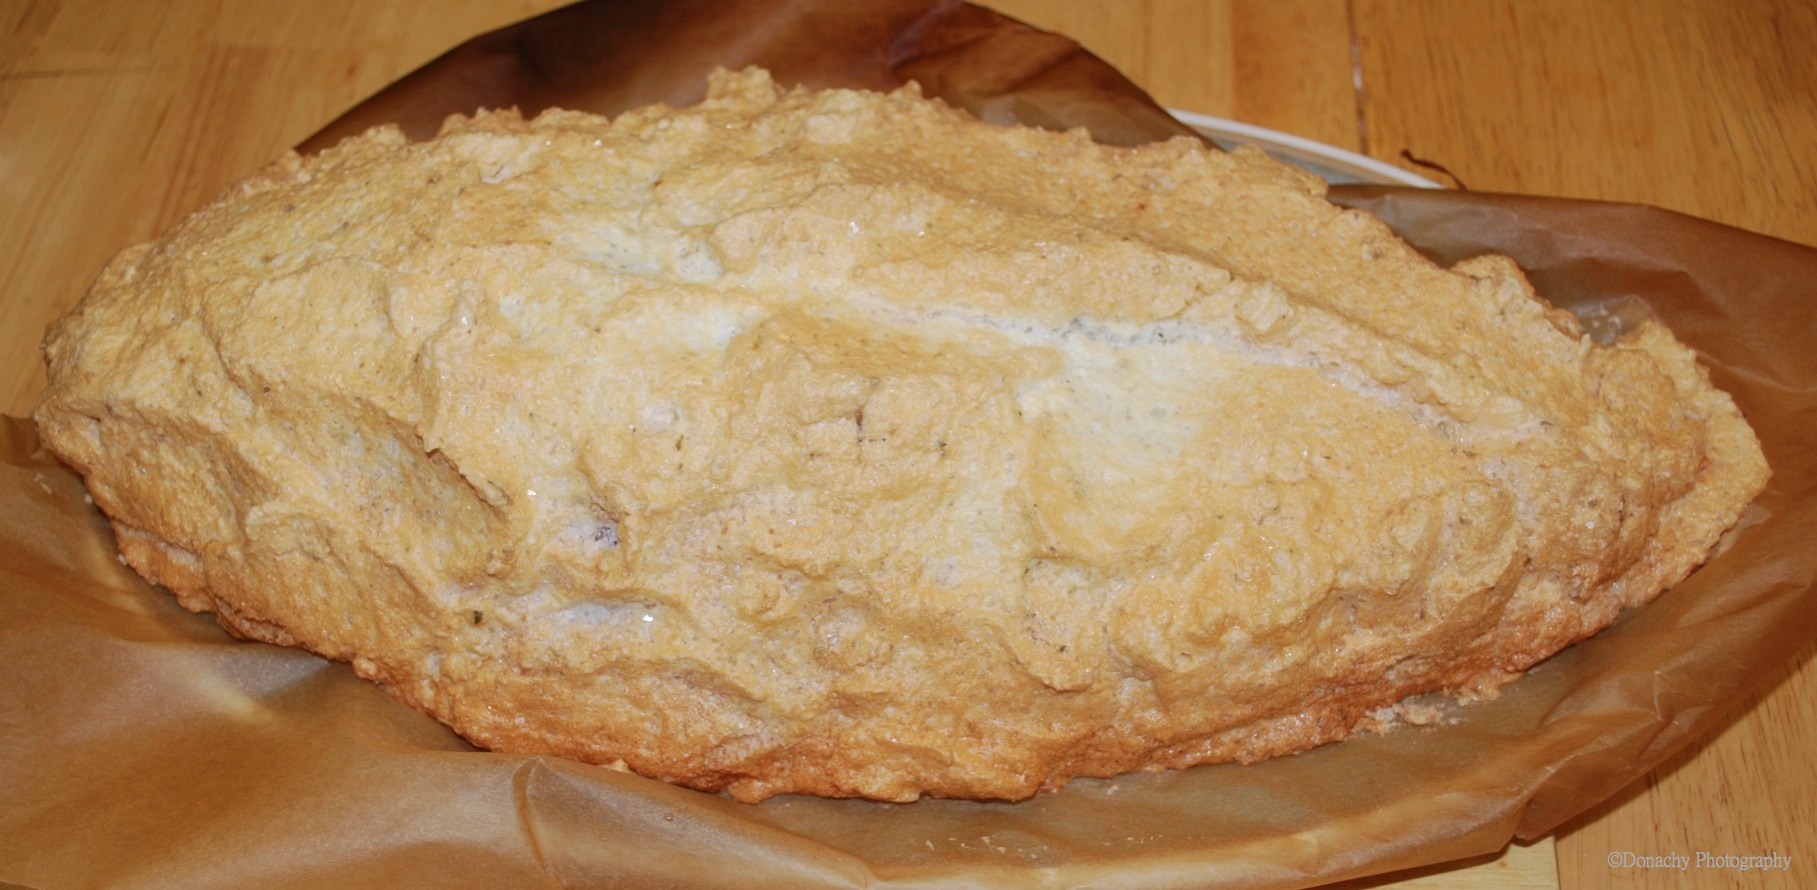
Pesce al Sale – Whole fish baked in a salt crust.

I’d read about this simple yet dramatic presentation for many years, but only got around to trying it when a recipe appeared in the June issue of Field & Stream magazine, which I subscribe to. The basic cooking method is a breeze and could easily be prepared onboard a boat or at camp. It is a show stopper when placed on the dining table, both in terms of the beautiful presentation and in terms of the incredibly moist, flavorful fish that results.

Encased in salt and egg white paste, the fish is ready for the oven.

While I had on hand a two pound yelloweye rockfish (Sebastes ruberrimus) which was perfect for this recipe, there are many fish which would work as well. The first that comes to mind are the true porgies – fish in the genus Pagras and Acanthopagrus. In Britain, these fish are commonly known as sea bream. In Japan, they’re are known as tai, and I would love to place a whole salt-crusted madai or kurodai on the table for Japanese guests, who typically revere these fish. Snapper, walleye, striped bass, pompano, black sea bass and even a firm-fleshed Coho salmon would all work well. A halibut just small enough to fit on a large oven tray and served this way would surely draw oohs and aahs.

About a half an hour later, the fish is ready to serve. 

Keep in mind that the best fish dinners start with the freshest fish possible. Good fish should smell as fresh as the sea they came from. Sadly, most American grocers still haven’t figured this one out, so if you’re having trouble finding good fish, try to locate a Japanese grocery store or an Asian market that sells to Japanese customers. Whole Foods and specialty butcher shops also usually carry quality, fresh fish. Costco, too, sometimes carries whole fish and can generally be depended on for a fresh product.

Voila! The dull side of a knife is used to crack and remove the crust, revealing a succulent fish that wants only a drizzle of olive oil and a squirt of lemon.

Figure about one pound of cleaned, gutted whole fish for every two diners. Thus, a two-pound fish will serve four.

Salt-Crusted Whole Fish with Shrimp

Ingredients: Serves 4

All you really need are the first four ingredients. The others are optional and can be omitted entirely or substituted freely.

  • One 2-pound (.9 kilogram) fish, scaled, gilled and gutted but otherwise left whole
  • 4 egg whites
  • 2 cups sea salt
  • a good-tasting extra virgin olive oil
  • parchment paper and baking sheet or baking platter
  • lemon wedges (preferably from Meyer lemons)
  • 1/4 pound shrimp, peeled (optional)
  • tarragon – either 1 or 2 sprigs fresh or 1 tsp dried & crushed (optional)
  • 1 tsp dried marjoram (optional)
  • 1 or 2 bay leaves, crushed (optional)
  • freshly ground pepper (optional)
  • additional sea salt (optional)

Directions:

  1. Line a baking sheet or platter with parchment paper.
  2. Preheat oven to 450 degrees F. (232 degrees Celsius)
  3. Use paper towels to pat the fish dry. Use a brush (a clean tooth brush works well) to remove all traces of viscera from the stomach and head cavity. Rub cavity with salt, pepper and crushed tarragon, if desired, or place a sprig or two of fresh tarragon in the cavity. Stuff with the shrimp. Set fish aside.
  4. Whip the egg whites until they from stiff peaks.
  5. Gently fold the salt (and the crushed bay leaves and marjoram, if desired) into the egg whites until a paste is formed.
  6. Spread about 1/3 of the salt paste on the parchment paper in a shape large enough to hold the entire fish.
  7. Place the fish on the salt paste and completely cover with remaining salt paste.
  8. Bake for 25 minutes. Turn oven off and continue baking for five minutes. Remove fish from oven, place on dining table and allow it to rest for another 5 to 10 minutes.
  9. Remove crust by cracking it open with the dull side of a knife. The crust can be lifted off with a spatula, large spoon or wide knife blade. The top layer of the fish will easily lift away from the bones.
  10. Serve with lemon wedges and drizzles of extra virgin olive oil.

We served the fish with oven-roasted potatoes and steamed vegetables. This dish would be fun with Margaritas.

Chocolate Drizzled Orange Marmalade Cookies

Our trip back to Point Hope, Alaska, went like clockwork – Swiss clockwork at that. The taxi driver arrived at our storage unit (where we’d spent the night in our camper) ten minutes early and was driving a van which easily held our eight coolers loaded with this summer’s catch. Traveling with eight coolers always fills me with a bit of trepidation; you can imagine the “what if” scenarios that run through our heads for this trip. So we plan for the worst and hope for the best.

Up in Point Hope, our big freezer is now stocked for the year while we wait for about a thousand pounds of dry goods we carefully packed and mailed to arrive via the U.S. Postal service.

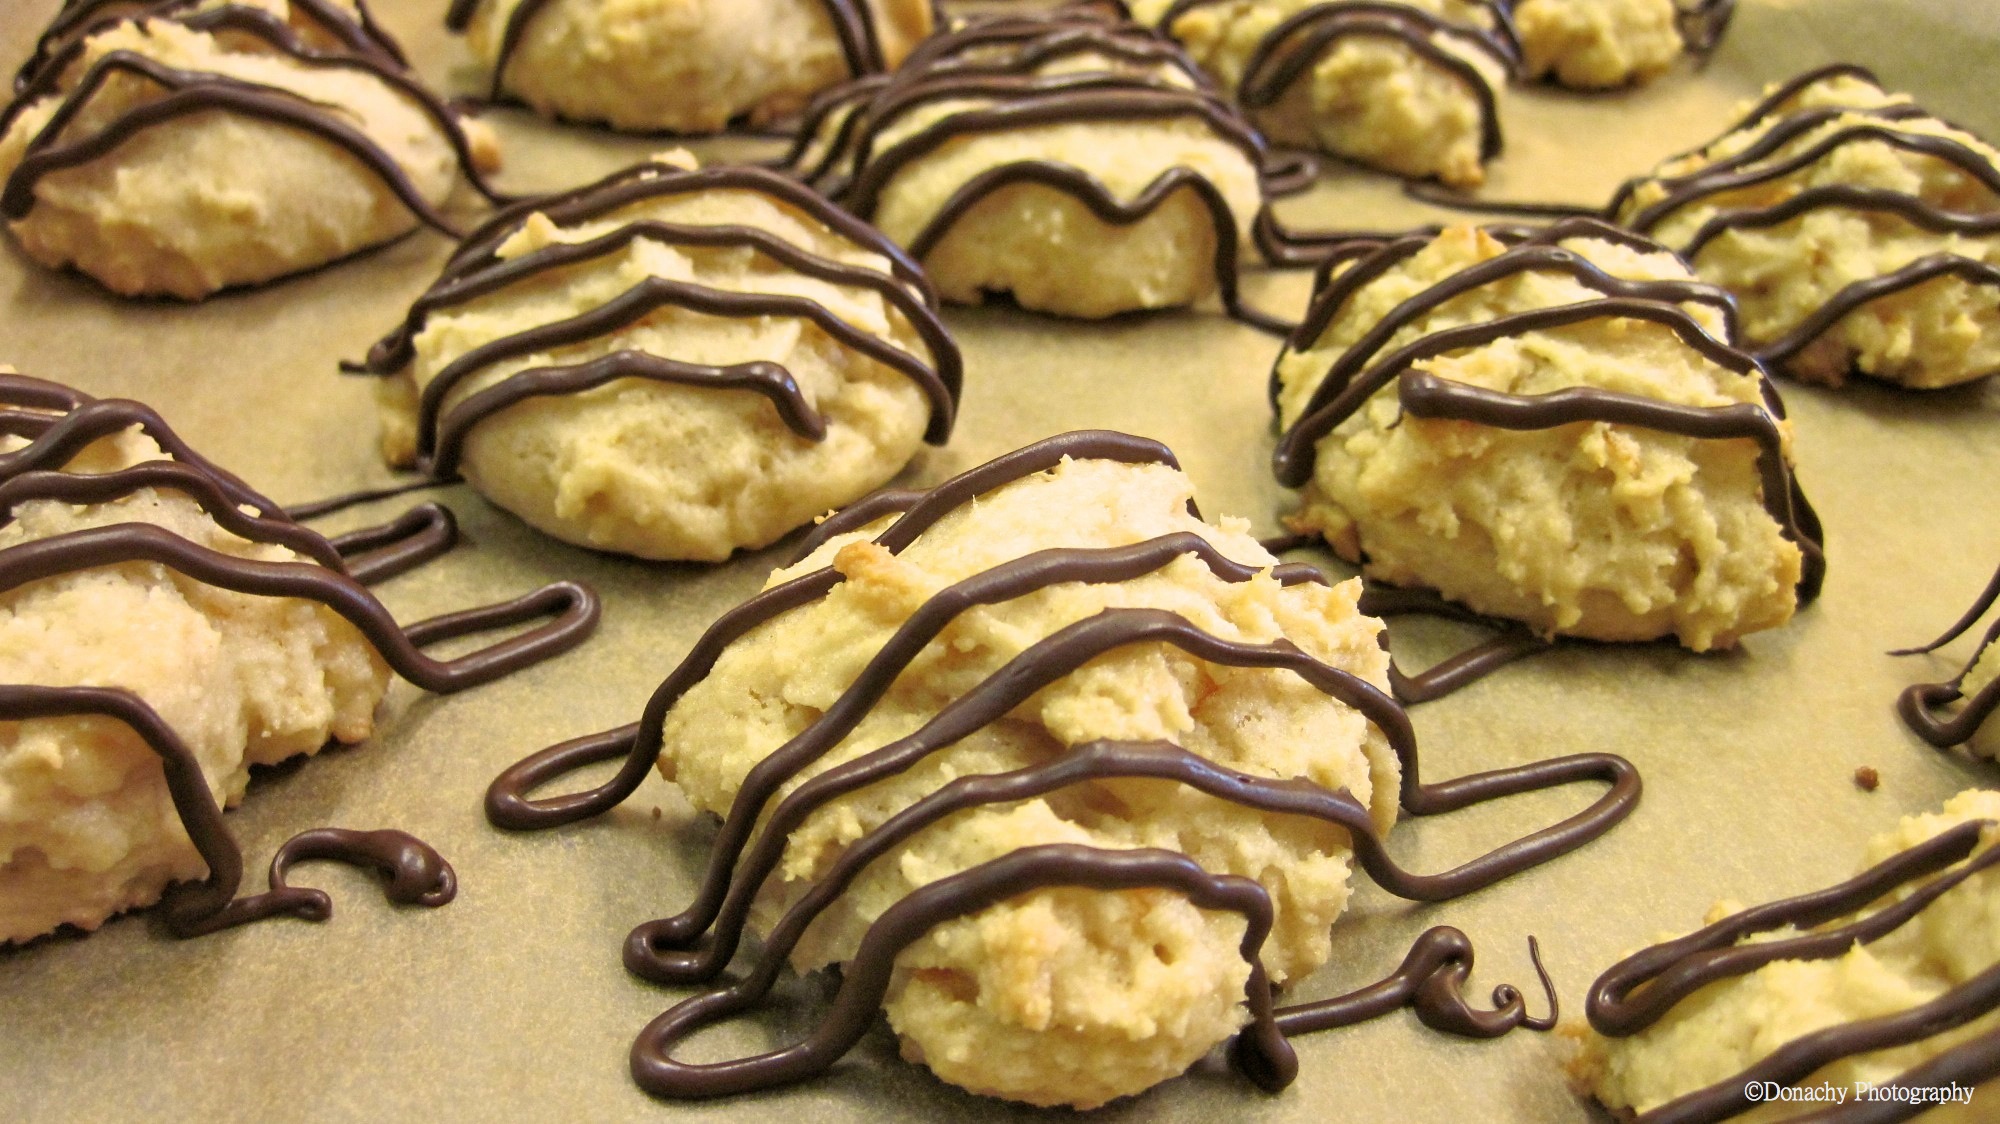
“Waiting” is not something I enjoy. “Doing” is much more fun. After finding a half of a jar of marmalade in the refrigerator, I decided conducting a cookie experiment would be much more fun than sitting around waiting for groceries to arrive. The results? Orange-flavored cookies. The chocolate added a layer of flavor that complimented the orange tang.

Orange Marmalade Cookies (makes 3 dozen)

Ingredients

  • 2/3 cup unsalted butter, softened
  • 1 cup granulated sugar
  • 1/2 cup unsweetened applesauce (can substitute with 2 eggs)
  • 12 tbsp orange marmalade
  • 3 cups all purpose flour
  • 3 tsp baking powder

Directions

  1. Preheat oven to 375 degrees F. Line cookie sheets with parchment paper.
  2. In a large mixing bowl, cream together butter and sugar.
  3. Add applesauce and marmalade and mix thoroughly.
  4. In a separate bowl, sift together flour and baking powder.
  5. Mix in flour mixture to butter mixture until just blended.
  6. Drop dough by tablespoons onto parchment-covered cookie sheets. Leave at least one inch between cookies.
  7. Bake until cookies spread slightly and are lightly browned (about 10 minutes).
  8. Cool cookies completely on wire rack.
  9. Drizzle with melted chocolate, if desired. (I used semi-sweet chocolate chips.)

Portabella Cap Stuffed with Yelloweye Rockfish

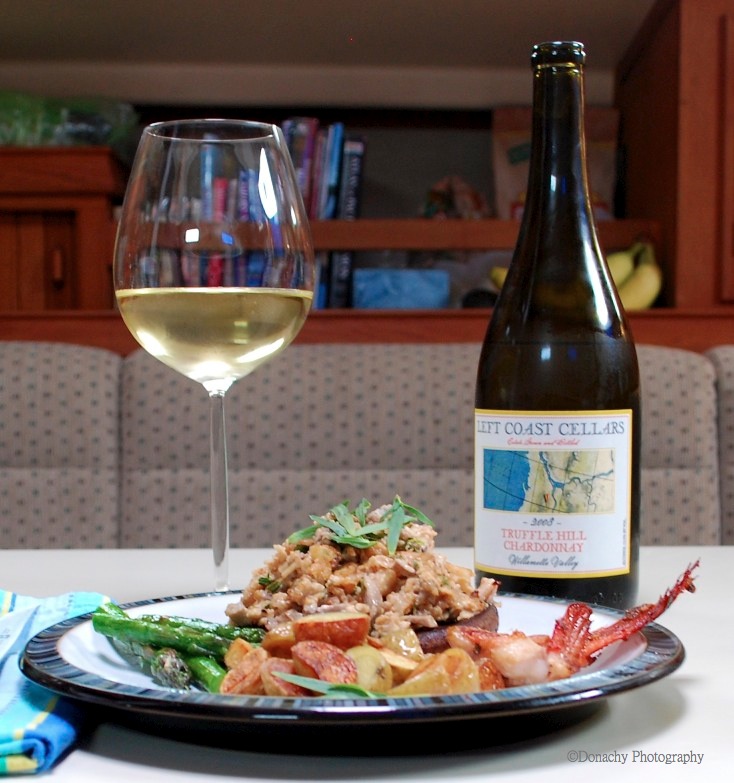
This summer’s fishing has brought us riches of our one of our favorite species, Sebastes ruberrimus, yelloweye rockfish. The collar meat of yelloweye, especially the smaller two to five pound fish, has a lobster-like texture and taste that we’ve enjoyed experimenting with and have even served as one would lobster with drawn butter. In this creation, we combined yelloweye with another favorite, Portabella mushroom caps, and paired it with a Willamette Valley Chardonnay for one of the easiest and best meals of the summer.

Ingredients for two servings:

  • ½ pound collar meat from yelloweye rockfish, chopped into small pieces. (Substitute similar fish such as red snapper, red porgy, striped bass or walleye)
  • 2 portabella mushroom caps, stems removed
  • 2 portabella mushroom stems (from above), chopped coarse
  • egg whites from 2 eggs
  • 2 or 3 cloves garlic, chopped fine, divided into equal parts
  • ½ cup rice crackers (sesame flavor is good) crumbled fairly fine
  • 2 tsp soy sauce, separated into 1 tsp each
  • 1 tbsp grated parmesan cheese
  • 2 tsp finely chopped tarragon
  • freshly ground black pepper
  • 2 tablespoons sherry
  • olive oil

Directions:

  1. Add enough olive oil to cover the bottom of a frying pan large enough to hold the 2 mushroom caps and heat over medium low heat.
  2. Add the mushrooms, gill side up, and cook for about 5 minutes.
  3. Add 1 tsp soy sauce and half the garlic. Turn the caps and move around so the gills absorb the soy sauce. Cook until mushroom is tender.
  4. Meanwhile, combine yelloweye meat, crackers, parmesan, tarragon, egg whites, chopped portabella stems, a healthy dollop of olive oil, a few grinds of pepper and the remaining garlic and soy sauce in a bowl, mixing ingredients together.
  5. Heat a frying pan over medium-high to high heat (you want enough heat to drive off moisture), add olive oil to cover the bottom, and add the yelloweye mixture, stirring frequently for about two minutes. Add sherry and continue cooking until browned, stirring frequently. Avoid overcooking.
  6. Place cooked yelloweye mixture on sautéed mushroom caps, garnish with a few tarragon leaves, (or, nori, or, better still, a shiso leaf, if available)

We served this dish with home fried potatoes, asparagus sautéed in butter and lemon, and a creamy Chardonnay with touch of oak, toasted almonds, and hints of fall fruit.

Afternoon Delight – Strawberries and Zabaglione

Cold, windy, rainy days are perfect days for making something special. This bowl of Strawberries and Zabaglione created with egg yolks, sugar and port wine took only about 15 minutes to prepare – and about two minutes to make disappear.

Some days on Resurrection Bay, glorious sunshine and turquoise waters allow us to imagine we are in the Bahamas rather than Alaska. But this afternoon’s dark skies, white-capped waters and steady drum of cold rain made it a good day to keep the companionway hatch closed and remain cozily tucked into our sailboat with a warm fire in our Dickinson fireplace.

With a few simple ingredients, I whipped up a lovely afternoon snack which had just enough warmth to it to keep the chill outside at bay.

Ingredients

  • 4 egg yolks
  • 4 tsp sugar
  • 4 tbsp port wine

Directions

  1. Whisk all ingredients together over a double boiler until it is not quite as thick as pudding.
  2. Serve immediately over berries. Top with sliced almonds or a spring of fresh mint.

Five Layer Port Berry Tart – Enjoying Summer Berries and Living Larger (if you’re not careful)

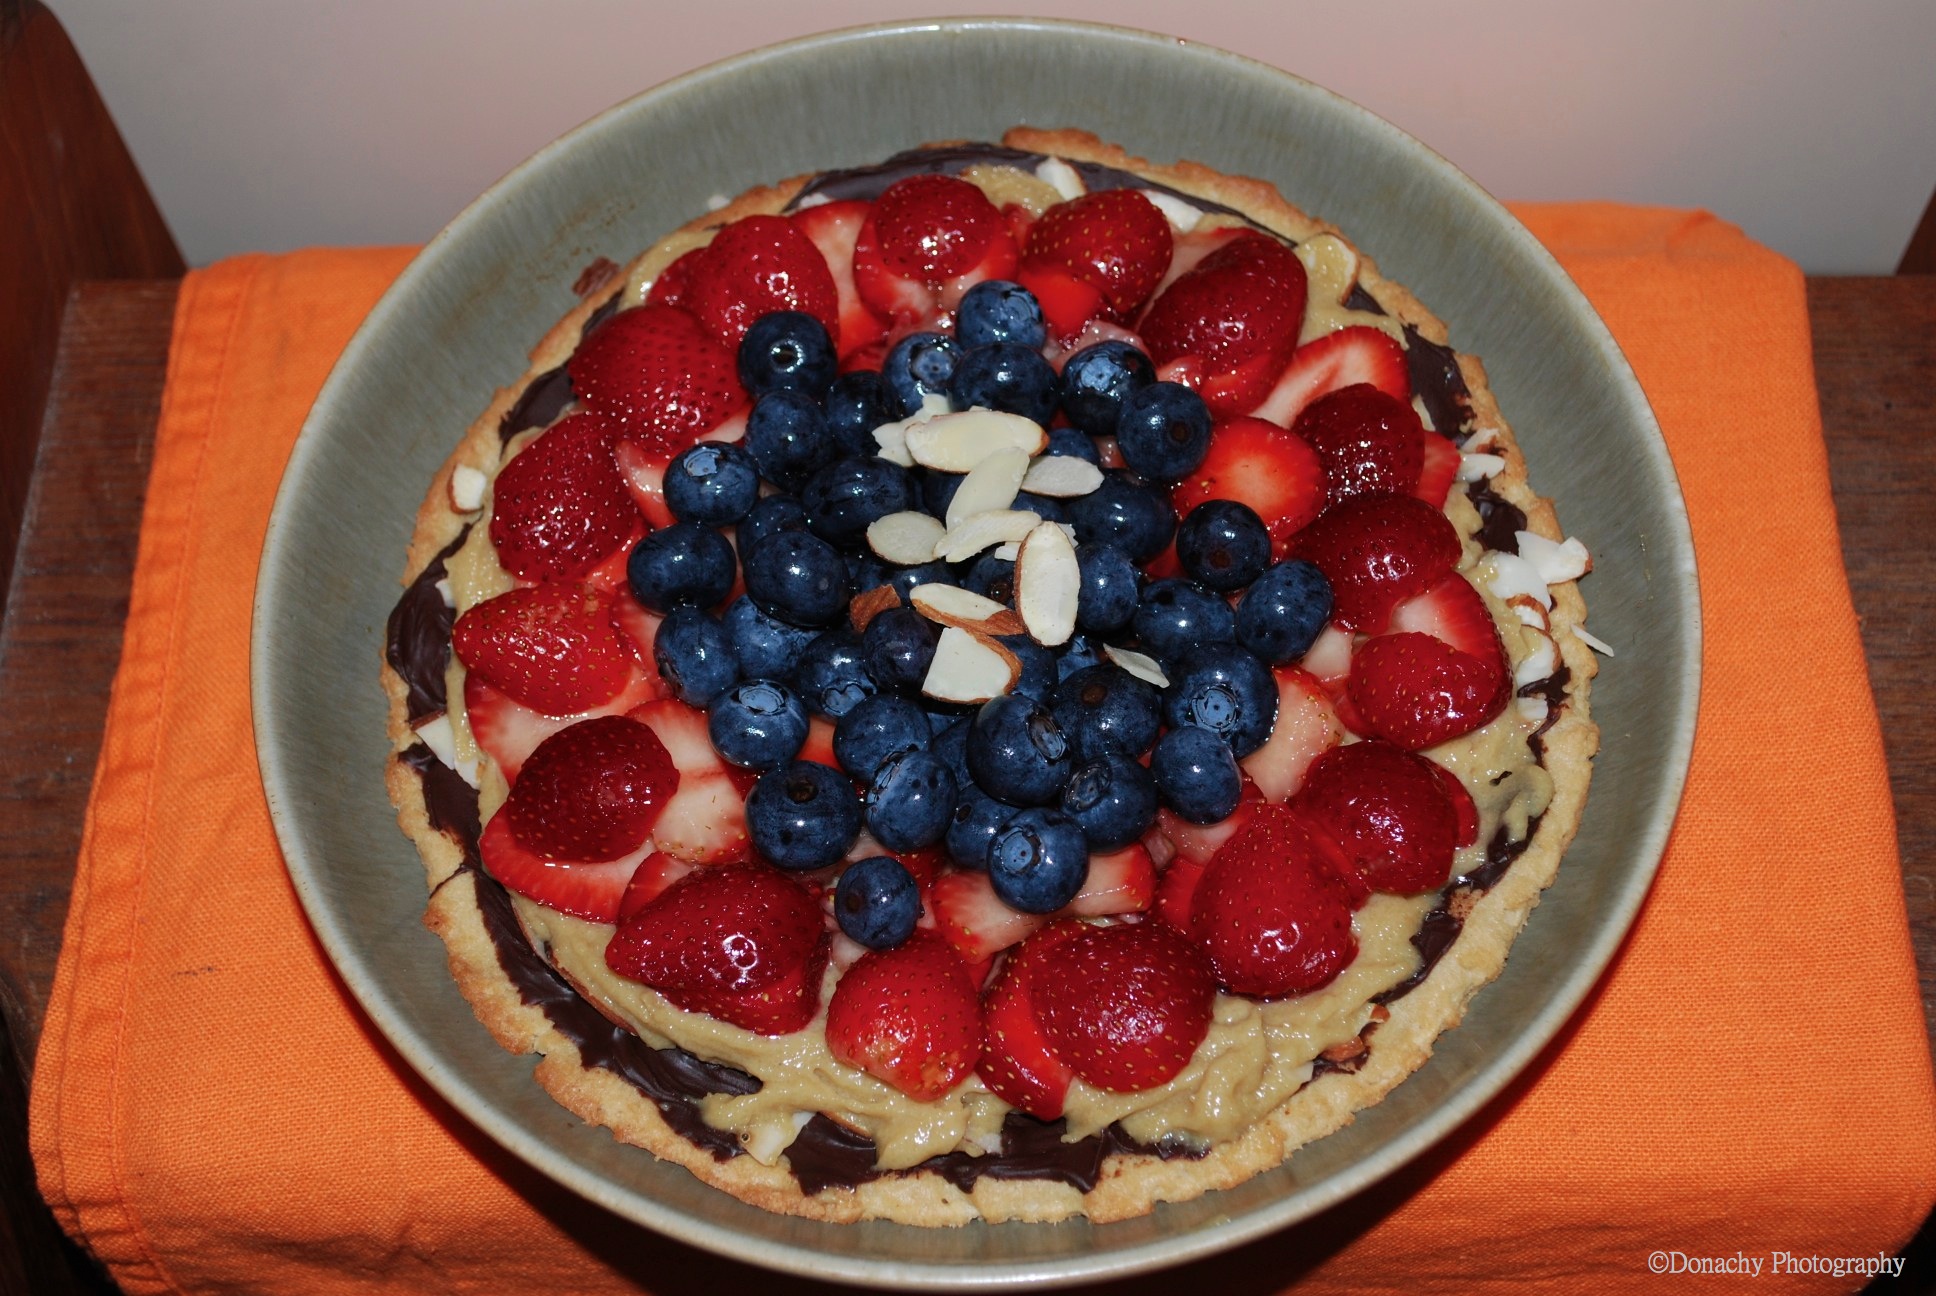
A crunchy cookie crust coated with dark chocolate is the foundation for this delicious tart. Layer on sliced almonds and pastry cream. Then finish with port wine-marinated berries. Yum!

Summer has always meant berries to me. When I was young, we would pick buckets of blackberries in thickets behind our home. I have fond memories of hot, sun-drenched, juicy strawberries at a “you-pick” farm…one for the container, one for me. All throughout my summers…berries. I can never seem to get enough of them. Maybe it is because their season is so fleeting.

In their short growing season, wild berries grow abundantly in Alaska. In the past, we’ve picked salmonberries, raspberries, blueberries and currents here on the Kenai Peninsula. This summer, our departure will beat the arrival of these ripening berries. Sigh. Fortunately, the local Seward grocery store supplied me with strawberries and blueberries to meet my berry craving.

This galley-sized tart serves four and was prepared in a Denby pasta bowl. In a traditional kitchen, you might double this recipe and bake it in a fluted tart or a springform pan. A dash of almond or vanilla extract might also be a nice flavor in the pastry cream. These are not staples in Bandon’s galley. Any berries could be used in this recipe. I would imagine ripe peaches would also be delicious.

Five Layer Port Berry Tart

Ingredients

Crust

  • 1 cup all-purpose flour
  • 2 tbsp brown sugar
  • 4 tbsp unsalted butter (separated into 2 portions of 2 tbsp each)
  • 12 rectangles of dark chocolate bar
  • 1/3 cup of sliced almonds

Pastry Cream

  • 2 egg yolks
  • 1/4 cup brown sugar
  • 1/2 cup semolina flour
  • 1/2 cup heavy cream
  • 1/4 cup low fat milk

Berry Topping

  • 1 cup of berries, I used sliced strawberries and whole blueberries
  • 2 tsp of brown sugar
  • 2 tbsp port wine
  • a few sliced almonds to garnish

Directions

  1. Preheat oven to 375 degrees F.
  2. Thoroughly mix together all-purpose flour and 2 tbsp brown sugar.
  3. Cut in unsalted butter.
  4. Mix to form dough ball (add drips of cold water if more moisture is needed to form dough).
  5. Press dough evenly into greased bakeware.
  6. Use tines of fork to prick dough all over the bottom and up the sides of the dough.
  7. Bake for 20 minutes.
  8. Let crust cool on wire rack in bakeware.
  9. On low heat, in a medium saucepan, melt chocolate and 2 tbsp of unsalted butter. Stir constantly.
  10. When chocolate mixture is thoroughly melted and mixed, spread evenly onto cooled crust, ensuring bottom and sides of crust are coated.
  11. Sprinkle 1/3 cup of sliced almonds onto melted chocolate. Press almonds into melted chocolate. Let cool and harden.
  12. In a small bowl, whisk egg yolks and 1/4 cup brown sugar until fully incorporated.
  13. Add semolina to egg mixture and whisk until fully incorporated. Set aside.
  14. Heat milk and cream in a medium saucepan on medium heat just until it boils.
  15. Whisk in heated milk mixture to egg mixture tablespoon by tablespoon, in order to avoid cooking eggs.
  16. Pour egg and milk mixture back into saucepan and stir constantly over medium heat until it thickens (should coat a wooden spoon).
  17. Continue cooking and stirring for two additional minutes. Cool pastry cream completely. Place plastic wrap over pastry cream to avoid developing a skin.
  18. Take remaining 2 tsp of brown sugar and mix with 2 tbsp of port wine.
  19. Pour port wine mixture over berries and let marinate while pastry cream is cooling.
  20. When ready to assemble, strain berries out of port wine mixture.
  21. Assemble tart by spreading cooled pastry cream evenly over chocolate coated crust and then placing strained berries atop pastry cream. Sprinkle a few sliced almonds on top of the berry layer and enjoy immediately.

The crust and pastry cream can be made ahead of time and will keep well in the fridge. Then you can easily assemble this delightful dessert right before you serve it. We did share two of the four servings with our dock neighbors to avoid living too “large!”

Rockfish Meunière on Whole Wheat Pasta

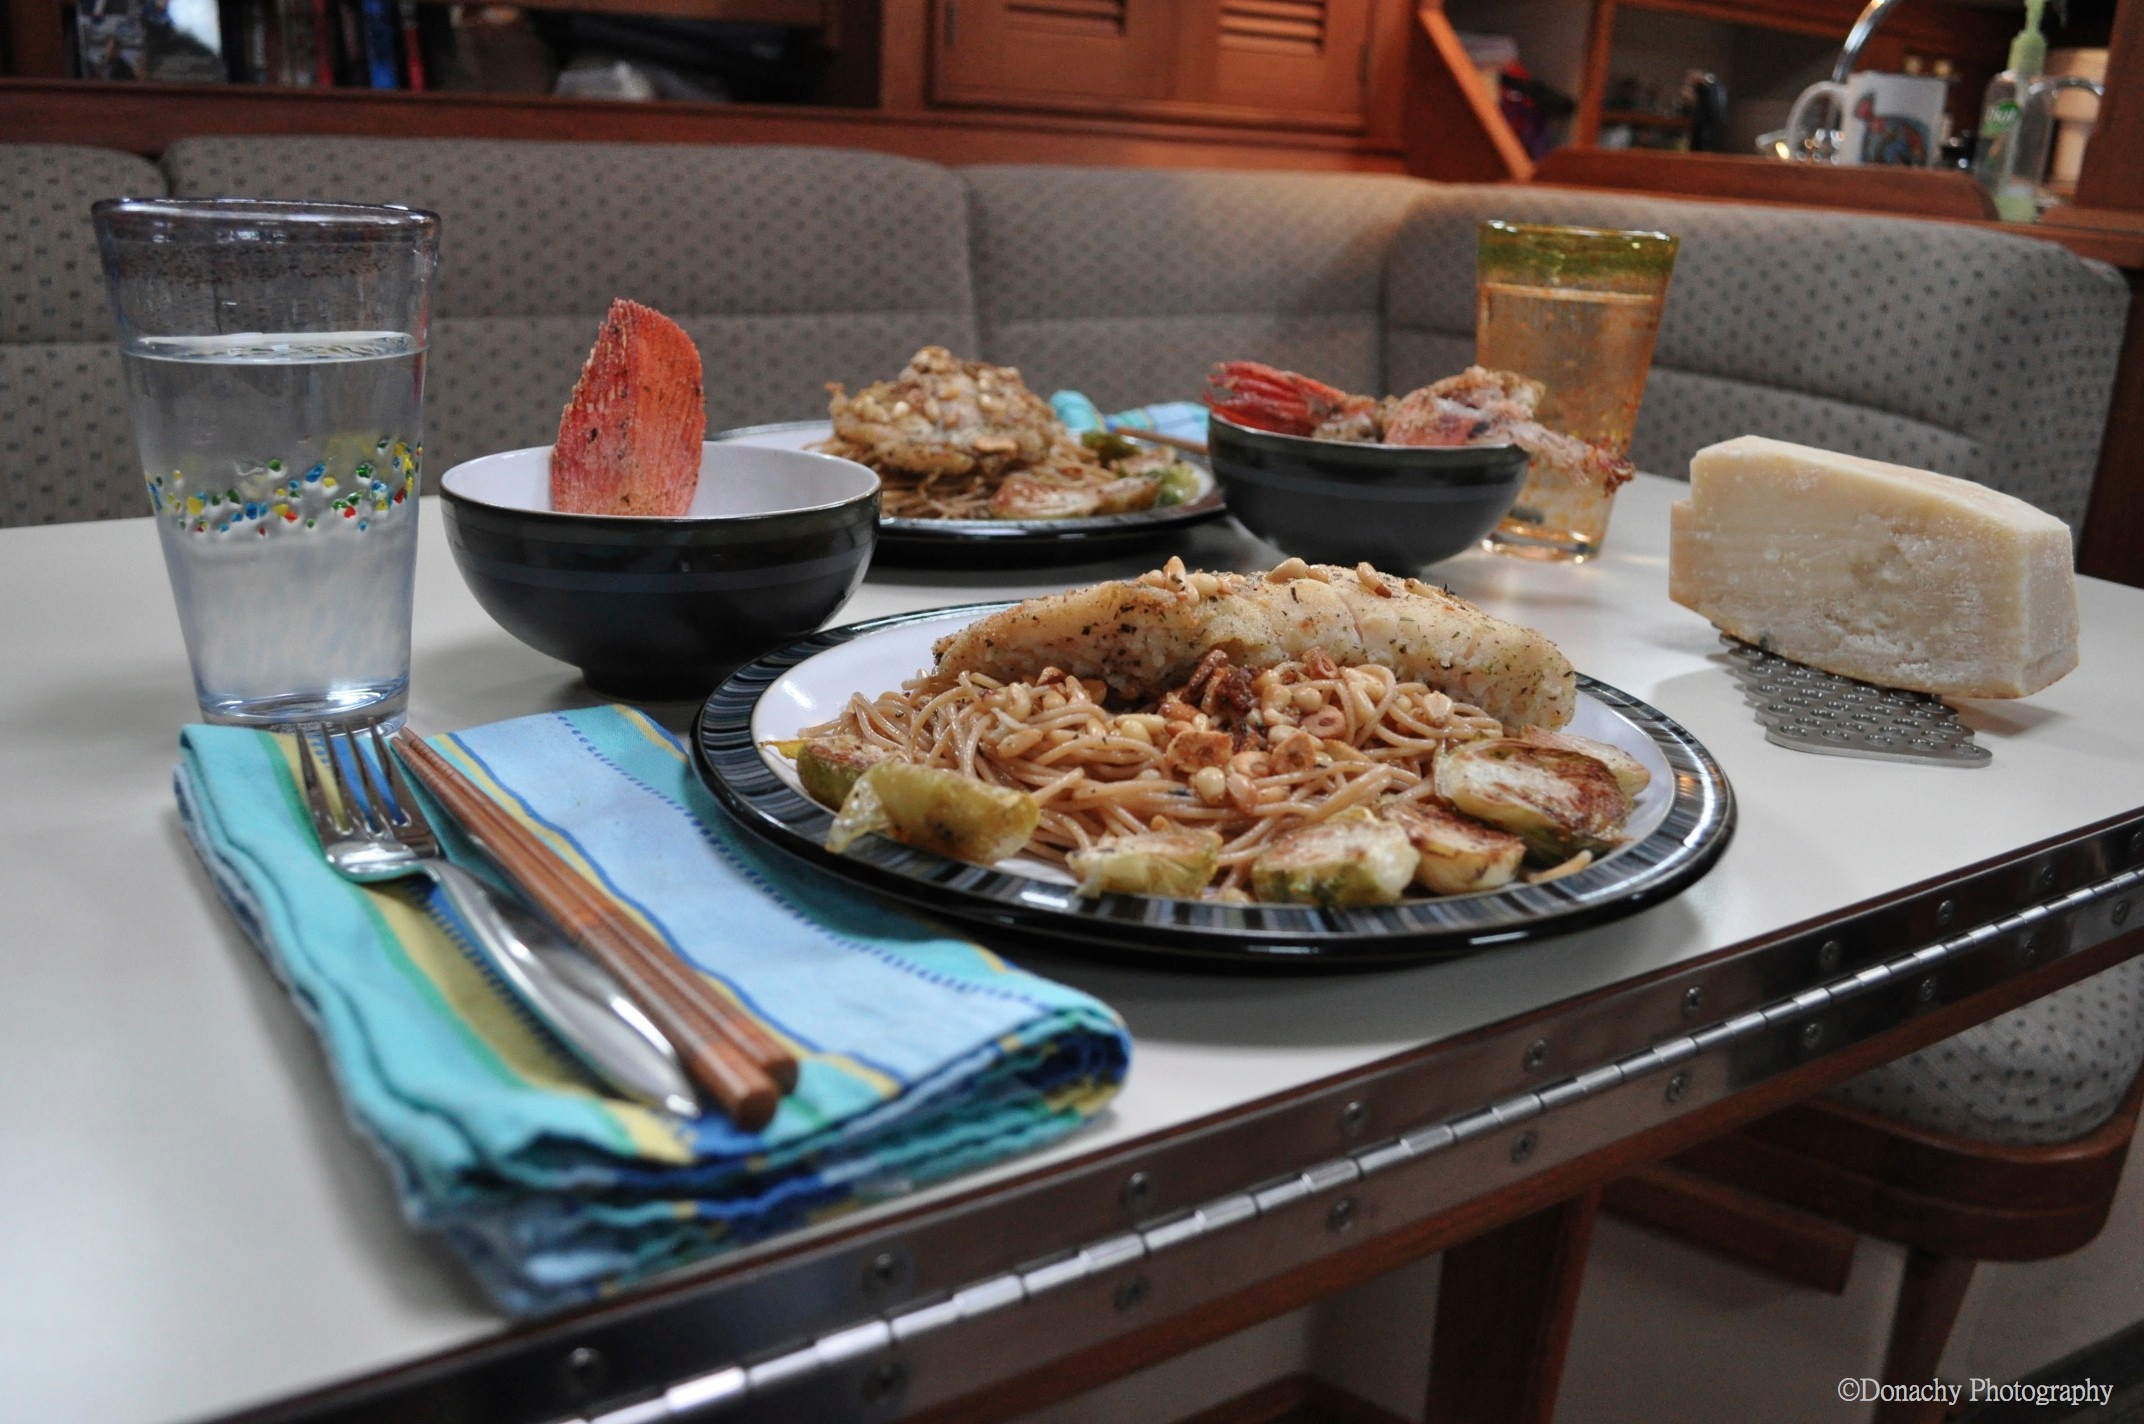
A fillet prepared à la meunière and served on pasta is one of our favorites when cooking with firm, delicately flavored white fish. We modify the traditional recipe, which means “miller’s wife” (descriptive of the flour this method employs) by using olive oil instead of butter and by skipping the lemon and butter finishing sauce.

Our three favorite methods for preparing fish, in no particular order, are as follows: sashimi – raw, thinly sliced fish dipped in a soy sauce and wasabi mixture; shioyaki – fish salted and then broiled or grilled; and à la meunière – dredged in seasoned flour and pan fried. These three preparation methods are the epitome of simplicity, emphasizing the freshness of the fish rather than sauces or seasonings, and can be accomplished in even the most bare-bones of kitchens. While they won’t adequately cover every species of fish (some species do well only when poached, and a few others shine best when deep fried), they are good methods to have in one’s repertoire.

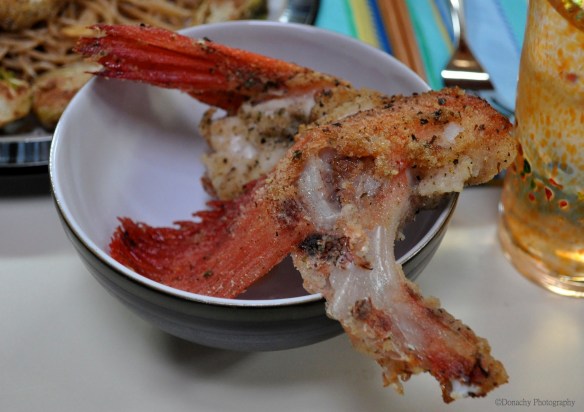
A collar – the meat just behind the fish’s head, including the pectoral and ventral fins – is a good candidate for meunière. Pictured is the collar from a two to three pound yelloweye rockfish.

Each cooking method works particularly well with certain species of fish. Chinook salmon, for example, is a superb fish for shioyaki and a much underutilized sashimi fish. Yellowtail and other tuna are excellent served as sashimi. When you think of meunière, think of fish that is white, firm but not dense, and mildly or even delicately flavored. Some of the best candidates are sole, flounder, greenling and Pacific rockfish in the genus Sebastes such as black rockfish, copper rockfish, yelloweye and so forth.

Rockfish à la Meunière on Pasta for Two

Ingredients:

  • two fish fillets 1/4 to 1/2 pounds each (110 to 230 grams), cleaned, skin removed, rinsed and patted dry with paper towels. Do not use a thick cut of fish for this. The fillets should be fairly thin – less than an inch thick (2.5 cm) as opposed to using part of a fillet from a large fish.
  • 1/3 cup semolina flour. (All-purpose or other flour is fine, but semolina will result in a very pleasant additional crunch and fuller texture to the finished fillet.)
  • 1/2 tablespoon herbs de Provence, plus 1 teaspoon herbs de Provence, separate
  • 1/8 teaspoon sea salt
  • 1/2 teaspoon freshly cracked pepper
  • 3 to 6 cloves of garlic, sliced thin
  • 2 tablespoons pine nuts (optional)
  • 1 tablespoon extra virgin olive oil
  • olive oil for frying
  • enough pasta for two servings
Directions:
  1. Cook pasta according to directions. Drain off water, return to pot and toss with about 1 tablespoon of extra virgin olive oil and 1 teaspoon herbs de Provence. Set aside. (Or do this simultaneously while cooking the fish.)
  2. In a plastic Ziplock bag, or in a mixing bowl or on a plate, mix together the flour, 1/2 tablespoons herbs de Provence, salt and freshly ground pepper.
  3. Thoroughly dredge the fillets in the flour mixture and set aside on a plate or cutting board. Left over flour can be used as a bed for the fillets.
  4. In a frying pan large enough to hold both fillets, add olive oil to about 1/8 inch depth. Heat over medium to medium-low until oil causes a pinch of flour to sizzle.
  5. Position fillets in pan making sure they do not touch. Cook uncovered over medium to medium-low heat for about 3 to 5 minutes.
  6. Carefully turn the fillets over. Add garlic slices and pine nuts and continue cooking for 3 to 5 minutes. The first few times you cook fish this way, you may have to break the fillets apart to check for doneness as it will vary depending on thickness, type of fish and cooking temperature.
  7. Place pasta on dinner plates. Remove fillets from pan and place on pasta. Use a slotted spoon to separate garlic and pine nuts from oil and sprinkle on fish and pasta.
  8. Serve hot with freshly grated Parmesan cheese.

We served the pasta and fillet with a side of fish collars, also prepared à la meunière, and brussels sprouts sliced in half, seasoned with salt and pepper, and pan roasted. This is a simple yet elegant meal that can be prepared in a galley, on a camp stove, or in virtually any kitchen.

Most Excellent Nachos

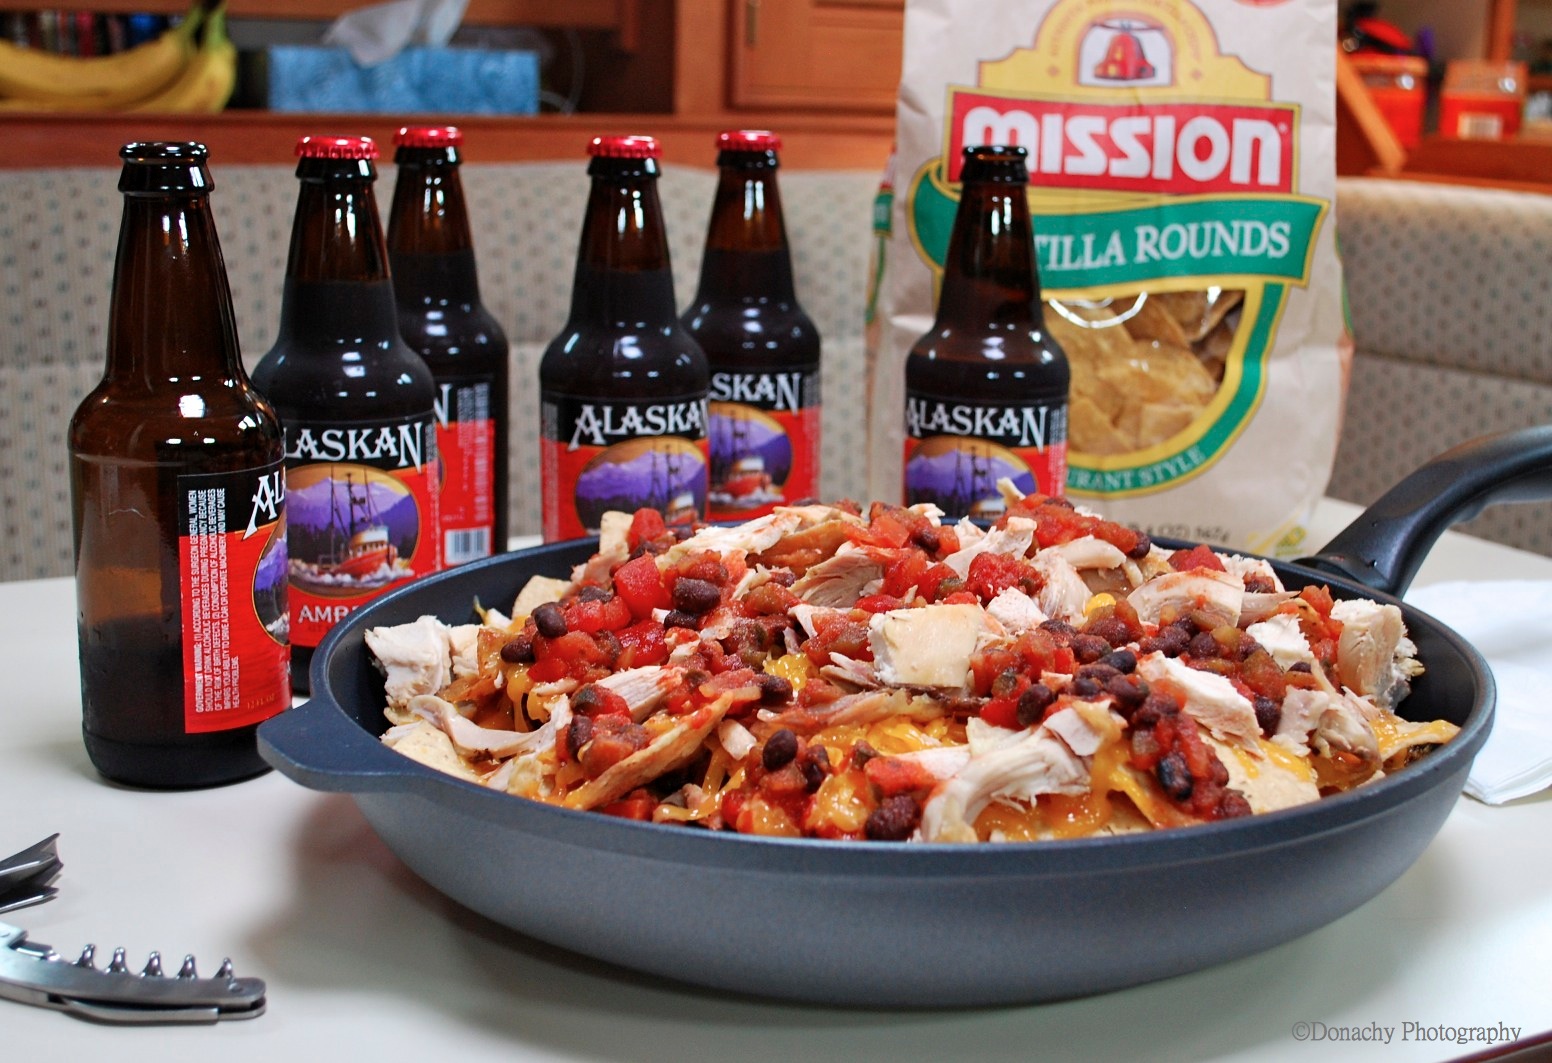
A heavy skillet, a bag of your favorite tortilla chips, salsa spiced up with jalapenos, medium cheddar cheese and an already-roasted chicken from the supermarket are all you need for the best nachos you’ve ever had!

By the time we were finished cleaning fish yesterday, it was already close to five o’clock. Tired, hungry and in dire need of a beer (or three), we had J-Dock vacuum pack and flash freeze our fillets, absent-mindedly forgetting to set aside a piece of salmon for ourselves for dinner. We’d fished hard and filled our cooler, and neither one of us was keen to cook. “How about super nachos?” Barbra suggested. “We could get one of those roasted chickens at Safeway….”

“And a case of beer,” I added.

We already had everything else we needed: medium-aged Tillamook cheddar cheese, sliced jalapeno peppers, Newman’s Own salsa, and Mission tortilla chips. Here’s all there is to it.

Pick a heavy frying pan, one that heats evenly and won’t burn the chips. Pour in a little olive oil, turn the heat to low or medium low, and when it’s hot, put in a layer of chips followed by a layer of cheese, a few spoonfuls of salsa, a few jalapenos sliced thin or diced fine (cook’s choice), and a generous amount of chunks of roasted chicken. Lay down a second layer of chips, cheese, salsa jalapenos and chicken, cover the pan with a lid, and cook over low heat till all the cheese is melted. Add a couple dollops of sour cream or guacamole when it’s all done if you want, serve it right in the pan, and keep the beers coming. Pop in a movie and eat and drink more than you should.

I had a few black beans on hand and added those this time, but usually I make this with no beans. This dish is great without the chicken (or any other meat), too. Next time I make this, I’m going to use rockfish and see how that goes. Future experiments might include caribou, moose or ground black bear.

Leftover S’mores Ingredients? Bake a S’mores Cheesecake!

After grilling s’mores for ourselves and our dock neighbors, we were still left with half a bag of marshmallows, a box of graham crackers, and a whole bar of dark chocolate. Such problems… Cheesecake was the answer to this problem!

Our galley kitchen is small. The counter space is measured in inches. Our pantry has just the basics. Our cookware and dishes are on the multifunctional and minimal side. We did outfit our little home with Denby dishes, which can be baked in. So, forget about the springform pan and the food processor in this preparation. What follows is how I made S’mores Cheesecake, galley style.

S’mores Cheesecake

Ingredients

Crust-

  • a little more than 1 cup of ground graham crackers. I ground the graham crackers using our coffee grinder.
  • 3 tbsp brown sugar
  • 1/4 cup melted unsalted butter
Cheesecake Filling
  • 8 oz. cream cheese, brought to room temperature
  • 2 eggs, also room temperature
  • 4 tbsp brown sugar
  • 1/4 cup of coarsely chopped dark chocolate bar

Topping

  • Marshmallows, quartered
  • 1/4 cup of coarsely chopped dark chocolate bar

Directions

  1. Mix graham cracker crumbs with 3 tbsp brown sugar and butter.
  2. Press into a well-buttered pasta bowl that can be baked (or springform pan if you are in a standard kitchen).
  3. In a medium-sized pot, beat eggs and remaining 4 tbsp. of brown sugar. I used brown sugar to add flavor in lieu of vanilla extract.
  4. Whisk in cream cheese until smooth. A mixer would have come in handy for this step. My arm was a little tired here.
  5. Mix in 1/4 cup of chopped dark chocolate. I did experiment with using a vegetable peeler to curl pieces of chocolate. Using a cutting board and a chopping knife was easier and turned out with equally good results.
  6. Pour cream cheese mixture into graham cracker crust and bake in a 320 degree F oven. My little oven may bake a little warmer than yours, so you may need to increase the temperature a bit.
  7. Bake for about 40 minutes, until the center is almost set.
  8. Evenly place marshmallows on top of cheesecake. Sprinkle with remaining 1/4 cup of chocolate. Bake for another 5 minutes, marshmallows should just be tanning.
  9. Remove from oven and let cool for about an hour. No matter how much Jack begs, tell him he can’t have any cheesecake until tomorrow.
  10. Refrigerate overnight. Fortunately, our camper is parked in the harbor parking lot and is equipped with a nice little fridge.

I was pleasantly surprised that we could pop the cheesecake out of the pasta bowl. I thought we were going to have to enjoy this dessert spoonful by spoonful. Who needs springform pans?!

Strawberry-Port Gallette with Sliced Almonds

Delicious first baking experience in the galley of our boat, Bandon. Strawberries marinated in brown sugar and port wine stuffed into a simple crust filled our little home with delicious smells and satisfied my need to bake.

Our boat is equipped with a gimbaled stove, which pivots and swings to remain level in spite of waves and wind in the harbor. The stove houses a tiny oven, which is perfect for baking for two. I love to bake and have had an itch to make something with the  beautiful strawberries I kept seeing at the store. We hadn’t had strawberries since last summer! After thirty minutes of baking, the first experiment emerged from the oven a success. The only thing that would have improved this dessert was a couple of scoops of  vanilla ice cream. Next time…

Strawberry Port Gallette

Ingredients

  • 1 cup all-purpose flour
  • 2 tbsp granulated sugar
  • 1/4 tsp salt
  • 3 tbsp unsalted butter
  • 2 cups sliced strawberries
  • 1/4 cup brown sugar
  • 2 tbsp port wine

Directions

  1. In a small bowl, stir together strawberries, brown sugar, and port. Set aside.
  2. In a medium bowl, mix flour, granulated sugar, and salt.
  3. Cut in butter to flour mixture. I mixed this by hand, literally, until the butter was well incorporated.
  4. Add a bit of water to form flour mixture into a dough ball (I used about 2 tbsp).
  5. Roll out dough to an 8″ circle. I didn’t have a rolling pin, so I pressed out the dough into 8″ circle onto a well-buttered cookie sheet.
  6. Place berries in a mound on the circle, leaving a 1-2″ border. I reserved some of the sugar-port juice to sauté the sliced almonds.
  7. Fold the 1-2″ border over fruit, leaving the strawberries exposed in the center.
  8. Bake at 375 degrees F until golden, about 30 minutes.
  9. While gallette is baking, sauté almonds in reserved sugar-port juice.
  10. When baking is complete, remove gallette from oven and sprinkle with sautéed almonds.