Cloudberry Cake: An Arctic Treat

Cloudberry jam is baked right into the top of this moist vanilla cake. Try it with a hot cup of tea and a scoop of vanilla bean ice cream.

 Continuing with the clean-out-the-pantry theme, I had a couple jars of cloudberry freezer jam left from our fall berry picking. These delicious orange berries of the far north are only available for a few short weeks at the end of the Alaska summer. Growing in patches on small mounds across the boggy tundra, Akpik (the Inupiaq word for the berries) are at first a brilliant red before turning orange during their peak ripeness. We picked two gallons and turned them into some of the best jam, sorbet and ice cream we’ve ever eaten. Prized wherever they grow, (they’re protected by law in some European locales) cloudberries have a distinctive sweet flavor with a hint of agreeable tartness. They have become our favorite berry.

Cloudberry Cake

Ingredients

  • 1 cup granulated sugar
  • 5 eggs
  • 1 cup unsweetened applesauce
  • 1 tsp vanilla extract
  • 2 tbsp sour cream
  • 2 cups all-purpose flour
  • 2 tsp baking powder
  • 2 cups cloudberry jam (or other jam)

Directions

  1. Preheat oven to 350 degrees F.
  2. Beat sugar and eggs until pale yellow (about 5 minutes). Beat in applesauce. Add vanilla and sour cream. Mix again.
  3. Sift flour and baking powder together. Stir into egg mixture.
  4. Grease a 9-inch springform pan.
  5. Pour batter into springform pan.
  6. Dot the jam on top of the cake batter. Poke some of the jam down into the batter.  Bake 45 minutes or until a toothpick or cake tester comes out clean.

Matcha Green Tea Cookies

As our school year comes to a close, I searched our pantry for baking inspiration. It is a dual goal – bake something interesting and use something up that may not weather sitting for three months in a cabinet. Today’s ingredient? Matcha green tea. This is a powdered or finely milled form of shade-grown tea, which is used in Japanese tea ceremonies. It is very flavorful. Increasingly, matcha is finding its way as an ingredient into other food where it adds color and flavor.

This is probably not an everyday pantry item. Jack and I greatly enjoy tea. Before we moved up to Alaska, we purchased lots of tea from a favorite shop in California that was (sadly) closing. We had one opened bag of this delicious powder with exactly three teaspoons left… the perfect amount for a cookie recipe! If you would like to try this recipe, we suggest checking with a tea shop that carries Japanese teas.

Matcha Green Tea Cookies

Ingredients

  • 7 tbsp softened, unsalted butter
  • 6 tbsp confectioner’s sugar
  • 1 egg yolk and 1 egg
  • 1 tsp vanilla extract
  • 3/4 cup all-purpose flour
  • 6 tbsp finely ground almonds
  • 3 tsp matcha powder
  • 2 tbsp granulated or turbinado sugar

Directions

  1. In a medium mixing bowl, cream together butter and confectioner’s sugar. Add eggs and vanilla. Blend thoroughly. Set aside.
  2. In a separate bowl, sift together flour and matcha powder. Add in almonds. Mix thoroughly.
  3. Add flour mixture to butter mixture. Mix until dough comes together into a ball.
  4. Shape dough into a log with about a 2-inch diameter. Wrap in plastic wrap and chill in the refrigerator.
  5. Preheat the oven to 350 degrees F.
  6. Line baking sheets with parchment paper.
  7. Sprinkle granulated or turbinado sugar onto a plate. Roll chilled log in sugar, pressing log into sugar to coat.
  8. Using a sharp knife, cut 1/2 slices. Place slices on baking sheet leaving room between cookies for slight spreading.
  9. Bake for 12 minutes or until cookies are lightly browned on the edges.
  10. Cool on baking sheet for 2 minutes before transferring to a wire cooling rack.

Recipe adapted from http://chocolateandzucchini.com/archives/2009/10/matcha_shortbread_cookies.php

Chocolate Dipped Coconut Macaroons

In our world of BPA warnings for canned products and ingredients in processed foods that I can’t pronounce (and have no clue what they are), Jack and I have decided to limit our use of canned products and make as much as we can from scratch. My search for a coconut macaroon recipe resulted in recipe after recipe indicating the need for sweetened condensed milk. I hesitated. First of all, canned milk was bound to cost a fortune in our little Arctic store and second, it would be in a can.

Eventually I found a homemade substitute, which, in addition to being less expensive and more natural, had none of that can aftertaste common to many canned products. With the help of a stick blender whipping 1 cup of powdered milk, 2/3 cup of sugar, 1/3 cup of boiling water, and 3 tablespoons of butter, I soon had 14 ounces of sweetened condensed milk. This homemade version keeps well covered in the refrigerator.

Coconut macaroons were always a top fix for sweet cravings for me. When I was a starving student, I would wait until Passover passed so I could buy cans of Manischewitz macaroons that had been marked down. They were tasty, but I these bite-sized treats would taste better fresh. Baked at home, they are a bit crunchy on the outside and chewy on the inside. If you shape them like a pyramid, they are easy to dip into melted chocolate, for a nice presentation.

Chocolate Dipped Coconut Macaroons

Ingredients

  • 2/3 cup sweetened condensed milk
  • 2 egg whites
  • 1 1/2 tsp vanilla extract
  • dash of salt
  • 3 1/2 cups of unsweetened flaked coconut
  • 10 oz. semi-sweet chocolate chips
Directions
  1. Preheat oven to 325 degrees F. Line two baking sheets with parchment paper.
  2. In a large bowl, stir together the sweetened condensed milk, egg white, vanilla and salt until combined.
  3. Stir in coconut until well blended.
  4. I used a cookie scoop to make uniform mounds on the baking sheets.
  5. Use wet hands to form mounds into pyramids. (Keep a bowl of cold water handy for this process.)
  6. Bake, one sheet at a time, until cookies are lightly browned, 15 – 20 minutes. (Don’t put away pan or throw out paper, yet.)
  7. Cool cookies on baking sheet until set, about 2 minutes. Then move to wire cooling racks.
  8. Melt chocolate chips in a double boiler, or in a heat-proof bowl over a simmering pot of water. Stir until smooth. Remove from heat.
  9. Holding the macaroon by its pyramid top, dip the bottom of the macaroon into the melted chocolate. Place the dipped macaroon back on the parchment-covered baking sheet. Repeat process with all the macaroons.
  10. Refrigerate the macaroons until the chocolate sets, about 15 minutes.

Recipe adapted from http://www.browneyedbaker.com/2009/06/19/chocolate-dipped-coconut-macaroons/.

Flipped Lemon Meringue Cookies

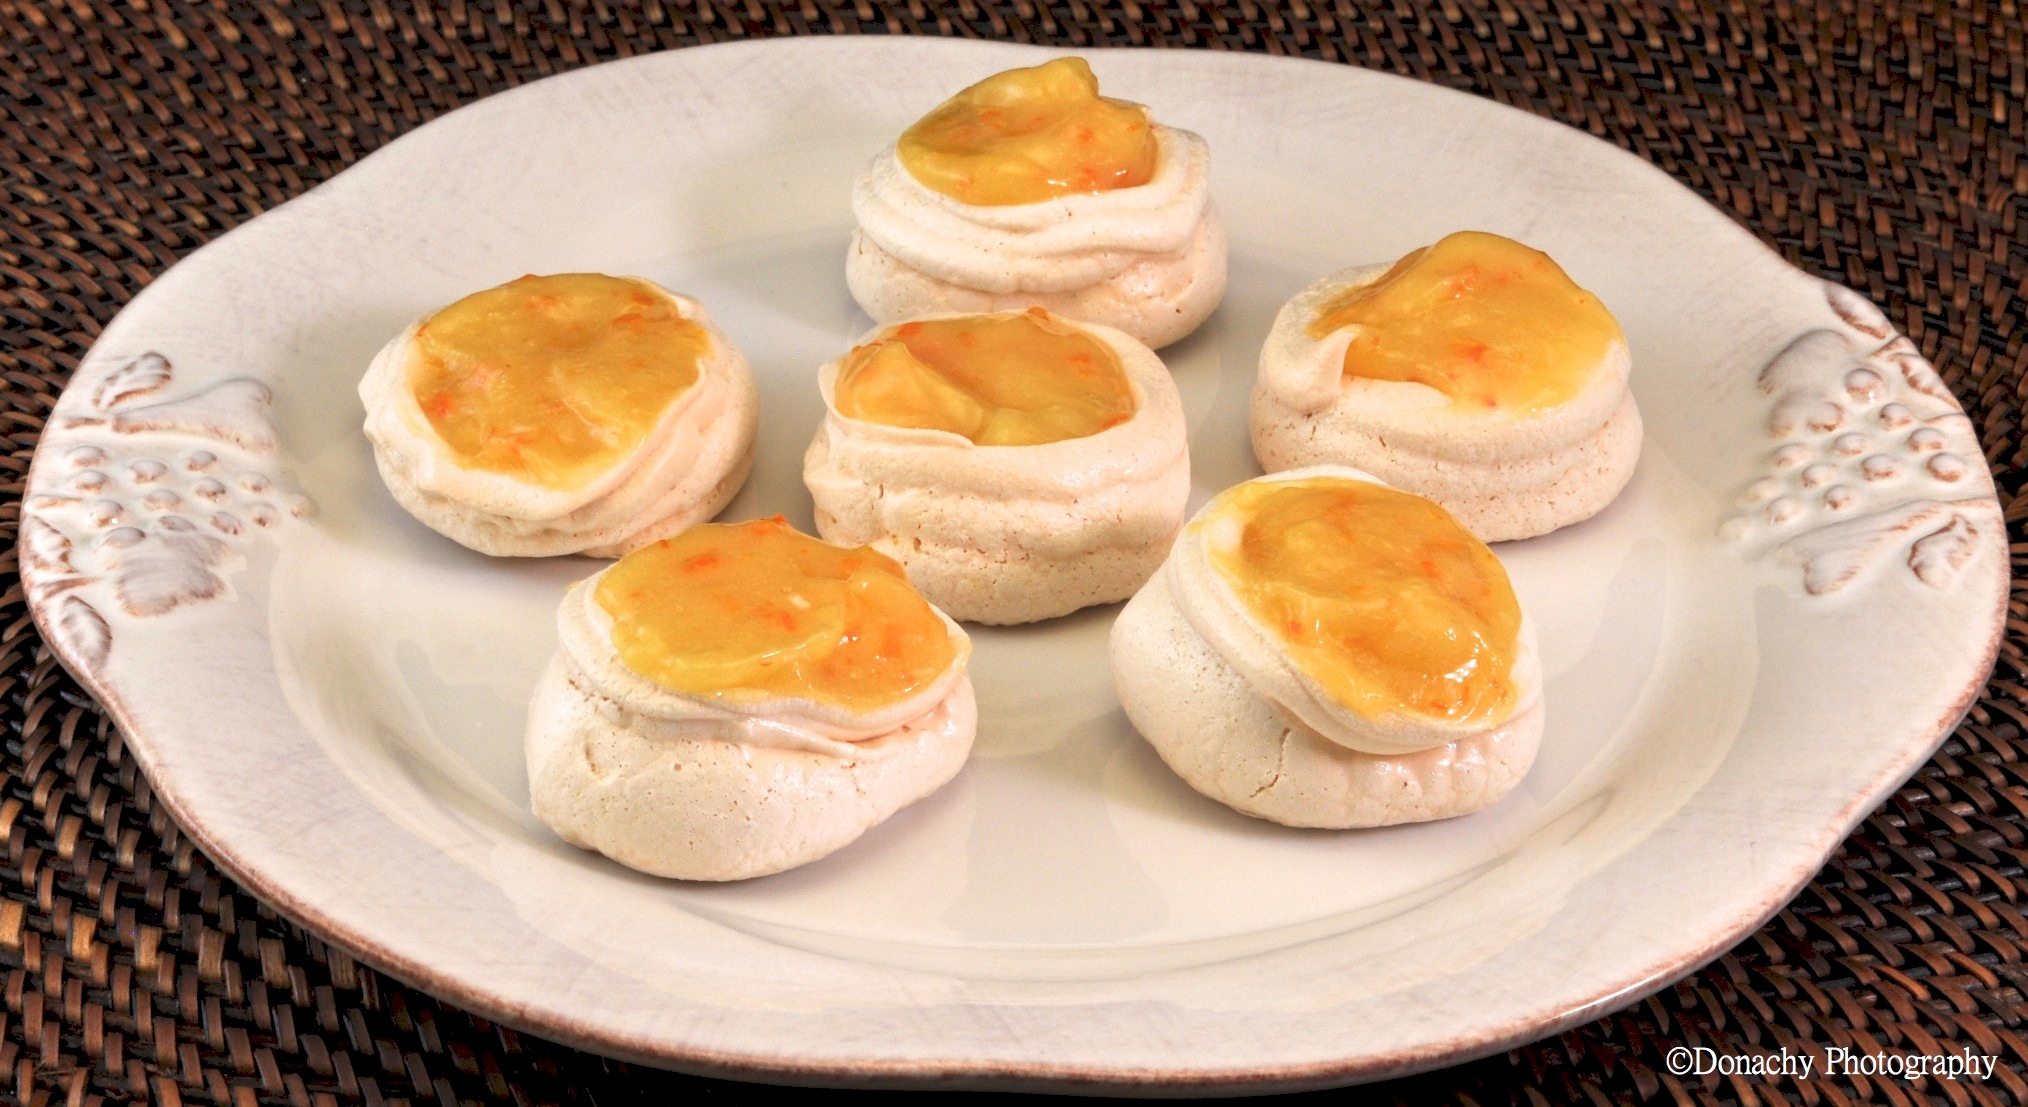
Imagine the tart creaminess of lemon meringue infused with orange zest sitting on a crisp, airy cookie ready to be devoured in one scrumptious bite. You’ll flip when you taste these cookies!

You know those beautiful Parisian macarons? Smooth and glossy, perfectly round and filled with creamy flavors? This cookie recipe allowed me to practice with the elements of the macaron – especially the meringue. And I got to play with a Kitchen Aid mixer for the first time.

Jack and I do our best to keep our kitchen to a minimum and have been debating about whether this appliance is worth its weight in counter space. Recently, we borrowed a Kitchen Aid mixer to take for a test drive. Our thoughts? This machine is pretty incredible. It beat the egg whites and confectioners’ sugar into a consistency we doubt we could have achieved by hand or even with a hand-held mixer — and after 20 minutes of steady mixing, no one was tired! The meringue was stiff and glossy and fluffy, just like it’s supposed to be. Even after scooping the meringue into a Ziploc and piping it out, it didn’t loose any volume. I think that was due to the mixer. The meringue baked perfectly, despite my inexperience in piping. We’ll see how often we use this mixer, but we’re sold on it for heavy mixing jobs.

The cookies took time in that leisurely Sunday kind of way. First I made the lemon curd and put it in the refrigerator to chill. After a while, I made the cookie shell. Then, when the shell and the curd were both cooled, I assembled the cookies. I found it easy to eliminate the evidence of my first attempts at piping, which were not pretty, but were tasty!  The technique which I settled on was to pipe the meringue in a spiral, starting in the center, with the last two spirals going vertical. This made a nice little cup for the lemon curd.

Flipped Lemon Meringue Cookies

Ingredients:

For Lemon Curd –

  • 1/2 cup granulated sugar
  • 1 large egg and 1 egg yolk
  • 1/2 cup lemon juice
  • 2 tsp orange zest
  • 3 tbsp melted unsalted butter

For Meringue –

  • 4 egg whites
  • 2 cups confectioners’ sugar

Directions

  1. In a medium pot, mix together curd ingredients, except butter (granulated sugar, egg and egg yolk, lemon juice and orange zest).
  2. Whisk continually over medium heat until mixture thickens and coats a spoon (about 10 minutes). Stir  in melted butter.
  3. Pour into a sealed container and refrigerate until cold.
  4. While the curd is chilling, make the meringue cookies.
  5. Preheat oven to 250 degrees F.
  6. Take the 4 egg whites and beat on medium speed until they develop soft peaks (peaks will bend when you remove beaters)
  7. Beat eggs whites at high speed while adding confectioners’ sugar by the tablespoon, making sure the sugar is mixed in before adding next tablespoon. The final product should have stiff peaks and be somewhat glossy and thick.
  8. Pour into a piping bag with a small tip. (I used a Ziploc bag with the corner cut off).
  9. Pipe a tight spiral from the center out, layering the outside spiral twice so you have about an inch-diameter cookie with a cup to hold the curd.
  10. Bake for 60 minutes on a parchment lined baking sheet. Slight cracking is OK. The cookies should easily come off the parchment paper when finished. Let cool.
  11. Fill meringue cookie with lemon curd.
  12. Store in covered container in refrigerator.

Bread Machine Oatmeal Walnut Wheat Bread

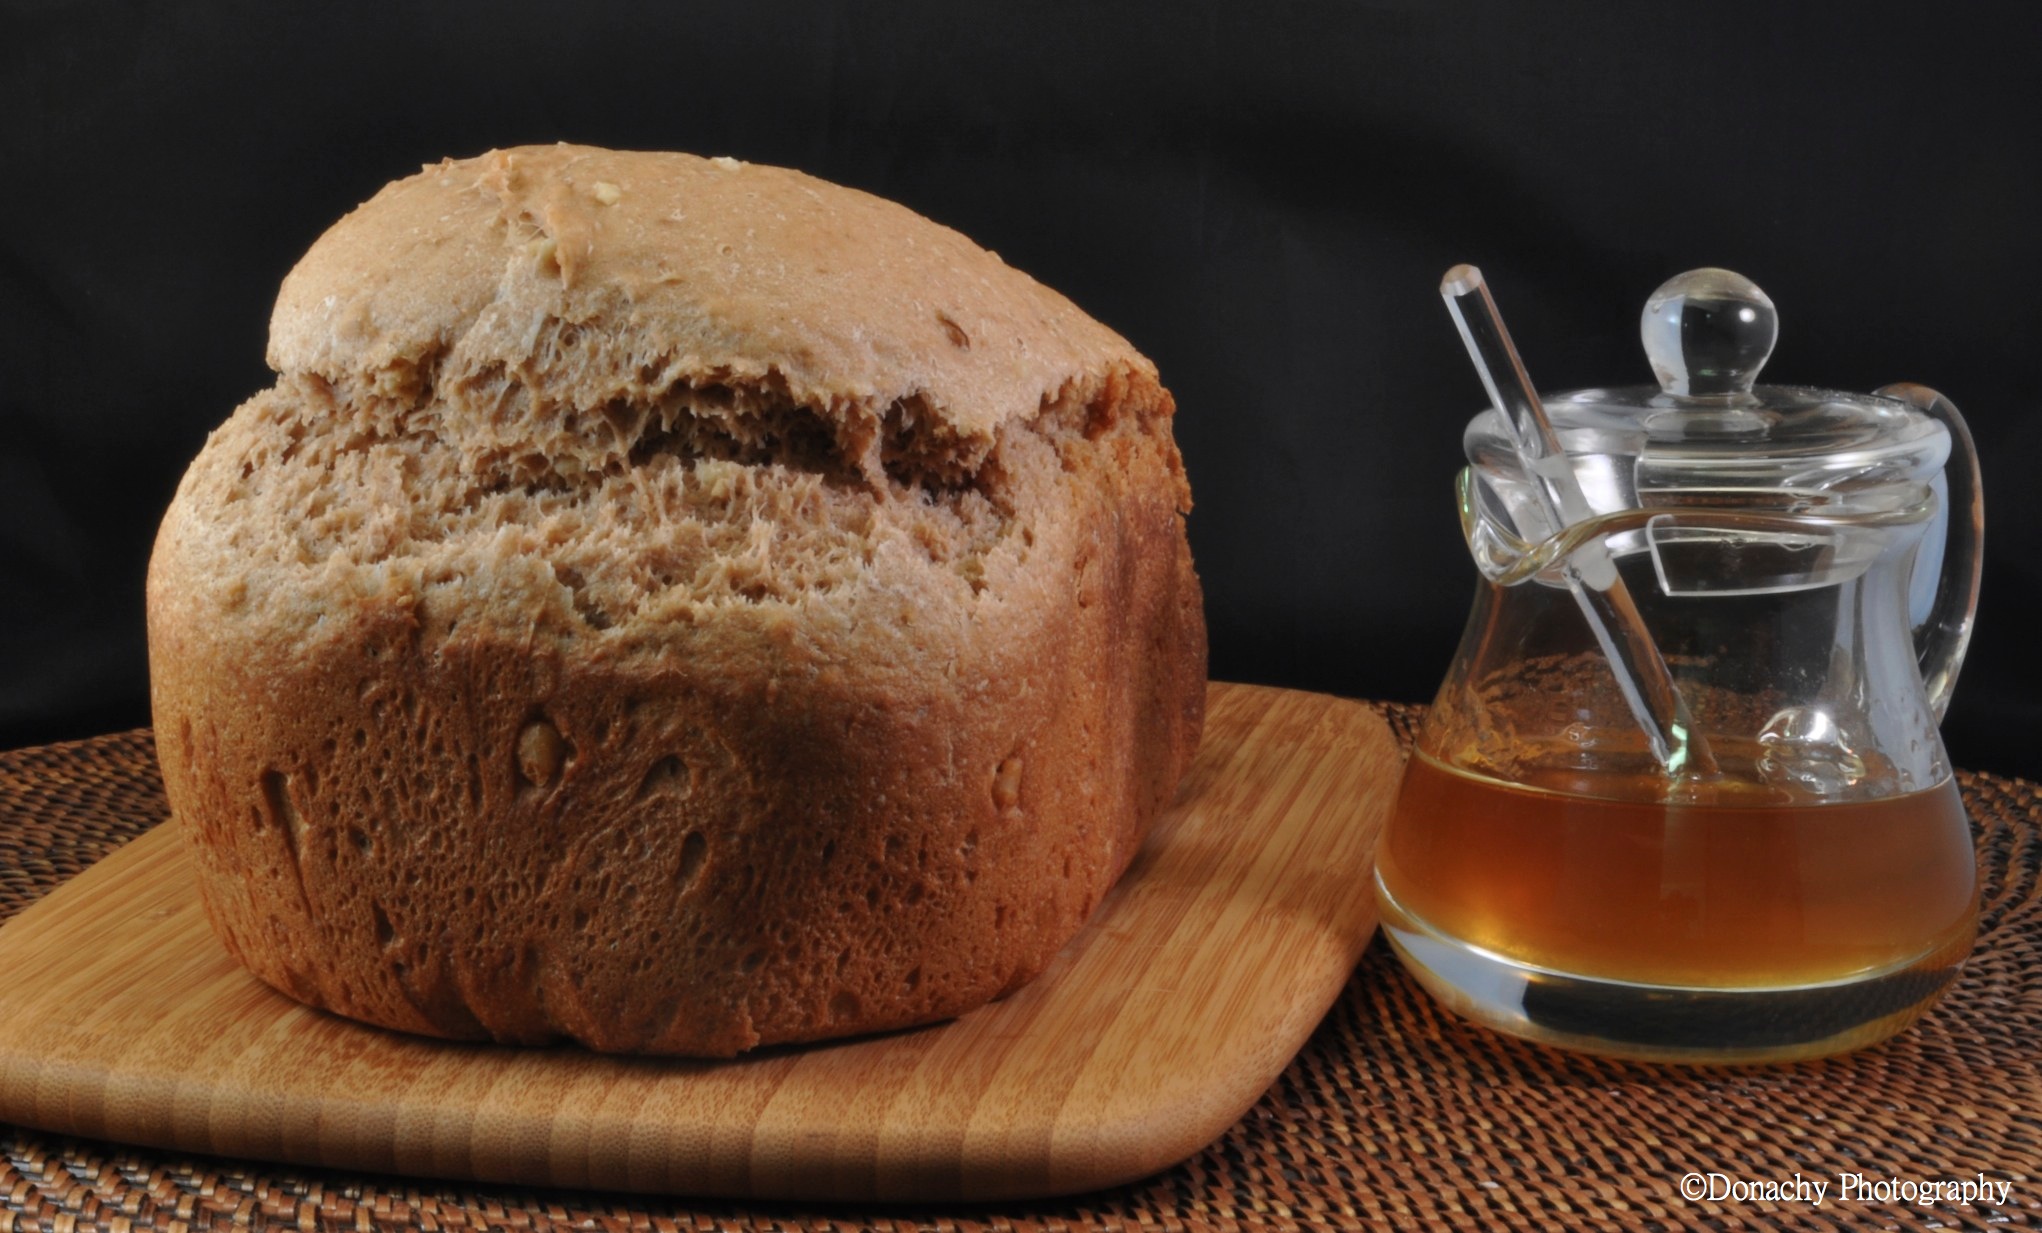
This hearty but soft wheat bread has crunchy walnuts and a hint of honey. The aromas while baking are magnificent! Jack says each bread I make is his new favorite. I think he really means it, too.

Oatmeal Walnut Wheat Bread

Ingredients

  • 1 1/4 cups water
  • 1/4 cup nonfat dry milk
  • 1 1/4 tsp salt
  • 2 tbsp olive oil
  • 1 tbsp honey
  • 1 tbsp molasses
  • 1 cup wheat flour
  • 2 cups all purpose flour
  • 1/2 cup quick-cooking oats
  • 1/3 cup chopped walnuts
  • 1 tsp instant yeast

Directions

  1. Place ingredients in bread machine according to manufacturer’s instructions.
  2. Start machine
  3. Wait impatiently for cycle to finish armed with butter and honey and a knife.

Recipe adapted from 300 Best Bread Machine Recipes by Donna Washburn and Heather Butt.

Vanilla-Orange-Chocolate-Nut-Filling Sandwich Cookie

Sugary, light vanilla cookies pizzazzed up with orange zest sandwich creamy almond-chocolate filling.

Still have to come up with a better name for these . Maybe you could help. The idea for this creation started with the chocolate-almond spread I made a couple of days ago. I thought it would make a delicious filling in a sandwich cookie, and since the spread is chocolate, I wanted the cookie to be vanilla. I found a basic sugar cookie recipe, omitted the chocolate the recipe called for and added vanilla and orange zest. “Perfect!” I thought. A vanilla cookie with orange zest sandwiching chocolate almond spread. How about the name VOCNFS Cookie to borrow from the texting world? Uh… no. I’m open to suggestions!

Vanilla Orange Sandwich Cookie

Ingredients:

  • 1 1/4 cups all-purpose flour
  • 1 tsp baking soda
  • 1/4 tsp baking powder
  • 1/4 tsp salt
  • 1 1/4 cups sugar
  • 1/2 cup plus 2 tbsp (1 1/4 sticks) room-temperature, unsalted butter
  • 1 large egg
  • 1 tsp vanilla
  • almond-chocolate spread

Directions:

  1. Preheat oven to 375°F.
  2. In a medium bowl, mix the flour, baking soda, baking powder, salt, and sugar. Add zest. Mix. Add butter. Mix. Then add egg and vanilla. Continue mixing until dough comes together.
  3. Take rounded teaspoons of batter. Roll into a ball and flatten for uniform cookies. Place approximately two inches apart on a parchment-paper-lined baking sheet. Bake for 9 minutes, until cookies are slightly cracked on the top.
  4. Remove from oven and set baking sheets on a rack to cool.
  5. To assemble the sandwiches: take one cookie and smear chocolate-nut spread evenly on the bottom of the cookie (because the bottom side will be flat. You want the cracked tops of the cookie to be on the outside.) Take a matching cookie and gently press flat side into the chocolate spread. Voila! You have a sandwich cookie. Continue with remainder of cookies.

We took these cookies to our friends’ house. They gave these cookies high marks on the would-you-buy-these-in-a fancy-cookie-shoppe test!

Apple Cinnamon Walnut Bread

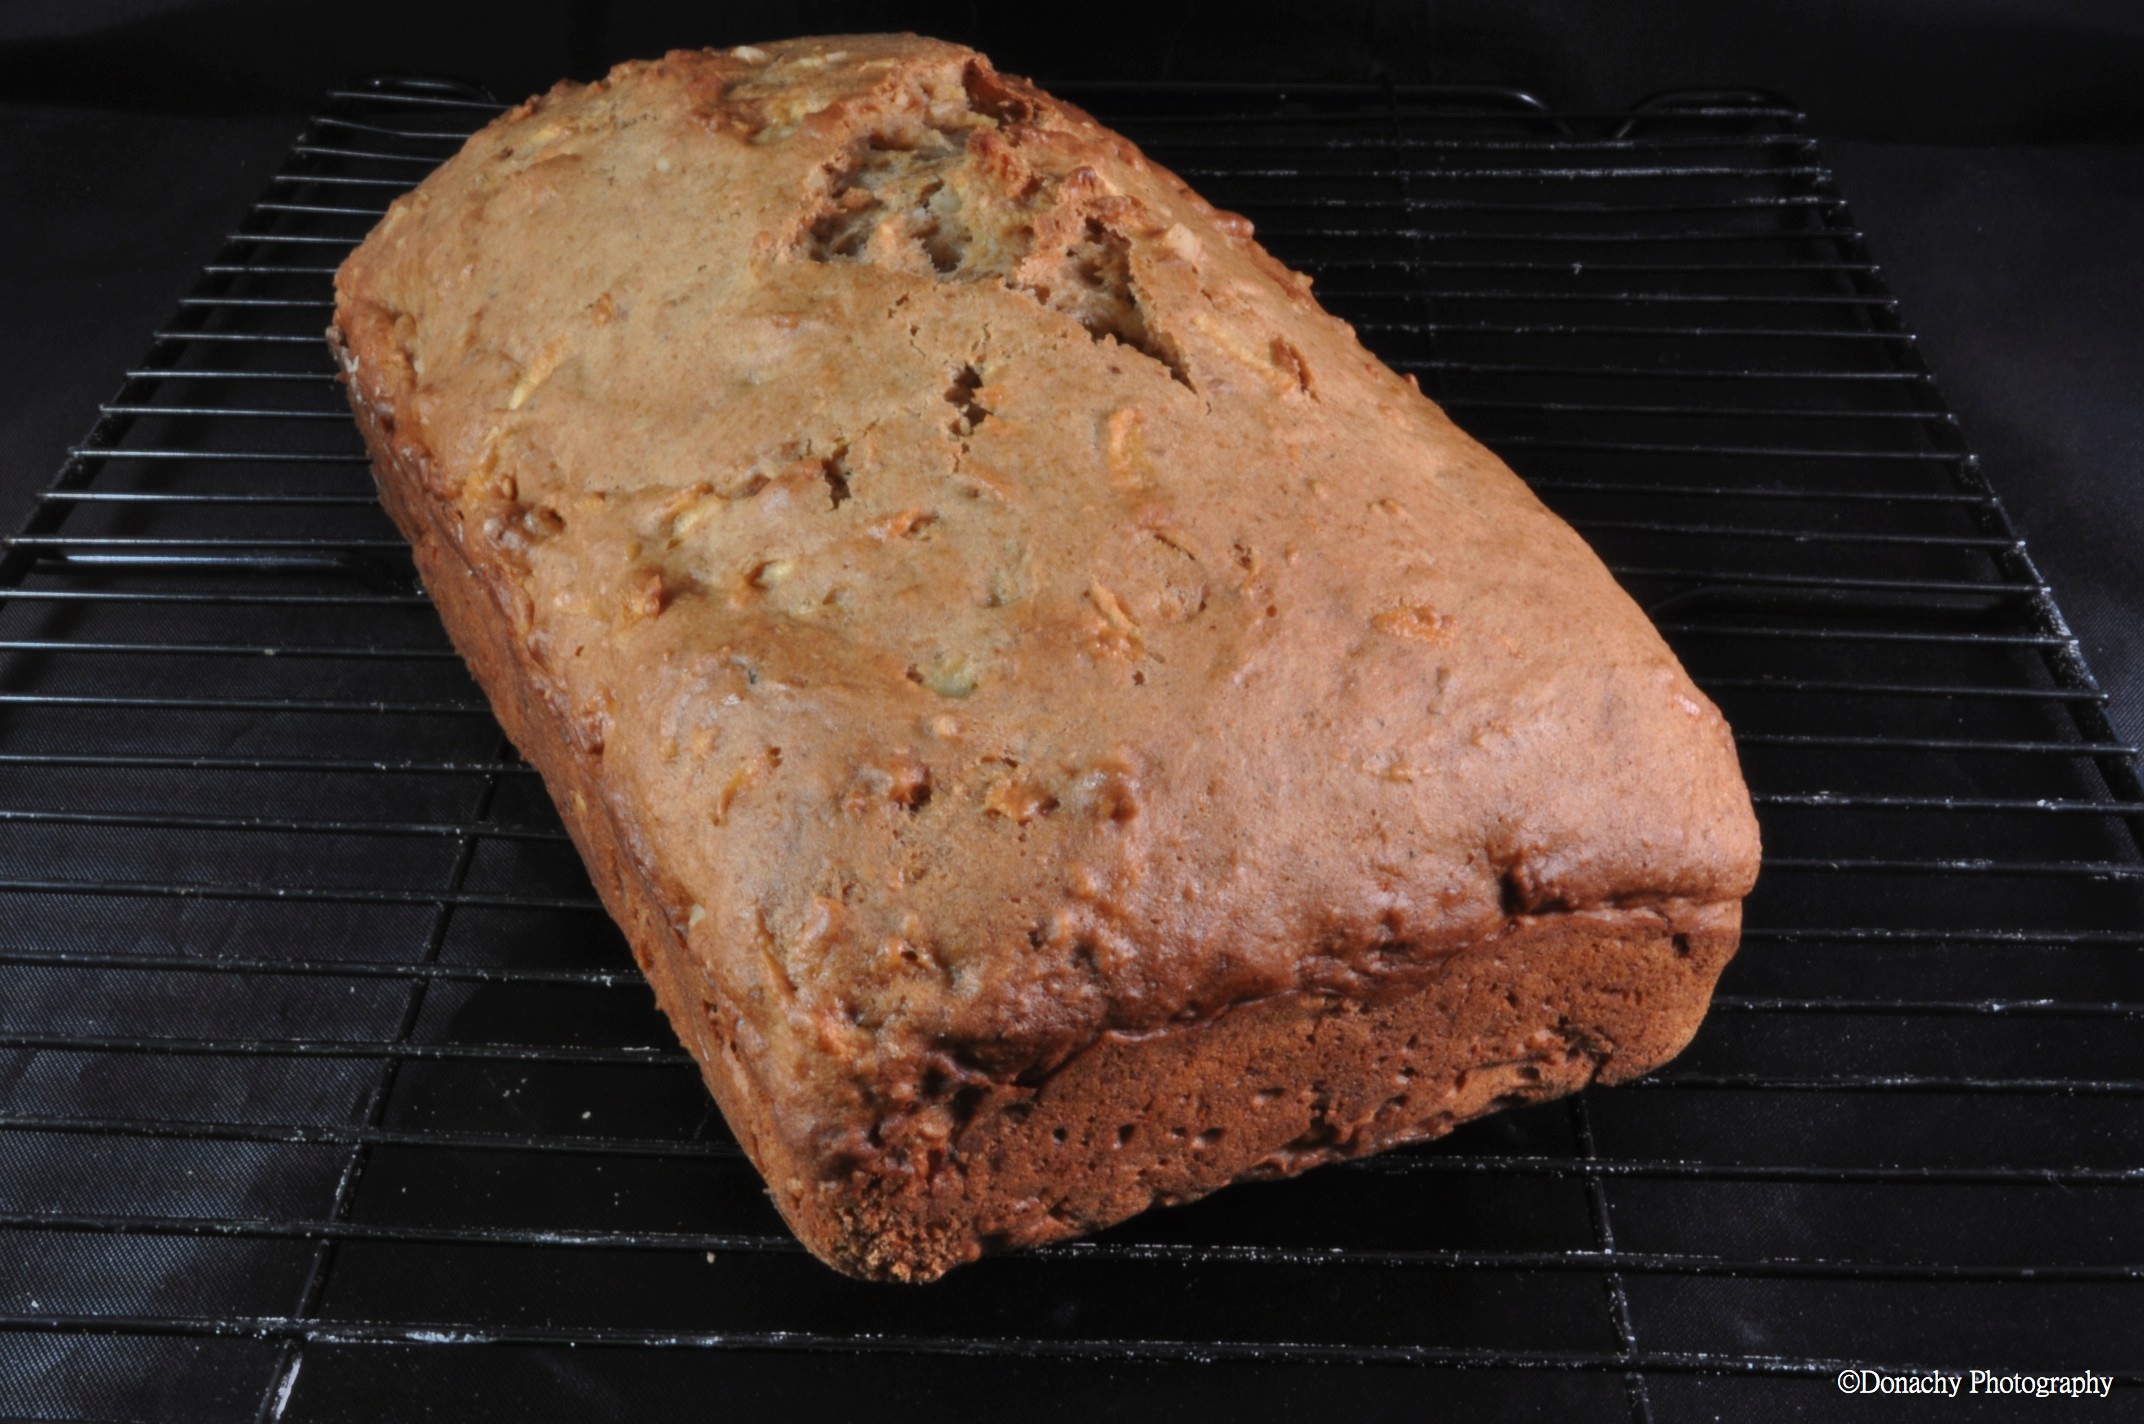
Walnut, cinnamon, and freshly grated Fuji apples make peanut butter sandwiches something to look forward to.

I love variety in my meals. I love sampling new foods and new food combinations. So it might seem paradoxical that I could happily eat a peanut butter sandwich every day for lunch. Jack… not so much. After a few consecutive days of peanut butter sandwiches, he diplomatically asks if we could change up the lunch menu. This year, I vowed to make lunches more interesting. Chili on rice, calzones, stew on baked potatoes, and salmon sandwiches have satisfied Jack’s need for variety. And so, with time ticking away toward the end of another year in the bush, I looked in the cupboard at the last third of our 80-ounce jar of Adam’s peanut butter. An idea! What if I made peanut butter sandwiches on fruit bread? Let me tell you how well this went over… When I asked Jack if he wanted salmon pizza or a peanut butter sandwich for lunch tomorrow, he chose a peanut butter sandwich! I’m not planning on going back to peanut butter every day, but we are both happy it is still in the rotation.

Apple Cinnamon Walnut Bread

Ingredients

  • 1 3/4 cups all purpose flour
  • 1/2 tsp baking powder
  • 1 tbsp ground cinnamon (we love cinnamon)
  • 1/4 tsp baking soda
  • 3/4 cup granulated sugar
  • 1/2 cup unsweetened applesauce
  • 2 eggs
  • 1 tsp vanilla extract
  • 1 grated Fuji apple (a little more than a cup)
  • 1/2 cup walnuts, chopped coarse

Directions

  1. In a large mixing bowl, combine flour, baking powder, cinnamon, and baking soda. Set aside.
  2. In another mixing bowl, combine sugar and applesauce. Mix well. Add eggs, one at a time, beating well after each addition. Stir in vanilla.
  3. Stir wet ingredients into dry ingredients until just moistened.
  4. Stir in grated apple.
  5. Stir in walnuts.
  6. Pour into a greased bread pan (8 in. x 4 in. x 2 in.)
  7. Bake at 350 degrees F for 55 – 65 minutes, or until a toothpick comes out clean.
  8. Cool for 10 minutes before removing from pan to a wire rack.

We enjoy fruit breads and use the above recipe as a base. It’s easy to substitute different types of fruit and spices. Pear bread with ginger and banana bread with cinnamon and nutmeg are two other favorite fruit breads that make excellent peanut butter sandwiches or breakfast toast.

Marvelous Marbled Chocolate Cheesecake Brownies

Fudge-like brownie batter swirled with chocolate chip cheesecake make this decadent dessert irresistible. 
As we go through our annual shopping list, I have to wonder why I thought I needed twenty pounds of chocolate chips! It is a challenge to shop for a whole year in one fell swoop. In most regards, we were really accurate, but I must have been suffering from a chocolate craving while we were in Costco! I did make it through about five pounds so far. With 15 pounds remaining and big chocolate lovers around, I am inspired to keep baking wickedly chocolate confections.
Marvelous Marbled Chocolate Cheesecake Brownies
Ingredients
  • 1 (8 ounce) package cream cheese, softened
  • 3/4 cup white sugar
  • 1 tsp vanilla
  • 3 eggs
  • 2 cups semisweet chocolate chips, separated
  • 1/4 cup unsalted butter
  • 2/3 cup all-purpose flour
  • 1/2 teaspoon baking powder
  • 1/4 teaspoon salt
Directions
  1. Preheat oven to 350 degrees F (175 degrees C). Grease a 8-inch square baking pan or baking dish.
  2. Combine cream cheese with 1/4 cup sugar, 1 egg, and vanilla in a mixing bowl; beat until smooth. Stir 1 cup chocolate chips into the cream cheese mixture. Set aside.
  3. Fill a saucepan with water and bring to a simmer. Set a heatproof mixing bowl over the water. In the mixing bowl, combine butter with the remaining 1 cup of chocolate chips; stir until just melted and blended together.
  4. Mix in the remaining 1/2 cup sugar and 2 eggs in a bowl. Sift together flour, baking powder, and salt. Stir flour mixture into sugar and egg mixture. Mix in chocolate-butter mixture into flour mixture so that it is evenly blended.
  5. Pour half of the batter into the prepared baking pan. Spread the cream cheese mixture over the chocolate layer. Top with remaining chocolate mixture (this doesn’t need to completely cover the cream cheese layer). Using a knife, swirl the top chocolate layer into the cream cheese to make a marble pattern by cutting the blade through the mixtures in a swirling pattern.
  6. Bake in preheated oven at 350 degrees F (175 degrees C) for 25 to 30 minutes, or until top is cracked and edges pull away from sides of the pan. Cool thoroughly. Cut into 12 to 16 squares. Store in refrigerator or freeze.
We tried the brownies cooled on the counter and chilled in the refrigerator. We preferred them chilled in the refrigerator.

Recipe adapted from http://allrecipes.com/recipe/chunky-cheesecake-brownies/Detail.aspx.

Butter Toffee Almonds

Plain, cayenne pepper, or rock salt. We liked all three. Which will you make?

We don’t like to visit friends empty-handed, especially when we invite ourselves over to watch a sporting event on TV. In bush Alaska, there aren’t six-packs of beer or bottles of wine to grab at the store. Our ready gift is usually something we’ve created in the kitchen. Recently we were running late for one of the March Madness basketball games and had nothing already prepared, so a few whirls in the kitchen and we had buttered toffee almonds – three ways. The original plain version is quite tasty. Two other versions were made by sprinkling cayenne pepper on some for that back-of-your-throat-bite and by sprinkling large grains of sea salt for another pleasant surprise. All three versions were tied for first place. This recipe was finished in 15 minutes. Lucky for us, the walk over in sub-freezing temperatures cooled the almonds enough to eat as soon as we entered our friends’ home.

Butter Toffee Nuts Recipe

Ingredients

  • 1 cup sugar
  • 1 cup butter (2 sticks)
  • 3 tablespoons water
  • 3 cups whole almonds (or use 3 cups peanuts)
Directions
  1. Use a deep, heavy-bottomed saucepan to heat all of the ingredients, except the nuts. Stir the mixture constantly to prevent scorching. Using a candy thermometer and medium heat, bring the mixture to 300 degrees. The temperature will rise as the water is boiled off, and this can happen quickly, so be prepared to lower the heat or remove the candy from the heat as needed.
  2. As soon as the mixture reaches the desired temperature, remove it from the stove and add the nuts. Mix until all nuts are coated. Pour the nut mixture onto a greased cookie sheet spread into an even layer. Let fully cool. This step works well on parchment paper.

Recipe adapted from http://www.life123.com/food/candies-fudge/toffee/making-butter-toffee-almonds.shtml.

Chocolate Truffle Cookies with Pecans

Dedicated to fully addicted chocoholics, this chocolatey chocolate with chocolate-chip cookie is not for people who just “like” chocolate. Are you getting how chocolatey these are? 

This low-flour cookie is dense and fudge-like. Because the dough is quite sticky, I recommend using a cookie scoop and then rolling the chilled dough in a coating such as chopped nuts, confectioner’s sugar or coconut in order to make handling the dough easier. This extra touch also enhances the taste, texture and the presentation.

Chocolate Truffle Cookies

makes 3 dozen cookies

Ingredients

  • 2 cups semisweet chocolate chips, divided equally
  • 6 tablespoons butter
  • 3 eggs
  • 1 cup white sugar
  • 1 1/2 teaspoons vanilla extract
  • 1/2 cup all-purpose flour
  • 2 tablespoons unsweetened cocoa powder
  • 1/4 teaspoon baking powder
  • 1/4 teaspoon salt
  • 1 cup finely chopped pecans

Directions

  1. In a microwave or in a bowl warmed over a pan of simmering water, place the butter and 1 cup of chocolate chips and melt together, stirring occasionally until smooth. Remove from heat and set aside to slightly cool.
  2. In a large bowl, beat eggs and sugar until thick and pale, about 2 minutes. Stir in the vanilla and the chocolate mixture until well mixed.
  3. In a separate bowl, combine the flour, cocoa powder, baking powder and salt. Gradually stir into the chocolate mixture. Fold in remaining 1 cup chocolate chips. Cover dough and chill for at least an hour or overnight.
  4. Preheat oven to 350 degrees F (175 degrees C). Roll chilled dough into 1 inch balls. Roll dough balls to coat with chopped pecans. Place on ungreased cookie sheets so they are 2 inches apart.
  5. Baking time will vary depending on how chilled the dough is when it goes into the oven. Place cookies into preheated oven. Check at 9 minutes. Finished cookies should be puffed up and slightly cracked on top. This may take up to 15 minutes. Allow cookies to cool on baking sheet for 5 minutes before removing to a wire rack to cool completely.

This recipe was adapted from http://allrecipes.com/recipe/chocolate-truffle-cookies/detail.aspx.