Sunshine on a Snowy Day – Raspberry Lemon Curd Bars

Sunshine on a winter’s day… Lemon bars drenched in tangy-sweet raspberry jam

I love chocolate – in every form, flavor, and dish. I love dark, white, and milk chocolate. Except for a weird, avant-garde chocolate bar infused with pepper (??), I can’t think of a chocolate creation I haven’t enjoyed. Almost neck-in-neck with chocolate are desserts made with lemon. The difference with lemon is that it not only has a wonderfully tart flavor, but it also has a strong seasonal connection to summer. One bite or sip of lemon brings me back to sunshine splashed afternoons and evenings cooled by gentle breezes sitting in our little piece of paradise behind our home in California among Meyer lemon trees. When we moved to Alaska, I even made up a gallon’s worth of Meyer lemon simple syrup in order to ease the separation from those prolific trees.

As we hit the middle of March, our minds drift toward Spring! In our former life, I would be itching to get the planting pots and garden beds ready. In Chignik Lake, I’m ready to pull the Pack Rafts out and head down nearby rivers. Mother Nature has had three little words in response to these inclinations…”Not. So. Fast.” All the snow we didn’t see this past winter has been just now swirling around our windows and creating lovely white drifts. Our lake iced over, started to thaw, and is now covered in ice again.

As Jack tends to his culinary diversion, a slow-cooked moose roast, I decide on my own diversion…one that will bring a little sunshine into our home. I took a tried and true lemon curd bar recipe from my Williams and Sonoma Baking Book and adapted it with items from my bush pantry. All I can say is Wowee! After the initial mix of sweet and tart lemon, you are rewarded with a blanket of pure raspberry bliss. A definite blast of summer, in the best way possible.

Raspberry Lemon Curd Bars

Ingredients

Crust

  • 1 cup all-purpose flour
  • 1/3 cup granulated sugar
  • pinch salt
  • pinch cinnamon
  • ½ cup unsalted butter, melted

Filling

  • ¾ cup granulated sugar
  • 2 tbsp all-purpose flour
  • pinch salt
  • 3 large eggs (I used powdered eggs)
  • ½ cup lemon juice (I used good quality bottled lemon juice)
  • 3 tbsp heavy whipping cream

Topping

  • Raspberry jam (I used freezer jam which has a much brighter color and flavor)
  • Confectioners’ sugar

Directions

  1. Make crust.
  2. Preheat oven to 350° F (180° C).
  3. Grease an 8-inch square glass baking dish.
  4. Mix crust ingredients together.
  5. Press dough into bottom of baking dish.
  6. Bake for 20 minutes. Crust should be a pale golden color.
  7. Let the crust cool in the baking dish on a wire rack while you prepare filling.
  8. Reduce oven temperature to 325° F (165° C).
  9. Whisk together filling ingredients.
  10. Pour the mixture over the baked crust.
  11. Bake until filling is set, about 20 minutes. It may slightly jiggle when dish is shaken.
  12. Let lemon bars cool in the dish on a wire rack for at least 30 minutes.
  13. When ready to serve, run a knife around the edge of the pan. Cut into 12 or 16 rectangles.
  14. Remove from dish with a spatula and place pieces to be served on a serving dish.
  15. Spoon desired amount of jam on each piece.
  16. Dust each piece with confectioners’ sugar right before serving.

Bourbon Chocolate Chip Mini Skillet Cookie for Two

Warm and gooey, straight from the oven. Watch out – this cookie has been found to be highly addictive.

Several years ago, we were introduced to the cast iron skillet cookie. This giant chocolate chip cookie is best served nearly straight from the oven. No need for fancy serving dishes, we were handed spoons and in mere moments the 10-inch cast iron pan was emptied. 

This terribly addictive cookie came back into my thoughts during our last trip to Anchorage. Jack and I went to a restaurant where we were served a delicious skillet breakfast of country fried potatoes, a fried egg, and an Alaskan reindeer sausage all presented in a cute, single-serving cast iron pan. That presentation was as clever as it was practical. The mini-skillet was the perfect serving size for one and kept the breakfast piping hot. We could imagine all kinds of tasty creations that would work perfectly in these clever pans. When we got home, I ordered two, and was pleasantly surprised to find that they are relatively inexpensive.

When the pans arrived, the first order of the day was a skillet cookie… but not just any skillet cookie. We love the flavor of bourbon. It happens to perfectly complement the buttery, carmely, flavors of a chocolate chip cookie. (See our post about melty chocolate chip cookies.) So I decided to punch up the skillet cookie with a bit of bourbon. After a couple of different successful experiments, I came up with just the right balance of ingredients for my recipe.

The bad things about this cookie? It is ridiculously delicious. We found it impossible to eat part of it and save the other part for later. It is easy to make, which only contributes to the addiction problem. And if you happen to have some rich vanilla ice cream to scoop on the top? You may as well call your boss and tell him/her that you won’t be coming in this week.

With fair warning, I give you the –

Bourbon Chocolate Chip Skillet Cookie for Two

Ingredients

  • 1/4 cup unsalted butter, melted
  • 8 tsp granulated sugar
  • 1/4 cup brown sugar
  • 2 tbsp egg, whisked
  • 1 tsp vanilla extract
  • 2 tsp bourbon
  • 1/4 tsp baking soda
  • pinch salt
  • 1/2 cup all purpose flour
  • 1/3 cup semi-sweet chocolate chips

Directions

  1. Preheat oven to 350° F (180° C)
  2. Have a 6 1/2” cast iron skillet available
  3. Whisk melted butter with sugars
  4. Whisk in egg
  5. Whisk in vanilla and bourbon
  6. Stir in flour, baking solda and salt
  7. Fold in chocolate chips
  8. Pour batter into cast iron skillet
  9. Bake for 20 minutes. Cookie will be puffed up and will have pulled away from edge when finished.
  10. Let cool slightly. Serve while still warm plain or topped with creamy vanilla ice cream.

More Vegetables, Please! Spiced Carrot Cake with Rich Vanilla Cream Cheese Frosting

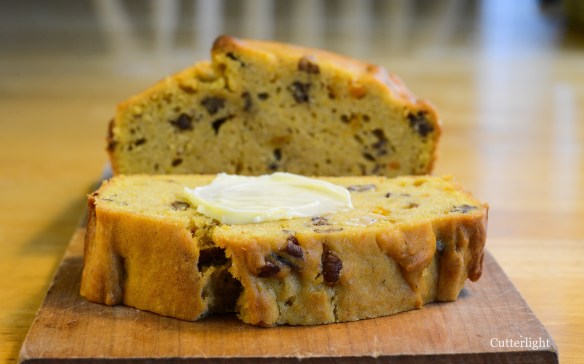
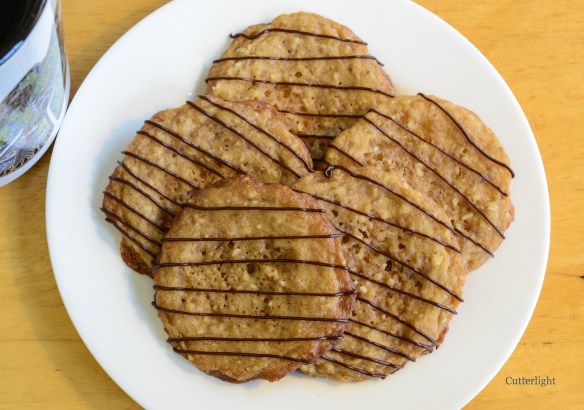
Packed with raisins, pecans and puréed carrots, this is a tasty way to enjoy a serving (or two) of carrots!

Living out in bush Alaska, there are certain ingredients that are a luxury in our pantry – like cream cheese. With recent outdoor temperatures agreeably mimicking a nicely chilled fridge, it was time to mail order dairy items requiring colder temperatures. Our here in Chignik Lake, Alaska, we’ve been relying heavily on the wonderful services of the mail order department at the Anchorage Fred Meyer (Debarr store). About every two weeks, we email a grocery list to the store and within four to five days, we receive  our items carefully wrapped or zip-top bagged for a nominal packing fee. A few weeks ago, we received heavy whipping cream, cream cheese and sour cream all nicely chilled in the belly of a little bush plane. Culinary feats take a bit of planning ahead, but with the cooperating weather, we can get most of what we need out here in tiptop condition. I can’t speak highly enough of our mail order friends in the Debarr Fred Meyer store!

If you’ve been following along, you’ll know that I periodically bake for my students. This has now become a time-honored tradition that has followed me through several schools. Last week, one of my students requested a cake for our “bake sale” (students can spend tickets they earn in class on a variety of rewards, including my baked creations). After my students polished off a bag of trail mix packed with raisins and nuts last week, I was confident that a carrot cake stuffed with nuts and raisins would be healthful and would be well-received by my young customers. Ok, and I like carrot cake, too, so I picked up my trusty Williams-Sonoma Baking Book to see what they had to say on the subject. Every recipe I’ve tried in this book has come out fantastically. The carrot cake recipe looked delicious. The one difference I noticed is that it called for puréed instead of shredded carrots. Pumpkin purée is a favorite, so why not a purée of carrots? Turns out the purée adds more moisture and the carrot flavor is slightly sweeter. I modified the recipe a bit and was highly pleased with the result. The cake was moist and smooth. The texture was only improved by the chopped nuts and raisins. What did the students say? They loved it! They especially liked the spice and the frosting, of course. If you won’t believe the kids, all the adults I shared the cake with agreed it was delicious!

Spiced Carrot Cake with Rich Vanilla Cream Cheese Frosting

Ingredients

  • 3/4 lb carrots, peeled and cut into 1/2 inch slices
  • 1 1/4 cups all purpose flour
  • 2 tsp baking powder
  • 1/2 tsp baking soda
  • generous pinch salt
  • 1 tsp ground cinnamon
  • 1/2 tsp mace (or substitute nutmeg)
  • 2 large eggs
  • 1 1/3 firmly packed light brown sugar
  • 1/2 cup whole milk
  • 1/2 cup unsalted butter, melted
  • 3/4 cup pecans, chopped coarse
  • 1/2 cup golden raisins
  • cream cheese frosting (see recipe below)

Directions

  1. Boil carrots until tender, about 10 minutes. Drain and let cool.
  2. Purée the carrots with a blender, stick blender or food processor. Set aside.
  3. Preheat oven to 350 degrees F (180° C). Line the bottom of an 8-inch square baking pan with parchment paper. Set aside.
  4. In a small bowl, whisk together flour, baking powder, baking soda, salt, cinnamon and mace.
  5. In a large bowl, whisk together eggs, brown sugar, milk and butter.
  6. Whisk the flour mixture into the egg mixture.
  7. Whisk in the carrot purée.
  8. Fold in the pecans and raisins.
  9. Pour batter into square baking pan.
  10. Bake 45 – 50 minutes in preheated oven. Cake will be lightly browned and wooden pick inserted into middle of cake will come out clean when cake is done.
  11. Let cake cool on a wire rack.
  12. Run a knife around edge of pan. Invert cake onto serving plate. Peel off parchment paper.
  13. Frost cake and serve right away.

Rich Vanilla Cream Cheese Frosting

Ingredients

  • 4 oz. cream cheese
  • 2 tbsp unsalted butter, melted
  • 3/4 cup powdered sugar
  • 3/4 tsp pure vanilla extract

Directions

  1. Using a mixer, beat all the frosting ingredients on medium speed until mixture is totally smooth and well-mixed.
  2. Alternatively, hand-mix all the frosting ingredients until smooth and totally mixed using a rubber spatula.

I’ve Become a Baking Nerd – Cranberry Pecan Rugelach

rugelach-cranberry-n

These sweet little cookies are common at Hanukkah, but filled with pecans and cranberries they will be welcomed at any Thanksgiving, Christmas or fall festivities table.

If you’ve been following our life off the beaten path, you know Jack and I love to read. The chilly, rainy days that encourage us to be inside only fuel our fires for reading. We read together almost every morning and most nights as well. We are in the midst of a tome of poetry for our morning sessions. The Top 500 Poems edited by William Harmon has been taking us on a poetic journey through the ages from Chaucer and Shakespeare to Ginsberg and Plath. In the evening, we are currently enjoying Truman Capote’s timeless classic Breakfast at Tiffany’s. In addition to our joint reading adventures, each of us is immersed in yet another read. My current book is excruciatingly nerdy  – The Professional Pastry Chef by Bo Friberg. It contains details and procedures for doing things only a baking nerd would love to do – like making marzipan from scratch, for example. And, yes, that is on my goal list now.

‘Tis the season for making pies, so I’ve delved into the section on infallible pie crusts. The author didn’t claim infallibility, but I am certainly trying to find one that never fails. I would like to be known as “The Pope of Pie Crusts.” The author did say that “a mastery of dough making is critical to the success of a professional pastry kitchen.” My kitchen is not professional, but I would like my crusts to have the taste and texture like those of the professionals. One pie crust which caught my eye includes cream cheese as part of the primary fat.

However, before I take on the intimidating world of pie crust perfection, I thought I would inch toward it with a cookie called rugelach that uses a similar cream cheese dough. The cookie dough spirals around a tasty filling. They are lovely to look at and even lovelier to eat!

Bo uses apricots and walnuts as her filling. I adapted her published recipe to make the directions simpler, and I also swapped her choice of fruit and nuts for what I had in my Alaska pantry. The resulting cookie recipe makes it easy to substitute any dried fruit and nut for the cranberries and pecans I used.

Pecan Cranberry Rugelach

Ingredients

Dough

  • 2 sticks unsalted butter (1 cup), room temperature
  • 8 oz. cream cheese, room temperature
  • 2 cups all purpose flour

Filling

  • 1/2 cup Craisins
  • 1 cup pecans, chopped coarse
  • 1 cup brown sugar
  • 1 tsp cinnamon
  • 3 tbsp unsalted butter, melted
  • 1 egg, beaten

Directions

  1. Beat 2 sticks butter and cream cheese together with mixer.
  2. Add in flour by 1/2 cups.
  3. Divide dough into thirds. Form 3 discs. Wrap each disc with plastic wrap and refrigerate for at least 2 hours.
  4. Rehydrate Craisins. Place Craisins in pan with enough water to cover. Bring water to boil, then remove pan from heat and let Craisins cool.
  5. Drain Craisins.
  6. Combine pecans, sugar, and cinnamon in a bowl.
  7. Preheat oven to 350 degrees F (180 degrees C). Line a baking sheet with parchment paper.
  8. Roll dough into 10-inch circles.
  9. Paint circles with melted butter.
  10. Sprinkle dough with pecan mixture.
  11. Evenly sprinkle with Craisins.
  12. With a pizza wheel, cut each circle into 12 even wedges.
  13. Roll the wedges from edge to center. Place cookies on prepared baking sheet.
  14. Paint all the cookies with beaten egg.
  15. Bake for 15 minutes. Finished rugelach will be golden when finished.

Happy Holidays! Lowbush Cranberry (Lingonberry) Upside-Down Cake

lingonberry-upside-down-cake_n

Bursting with the flavors and colors of the holidays, this lowbush cranberry cake makes a beautiful centerpiece for a fall table and, if there is any left, the breakfast table the next day!

Oh, these little red gems, these sour little beauties. They go straight from the freezer into a delicious batter and bake up into a cake you’ll want to share with friends.

Lowbush cranberries (as they are known here in Alaska) are our superstar fruit of fall and winter. Known as lingonberries elsewhere, these tart, tiny red berries grow close to the ground in cold, boggy habitat of northern climes. They taste similar to the cranberries we used to buy in the store, but they are so much better. As with many small, wild fruits, they are packed with more flavor than their mass-produced counterparts. And according to the University of Alaska, our lowbush cranberries contain more antioxidants due to clean air and long summertime sunlight hours. The berries are easy to pick and easy to clean and are widely available in our neck of the woods just around the time of the first frost. So far, we’ve made them into hot juice drinks and cranberry sauce. Now they are starring in this sumptuous upside down cake.

Lingonberry aka Lowbush Cranberry Upside Down Cake

Ingredients

Bottom Layer

  • 4 tbsp unsalted butter
  • ¾ cup dark brown sugar
  • 3 cups lowbush cranberries (or substitute store-bought cranberries)

Batter

  • 1 ¼ cup all purpose flour
  • ¼ cup corn meal
  • 1 ½ tsp baking powder
  • ¼ tsp salt
  • ½ cup unsalted butter, melted or browned
  • ¾ cup granulated sugar
  • 1 tsp Penzeys powdered lemon zest (or zest of 1 lemon)
  • 2 large eggs, beaten
  • 1 tsp vanilla extract
  • ½ cup whole milk

Directions

  1. In a small saucepan, heat 4 tbsp unsalted butter and brown sugar.
  2. Stir constantly until butter and sugar are melted together and bubbling.
  3. Pour mixture into bottom of 9 inch cake pan. Set aside.
  4. Preheat oven to 350 degrees F (180 degrees C).
  5. Whisk together flour, corn meal, baking powder and salt in a large bowl.
  6. In a small bowl, whisk together melted butter, sugar, lemon zest, eggs, vanilla and milk.
  7. Pour wet ingredients into dry and whisk together until mixed.
  8. Pour cranberries evenly on top of butter mixture in the 9-inch pan.
  9. Pour batter evenly over cranberries.
  10. Bake cake in preheated oven for 50 minutes. Wooden pick inserted into center will be clean when cake is done.
  11. Let cake cool in pan on wire rack for 10 minutes.
  12. Run a knife around the circumference of cake. Invert on cake platter to serve.
  13. Serve warm.

Recipe adapted from David Lebovitz.

Roasted Squash Pecan Bread

squash-pecan-bread-n

Imbued with traditional fall flavors, we have a feeling this bread could become a new Thanksgiving tradition!

During our annual shopping in July, we picked up several acorn and butternut squashes – favorite centerpieces in many of our recipes. There is also a practical side to squashes when living in the bush… they ship well and last a long time in a cool, dry location. Up in Point Hope, we used to keep squash and potatoes for months in our mudroom. Here in Chignik Lake, a much more damp location, the fridge serves as our long-term storage area.

Recently, after oven-roasting a butternut squash in olive oil and garlic, I decided to try something new. I have a time-tested base recipe for fruit bread, but instead of the usual pears or other fruit, I used the roasted squash. Even the raw dough was quite tasty! (I know, I know, I’m not supposed to eat raw dough…but I always do). The squash helps to make the bread moist and satisfying and pumpkin pie spices give it a sense of holiday seasons. Pecans add a layer of flavor and a hearty crunch. This would be a perfect Thanksgiving bread!

Roasted Butternut Squash Pecan Bread

Ingredients

  • 2 cups mashed roasted butternut squash (any roasted squash will work)
  • ½ cup vegetable oil
  • ½ cup unsalted butter, melted
  • 4 large eggs, beaten
  • 2 tsp vanilla extract
  • 1 ½ cups granulated sugar
  • 1 tsp galangal (or ground ginger)
  • ½ tsp ground nutmeg
  • 1 tsp ground cinnamon
  • 3 ½ cups all purpose flour
  • 1 tsp baking powder
  • ½ tsp salt
  • 1 cup chopped pecans

Directions

  1. Grease two 8 in. x 4 in. x 2 in. loaf pans. Set aside.
  2. Preheat oven to 350 degrees F (175 degrees C).
  3. In a large bowl mix together squash, oil, butter.
  4. Mix in eggs and vanilla.
  5. Mix in sugar.
  6. Sift in spices, flour, baking powder and salt.
  7. Mix well, but do not over mix.
  8. Fold in pecans.
  9. Pour batter into two prepared pans.
  10. Bake for 60 minutes or until a wooden pick inserted into center of loaf comes out clean.
  11. Top should be lightly browned.
  12. Cool for a few minutes in pans. Remove loaves and finish cooling on wire racks.

Blueberry Jam Bars – The Best Part of a Survival Kit for Stormy Afternoons

blueberry-jam-bars-n

Stormy afternoon survival kit: A great book, freshly brewed tea, and blueberry jam bars still warm from the oven.

My morning chores were to make a batch of yogurt, sourdough loaves for the week and sourdough pizza crusts for the freezer. Those tasks complete, it would have been nice to go outside for a walk. But this Saturday’s weather turned it into a stay-inside kind of day. We’ve heard that October is the month that Chignik Lake earned its name. Chignik means big winds in the native language. Saturday, it poured rain sideways. The lake was blown into a froth of whitecaps. Our little home here hunkered down solidly, just like our little house in Point Hope. It was the kind of day to curl up with a warm drink, a book, and a blanket. In our house, this scene also begs for a home-baked accompaniment. With a shelf of preserves made from berries we picked earlier, I had no trouble baking up a batch of oat bars filled with jam. The hardest part was to choose which jam – blueberry, currant, raspberry, or cranberry. Blueberry! In just over 30 minutes, I had delicious bars ready to go. This recipe is as easy as pie… or as blueberry oat bars.

Blueberry Oat Bars

Serves 9 polite eaters, or 2 ( if you have limited willpower)

Ingredients

  • 1/2 cup dark brown sugar, packed
  • 1 cup all-purpose flour
  • 1/4 tsp baking soda
  • pinch salt
  • 1 cup rolled oats
  • 1/2 cup unsalted butter, melted
  • 1 cup homemade blueberry jam (substitute any jam you have on hand)

Directions

  1. Preheat oven to 350 degrees F (175 degrees C).
  2. Grease 8 inch square baking dish.
  3. Combine sugar, flour, baking soda, salt, and oats in a medium bowl.
  4. Drizzle melted butter into flour mixture.
  5. Toss until mixture is crumbly.
  6. Press 2 cups of the mixture evenly into bottom of baking dish.
  7. Spread jam on top of flour mixture.
  8. Sprinkle remaining flour mixture atop jam, as even as you can.
  9. Lightly press flour mixture into jam.
  10. Bake for 35 minutes. Finished bars should be lightly browned.
  11. Allow to cool before cutting.

Out of Chocolate! Now What? Chewy Almond Thins to the Rescue

chewy-almond-crisps-n

These candy-like cookies are ridiculous. Chewy and flavorful – a cure for a terminal sweet tooth.

At the end of most evening meals, Jack and I enjoy a piece of dark chocolate or a little something sweet with a cup of tea. I have a terrible sweet tooth that seems to be sated by this little habit. Thinking that I would bake more than I have been, we didn’t send out very much chocolate for our après dinner tradition. Now our chocolate is all gone – at least till the next Amazon order arrives via bush plane.

In these kinds of emergencies, my Williams-Sonoma Baking book always seems to save the day. It is a solid baking book with a number of foundational recipes that can be followed directly or easily adapted. I remembered a quick cookie recipe loaded with almonds that I hoped would do the trick. The authors of the recipe called these cookies Almond Crisps. Mine turned out beautifully flat and a bit lacy. They were pleasantly chewy, like a really satisfying caramel. I think this is due to the combination of sugar and brown sugar. Delicious. I adorned these cookies with a chocolate drizzle made from a few semi-sweet chips I had stashed in my pantry.

Our problem now is that three dozen of these cookies have up and disappeared!

Chewy Almond Thins

Ingredients

  • ½ cup unsalted butter, room temperature
  • 1 cup brown sugar
  • 1 large egg
  • 1 tsp vanilla extract
  • ¾ cup all purpose flour
  • 1 tsp baking powder
  • pinch salt
  • ½ cup finely chopped almonds

Directions

  1. In the bowl of a stand mixer, cream butter.
  2. Add sugar and continue to beat until sugar and butter are well mixed.
  3. Add egg and vanilla into mixture. Mix on low speed until well mixed.
  4. Sift flour, baking powder, and salt together.
  5. Stir flour mixture into butter mixture.
  6. Stir in almonds.
  7. Preheat oven to 400 degrees F (200 degrees C).
  8. Line a baking sheet with parchment paper.
  9. Drop teaspoonfuls of batter onto prepared baking sheets. Space cookies about 2 inches apart. They will spread.
  10. Bake 5 minutes. Edges will be golden brown, but cookies will still be soft.
  11. Let cookies cool on baking sheet for exactly 5 minutes. Then remove to wire rack to finish cooling.

Super Sourdough Success

sourdough-loaf-n

Two loaves of sourdough bread fresh out of the oven. As soon as they cooled enough to cut, we were in. Delicious!

Every July, I make culinary goals for myself as this is the time of year we do our bulk shopping for our year in the Alaskan bush. My two big goals this year were to master working with sourdough starter and to make cheese.

I’ve tried making sourdough bread with starter before. A friend gave me some of hers which she had had going for several years. For whatever reason, my sourdough did not turn out. Jack called it an epic fail. I don’t remember it being epic. That would have involved tears, bread in the trash, and possibly my fists pounding the floor like a tantrumming child. Don’t ask me about the time I tried to hard boil eggs! That was an epic fail. I do remember that my last attempt making sourdough bread wasn’t good. So, it went on the goal list to try again.

Most people go to their local store to buy the things they need. If they are lucky, they live in a place with specialty shops where they can find unique tools to help them achieve their culinary goals. Out here in the bush, we rely on the U.S. Postal Service to deliver items we can find via the Internet. This involves lots of planning and lots of patience waiting for items to show up. Last week, my sourdough starter finally arrived. I’ve been diligently feeding it every day and it’s been bubbling away on the countertop in a nifty glass jar I bought especially for this purpose.

Today was the big day. The starter smelled nicely sour. I gathered my ingredients and set to work. Happily, the two loaves came out lightly sour and made for a great accompaniment to Jack’s clam chowder. Hurrah! It will be interesting to see if the starter changes flavor as it continues to age. I am also curious to see how the starter will taste in sourdough pancakes. Stay tuned to find out!

Homemade Sourdough Bread

Ingredients

  • 3 ¾ cups all purpose flour
  • 2 tbsp granulated sugar
  • 2 ¼ tsp active dry yeast
  • 1 cup whole milk
  • 2 tbsp unsalted butter
  • 1 ½ cups sourdough starter
  • 2 tsp salt
  • 2 tbsp olive oil
  • 1 egg
  • 1 tbsp water

Directions

  1. In a large bowl, combine 1 cup flour, sugar, and yeast. Whisk together.
  2. Place butter and milk in small pot on stove. Warm to about 110 degrees F.
  3. Whisk milk mixture into flour mixture.
  4. Whisk in sourdough starter.
  5. Stir another cup of flour into dough mixture.
  6. Stir and then knead in one more cup of flour and salt. (I actually knead in the large bowl.)
  7. Knead in final ¾ cup of flour. Dough should be well mixed and slightly sticky.
  8. Turn dough out of bowl and coat bowl with 2 tbsp olive oil. Place dough back in bowl.
  9. Cover with plastic wrap and rise for 1 hour or until doubled in size.
  10. Punch dough down. Divide dough in half and shape each half into a loaf-shaped log.
  11. Place loaves on a parchment-lined baking sheet.
  12. Cover and let rise for an hour, or until doubled in size.
  13. Heat oven to 375 degrees F.
  14. Mix egg and water and brush loaves generously with this mixture.
  15. Bake loaves for 25 minutes. Finished loaves will be golden brown and have a hollow sound when the bottom is tapped.

Lemon Tart for Two (or One)

gluten free lemon tart n

Tart and sweet, just like a lemon tart is supposed to be. Bites to remind of us of Spring in the middle of Winter.

I’ve noticed that lemon tart recipes are showing up on some of my feeds. Deep in the heart of Winter (a low of negative 30-something Fahrenheit in Ulaanbaatar today) , I think many of us are longing for Spring. The bright yellow zest and the taste of fresh lemon does seem to bring the feeling of Spring into the house, even if only momentarily.

Last summer, I found some four-inch baking dishes that are the perfect size for the two of us to share. And if I happen to eat the whole thing (ahem), I shouldn’t feel too guilty. Tiny tart – tiny guilt. As a nod to my friends who can’t eat gluten, or eggs, or milk, I created this recipe without any animal products or wheat. I really wanted to see if I could make a tasty crust with a nut and oat combination. The tart filling turned out nice and custard-like with a lovely sweet and tart lemony flavor. The crust had a nice nutty crunch to it which paired perfectly with the filling. This dessert turned out delicious!

Lemon Tart for Two

Ingredients

Crust

  • 1 1/2 tbsp oats
  • 1 1/2 tbsp finely chopped pecans
  • 1 tbsp brown sugar
  • 1/2 tsp baking soda
  • tiny pinch salt
  • 1/2 tsp vanilla
  • 1/2 tbsp applesauce

Filling

  • 3 tbsp sugar
  • 2 tbsp cornstarch
  • tiny pinch salt
  • ¼ cup soy milk (or other non-dairy milk)
  • 2 tbsp water
  • juice of one lemon juice (about 3 tbsp)
  • zest of one lemon

Directions

  1. Preheat oven to 375 F (190C). Grease a 4-inch tart pan.
  2. Put the oats, pecans, and sugar into a food processor or blender and process until finely ground.
  3. Add the remaining dry ingredients and blend well. Transfer to a bowl and add the vanilla and apple sauce. Stir well until completely combined.
  4. Put the mixture into the tart pan. Press mixture with moistened fingers until it evenly covers the bottom and extends up the sides of the pan as far as possible.
  5. Put it in the oven and cook for 8-10 minutes, until it is crisp but not overdone. Set aside to cool before filling.
  6. Whisk together sugar, cornstarch, and salt in a small saucepan.
  7. Stir in the soy milk and water until completely combined.
  8. Heat until thickens over medium heat stirring constantly.
  9. Remove from heat and stir in lemon juice and zest (reserve a tiny amount of zest for garnish).
  10. Return to heat and continue whisking over heat for 2-3 minutes. Mixture should be smooth and lump-free.
  11. Pour mixture into the tart crust. Sprinkle reserved lemon zest on top of tart. Chill until set, about an hour.