Dutched Hot Cocoa

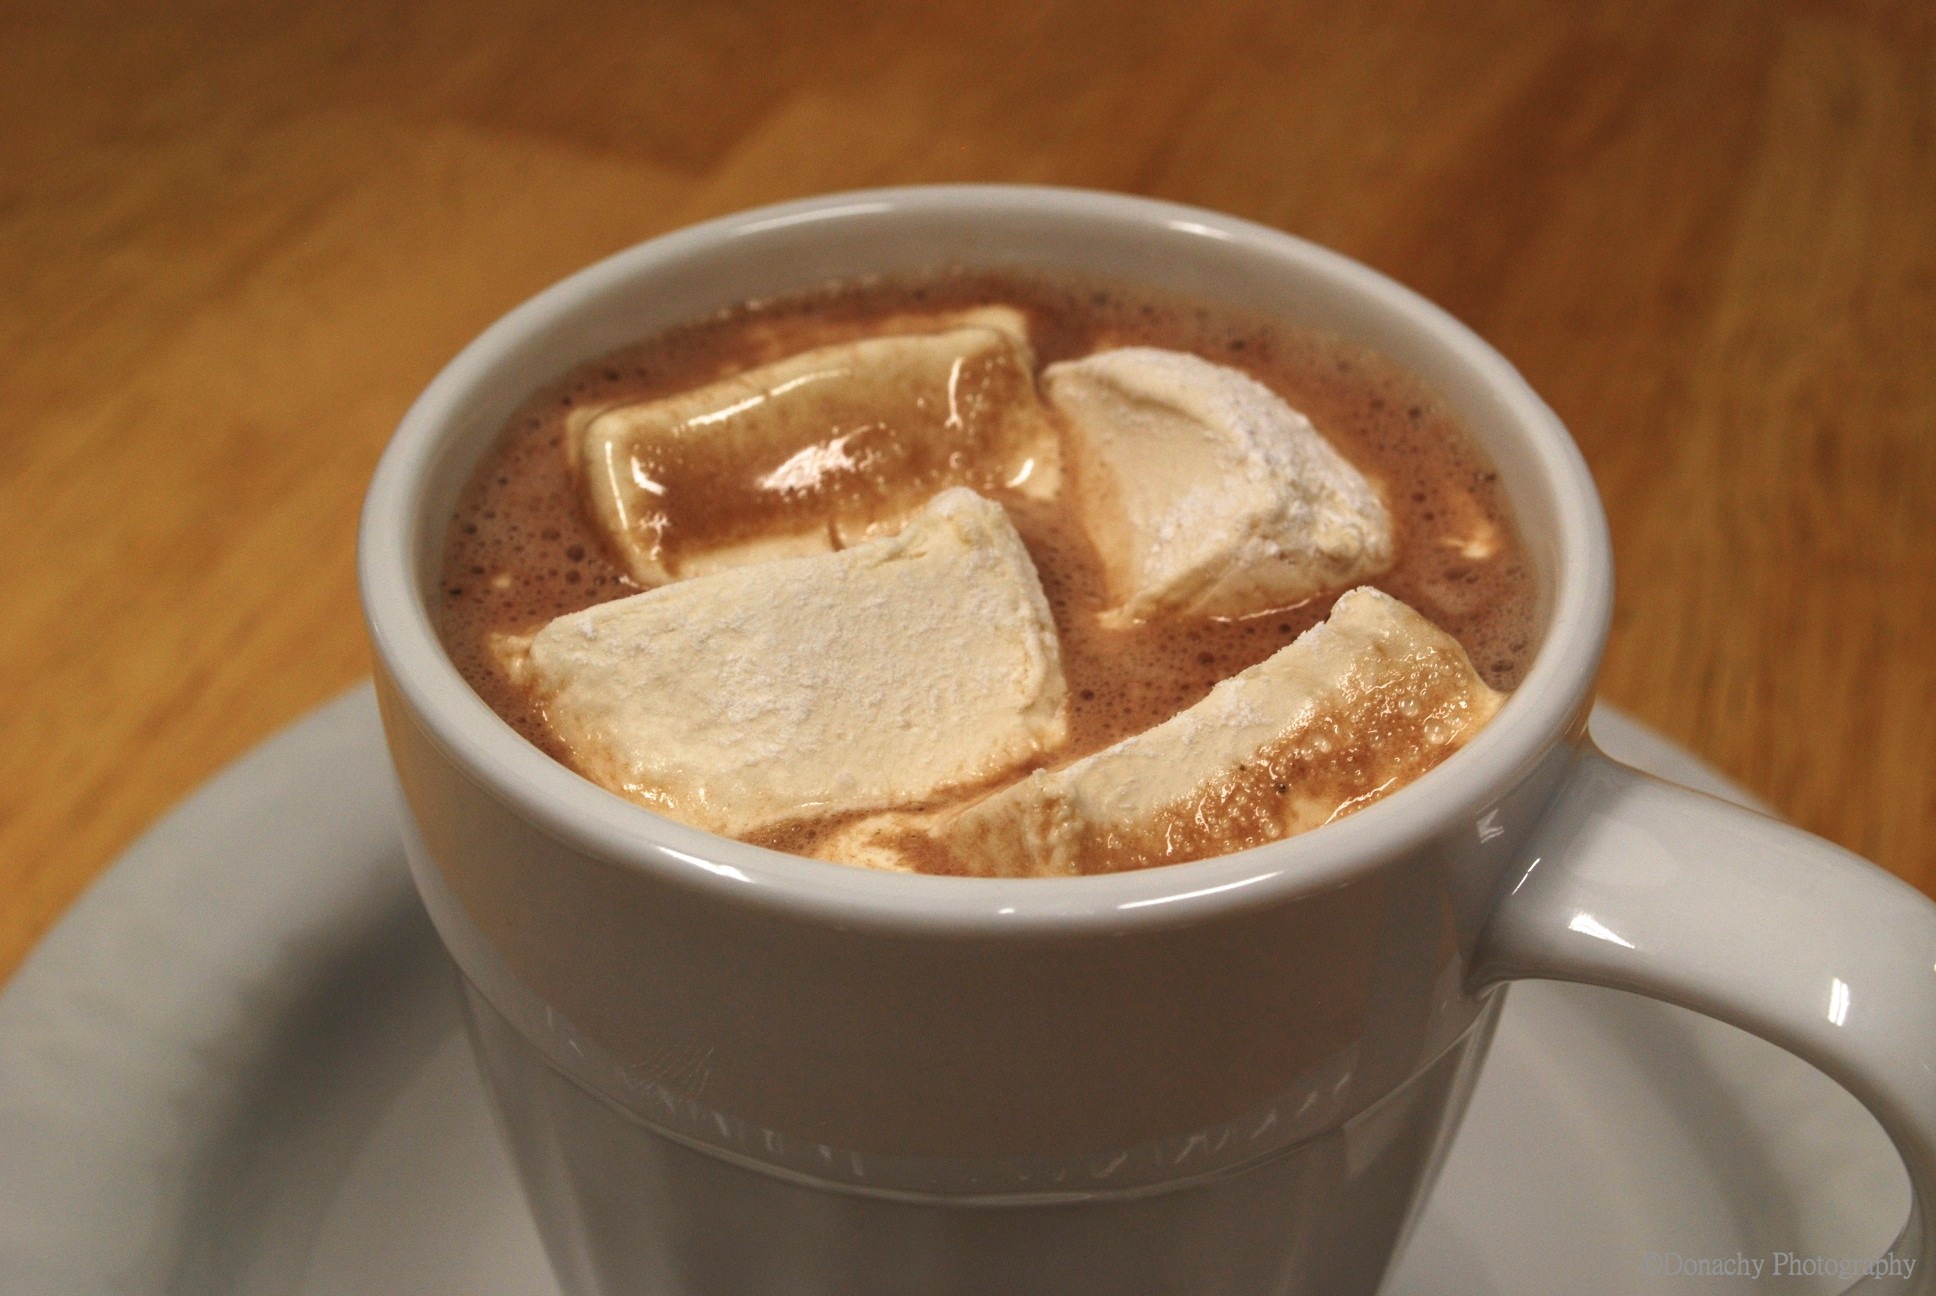
Rich, creamy and with a wicked cocoa flavor you can almost sink your teeth into, Dutched cocoa and homemade marshmallows make the perfect after dinner or home movie hot beverage.

Homemade Hot Cocoa with Homemade Marshmallows

Every great food has “secret ingredients.” Here, they are Dutch process high fat cocoa and homemade marshmallows. Also known as “Dutched” cocoa, this cocoa is made from the richest grade of cocoa available and is processed for an especially smooth flavor. As for the marshmallows… As sticky and messy as these are to make from scratch, having experienced how flavorful and wonderfully gooey a melted marshmallow can be, it’s going to be hard to go back to store-bought.

Ingredients (2 cups)

  • 2 cups milk or soy milk
  • 1 tbs Dutch Process High Fat Cocoa (available from Penzeys Spices)
  • 1 1/2 tbs sugar
  • dash of cinnamon
  • dash of vanilla
  • a couple of homemade marshmallows cut into chunks

Directions: Heat milk, cocoa, sugar, cinnamon and vanilla in a heavy pot (to prevent scorching) over medium low heat. A whisk works well for mixing in the cocoa. Do not boil. When steam develops and liquid is hot to the touch, pour into mugs and top with marshmallows.

Baked Lingcod with Lobster Sauce: Celebrating The Rough, Tough King of Northern Pacific Reefs

Seasoned breadcrumbs, lobster sauce with Alaskan shrimp, and a couple dabs of lumpfish roe are fitting accompaniment for one of the sea’s most prized fish – lingcod. This fillet is served on a bed of couscous and is surrounded by thin slices of Coho salmon sashimi. Recipes can be found at the end of this article.

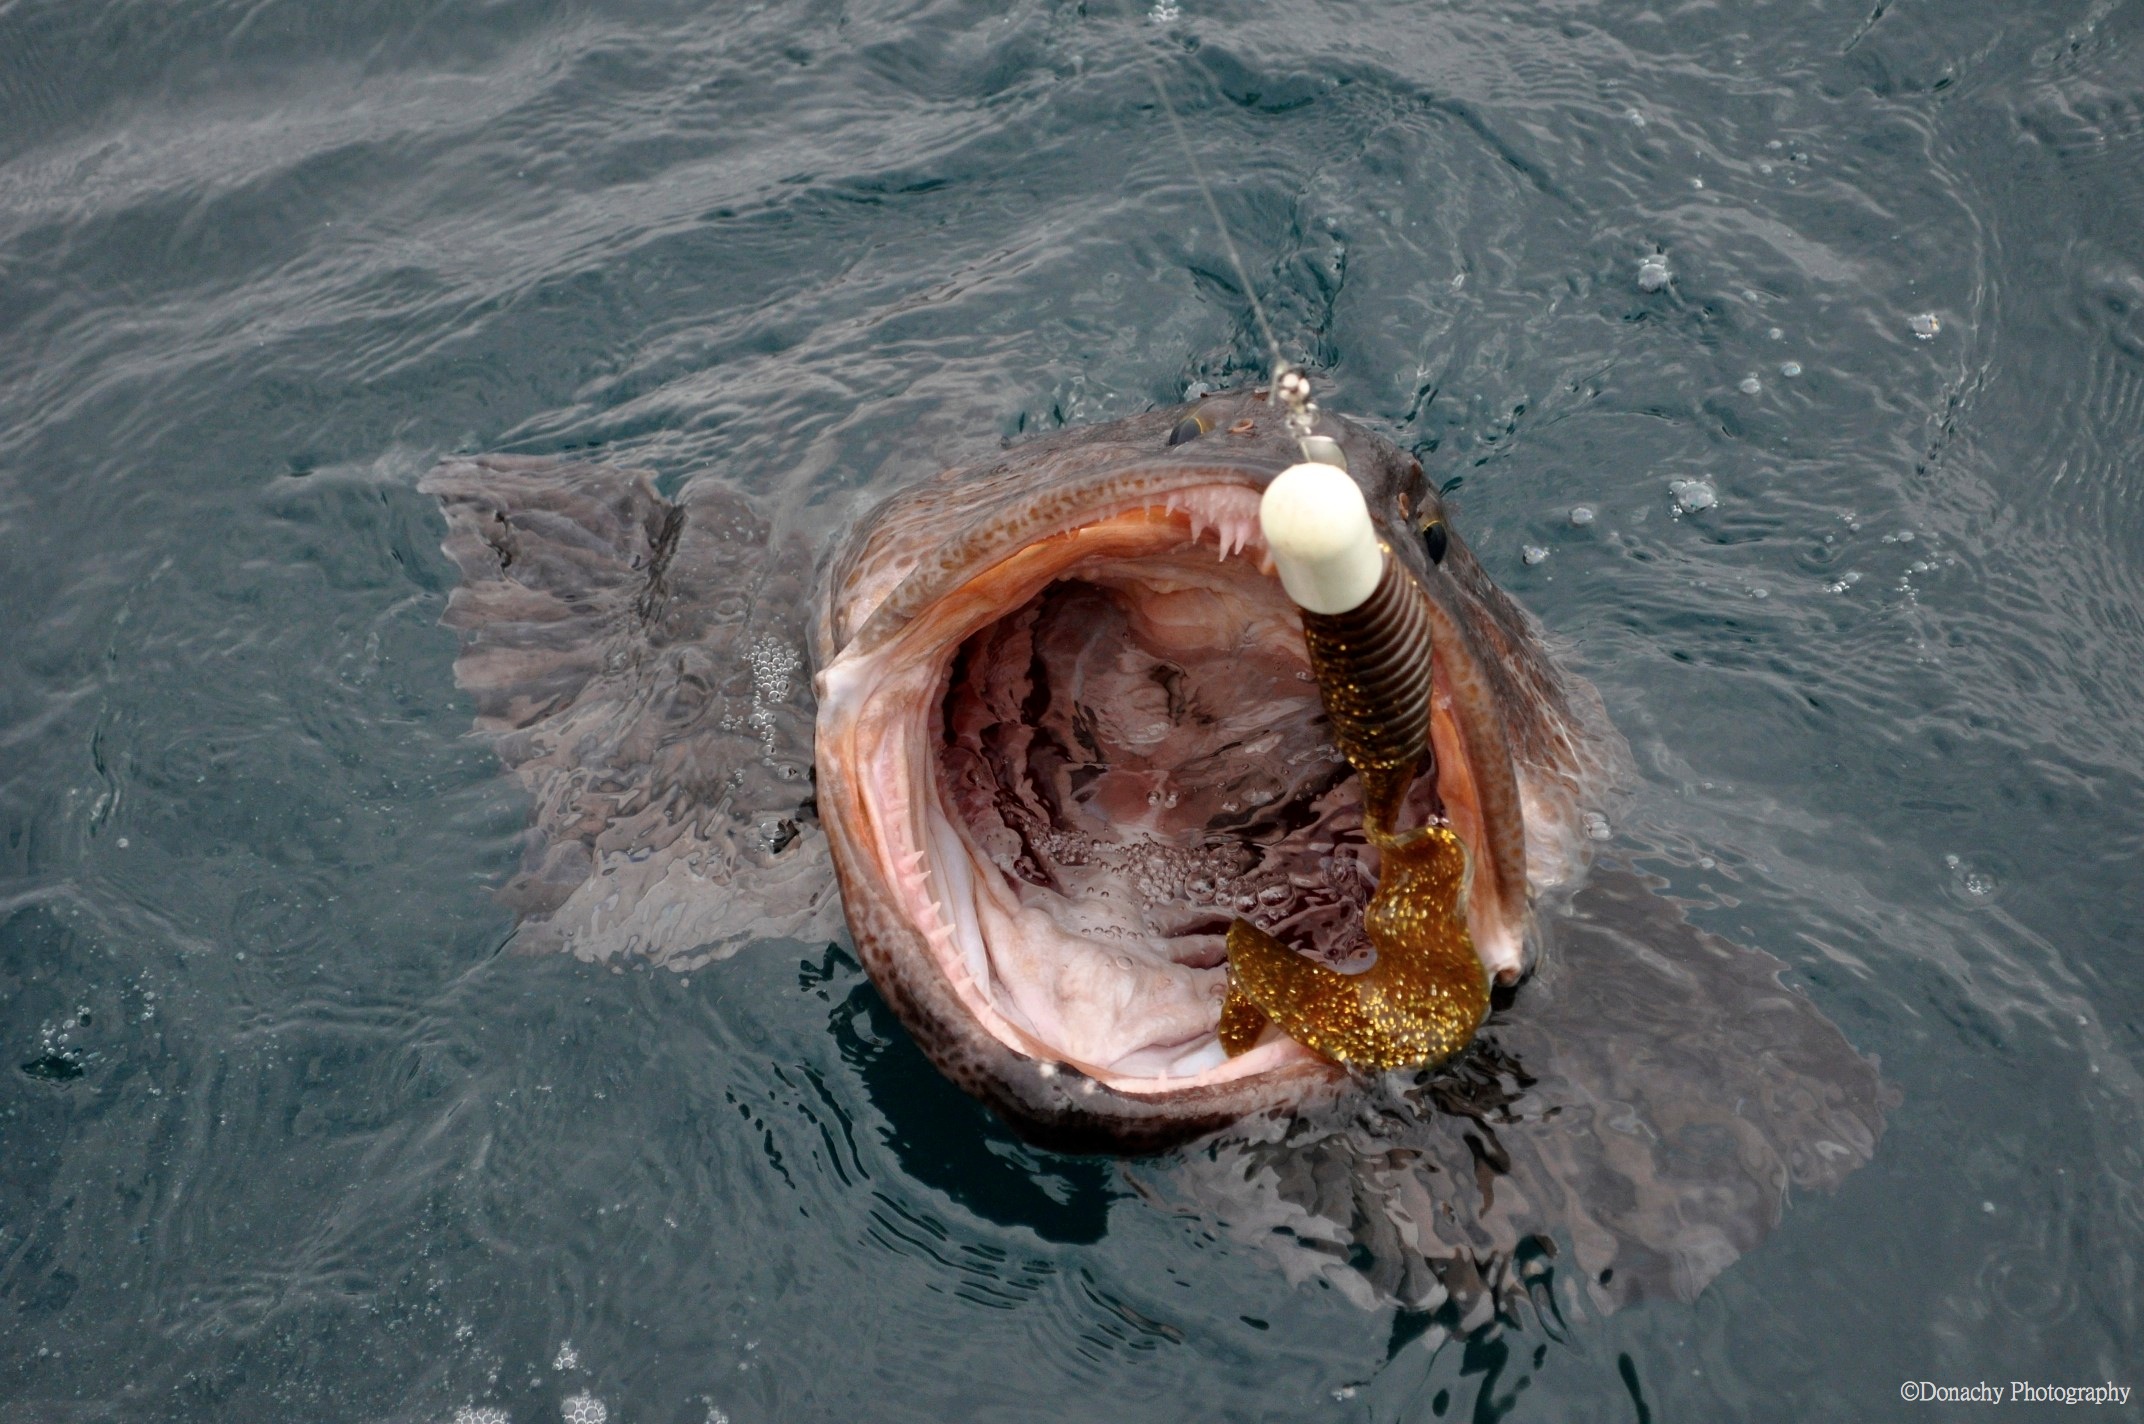
Lingcod (Ophiodon elongatus – long tooth) are a special fish. Their leopard-like spotting marks them for what they are: aggressive predators that, save for other, bigger lingcod, are at the top of the food chain among the fish with which they share rocky Northern Pacific reefs. They lie in ambush, waiting for unsuspecting greenling, rockfish, octopuses or whatever else might happen by, and then spring into action with massive jaws encircling 18 needle-sharp teeth. In the heart of their range – from British Columbia through Southcentral Alaska – 20 to 40-pound lingcod are common, with fish over 50 pounds showing up each year. The all-tackle IGFA record stands at 82 lb 9 0z and came from the Gulf of Alaska. Larger fish have been reported in commercial catches.

Welcoming a nice ling aboard our C-Dory 22 Angler. Note the two-pound rockfish hanging from the lower end of the metal jig.

A few of the usual customers you can expect to run into dropping a metal jig off a deep, rocky point in Alaska: salmon, rockfish, and a lingcod. 

Lings thump a jig like few other fish, and although pound-for-pound the smaller eight to 20-pounders seem to fight harder than the big cows, all lings generally give a good account of themselves, typically peeling line from reels as they dive for the rocks after being hooked. Many an angler has hooked a two or three pound

A 10″ twister tail grub on a 1 pound jighead is dwarfed in the maw of a 40-pounder. Root beer is a favorite color among lingcod fishermen. Here the color is paired with a glow-in-the-dark jig.

rockfish and while reeling in the catch had it violently intercepted by a lingcod. Frequently in these cases, the ling isn’t even hooked, but will hang onto its catch as tenaciously as a bulldog, fighting all the way to the boat where, if the angler is quick-witted enough, it can be gaffed or scooped up in a net. A moment’s hesitation, slack line, or lifting of the hitch-hiking ling’s head above water, however, can cause the predator to release its prey and nonchalantly swim back to the bottom.

If I had just one type of lure to fish rocky reefs, there’d be no contest as to what I’d choose: metal jigs in the right hands are deadly. 

On the table, it is our view that lingcod is unsurpassed among white-meated fish. It compares favorably with grouper, halibut, snapper, and similar fish whether baked, broiled, pan-fried or deep-fried. Interestingly, the meat of fresh lingcod is sometimes blue. This does not affect the flavor or texture at all, and when cooked, the meat comes out in big, white, flakey chunks.

Lingcod are susceptible to overfishing. Most of the ones we catch go back to keep growing and to sustain the population.

Baked Lingcod with Breadcrumbs

Ingredients (serves 4)

  • 24 ounce lingcod fillet cut into 4 separate pieces, skin removed
  • 1/2 cup olive oil, placed in a bowl
  • 2 cups seasoned breadcrumbs (We make our own breadcrumbs and season them with an Italian seasoning blend of our own making, but any good commercial blend is fine.)
  • salt
  • freshly ground pepper
  • Additional olive oil for baking

Directions

  1. Place a baking sheet on the center rack of an oven and preheat to 425 degrees F.
  2. Place breadcrumbs in a bowl and season with Italian seasoning, salt and pepper to taste. Then transfer 1 1/2 cups of breadcrumbs to a plate where you will roll the fillets, and spread the remaining 1/2 cup of breadcrumbs on a cutting board where you will rest the fillets once they’re coated with breadcrumbs.
  3. Dip fillets one at a time in olive oil and completely cover with oil. Then roll the fillet in the breadcrumbs, covering all sides. Place atop breadcrumbs on cutting board.
  4. Coat baking sheet with olive oil. When oil is sizzling hot, place fillets on baking sheet and bake for about 10 minutes (for fillets that are 1 inch thick). Breadcrumbs should be golden brown when fillet is done.
  5. Remove fillets from oven and place on a bed of couscous, rice or farfalle pasta.
  6. Spoon lobster sauce on fillets. Garnish with caviar, lumpfish roe or ikura (cured salmon eggs) and serve piping hot.

Lobster Sauce with Alaskan Shrimp

Ingredients

  • 1 tablespoon Better than Bouillon lobster base or similar lobster base
  • 1/4 pound peeled shrimp. Small shrimp are preferable; larger shrimp can but cut into smaller pieces.
  • 1/2 cup water
  • 1 cup heavy cream
  • 1 1/2 tablespoons rice flour (or substitute all-purpouse flour), as a thickener
  • 1 tablespoon butter
  • 1 tablespoon olive oil
  • 1/4 cup finely chopped sweet onion
  • 1/4 tsp paprika
  • 1 teaspoon dried tarragon
  • Freshly ground pepper
  • Salt, if needed

Directions

  1. In a small pot over medium-low heat, place olive oil and onions. Stir occasionally till onions begin to turn translucent.
  2. Lower heat and add water and lobster bouillon, stirring until mixed together.
  3. Add rice flour, tarragon, pepper, paprika and butter, stirring constantly until flour is completely mixed in and mixture begins to thicken. Cover and lower heat (use a flame tamer if necessary).
  4. Add cream a little at a time, stirring constantly, until desired consistency is achieved.
  5. Add shrimp. Continue to stir until shrimp is cooked through (about 2 to 3 minutes).
  6. Remove pan from heat, but keep warm until sauce is needed.

Deep Dish Garlic Margherita Pizza

Uptown Chicago on the Chukchi Sea: Pan-fried garlic chips and lots of parmesan create a tasty topping for this Margherita-stye deep dish pizza. 

Barbra’s formative food experiences were considerably more worldly than mine. For her, deep dish pizzas were part of growing up. But I still vividly remember my first encounter with deep dish pizza. It occurred during my senior year of high school when one of my track teammates qualified for nationals in the javelin. The meet was in Chicago. When he got back, he raved about a strange and wondrous food called “Chicago Deep Dish Pizza.” The way he told it, a single lare slice of this thick, crusty, meat-and-cheese-stuffed pie would constitute a meal for a regular person.

After that, I kept my eyes open, hoping to find such a pizza on a local menu or in our supermarket’s frozen food section. But back then, in my small town in western Pennsylvania, there were no Chicago Style Deep Dish Pizzas. (I felt like an epicurean adding a little extra cheese and a sprinkle of Italian Seasoning on my frozen Red Barrons.) Many years later, when I finally did get the opportunity to try a deep dish pizza, it was at a well-known pizza chain where, not surprisingly, the experience was entirely anticlimactic.

I’m happy to say that I have finally experienced the gustatory joy of digging into an authentic, perfectly baked, zesty, cheesy satisfying deep dish pizza. Barbra kept the ingredients fairly simple, starting with a Margherita-style filling featuring diced tomatoes, slices of mozzarella, olive oil and a blend of Italian herbs. She topped this with shredded parmesan and pan-fried garlic slices. In our view, pizzas ultimately stand or fall on their crusts. This one was perfect.

Deep Dish Garlic Margherita Pizza

Ingredients

Crust

  • 4 cups all-purpose flour
  • 3 tbsp yellow cornmeal
  • 2 3/4 tsp yeast
  • 1 3/4 tsp salt
  • 4 tbsp olive oil
  • 4 tbsp butter, melted
  • 1 1/4 cup water

Filling and Toppings

  • 3/4 lb. mozzarella cheese, sliced
  • 28 ounces (two 14 ounce cans) of diced tomatoes, drained thoroughly
  • 3 tsp dried Italian seasonings
  • 1 tsp dried garlic powder
  • 1 cup freshly grated Parmesan cheese
  • salt and pepper to taste
  • garlic chips (see recipe below)

Directions for Crust

  1. Preheat oven to 400 degrees F.
  2. Place the crust ingredients in the bread machine pan in the order recommended by the manufacturer.
  3. Turn on dough setting.
  4. Place the dough in a lightly oiled bowl.
  5. Oil a pizza pan or two 9-inch pie pans by pouring a couple of tablespoons of olive oil in pan and tilting it to cover bottom(s).
  6. Stretch the dough to make a large circle. Do this with your hands or with a rolling pin on a lightly oiled surface.
  7. Lay the dough in the pan and stretch the dough up the sides of the pan. Cover and let rest for 15 minutes.
  8. Bake crust for 10 minutes until set and very lightly browned

Directions for Filling and Toppings

  1. Combine tomatoes with herbs, garlic, salt and pepper.
  2. Cover the bottom of baked crust with mozzarella slices.
  3. Add tomato mixture.
  4. Sprinkle parmesan cheese on the top.
  5. Top with garlic chips (See below).
  6. Bake pizza for about 25 minutes. If edges begin to brown too much, cover edges with foil during baking. When finished, pizza filling should be bubbly and top should be golden brown.
  7. Allow pizza to cool for about 10 – 15 minutes before serving.

Garlic Chips

  1. Slice 6 large cloves of garlic into thin slivers.
  2. Heat olive oil over medium-low heat in a medium frying pan. Add garlic slivers and sauté until just browned and edges are crisp.
  3. Remove chips from heat and drain on paper towel.

Burebrot or Swiss Farmer’s Bread

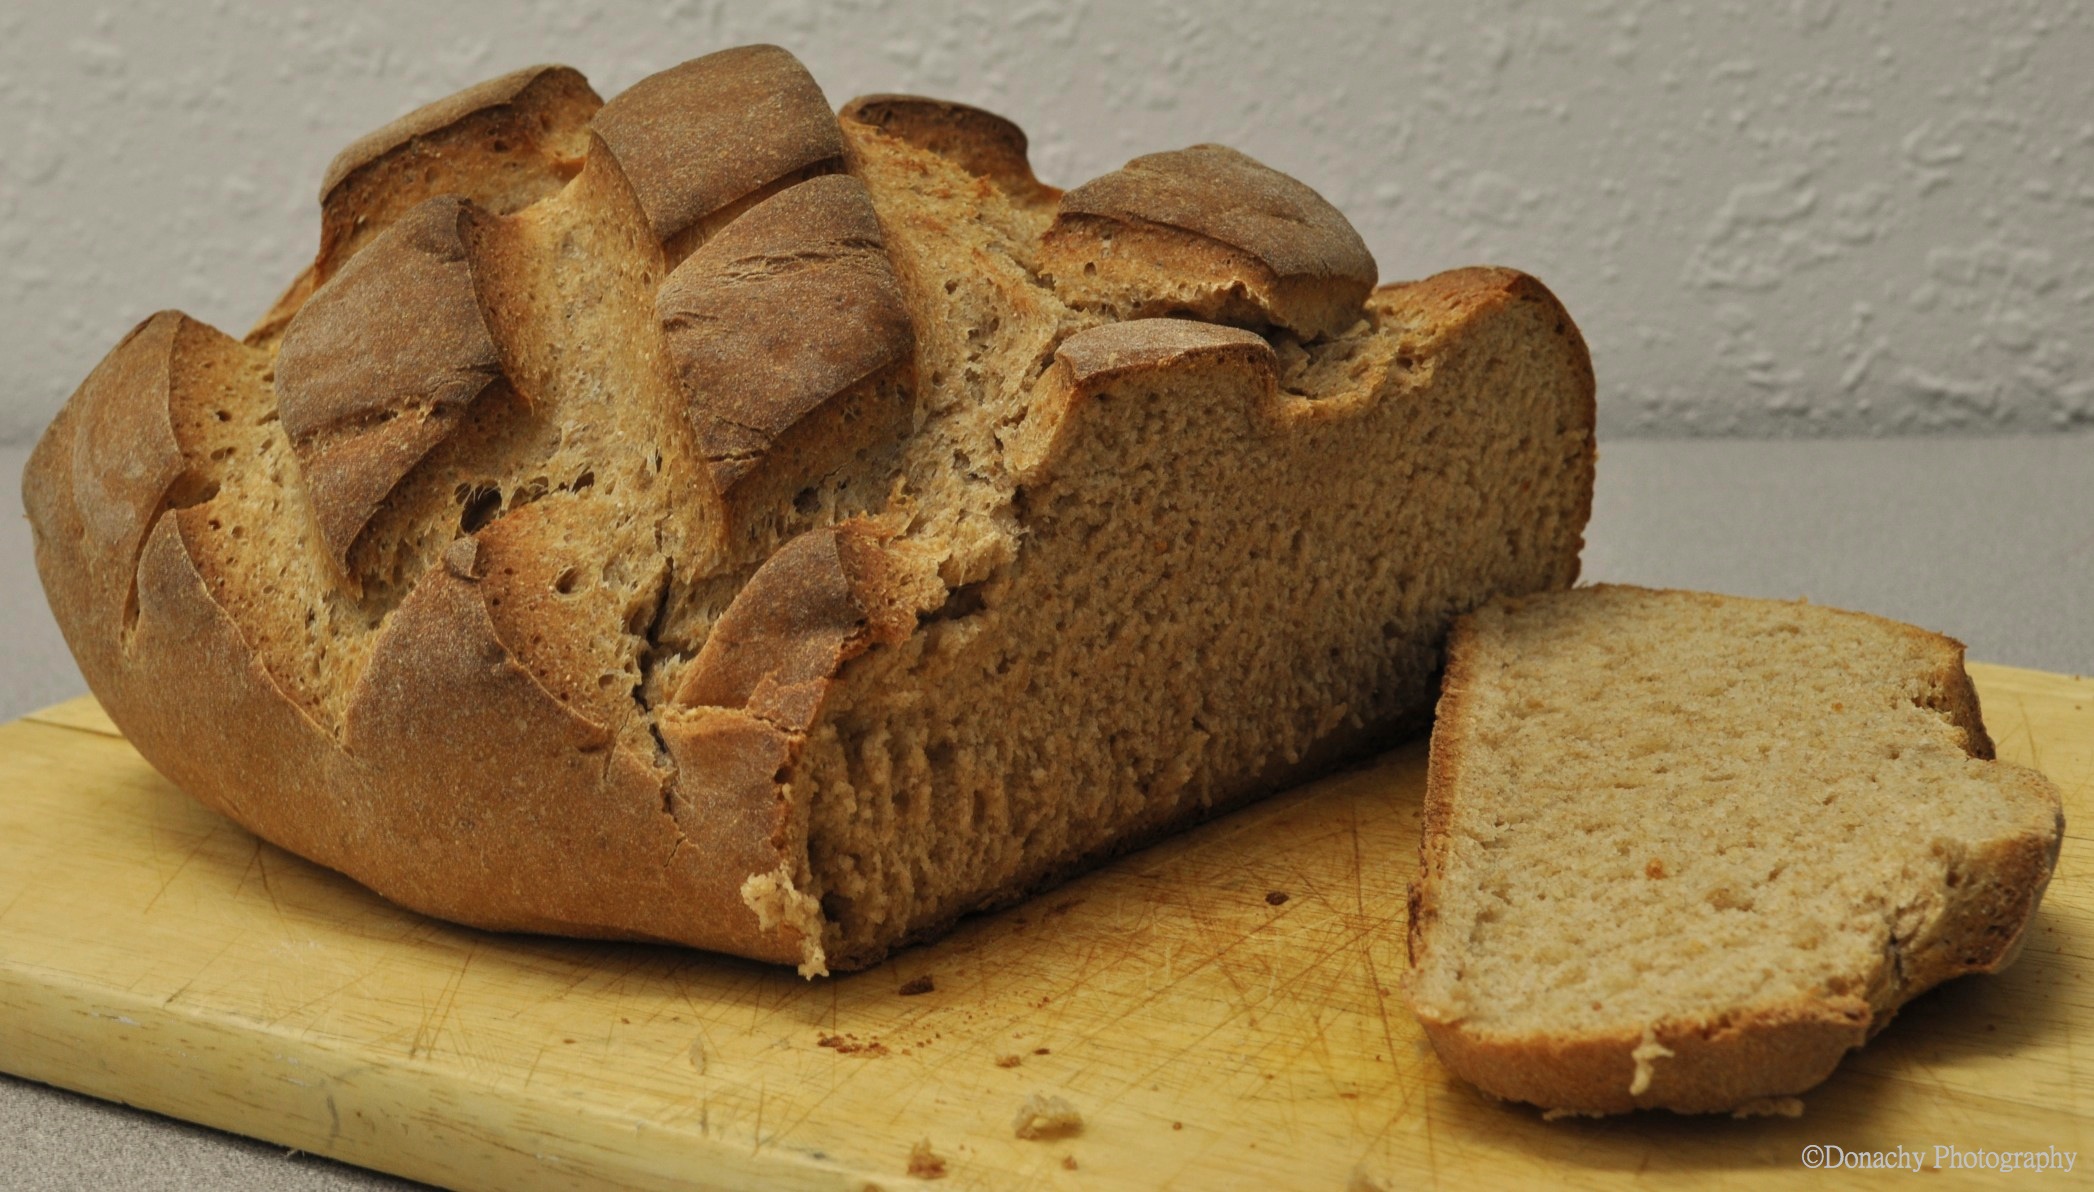
Just waiting to be slathered with fresh butter and a favorite jam, you can almost hear the crust crunching on a slice of this rustic Swiss Farmer’s Bread.

One of my fondest childhood memories is of visiting my favorite auntie in Switzerland and talking with her in broken English and Swiss over my favorite breakfast: cafe mit schlag with a schniteli: milk coffee and farmer’s bread slathered with freshly made creamery butter and jam.

As I began baking different kinds of bread last year, I wanted to see if I could create Burebrot in my own kitchen. It turned out that every recipe I could find included rye flour. So, I had to wait until this fall, after we did our annual summer shopping.

After the bread finished baking, Jacked whipped up a small pot of tasty broccoli soup. I cut two generous pieces of Burebrot and topped them with butter. The bread was just the way I remembered it: hearty and wonderfully crusty. This is the perfect bread to pair with a slice of savory swiss cheese. We have a few pounds of rye flour for the year, so this bread will be making several encores.

The following recipe is a result of adaptions of several recipes to match the ingredients that are in my pantry. I processed the dough in my Zojirushi bread machine so it would rise properly in my Arctic home.

Burebrot

Ingredients

  • 8 oz buttermilk
  • 7 oz water
  • 2 2/3 cups all-purpose flour
  • 1 1/4 cups whole wheat flour
  • 1 1/2 cups rye flour
  • 3/4 tsp salt
  • 2 1/2 tsp dry yeast

Directions

  1. Place the above ingredients in the bread machine pan according to the manufacturer’s recommendations.
  2. Turn on dough cycle.
  3. Preheat oven to 400 degrees F.
  4. Shape the dough into an oval on a baking sheet lined with parchment paper. Cover and let rise for 30 minutes.
  5. Cut a lattice pattern into dough with a sharp knife.
  6. Bake for 40 – 45 minutes. Bread will be crusty when finished.

Alaska’s Permanent Fund and Trout Unlimited

Daughter Maia works a pool in the canyon country of Oregon’s Deschutes River.

This past summer, we fell in love with the film Away We Go in which Verona De Tessant (Maya Rudolph) and Burt Farlander (John Krasinski) find themselves in the enviable, daunting and sometimes scary position of realizing that, although they are not wealthy, they can live virtually anywhere they choose to. Their story unfolds as a touching, insightful comedy as they criss-cross North America searching for just the right place.

Verona: I can do my job from anywhere. And all you need’s a phone, right?

Burt: Well, we don’t want to go back to Chicago, do we?

Verona: No, we did Chicago.

Burt: I used to picture myself in Alaska. God, I love that landscape.

Verona: Alaska?

Burt: Yeah.

Verona: You’ve never mentioned Alaska.

Burt: Wow, they pay people to live in Alaska.

Burt’s line about people being paid to live in this great state gets laughs from audiences, although for different reasons depending on who the audience is. While it’s not true that people are paid to live here, there is something called the Permanent Fund. Without getting into the complexities, Alaska’s Permanent Fund is a constitutional provision established in 1976 that, essentially, taps oil revenues allowing the state government to pay an annual check to every Alaskan resident once they’ve lived here one fiscal year. The amount of the check varies from year to year. The current five-year average is $1,341. This year’s payout was lower, but still appreciable at $878.

That’s where Trout Unlimited comes in.

Barbra and I feel a deep commitment to helping to conserve, protect and restore America’s cold water resources. This commitment flows naturally from our love of salmon and trout and the beautiful and often pristine environs they inhabit and depend upon. Protecting our cold water resources, though, is about more than protecting fish. Trout Unlimited has worked in concert with others to bring down dams that are no longer useful – thus restoring countless miles of free flowing rivers and streams. They work with vineyard owners and other farmers to help ensure water-wise land use. And all across the landscape, TU has, for decades, been instrumental in ensuring that mining, timbering and other resource extraction be carried out with sensible respect for its impact on rivers, streams and estuaries when sensible respect is possible, and that extractive industries be turned away when they can’t conduct their business without destroying watersheds.

At present, TU is in the midst of several critical battles. One of them involves a multi-national mining proposal that threatens the world’s greatest salmon estuary, Bristol Bay. The proposed Pebble Mine could wipe out runs that number into the millions of salmon, as well as fishing jobs and subsistence fishing that generations upon generations of Alaskans (and salmon consumers throughout the world) have depended on. TU is also on the vanguard in fighting against irresponsible extraction of natural gas locked underground in Marcellus Shale. The extraction requires fracking, and it is posing a major risk to the streams and rivers I cut my teeth on as a young angler in Western Pennsylvania.

Again, this isn’t just about trout and salmon. We humans, too, drink the water, grow our farms and forests with it, admire its beauty, and are responsible for passing down a legacy of clean water to future generations.

And so, presented with money that is essentially a gift from our adopted state, the choice on how to spend it was easy. This year, Barbra and I will become lifetime members of Trout Unlimited.

After vetting dozens of organizations, we came to feel that in TU, our contributions will support the causes closest to our hearts. Not just for us, but for generations to come.

To read more about TU’s efforts, click on the following links:

Trout Unlimited’s Home Page

Marcellus Shale Project

Bristol Bay

Maia on a seldom-fished hike-in lake raptly watching her fly line for a twitch. 

Smoked Salmon Quiche and Butternut Squash Pie: Savory and Sweet Breakfast (or Dinner)

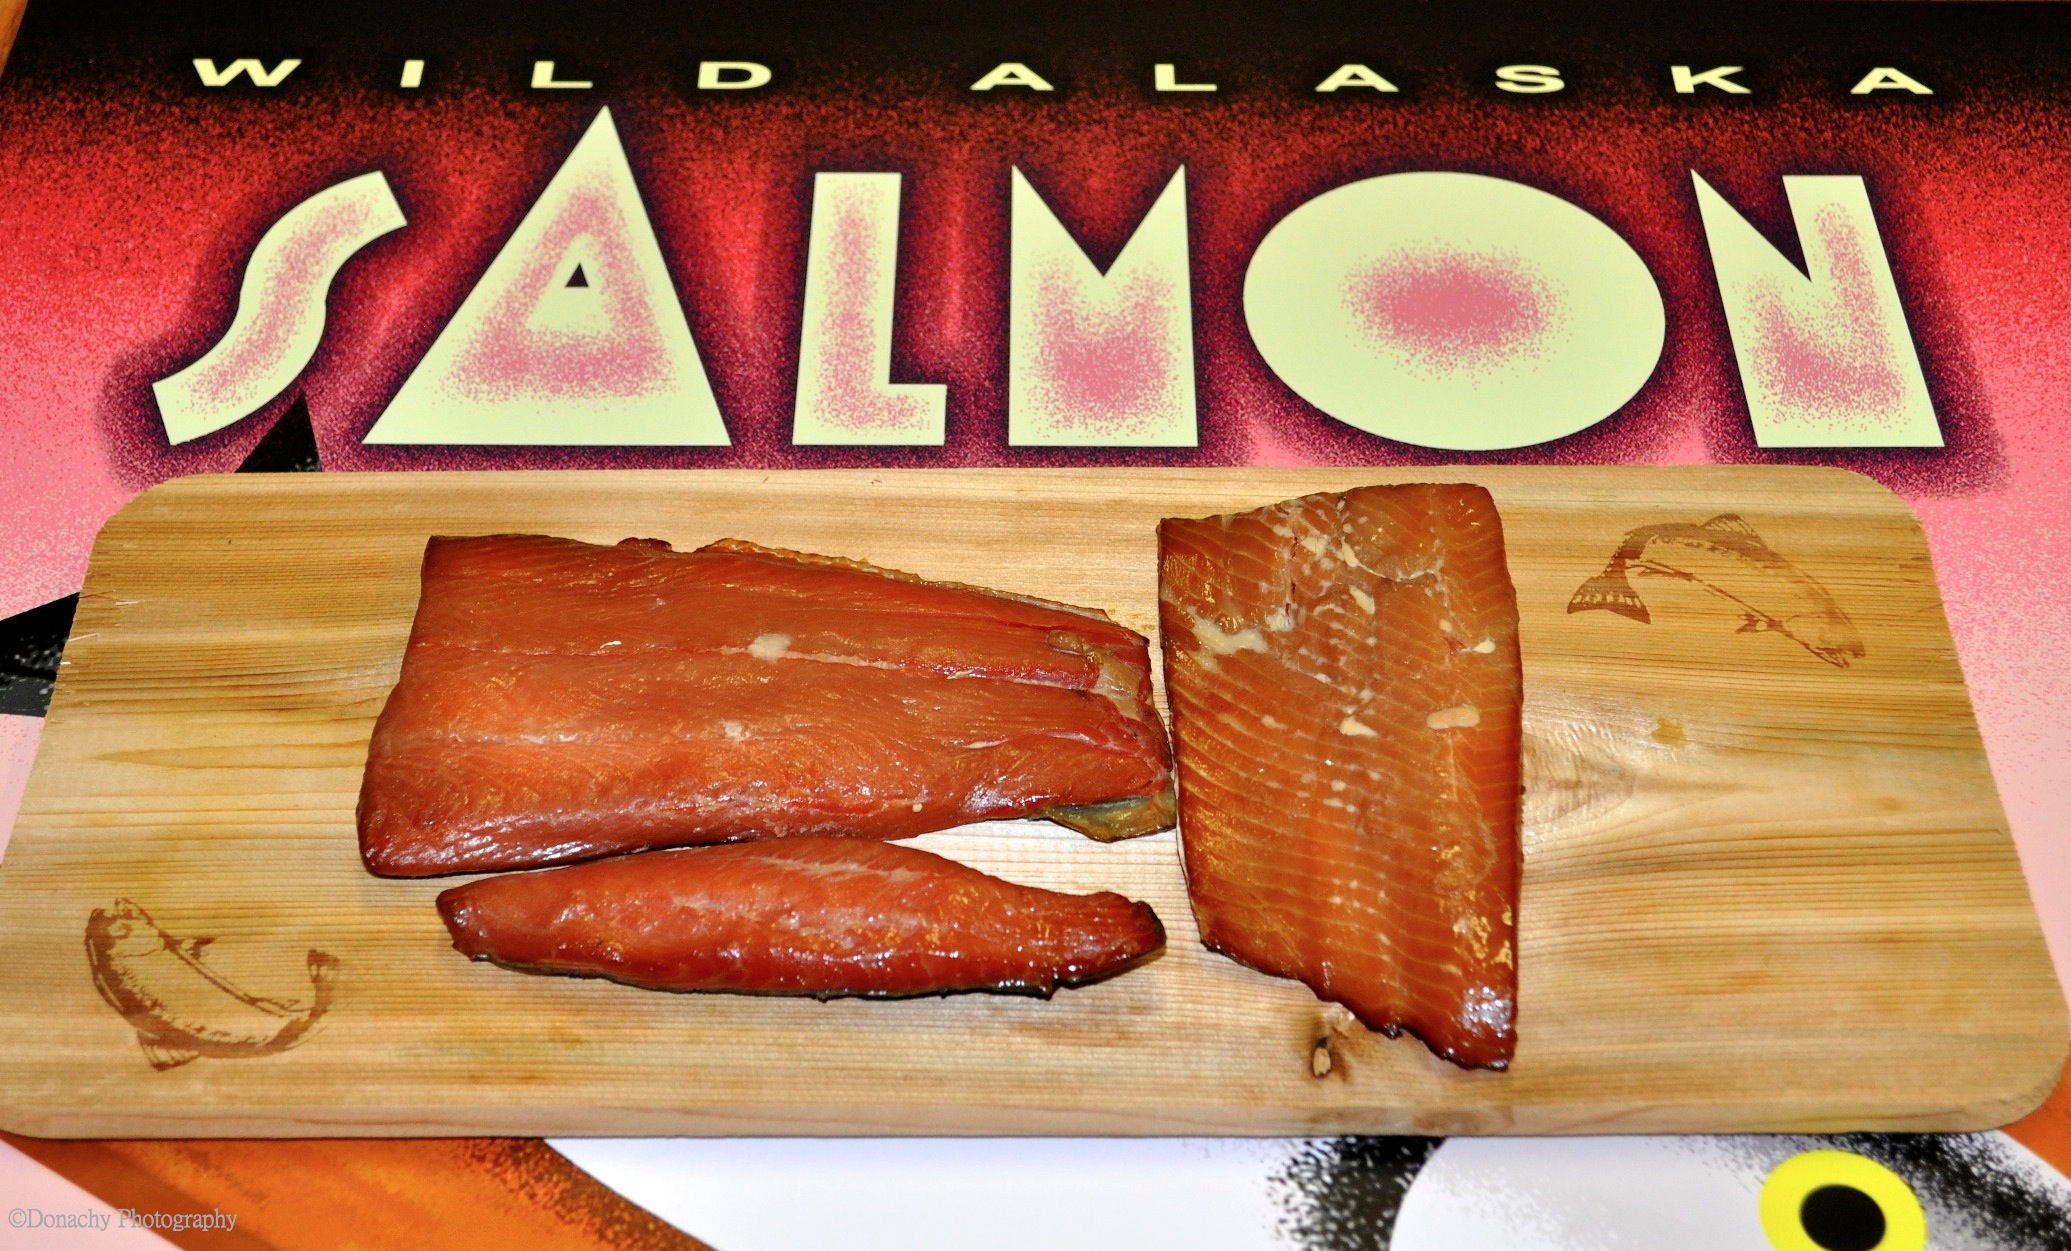
Savory smoked salmon quiche, sweet butternut squash tarts, a strip of smoked salmon and a mug of black French roast coffee make for a hearty Fisherman’s Breakfast. 

Whether served as breakfast, lunch or dinner, we’re big fans of quiche. It’s easy to make, and since it’s delicious either hot or cold, there are no complaints about leftovers. In making this particular quiche, I set out to resolve two questions. First, would smoked salmon that has been frozen and then thawed work well, and second would the Penzeys dried shallots I’d recently gotten live up to their billing. I’m happy to report that the smoked salmon seemed to suffer not at all from freezing, and the dried shallots were flavorful enough to merit making them a standard part of our kitchen here in the Alaskan bush.

For the squash pie, I used a modification of Craig Claiborne’s pumpkin pie recipe that has long served well. Since the baking times and temperatures for these two pies was similar, I baked them together. We had a bit of squash purée and pie crust dough left over, so Barbra used a muffin pan to make a few squash tarts.

Smoked Salmon Quiche

Ingredients:

  • 1 pie crust
  • 4 large eggs
  • 3/4 cup heavy cream
  • 1/2 cup milk
  • 1 cup shredded Swiss or Gruyère cheese
  • 1/4 cup shallots chopped fine (I used Penzeys dried shallots,which were excellent)
  • 1/2 cup mushrooms, cut into less-than-bite-sized pieces
  • 1/3 to 1/2 pound smoked salmon, cut into less-than-bite-sized pieces
  • 1/3 cup sun dried tomatoes, cut into small pieces
  • 1 tsp dried majoram
  • sea salt to taste
  • freshly ground pepper to taste

Directions:

  1. Preheat oven to 350 degrees F. Bake pie crust for 20 minutes. Halfway through baking, cover edges with aluminum foil or a pie ring to prevent edge of crust from burning.
  2. Remove the pie crust from the oven and set aside.
  3. Turn oven up to 400 degrees F.
  4. Whisk eggs until blended. Add cream, milk, shallots, marjoram, salt and pepper and mix together.
  5. Add mushrooms, sun-dried tomatoes and smoked salmon, mixing together gently so as not to break up the salmon.
  6. Pour and scrape ingredients into the baked pie crust and place on oven’s center rack. You do not need to place on a baking sheet.
  7. Bake quiche at 400 degrees F. for 15 minutes. Turn down oven to 350 degrees F. and continue baking for 25 – 35 minutes – until a wooden toothpick poked into the center comes out clean.
  8. Serve hot or cold.

Butternut Squash Pie

Ingredients:

  • 1 pie crust
  • 3 cups butternut squash (or pumpkin) purée
  • 1/2 cup sugar
  • 1/2 tsp salt
  • 1/2 tsp grated nutmeg
  • 1/2 tsp cinnamon
  • 1/2 tsp powdered ginger
  • 3 large eggs, lightly whisked
  • 2 tablespoons Bourbon (optional, but very tasty)
  • 1 cup heavy cream

Directions:

  1. Preheat oven to 425 degrees F.
  2. Have a chilled, unbaked pie crust ready.
  3. Squash purée: Cut away the stem of the squash and discard. Then slice squash into into round discs approximately 1 inch thick. Cut the disks into 4 to 6 parts. When you get to the bulb, remove the seeds and fibrous part and slice into 6 strips as you would a pumpkin or melon. Steam, oven roast or grill the squash until a fork passes easily through the flesh. Let cool and cut off the skin. Use a stick blender, regular blender or food processor to purée the squash.
  4. Combine the purée with all the other ingredients in a large mixing bowl, blend together, and pour into the chilled pie crust.
  5. Place on oven’s center rack. Bake for 15 minutes, then reduce heat to 350 degrees F. and continue baking for 30 or 40 minutes, until the filling is set. Cracks will begin to appear on the surface of the pie when the filling is set.
  6. Serve warm or chilled, with or without whipped cream.

For a great recipe for making smoked salmon, see Smoked Salmon with Soy Sauce and Brown Sugar Brine.

Tikigaq Cemetery

Weathered jawbones of bowhead whales form a fence around the cemetery in Tikigaq, (Point Hope) Alaska).

After four consecutive weeks of daily rain – a precipitation rate almost unheard of in this semi-arid region of the Arctic – we’ve had several days of brilliant sunshine. The past three mornings, the gravel that makes up the ground here in Point Hope has been hard underfoot. Frost. The cloudberries are over, and the frost means it’s time to go pick cranberries. In the old days, the dead were not buried. “The land all around was our graveyard,” I was told by one of the people of the village. But when the missionaries came, they told the people of the village that the dead must be buried. And so this cemetery was created. 

Today while Barbra and I were eating lunch, we saw a snowy owl outside my classroom window. Last week a brown bear – a grizzly – passed by the edge of town. This might be a good weekend to get up early and walk up the beach in hopes of seeing a walrus.

Smoked Salmon with Soy Sauce and Brown Sugar Brine

Smoked salmon is a highly anticipated delicacy. With another successful fishing season behind us, I used a tried and true recipe to turn out several pounds worth.

Smoked salmon mousse, smoked salmon omeletes, smoked salmon on pasta, and smoked salmon on crackers are among the many great reasons to set aside a couple of days and smoke part of your catch. Once you’ve done a batch of smoked fish, it’s easy to appreciate why it’s expensive. Smoking takes time. But the results are very much worth it. There’s really not much to our favorite recipe. From year to year and batch to batch, I might vary the amount of garlic or ginger or try a new spice or seasoning. But other than that… well, here it is.

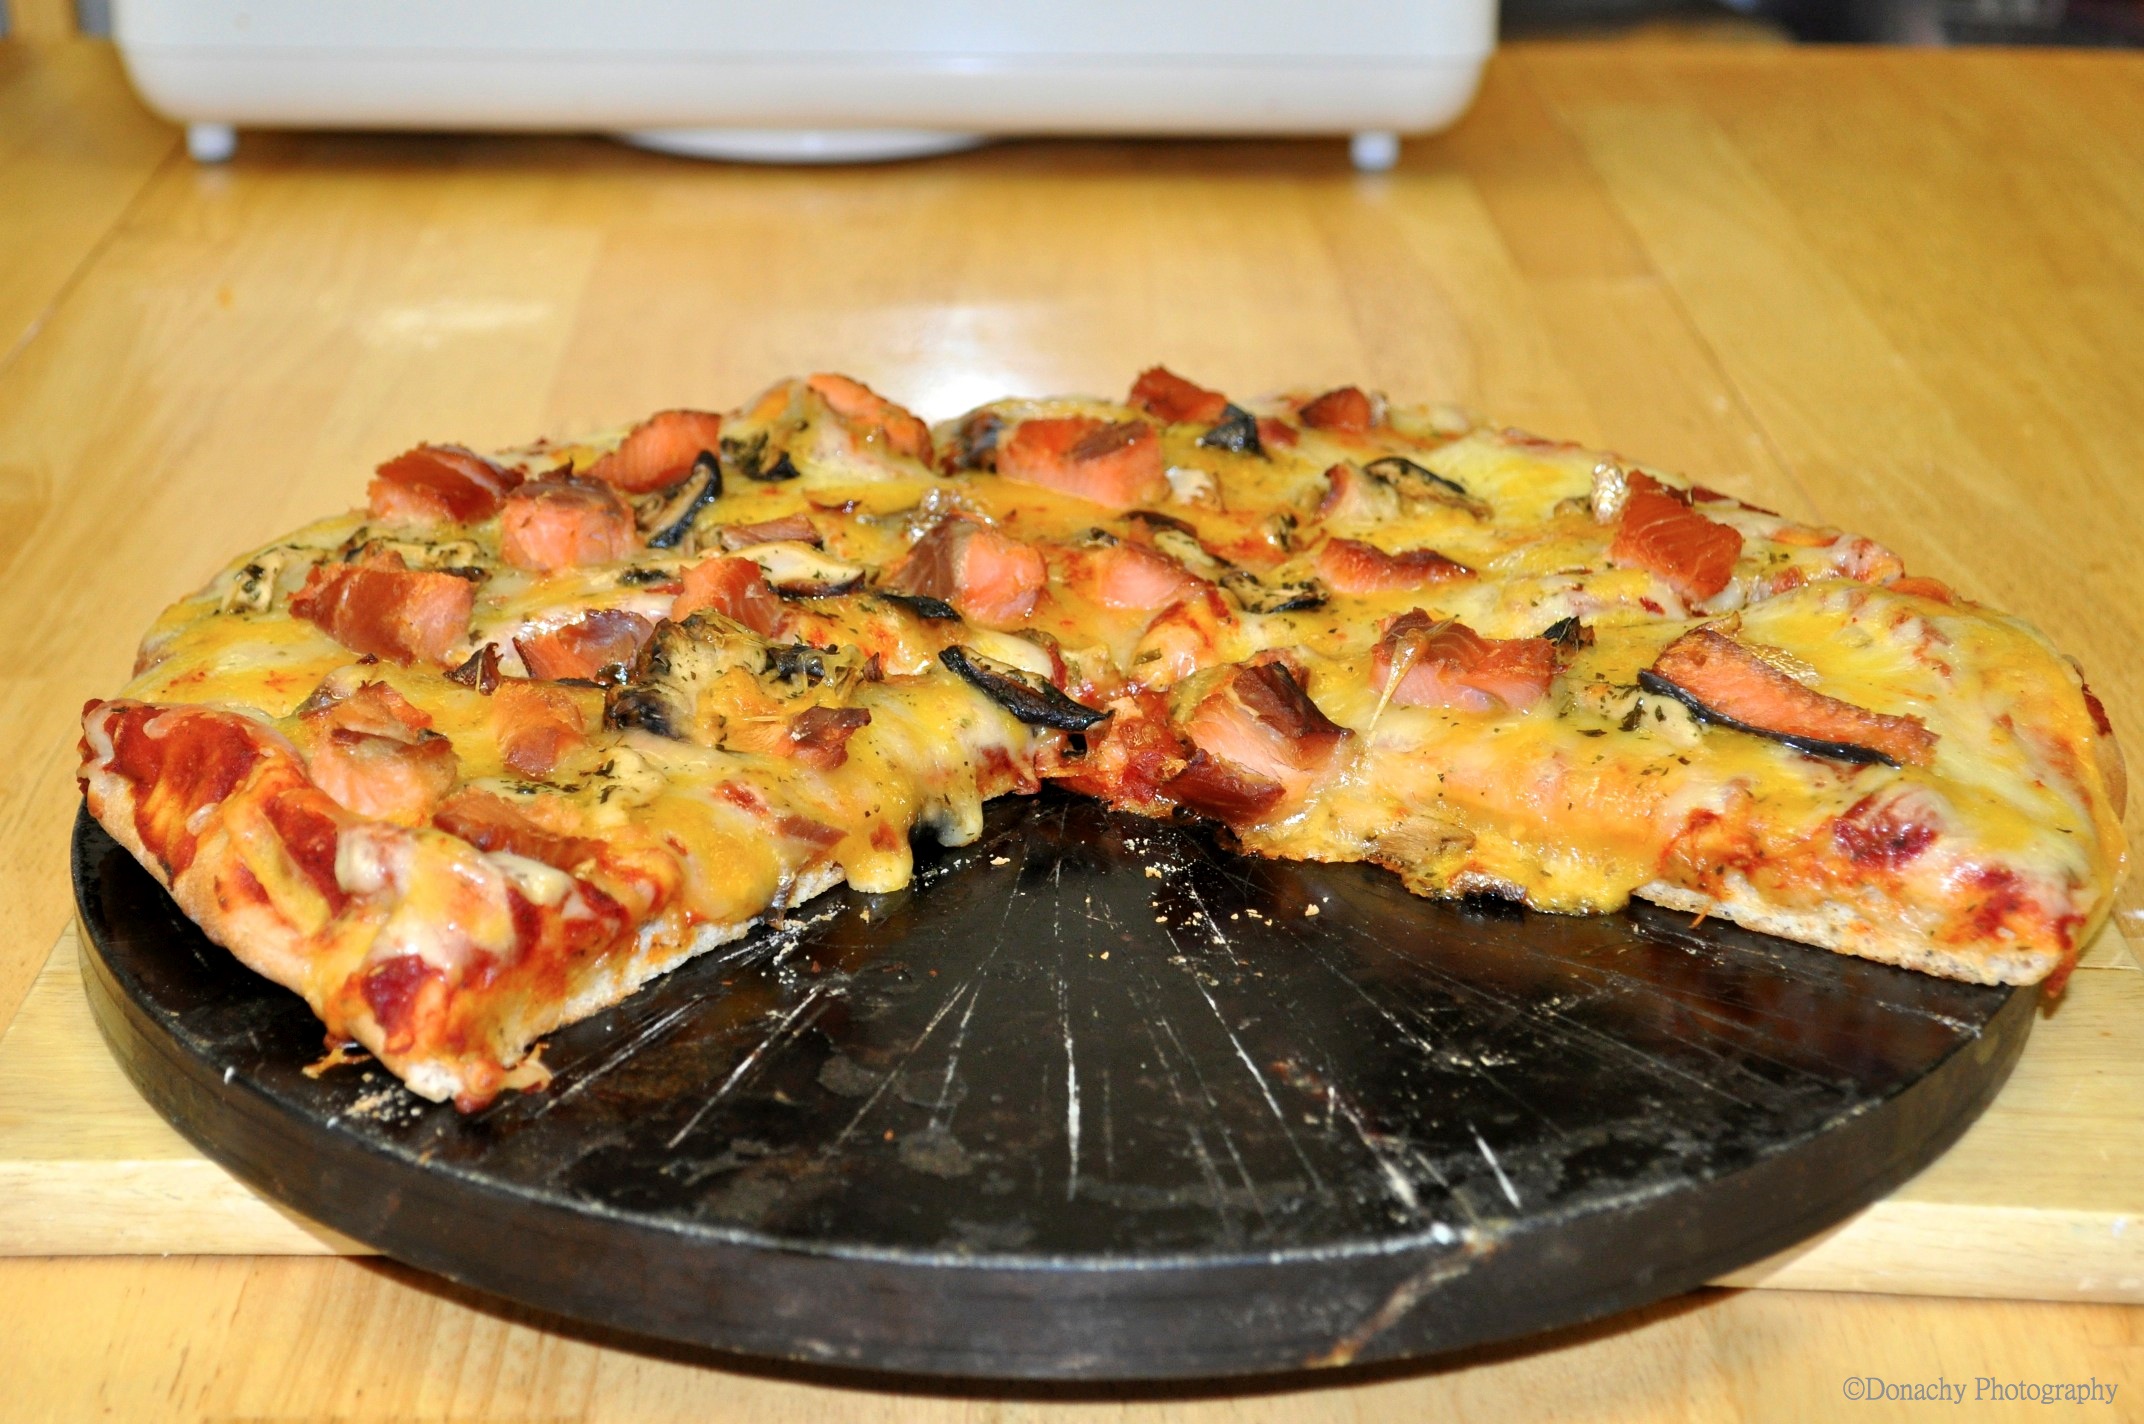
Smoked salmon pizza always draws rave reviews. 

Smoked Salmon with Soy Sauce and Brown Sugar Brine

The basic recipe is 4 parts water to 1 part soy sauce with 1/4 cup sea salt for every cup of soy sauce. Figure about 1 cup brine per pound of fish. Add brown sugar, garlic and ginger to taste. White pepper, cayenne pepper, and other seasonings and spices can be added to create unique brines.

Pyrex clear glass bakeware with their plastic lids is perfect for marinating the fillets. If you’re using a Big Chief or Little Chief smoker, the metal racks fit atop the empty Pyrex containers – and with the fillets atop the racks this setup works well for drying the fillets in the refrigerator prior to smoking.

Ingredients: For eight pounds of salmon, trout, sturgeon or other fish

  • 8 pounds fillets, skin on, rinsed, patted dry, cut into small pieces (a good size is about 3″ x 6″, but smaller or slightly larger is fine)
  • 8 cups water
  • 2 cups soy sauce (Kikkoman is our favorite)
  • 1 1/2 cups brown sugar
  • 1/2 cup sea salt or kosher salt
  • 1 1/2 tbsp granulated garlic
  • 1 tbsp ginger

Directions:

  1. Arrange salmon fillets in glass baking dishes or similar non-reactive containers.
  2. Mix remaining ingredients in a large bowl.
  3. Pour mixture over fillets, making sure they are covered, or until they float.
  4. Cover containers and marinate for about 8 hours (or overnight) in the refrigerator.
  5. Remove fillets from brine, pat dry with paper towels, and arrange on racks to dry in the refrigerator for 6 to 8 hours (or overnight)
  6. Smoke fish according to your smoker’s directions with alder wood, mesquite, fruit tree or hickory chips. Check frequently, keeping in mind that air temperature will influence smoking time. Typical smoking times range from 6 to 8 hours. A slightly wet product is best suited for many of the recipes we enjoy. For straight snacking, a drier product may be preferred.

Don’t have a smoker? Excellent smoked fish can be made on a charcoal grill. I’ve done small batches on my little Weber Smokey Joe and larger batches on Weber’s larger models.

Looking for a recipe to use your smoked salmon in? Type “smoked salmon” into the search tool on this page for some great ideas.

Homemade Cloudberry Syrup – For Belgian Waffles and Italian Sodas

Although ripe cloudberries are golden amber in color, the syrup they produce is a luminescent dark pink. Thick and flavorful, mixed with carbonated water, the syrup makes refreshing Italian sodas. This morning, it topped our Belgian waffles.

We’ve already turned about 20 pounds of freshly picked cloudberries (click here to see cloudberry photos) into two kinds of jam as well as sorbet. Our most recent venture out on the tundra yielded another eight pounds that I hadn’t counted on. When I asked a berry-picking friend what she thought I should make, she enthusiastically replied, “Syrup!”

The syrup, which is easy to make, turned out a beautiful dark pink color. I hadn’t expected this because the fruit I started with was a lovely salmon color. The seeds seemed to color the juice. I made freezer jam with the remaining pulp in order to save every luscious part of the berries. I thought if the “pulp jam” didn’t look good, it could still be used as a key ingredient in fruit breads. Any kind of berries could be used to make this syrup with an adjustment to the amount of sugar used.

Aqpik (Cloudberry) Syrup

Ingredients: (Yields 4 cups syrup)

  • 10 cups of berries
  • 4 cups of water
  • 3 cups granulated sugar

Directions

  1. Place berries and water in a large pot. Cook on medium high heat.
  2. Boil berries for about 15 minutes.
  3. Line a strainer with cheesecloth. Elevate strainer over a bowl so that syrup can drain through cheesecloth and into the bowl. (I used a strainer that stands by itself set on a wire cooling rack set on a large mixing bowl.)
  4. Place berries in pot and puree them using an immersion or stick blender.
  5. Pour pureed berries and all liquids from pot into cheesecloth lined strainer.
  6. Let berries sit in strainer for at least two hours to drain off liquid.
  7. Take the liquid that has drained into the large mixing bowl and put it in a pot.
  8. Add sugar to the pot.
  9. Cook over medium-high heat, stirring frequently, until syrup boils.
  10. Skim off any foam and discard.
  11. Pour juice into canning jars to freeze or into decorative bottles to refrigerate.

Smoky, Fiery Chili con Carne with Beans and Sweet Corn

Berry leaves are turning red and the grass is going to autumn gold. Nightly temperatures are dipping into the thirties. We’re losing about seven minutes of daylight each day. Winter’s coming, and so today I made the season’s first Big Pot of chili.

I’ve been doing this for years now – one or two pots of chili con carne every fall and winter. No two pots are the same. Here’s this year’s first four-gallon batch. The smoked chipotle’s, smoked sea salt and charcoal grilled meat made this batch the best chili to date!

Ingredients:

  • 2 3/4 lbs tri-tip steak
  • 1 tbsp cumin – divided into two equal portions of 1/2 tbsp each
  • olive oil
  • 1 tbsp sweet mesquite seasoning
  • 13 lbs, 10 oz diced tomatoes, seeds removed
  • 1 1/2 pounds (24 oz) tomato paste
  • 3 3/4 pounds sweet onions, chopped coarse
  • 2 1/2 lbs sweet corn
  • 9 pounds beans, soaked, tender, and ready to go. Pinto and black beans in equal portions work well. Alternatively, all black beans are fine.
  • water, as needed (about 1 to 2 cups)
  • 2 bay leaves
  • 1 1/2 tbsp dry oregano, crushed
  • 1 tbsp dry sage
  • 1/2 tsp smoked paprika
  • 1/2 tsp white pepper
  • 1 tsp black pepper
  • 1 tsp smoked sea salt (to taste)
  • 2 arbol chilis, with seeds, chopped fine
  • 4 smoked chipotle chilis, with seeds, chopped fine
  • 2 tbsp chili garlic sauce
  • 2 tbsp mince garlic

Directions:

  1. Fire up a grill to a fairly hot temperature. Charcoal gives the best flavor, but a gas grill is fine.
  2. Cut the tri-tip into small cubes. And place into a mixing bowl. Add 1/2 tbsp cumin, 1 tbsp mesquite seasoning, and 1 tbsp olive oil. Mix together and place on a sheet of heavy duty aluminum foil that has been coated with olive oil.
  3. Place the aluminum foil with the meat on it on the grill and cover. Use a spatula to occasionally turn and stir the meat till it’s cooked through. Remove meat from grill, place in a bowl and set aside.
  4. Meanwhile, place tomato paste in a bowl and stir in just enough water to make a thick liquid. If you’re using canned diced tomatoes, the liquid from those will be plenty. Set aside.
  5. Add olive oil to a large pot, heat over medium heat, and add onions. Stir to ensure even cooking. When onions just begin to turn translucent, add the tomatoes, the tomato paste (from step 4), and all the remaining spices and seasonings. Heat over medium heat and stir till well mixed. Add the beans. The spices will become more pronounced with cooking, so wait at least an hour before adding additional spices.
  6. Bring pot to just barely boiling, then reduce heat to a low simmer. Use a flame tamer if necessary. Cook for one hour, or more.
  7. Stir in the sweet corn and the meat.
  8. Serve piping hot with corn bread fresh out of the oven and perhaps some grated cheddar cheese.