Unknown's avatar

About Jack & Barbra Donachy

Writers, photographers, food lovers, anglers, travelers and students of poetry

Magical All Fruit Ice Cream with a Quick Hot Fudge Topping

All Fruit Ice Creams n

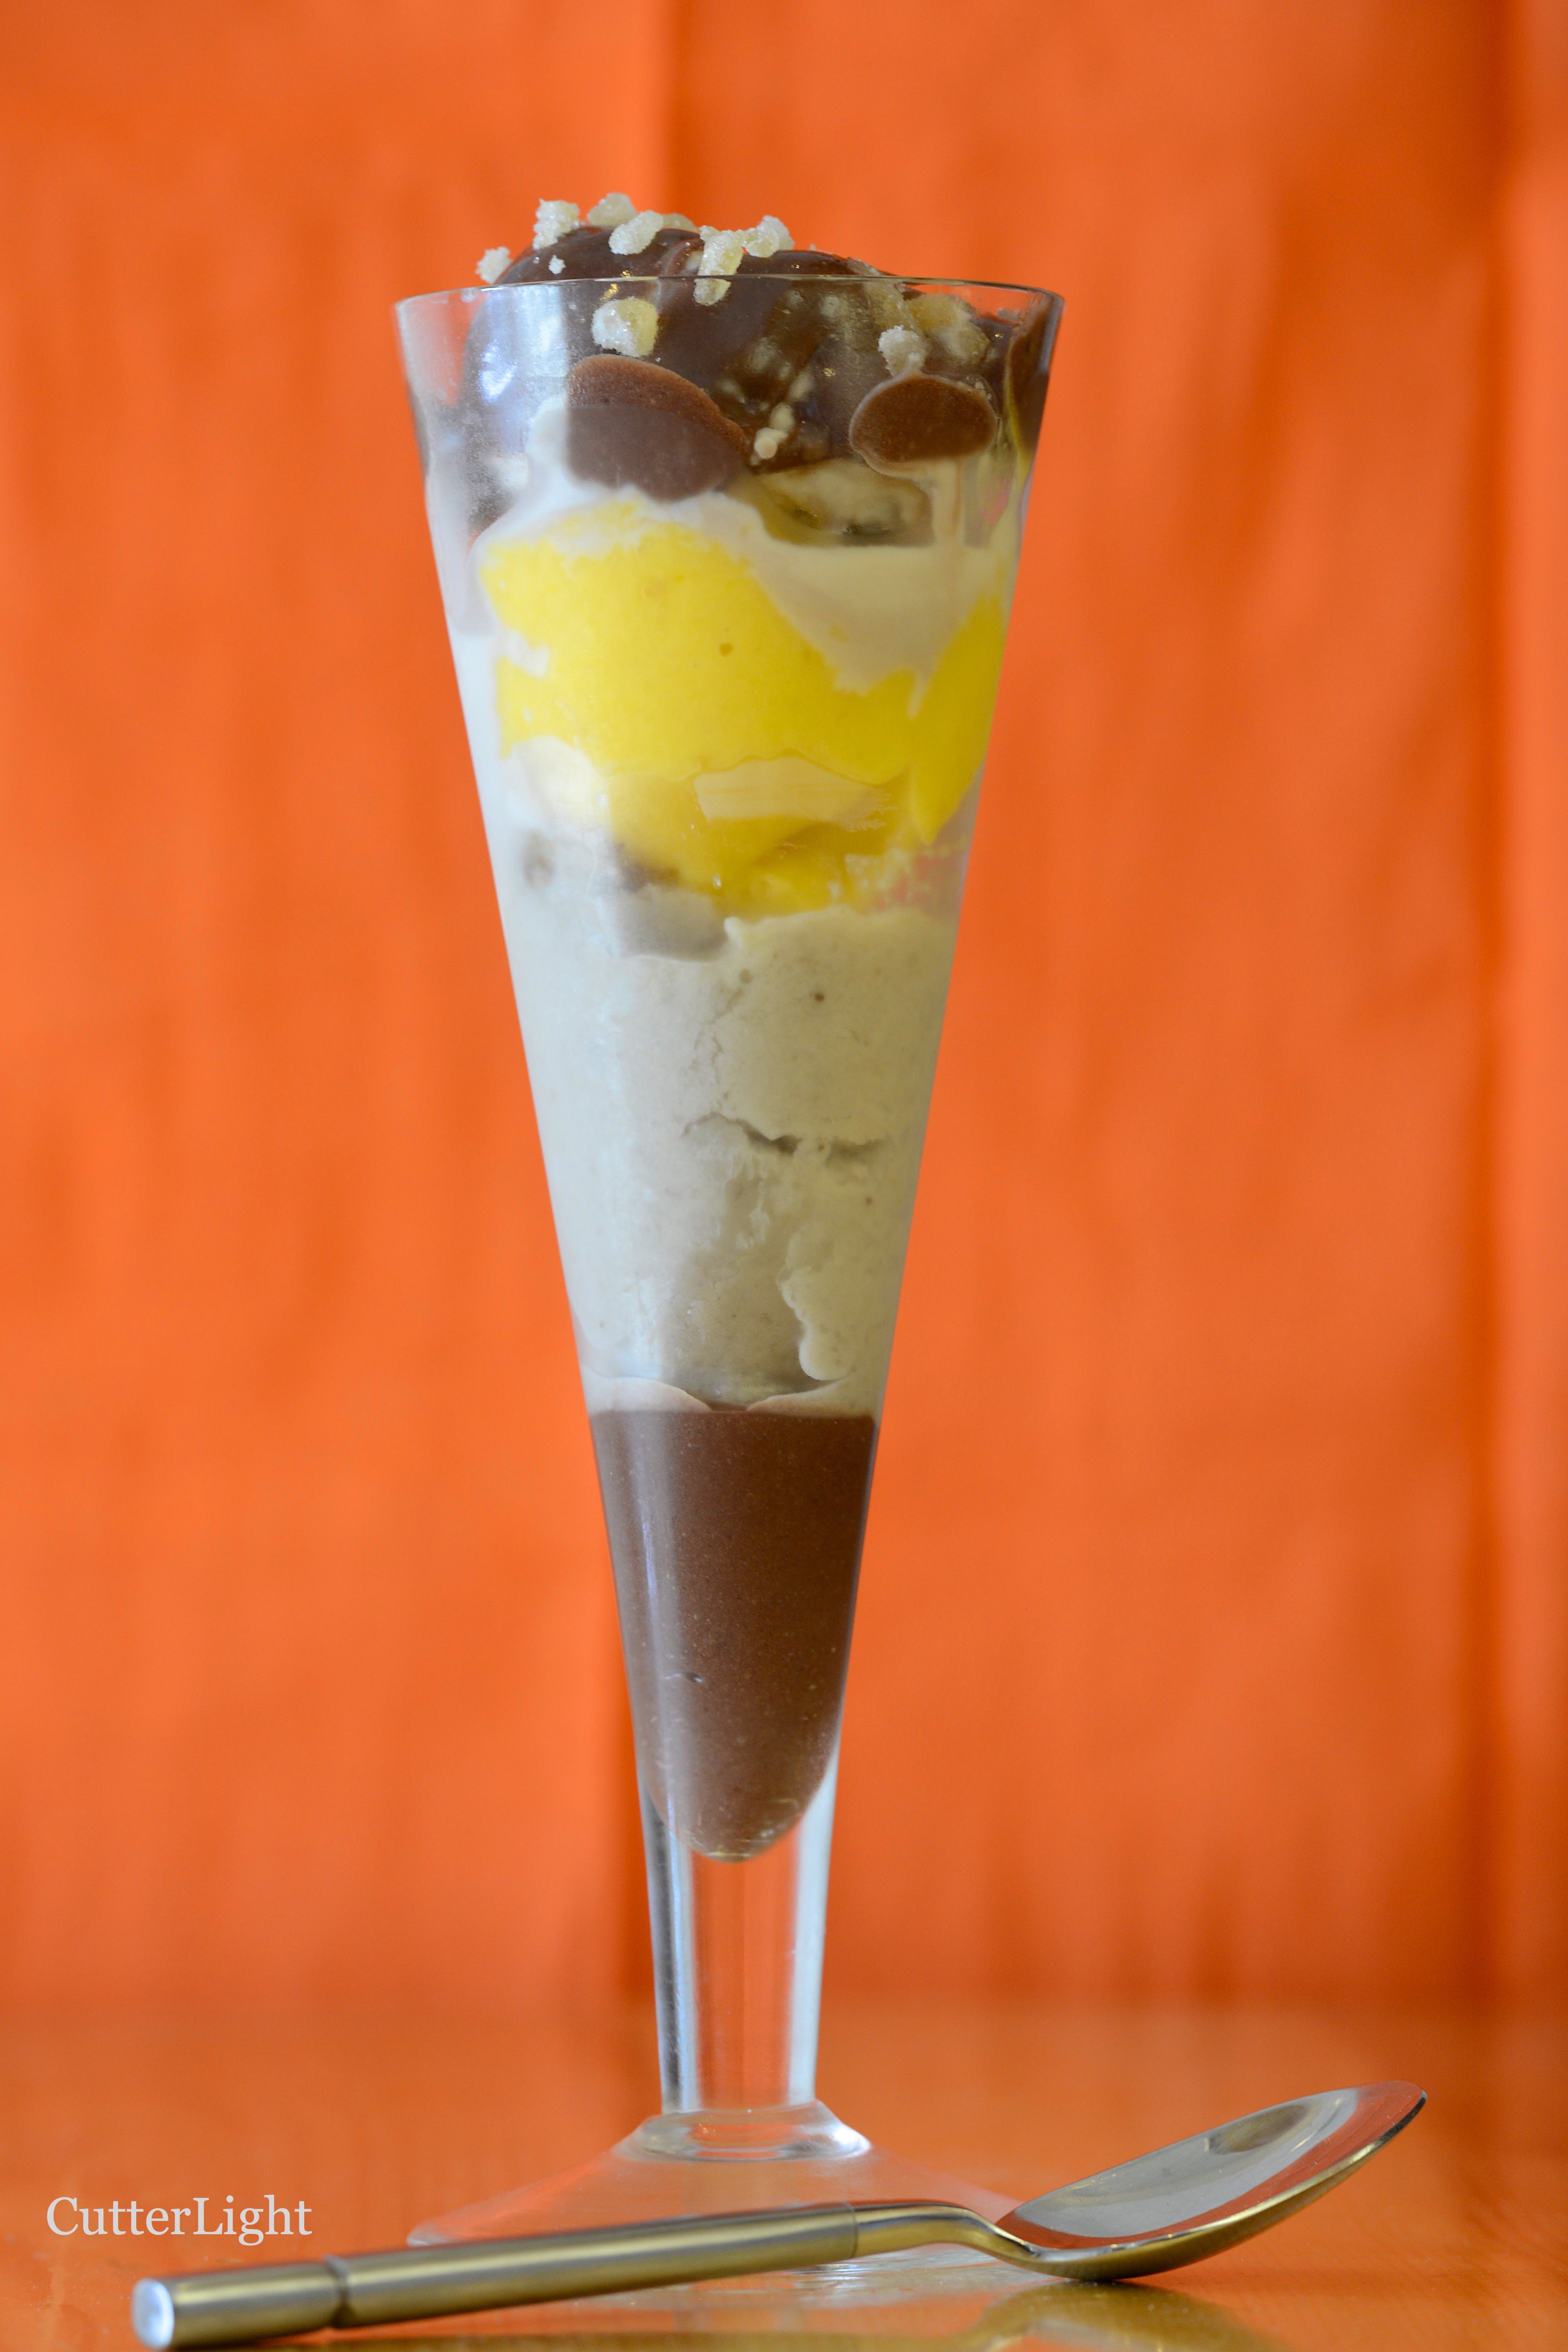
A tropical triple sundae created with all-fruit coconut, mango, and banana ice creams topped with homemade hot fudge and crystallized ginger. Happy Summer Solstice everyone! 

Recently, I came across a recipe for one-ingredient ice cream. As big fan of homemade ice cream, I was curious, so I clicked. Bananas! We used to freeze bananas and dip them in carob when I was a kid (the carob thing is a whole other story). I loved that refreshing summertime treat. This memory brought about other childhood memories of eating all-fruit popsicles. In all of my custard and milk based ice cream making adventures, I don’t know why it never occurred to me to try making an all-fruit “ice cream.” It certainly is more healthful to eat a banana than a cream-based, sweet frozen custard concoction, not that I’m planning to give those up!

I had bananas in my kitchen that were just past the perfect-to-eat stage, which made the banana flavor stronger and sweeter. I sliced the bananas into coins, laid them out on a baking sheet and froze them. After an hour, I popped the frozen pieces into the tall cup that came with my stick blender. It did take some work for the stick blender to smooth out the frozen bananas. But after a couple of rounds of stirring and puréeing with the stick blender, I scooped pure magic into bowls. The consistency of the banana ice cream was creamy and the flavor was sweet and rich.  One ingredient ice cream is delicious!

My culinary sense of adventure and curiosity got the best of me while eating this creamy frozen snack. A banana is a snack, after all. By adding one more ingredient to this creamy base, I could create chocolate banana or peanut butter banana ice cream. From here, my thoughts took off, adding many more ingredients. And toppings. This recipe is versatile!

I thought that since bananas worked so well, other fruits might prove equally appropriate. Here in Ulaanbaatar, we don’t get a huge variety of fruit. But I happened to see frozen mangos at the store. I work with what I can get. The frozen mango worked as well as the banana. The batch of frozen mangos I purchased was on the sour side, so I did add some honey and crystallized ginger to sweeten up the ice cream and give it some pizzazz. This was no longer a one-ingredient recipe, but I was experimenting. It was delicious and tropical.

A proper sundae needs three different flavors, in my opinion. I froze small cubes of coconut milk and processed the frozen cubes just as I had processed the fruit. The coconut milk came out icy, so I added a bit of regular milk to smooth the texture. And since coconut milk doesn’t have much natural sweetness, I added two tablespoons of powdered sugar. The resulting ice cream was tasty and perfectly complemented the mango and banana ice creams.

In order to create the ultimate all-fruit sundae, I whipped up some hot fudge (there goes the healthful dessert), sprinkled some crystallized ginger to finish it off and voilà, a cool, beautiful, tropical summertime dinner… I mean dessert. (Well, in all honesty, we did eat it for dinner.)

Frozen Fruit Ice Cream

Ingredients

  • small chunks of fruit of your choosing, frozen
  • (optional) other flavorings to enhance the fruit like vanilla, ginger, cocoa powder
  • sweetener, to taste (if needed add honey, maple syrup, sugar, etc.)

Directions

  1. Place frozen fruit in food processor or cup of a stick blender and process scraping down sides occasionally until fruit is thick and creamy and there are no chunks remaining.
  2. Mix in optional ingredients.
  3. Serve immediately.

Quick Hot Fudge Sauce

Ingredients

  • 1/3 cup boiling water
  • 4 tbsp unsalted butter
  • 3/4 cup sugar
  • 1/2 tsp vanilla extract
  • 1 cup powdered milk

(or substitute the above with 14 oz sweetened condensed milk)

  • 1/2 cup unsalted butter
  • 1 cup chocolate chips

Directions

  1. Place first 5 ingredients in the metal cup that came with your stick blender to make sweetened condensed milk.
  2. Blend until well mixed and thickened. Set aside.
  3. In medium pan, with medium heat, melt 1/2 cup butter.
  4. Stir in chocolate chips.
  5. Add milk mixture and stir until smooth and silky.
  6. Store leftovers in covered container in the refrigerator.


Urban Birding: First Flight – Isabelline Wheatear Chicks Feeding and Fledging

Isabelline wheatear juv 1st flight n

Tired of waiting for mom, this isabelline wheatear chick (Oenanthe isabellina) faced the morning sun and achieved its first airborne moments. (11 additional photos.)

Many species of animals are highly adaptable – if given half a chance. Until recently, this construction site in Ulaanbaatar, Mongolia, was steppe grasslands. Chock full of the abandoned rodent holes isabelline wheatears seek out to make their nests, it was perfect habitat for these passerines.

Isabelline wheatear mom feed 2 juv grub 1 n

But as Mongolia’s population continues to grow, the grasslands which once seemed limitless are shrinking. This fortunate adult and her mate successfully reared a pair of chicks in a cavity beneath an old truck tire. Here, safe from the stray dogs that plague this city, and unnoticed in a lot that has yet to be developed, the chicks’ parents have been able to forage the steady supply of grubs and insects their offspring thrive on.

Isabelline wheatear feeding grub 2 n

Unfortunately, these will likely be the last wheatears to brood on this lot. On our morning run today, we noticed that the bulldozers have arrived. Yet another apartment building and adjoining parking lot will replace the last remnants of suitable habitat.

Isabelline wheater mom n juv feeding n

We had been observing the adult wheatears in this area for some time. But only on this, the final day the birds were here, did we realize a nest and chicks were in such close proximity. We shot these photos through a locked gate, at a far enough distance that it was a challenge to get clear captures.

At one point we observed an interesting behavior. The chicks were pecking at a piece of plastic. The mother, observing this and perhaps understanding, somehow, that ingesting the plastic could be fatal to her offspring, picked up the rubbish and flew off several meters from the nest before dropping it and returning.

Isabelline wheater feeding looking for more 3 n

There seemed to be no sating the young birds’ appetites…Isabelline wheatear mom feeding chicks 1 nThe adults returned again and again…

Isabelline wheater chicks waiting for mom n

With much anticipation…

Isabelline wheatear chick stretching wings n

Their stubby wings and chubby bodies hardly seemed to bode well for flight. Was it out of boredom or hunger – or something even more primal – that prompted one of the birds to begin vigorously stretching its wings?

isabelline wheaters flight attempt n

Suddenly it occurred to us. These little guys are going to fledge, right now!

Isabelline wheatear juv 1st flight n

And just like that…Isabelline wheater mom last look around nest n

The female returned for a final look at her empty nest, then caught up with the chicks. They hid behind a a pile of rusted junk, and that was the last we saw of them.

Isabelline wheatear empty nest n

Who would suspect that a a nest of birds was once here, hidden safe and well-fed beneath this rotting tire?

Isabelline wheateater juv on ledge n

A while later, we encountered this juvenile perched on the ledge of an apartment near ours. Where will they go next year? It’s a question with no easy answer in a world that continues to fill up with people.

Almondtella – A Twist on the “Other” Chocolate Nut Spread (without the Palm Oil)

Almondtella n

Everything tastes better when you make it from scratch.  One taste of this homemade spread, loaded with toasted almond yumminess, and you will forget the name of that decadent stuff you used to spread on your toast. …what was that called again?

Headlines Inspire Kitchen Creativity

Recently, France’s Minister of Ecology put Nutella in the headlines because of its environmentally hostile ingredient, palm oil. Like many large scale agricultural operations, palm oil plantations require the deforestation of vast tracts of natural forests. In Indonesia and Malaysia, where the largest palm oil plantations operate, many species of native animals and plants are being pushed toward extinction. The process of slash and burn forest removal is releasing stored CO2 and generating tremendous amounts of smoke, contributing to Indonesia’s sudden jump to third place among the world’s emitters of greenhouse gasses. It’s estimated that 40-50% of household products in the U.S. contain palm oil. This product extends beyond food items to cosmetics and cleaners. Yikes.

I suppose everything humans consume has a detrimental effect on the environment due to the sheer number of humans that consume. What to do? We limit our consumption of products by using them until they can’t be used any longer. For example, we have been using the same box of zip top bags for almost a year by carefully using the bags, washing them and reusing them. We also try to make as much as we can from scratch in order to limit the addition of chemicals and unnatural ingredients into our bodies.

Our answer to the controversy swirling around Nutella is to make our own spreadable delight using more Earth-friendly ingredients. Before you quibble with me about almonds and how much water it takes to grow them… I know. However, a friend was moving from Ulaanbaatar and offered us her unused pantry items. Among those items was a three-pound bag of almonds. Other nuts would work well in this recipe.

Who knew a post about a delicious nutty spread would be so political? Moving away from the political, let me tell you this spread is better tasting than any commercial product. And with less sugar, no processed emulsifiers and no artificial flavorings (what is vanillin?) this is arguably a much healthier spread. The top two ingredients in that other spread are sugar and palm oil. The top ingredient in this recipe is pure, natural almonds. And the vanilla extract is real vanilla extract.

The key to the standout flavor is the toasted nuts. The delicious end product makes the slightly arduous process of skinning the almonds totally worth it. Now we have a sweet chocolate spread that is packed with protein and tastes great on toast or as a topping on the all-fruit banana and mango ice creams we’ve been enjoying on these warm summer days. Or how about cheesecake swirled with homemade almondtella?

Chocolate Nut Spread aka Almondtella

Ingredients

  • 1 cup whole raw almonds
  • 1 cup powdered sugar
  • 2 tbsp cocoa powder
  • up to 1/4 cup vegetable or light olive oil
  • 1/2 tsp vanilla extract

Directions

  1. Skin almonds by pouring boiling water over them in a bowl and letting them sit for 2 minutes. Drain off hot water and replace with cold water. Almond skins should pop off when you squeeze the individual almonds.
  2. Preheat oven to 350° F (175 degrees C). Place almonds in a single layer on a shallow baking pan. Toast for 10 minutes. Stir the nuts halfway through baking to ensure an even color.
  3. Process nuts in a food processor, or use a stick blender. Scrape down the sides of the bowl as necessary until the nuts have liquefied, about 5 minutes. First, you will get coarsely chopped nuts, then a fine meal. After a little while, the nuts will form a ball around the blade. Keep processing. The heat and friction will extract the natural oils from the nuts and you will get almond butter!
  4. When the nuts have liquified, add the sugar, cocoa and vanilla. Slowly drizzle in enough oil to make a spreadable consistency. Since the mixture is warm, it will be more fluid now than at room temperature.
  5. Transfer the spread to an airtight container and store in the refrigerator.

Here are some ideas for using your “Almondtella.”

Vanilla-orange cookies with chocolate nut filling

Place almondtella at the bottom of crème brûlée for a nice surprise.

Read more about the problems with palm oil at: Palm Oil, What’s the Issue?

Delicious Homemade Bagels – Without The Machine

bagels homemade n

Chewy homemade bagels smeared with cream cheese and an icy glass of cherry almond tea – a delicious lunch to enjoy while working from home. Next project? Making our own cheese spread for these tasty bagels.

We’ve discovered one place to purchase really good chewy bagels in Ulaanbaatar. We still prefer to make our own, even with the time it takes, instead of trekking out to the deli. Back in Alaska, I used a Zojirushi bread machine to create the dough for my bagels (see bagels three ways). We sold the machine when we left Alaska, and in our efforts to simplify our kitchen I did not replace it when we moved to Ulaanbaatar. That means taking my trusty bread machine bagel recipe and rewriting it to eliminate the machine. My adapted recipe’s results are just as tasty and chewy. You can still adorn the bagels with whatever your heart desires. Without the appliance, these bagels can be made in a galley or a tiny kitchen in a camper. Enjoy!

Homemade Chewy Bagels

Ingredients

  • 2 tsp active dry yeast
  • 1 1/2 tbsp granulated sugar
  • 1 1/2 cups warm water (105 degrees F/40 degrees C)
  • 3 1/2 cups all-purpose flour
  • 1 1/2 tsp salt
  • 3 qts water
  • 3 tbsp granulated sugar
  • 1 egg, beaten
  • toppings such as poppy seeds, toasted onions, sesame seeds, etc. (optional)

Directions

  1. In a large bowl, stir together yeast, 1 1/2 tbsp sugar and water. Let sit for about 5 minutes to make sure the yeast is good. (It will foam.)
  2. Stir in salt and the flour, 1/2 cup at a time. The last 1/2 cup, you will need to knead in by hand.
  3. Knead the dough until it is smooth and elastic.
  4. Coat the inside of a large bowl and place the dough inside.
  5. Cover bowl with plastic wrap and let dough rise until doubled, about an hour.
  6. Line baking sheet with parchment paper.
  7. Cut dough into 8 equal pieces.
  8. Roll pieces into balls.
  9. Flatten balls slightly.
  10. Poke your finger through center of ball and twirl dough around your finger to enlarge the hole.
  11. Place bagels on parchment-lined baking sheet to rest.
  12. Bring 3 qts water to boil in large pot. Stir in 3 tbsp sugar.
  13. Place 4 bagels in boiling water. Boil for 1 minute. Flip bagels and let boil for another minute.
  14. Place boiled bagels on clean, dry towel.
  15. Place remaining 4 bagels in boiling water. Repeat boiling process with these bagels.
  16. Take bagels from towel and place them on parchment-lined baking sheet.
  17. Preheat oven to 375 degrees F (190 degrees C).
  18. Brush bagels with beaten egg.
  19. Sprinkle desired toppings on bagels (poppy seeds, sesame seeds, charnushka, minced dried onion and minced dried garlic are some of our favorites).
  20. Bake in preheated oven for 20 – 25 minutes, until browned.


My Version of an $8 Chocolate Chip Cookie

eight dollar chocolate chip cookie n

High quality milk chocolate, white chocolate, toasted almonds, browned butter and vanilla paste pack in the flavor. Served warm out of the oven, this cookie adds up to… Irresistible!

This week, I read an article about a restaurant which offers a chocolate chip cookie and a glass of flavor-infused milk for $8! The value of this pricey cookie lies in the care with which it is baked and served as well as with the quality of the ingredients. Customers love that this warm-from-the-oven-cookie has a soft, melty chocolate center and crispy edges.

Using the concepts from the article – ingredients should be top notch and the cookie needs to be served individually-baked and warm – I created my own version of a cookie that would deserve an $8 price tag. I love the flavor and texture of nuts in my chocolate chip cookies, so I browned the butter and toasted some chopped almonds to ensure plenty of nutty flavor. I added a dash of almond extract for additional flavor. Traditional chocolate chip cookies use vanilla extract. I substituted the extract with vanilla paste for a richer vanilla flavor. I baked the cookies at a little lower temperature than traditional recipes to allow the cookie to retain its gooeyness a little longer… not that these cookies will last long! I highly recommend you bake only the number of cookies you will immediately serve. The dough will keep in the refrigerator so you can make ’em as you need ’em fresh out of the oven.

Both Jack and I agreed that the flavor was amazing. Jack thought the cookies could have been a little bit bigger for the price tag. Feel free to scoop them larger if you agree with Jack!

Ingredients

  • 1 large egg
  • 1/3 cup dark brown sugar
  • 3 tbsp granulated sugar
  • 1/3 cup unsalted butter, browned
  • 2 tsp vanilla paste
  • 1/2 tsp almond extract
  • 3/4 cup plus 2 tbsp all-purpose flour
  • 1/2 tsp baking soda
  • pinch salt
  • 1/3 cup toasted almonds, chopped
  • 1/3 cup good quality milk chocolate chips
  • 1/3 cup good quality white chocolate, chopped

Directions

  1. Mix the sugars and the egg well.
  2. Add in the browned butter.
  3. Mix in vanilla paste and almond extract.
  4. Stir flour, baking soda and salt into the mixture.
  5. Fold in the almonds and chocolate pieces.
  6. Chill the dough for at least 1 hour.
  7. Line a baking sheet with parchment paper.
  8. Preheat oven to 325 degrees F (160 degrees C).
  9. Scoop tablespoon-sized balls using a small ice cream scoop onto the baking sheet. Bake for 8 – 10 minutes.
  10. Let the cookies set on the baking sheet for about 3 minutes before removing them to a wire cooling rack.
  11. Continue to cool for another two minutes on the wire rack.
  12. Serve cookies while still warm.

Makes 10 cookies.

Perfect Gourmet Popcorn (for Date Night or Any Night)

gourmet popcorn and beer cover n

Savory stovetop popcorn, a favorite lager and your main squeeze. All that’s needed now is the movie.

A blend of Italian seasonings and powdered chili peppers add a savory and zesty kick to this classic movie-night dish. Step by step directions for a perfect bowl of popcorn follow. (10 more photos)

You’ll need:

  • an herb and spice blend
  • salt
  • a pan with a lid for popping the popcorn
  • a pan for melting the butter
  • a large bowl for slightly cooling the popcorn
  • a fairly large plastic bag for shaking the popcorn to mix in the butter and seasonings
  • a serving bowl
  • a couple of glasses set in the freezer to get frosty cold
  • a beverage

spices gourmet popcorn n

Start by mixing together a savory blend of herbs and spices. 

1 tsp basil

1 tsp marjoram

2 tsp oregano

1 tsp powdered garlic

1 tsp smoked chipotle chili powder

1 tsp smoked paprika

popcorn third cup 3 seeds n

No need for an air popper or countertop gadget. Excellent popcorn can be made right on your stovetop. 

Start with 1/3 cup popcorn. Set three kernels aside. These will go into your pan first. 

Place 2 tablespoons olive oil (or other oil) into a pan such as the one pictured below. Add the three test kernels and heat over medium heat. (Use three in case one or two are duds.) When one of the test kernels pops, remove it, and add the rest of the popcorn.

popcorn stovetop swiss diamond n

A pan with a clear lid is helpful, but not necessary. Gently shake the pan occasionally. While preparing the popcorn, melt about 1/3 cup of butter in a separate pan. When the butter is melted, remove from heat, but keep it warm.

popcorn in metal bowl n

Place the popped popcorn in a bowl. This will allow it to slightly cool which will prevent the hot seeds from causing the plastic bag to melt. If you’ll be making additional batches of popcorn, place the bowl in a warm oven of around 100 degrees Fahrenheit (40 degrees Celsius). 

popcorn in bag w butter n

Place the popcorn in a plastic bag. Drizzle on the butter. The butter should be liquid, but not hot. Otherwise it might melt through the bag.

popcorn shaking bag n

Close the bag and shake vigorously to evenly distribute the butter.

popcorn adding spices n

Add the herb & spice mix and salt to taste.

popcorn shaking bag 2 n

Close the bag and shake again. Pour the seasoned popcorn into a serving bowl.

popcorn n pouring beer n

Get the glasses from the freezer. Fill with a beverage that will compliment this savory popcorn. We recommend a favorite lager.

popcorn n admring beer n

And dinner and a movie is served!

Long-tailed Rosefinch: Tuul River, Ulaanbaatar

Pallas Rosefinch male n

After a long winter, this striking male long-tailed rosefinch (Carpodacus sibiricus) was fattening up on fresh willow seeds near the Tuul River. 

pallas rosefinch female n

And here’s the female. Although residents of Mongolia, these birds were likely passing through Ulaanbaatar on their way to higher elevations to the north. Rosefinches are mainly seed eaters. There are several species throughout the Northern Hemisphere. 

Penduline Tits: Nest-Builders Extraordinaire

Penduline tit gathering nesting material

His face stuffed with down from willow catkins, this male white-crowned penduline tit (Remix coronatus) was hard at work finishing one the bird world’s most unique nests. (Eight more photos)

During this past winter, we found a couple of mitten-shaped nests suspended from bare branches near the Tuul River. The birds were long gone, but I looked up the nest: Penduline tits, a new species for us and one we hoped to see when they returned in springtime. So, on a recent evening as I was walking along the river, I was listening for something I hadn’t heard before. With the willows and poplars now leafing out, I figured song was my best bet at locating nesting pendulines.

Sure enough, not long into my walk I heard something I hadn’t heard before – a twittering and song that sounded like it came from a small passerine. I followed the voice till I thought I was as close as I dare get without spooking whatever was singing, quietly set up my camera and tripod, froze, listened, tried to part the dense willow tangles with my eyes, caught movement and hoped the bird would present itself where I could get a decent photo.

Above is my first photo of a penduline tit.

Penduline tit nest hidden plain sight

Hidden in plain view…

I knew that finding the bird was no guarantee I’d find his nest, but using clues from the nests we’d stumbled upon over the winter, I located the same sort of tree in the same sort of setting, looked carefully among the boughs about 17 feet up, and there it was, hidden in plain view. Penduline tits do not reuse their nests, but they do seek out the same habitat year after year.

There was cloud cover off and on, it was getting late in the day, and the light was all wrong to shoot the nest from the front, so I moved to the side. I was concerned about spooking him off his nest (the males do most of the building), so I kept a distance and tucked in behind some small willows.

Penduline tit nest profile detail

Cottony-soft and virtually impervious to rain and predators, these tough, tightly-woven nests were used as children’s slippers in Europe in the past. The Masai of Africa used those of a related species as purses. This one was swaying and rocking in the fresh spring breezes.

Penduline tit flying to nest w material

Intervals of several minutes passed between the bird’s visit to his nest. I waited still and quiet, my ears straining for his voice among the songs and sounds of rose finches, azure tits, magpies, sparrows and other birds in the riverine forest. I was able to spend a fair amount of time with this little fellow. Above, he is heading into his nest with more downy material.

Pendulin tit entering nest

In this frame I caught him just as he was disappearing into his nest. I read that there is a flap, which the bird must open, inside the nest.

Pendulin tit tail feathers

A slight pause just before completely entering… 

Penduline tit taking a look fm nest

A quick look over his shoulder…

Penduline tit taking off fm nest

   …and off again for more material.

Pendulin tit working into evening

He was still hard at work when it was time for me to call it an evening and meet up with Barbra…

Click these links to read more about our birding and hiking adventures near Ulaanbaatar, Mongolia

Urban Birding in the World’s Coldest Capital City: A Winter Walk along Ulaanbaatar’s Tuul River

Crows Ice Fishing for Caddis Larva: Tuul River, Mongolia

Connected by Waxwings

Cinnamon Toast Biscotti – A Light, Satisfying Small Batch

Cinnamon Sugar Biscotti n

Warning: the enticing aromas from baking this crunchy, cinnamon biscotti may cause neighbors to knock on your door. 

During our summer break, Jack and I don’t have as many little volunteers to help us eat our sweet creations. Being mindful of our waistlines, it is time to switch gears to confections that are either made in smaller batches, are lower in fat, or are just plain healthier. Curious what I’d discover, I searched for “lowfat cookie recipes” on the Internet. The top result, according to Google, was biscotti. Delicious and versatile, I could see how they would make the cut. I decided today’s creation would feature cinnamon, which always tricks my taste buds into thinking the cookie is sweeter than its sugar content would indicate. This small batch will be just right for the coming week.

So with all this, I give you a small batch of cinnamon biscotti that that is easy to whip up in about an hour’s time. This “two bake” recipe is especially galley and camper friendly, as it limits propane use.

Cinnamon Toast Biscotti

Ingredients

  • 1 cup all-purpose flour
  • ¾ tsp ground cinnamon
  • ½ tsp baking powder
  • Pinch salt
  • 1/3 cup granulated sugar
  • 3 tbsp butter, melted
  • 1 large egg, beaten
  • ½ tsp vanilla extract


Cinnamon topping (just mix ingredients together)

  • 2 tbsp granulated sugar
  • 1 tsp ground cinnamon

Directions

  1. Preheat oven to 325 degrees F (160 degrees Celsius).
  2. Line a baking sheet with parchment paper. Set aside.
  3. Whisk together flour, cinnamon, baking powder, salt and sugar in a medium bowl.
  4. Stir melted butter, egg, and vanilla into flour mixture
  5. Form dough into a flat log shape on parchment-lined baking sheet. Log should be about 10 inches long and 1 ½ inches wide.
  6. Generously sprinkle top of log with about half of the cinnamon topping.
  7. Bake for 20 minutes in preheated oven. Log will be firm to the touch.
  8. Remove from oven and let cool for 15 minutes.
  9. Cut log into 10 pieces using a serrated knife.
  10. Place pieces on their side, exposing a cut side.
  11. Sprinkle with remaining cinnamon topping.
  12. Bake for 10 – 15 more minutes, until biscotti is nicely toasted.
  13. Cool completely on wire rack before serving. Store leftovers in an airtight container.

Individual Pizza Crusts: For Dinner, Breakfast, Camp and Galley

individual pizza crusts n

Tasty individual-sized pizza crusts ready to use for breakfast, lunch, dinner, or snacks. The size is perfect for the grill, for a galley, or the small oven we use here in Mongolia.

After trying many different recipes, I now have our go-to basic pizza crust recipe. The recipe can be easily modified by adding different spices or cheese into the crust. I’ve also substituted half of the all-purpose flour with wheat for a heartier crust that goes especially well with olive oil-based toppings. The best thing about the recipe is that it makes six crusts – two for now and four more for two more meals later. These crusts freeze well.

The crusts bake up best on a pizza stone, or, as I’ve recently learned, on an untreated clay tile from your local hardware store. The stone provides for even baking, giving the bottom a satisfying crispiness and leaving the top of the crust nice and chewy.

Our traditional dinner pizzas tend to be fully loaded, like our cheese and burger pizzas or smoked anchovy and salmon pizzas or our Alaska silver salmon pizzas. Pizza crusts can be loaded up for breakfast, too. How about a pepperonata and fried egg pizza? Or brush on some olive oil and grate some parmesan cheese on the crust, bake for 10 minutes and you have yourself a tasty appetizer. The possibilities are endless.

Individual-Sized Pizza Crusts

Ingredients

  • 1 1/4 cups water
  • 2 tbsp olive oil
  • 1 1/2 tsp active dry yeast
  • 1 1/2 tbsp granulated sugar
  • 3 3/4 cups all-purpose flour
  • 1 1/2 tsp salt

Directions

  1. Mix water, olive oil, yeast, and sugar together in a large bowl.
  2. Mix in salt and about half of the flour.
  3. Knead in more flour in increments of about 1/4 cup. (I actually knead the dough in the large bowl.)
  4. When all flour is incorporated, dough should no longer be sticky.
  5. Turn the dough out onto a lightly floured surface and clean the large bowl.
  6. Oil the bowl well and place the dough in the bowl. Cover with plastic wrap and let the dough rise until doubled, about an hour.
  7. Divide dough into six pieces. Stretch the dough into the shape of a plate. Let pizza-shaped crusts rest for 10 minutes while you preheat oven.
  8. Preheat oven to 400 degrees F (about 200 degrees C). Preheat with baking stone in oven. If you don’t have a baking stone, preheat baking sheet.
  9. Place two crusts on baking stone, pricking each generously with a fork.
  10. Bake for 10 minutes.
  11. Repeat with remaining crusts.
  12. Let cool completely before you keep in the freezer or refrigerator.
  13. When you are ready to use crusts, let them thaw slightly (if frozen) cover with desired toppings and bake at 400 degrees F (200 C) for about 10 minutes – cheese should be bubbly and slightly browned.

Need some tasty ideas to top these crusts?

Click here for silver salmon pizza.

Click here for smoked anchovy and salmon pizza.

Click here for pepperonata and fried egg pizza.