Rosemary Kalamata Olive Loaf

Aromatic and flavorful, tonight this rosemary kalamata olive loaf will accompany a moose roast. Roasted lamb, too, would be a good choice, and we anticipate it pairing well with Italian or Greek dishes, as well. This morning we served toasted slices with olive oil with halibut omelets. During the baking process, our kitchen was filled with the irresistible scent of rosemary. We agreed it was one of the best savory breads we’ve ever had.

This is another recipe from 300 Best Bread Machine Recipes by Donna Washburn and Heather Butt. Monitor the dough during the kneading process to make sure the amount of flour/moisture is right. Because the kalamata olives added moisture, I found I needed to add a little more flour than is indicated below.

Olive Rosemary Loaf

Ingredients

  • 1 cup water
  • 3/4 cup kalamata olives, pitted and chopped coarse, extra moisture gently squeezed out in paper towels
  • 1 tsp salt
  • 1 tbsp granulated sugar
  • 2 tbsp extra virgin olive oil
  • 3 1/4 cups all purpose flour
  • 1/4 cup fresh rosemary (or 2 tsp dried)
  • 1 1/4 tsp yeast

Directions

  1. Measure ingredients into baking pan in the order recommended by the bread machine manufacturer. Insert pan into the oven chamber. Start your machine. During the kneading phase, check to make sure the dough is of proper consistency. Add flour or water as needed.

Chocolate Truffle Cookies with Pecans

Dedicated to fully addicted chocoholics, this chocolatey chocolate with chocolate-chip cookie is not for people who just “like” chocolate. Are you getting how chocolatey these are? 

This low-flour cookie is dense and fudge-like. Because the dough is quite sticky, I recommend using a cookie scoop and then rolling the chilled dough in a coating such as chopped nuts, confectioner’s sugar or coconut in order to make handling the dough easier. This extra touch also enhances the taste, texture and the presentation.

Chocolate Truffle Cookies

makes 3 dozen cookies

Ingredients

  • 2 cups semisweet chocolate chips, divided equally
  • 6 tablespoons butter
  • 3 eggs
  • 1 cup white sugar
  • 1 1/2 teaspoons vanilla extract
  • 1/2 cup all-purpose flour
  • 2 tablespoons unsweetened cocoa powder
  • 1/4 teaspoon baking powder
  • 1/4 teaspoon salt
  • 1 cup finely chopped pecans

Directions

  1. In a microwave or in a bowl warmed over a pan of simmering water, place the butter and 1 cup of chocolate chips and melt together, stirring occasionally until smooth. Remove from heat and set aside to slightly cool.
  2. In a large bowl, beat eggs and sugar until thick and pale, about 2 minutes. Stir in the vanilla and the chocolate mixture until well mixed.
  3. In a separate bowl, combine the flour, cocoa powder, baking powder and salt. Gradually stir into the chocolate mixture. Fold in remaining 1 cup chocolate chips. Cover dough and chill for at least an hour or overnight.
  4. Preheat oven to 350 degrees F (175 degrees C). Roll chilled dough into 1 inch balls. Roll dough balls to coat with chopped pecans. Place on ungreased cookie sheets so they are 2 inches apart.
  5. Baking time will vary depending on how chilled the dough is when it goes into the oven. Place cookies into preheated oven. Check at 9 minutes. Finished cookies should be puffed up and slightly cracked on top. This may take up to 15 minutes. Allow cookies to cool on baking sheet for 5 minutes before removing to a wire rack to cool completely.

This recipe was adapted from http://allrecipes.com/recipe/chocolate-truffle-cookies/detail.aspx.

Overnight French Toast with Blueberries

Blueberry French toast made from leftover challah bread makes for a gourmet breakfast. Thick slices of apple-smoked bacon and freshly brewed cups of espresso roast coffee rounded out this Spring Break breakfast.

Overnight French Toast with Blueberries

Ingredients

  • 6 slices day-old (or older) challah, cut into 1 inch cubes (other brioche-style breads can be substituted)
  • 1/2 (8 ounce) package cream cheese
  • 1/2 cup fresh blueberries (or dried blueberries soaked in hot water for five minutes)
  • 4 eggs, beaten
  • 1/2 cup milk (I used soy milk)
  • 1/2 cup heavy cream
  • 1 teaspoon vanilla extract
  • 1/3 cup maple syrup
Directions
  1. Lightly grease a baking dish approximately 8 x 8 inches. (My dish was 7 x 10.)
  2. Spread cream cheese on top of bread slices. Cut slices into 1-inch cubes. Arrange the bread cubes in the dish. Sprinkle with 1 cup blueberries.
  3. In a large bowl, mix the eggs, milk, cream, vanilla extract, and syrup. Pour over the bread cubes. Cover, and refrigerate overnight.
  4. Remove the bread cube mixture from the refrigerator about 30 minutes before baking. Preheat the oven to 350 degrees F (175 degrees C).
  5. Cover, and bake 30 minutes. Uncover, and continue baking 25 to 30 minutes, until center is firm and surface is lightly browned.

I opted to sprinkle chopped pecans onto the French toast during the last 10 minutes of baking. The French toast is not overly sweet, which is what I was going for. You could mix in confectioner’s sugar with the cream cheese for a sweeter version. Cinnamon would also be a nice addition.

Crustless Cranberry Cake

Tart cranberries and almonds make for an irresistible combination. This cake is delicious served with vanilla bean ice cream or covered with hot vanilla custard.

With eight weeks to go in our school year, it’s time to get creative with items remaining in our pantry and freezers. Our pecan upside-down pumpkin cake was a delicious way to use up a cup of frozen pumpkin puree that survived the holiday season. Our next challenge was two cups of cranberries from the freezer door. I found a promising recipe for a crustless cranberry “pie.” We are fans of tart and sweet flavor combinations, and this recipe was a terrific way to use those residual cranberries. I decided to pulverize the almonds so they would provide more flavor than texture.
.
Crustless Cranberry Cake
.
Ingredients
  • 1 cup all-purpose flour
  • 1 cup white sugar
  • 1/4 teaspoon salt
  • 2 cups cranberries
  • 1/2 cup whole almonds pulverized to the consistency of coarse flour
  • 1/2 cup applesauce (used instead of butter)
  • 3 eggs, well beaten
  • 2 tablespoons almond syrup (the kind used to flavor drinks in coffee shops)
  • (optional) zest from 1 orange or 1 tablespoon Grand Marnier
.
Directions
  1. Preheat oven to 350 degrees F. Grease one deep 9-inch pie pan.
  2. Combine the flour, sugar, and salt. Stir in the cranberries and the almonds, and toss to coat. Stir in the applesauce, beaten eggs, and almond extract. The mixture will be very thick. Spread the batter into the greased pan.
  3. Bake at 350 degrees F for 40 minutes, or until a wooden pick inserted near the center comes out clean.
  4. Serve warm with whipped cream, ice cream, or warm vanilla custard.

.

Recipe adapted from http://allrecipes.com/recipe/crustless-cranberry-pie/Detail.aspx

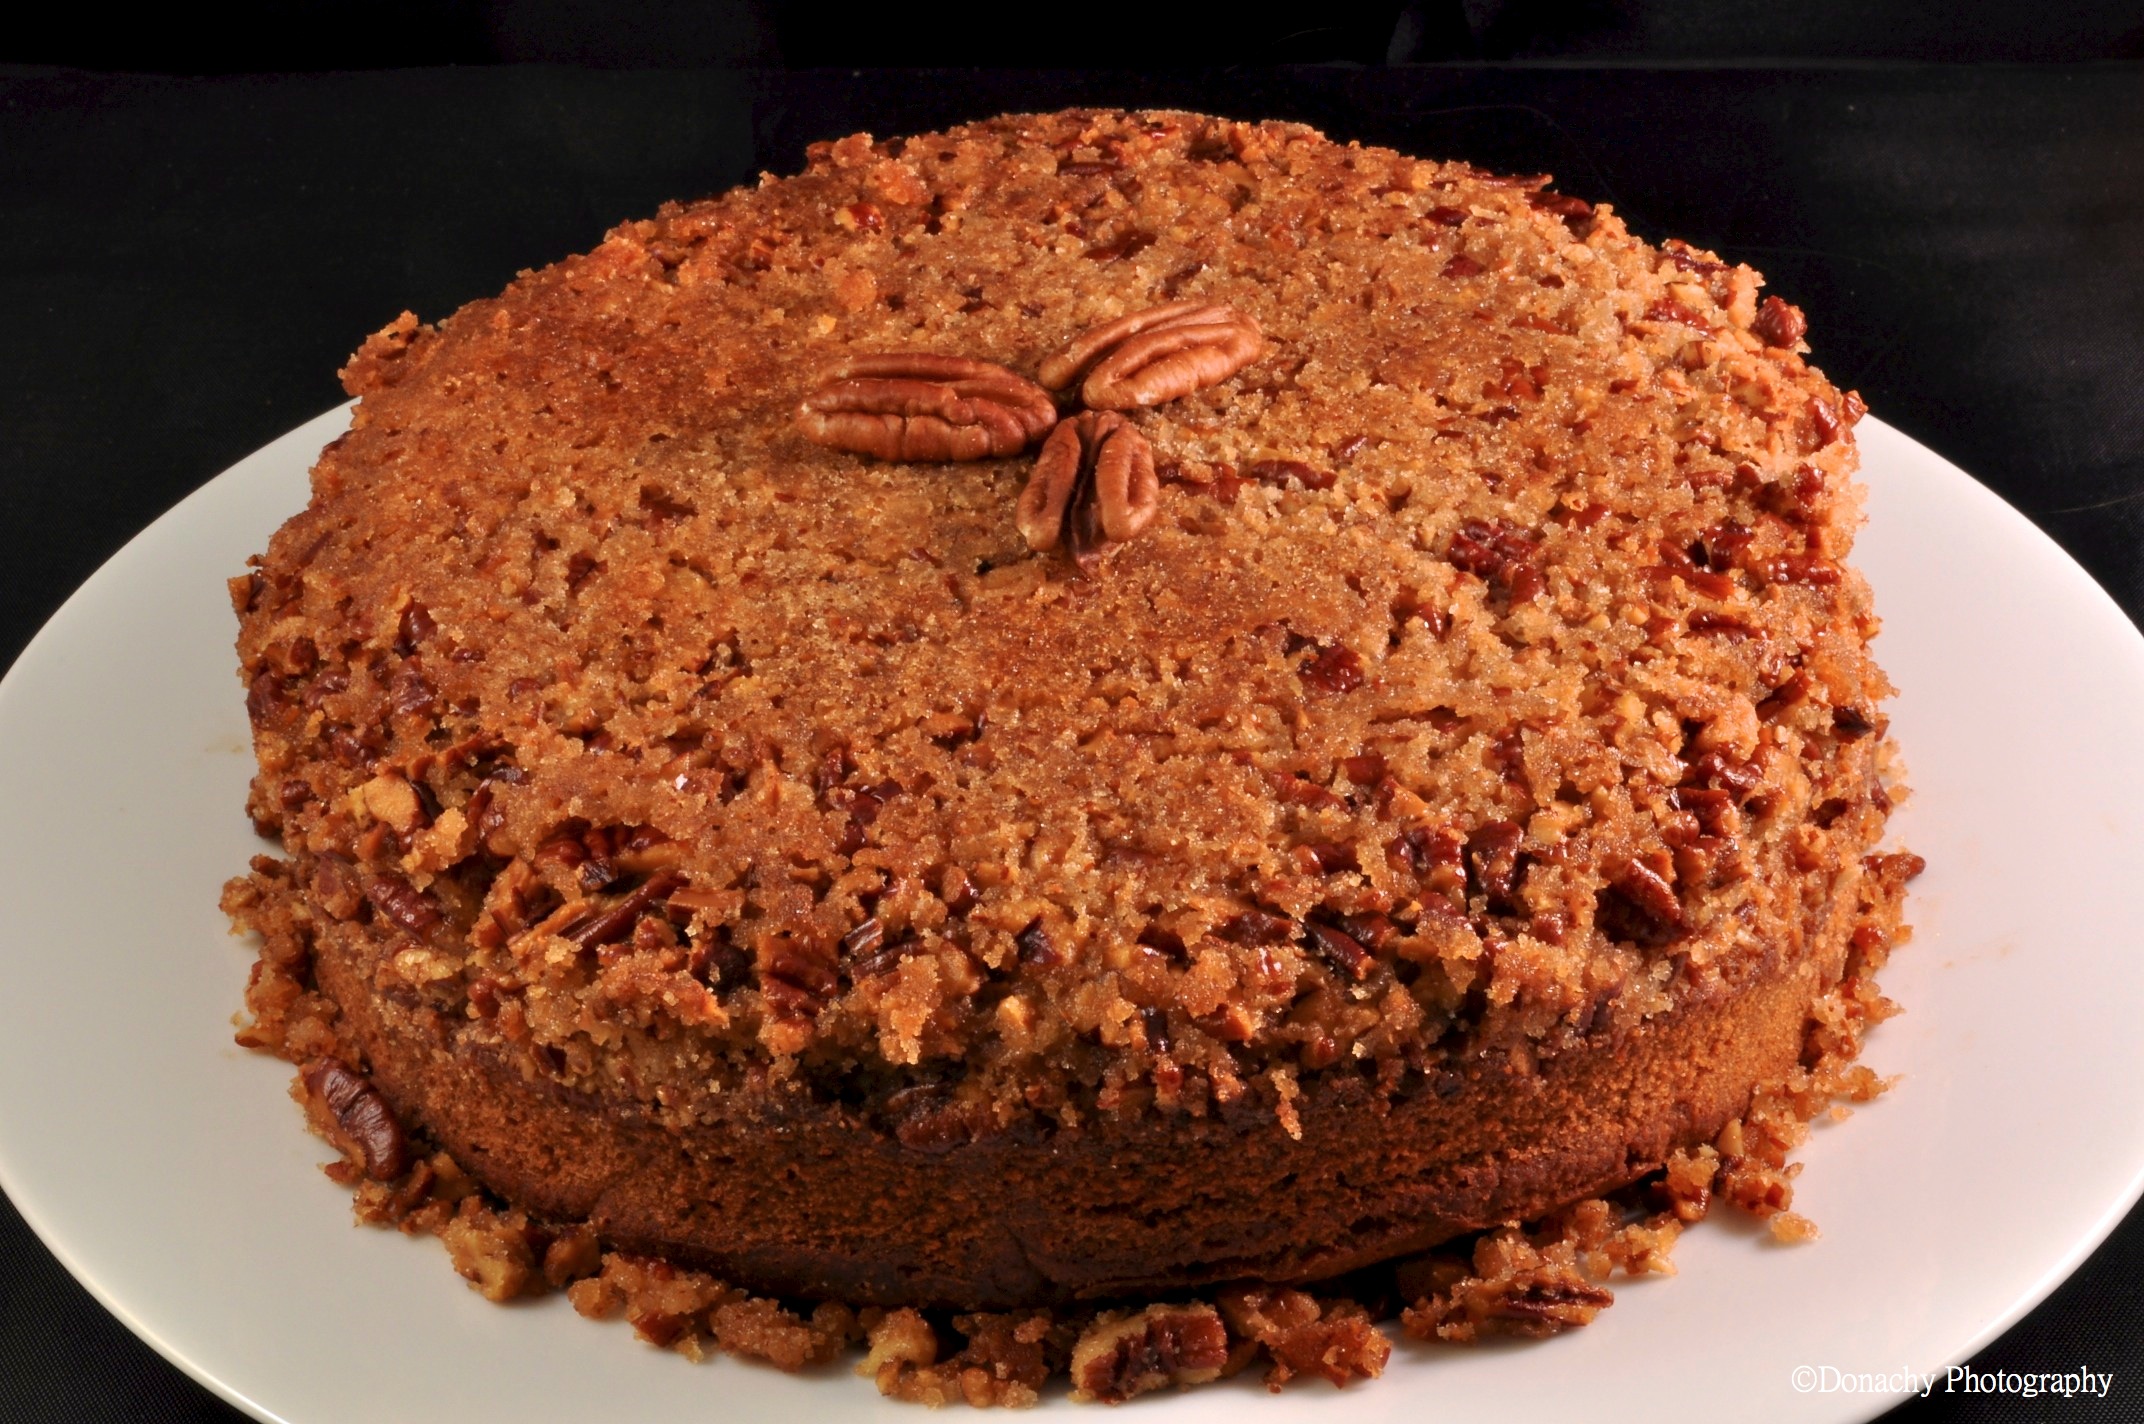
Upside-Down Pecan Pumpkin Cake

Moist, packed with flavor and topped with crunchy nutty deliciousness, this upside-down will have your guests glad they saved room for dessert. 

I baked this cake in a 9-inch springform pan because that was the best pan for the job in my cupboard. Set on a baking sheet it worked well, and unmolding the cake was a cinch.

Upside Down Pecan Pumpkin Cake

Ingredients

  • 1 cup (2 sticks) unsalted butter, evenly divided and melted
  • 3/4 cup of brown sugar
  • 3/4 cup pecan halves
  • 1 2/3 cups all-purpose flour
  • 1 teaspoon ground cinnamon
  • 1/2 teaspoon mace
  • 1/2 teaspoon salt
  • 1/2 teaspoon baking powder
  • 1/2 teaspoon baking soda
  • 1 cup granulated sugar
  • 1 teaspoon vanilla extract
  • 2 large eggs
  • 1 cup pumpkin puree, canned or fresh
  • 1/2 cup warm (110 degrees) milk

Directions

  1. Heat the oven to 350 degrees F. Spread pecan halves on a baking sheet and toast for 5 minutes or until aromatic.  Remove from the oven and let cool. Coarsely chop the pecans and set aside. Leave the oven set to 350 degrees F.
  2. Melt one stick of butter in a small sauce pan. Add pecans and brown sugar, mix thoroughly. Spread this mixture evenly at the bottom of a 9 inch cake pan.
  3. In a large bowl, sift together flour, sugar, cinnamon, mace, salt, baking powder, and baking soda. Set aside.
  4. Melt second stick of butter.
  5. Add melted butter, eggs, milk, vanilla extract and pumpkin puree into a mixing bowl. Beat together with mixer until well combined, about 2 minutes.  Add flour mixture and stir with spoon until just combined.
  6. Pour batter on top of pecan mixture in the baking pan. Bake until a cake tester inserted into the middle comes out clean, about 50 minutes. Transfer the cake to a wire rack to cool, approximately 5 minutes.
  7. Place a plate over the cake and invert to unmold cake and let cool completely.

We served the cake with homemade vanilla bean ice cream and cups of freshly steeped almond roobios tea.

This recipe was adapted from http://thenoshery.com/2011/03/28/praline-upside-down-pumpkin-cake/.

If you liked this post, you might also like:

Molten Chocolate Lava Cake

Chocolate Waffle Cookies in Two Minutes Flat!

This week, I based my search for a new cookie recipe solely on looks. I found a photo of “boot print cookies,” not a terribly appetizing name for a cookie, but the waffled pockets make it easy to imagine serving these with ice cream or chocolate sauce, and the powdered sugar on a chocolate-colored background is classic. The unique look, rich brownie flavor, and the crispy Belgian waffle texture are a winning combination. The best part? After the batter is made, you only have to wait two minutes before you can enjoy fresh, hot, chocolate waffle cookies! Just dollop a rounded tablespoon of batter onto the hot waffle iron, press, and there they are – Boot Print Cookies! Or, if you like, in deference to the waffle-soled running shoes Bill Bowerman created in his kitchen while a coach at Oregon University back in the 1970’s, “Cross Country Cookies!”

Chocolate Waffle Cookies

makes 32 cookies

Ingredients

  • 3/4 cup white sugar
  • 1/2 cup butter, melted
  • 2 eggs
  • 1 teaspoon vanilla extract
  • 1 cup all-purpose flour
  • 1/4 cup unsweetened cocoa powder
  • 1/2 cup chopped walnuts

.

Directions

  1. Preheat the waffle iron. In a medium bowl, mix the sugar and butter together. Stir in the eggs and vanilla. Then mix in the flour, cocoa, and walnuts.
  2. Drop dough by rounded tablespoons onto the waffle iron. My waffle iron is large enough to do 16 cookies per batch. Close the lid and cook for 2 minutes. It may take more or less time depending on the individual waffle iron. Separate any cookies that have run together while still warm. Dust with confectioner’s sugar if desired.
.

adapted from http://allrecipes.com/recipe/waffle-cookies-ii/detail.aspx

If you liked this post, you might also like:

Florentines

Linzer Cookies

Cranberry and Pecan Rugelach

Mailanderli

Stuffed Cookies

Florentines – Chocolate or Plain?

These crispy yet chewy cookies can be made as a sandwich with a layer of chocolate to hold them together, chocolate dipped, or with a drizzle of chocolate. And they are wonderful without any chocolate at all.

When I was young my family sometimes went to a deli in San Francisco where, out of an assortment of scrumptious confections, I was allowed to pick out a cookie after our meal. Often, I chose a chocolate dipped florentine, a delicious almond cookie flavored with the essence of orange zest, one of my favorite combinations.

We are trying to keep our kitchen as simple as possible in order to ready ourselves for life on a boat with only a relatively small galley kitchen. So it was only after serious contemplation that we recently added a new gadget to our galley – a Miallegro stick blender. Our manual nut chopper has worked well for most duties, but would have been tough to chop almonds fine and consistent enough to meet the needs of this recipe. The stick blender is much smaller than our counter top blender and much more versatile. With 550 watts of power and a dedicated nut chopper attachment, I had finely ground, perfectly uniform coarse almond flour in less than one minute!

Even with the help of the chopper, this recipe was time consuming, but our cookie taste testers all agreed: the result was fabulous. The first step was blanching and skinning the almonds. After some trial and error, I figured out that the easiest way to skin the almonds was to boil them for two minutes and then pinch them out of their skins while they were soaking in cold water. After this step, the almonds had to dry. I let them sit out on a cookie sheet overnight. After the dough is made, it needs to sit for about a half an hour in order to cool enough to handle. I could only bake six cookies at a time, which also added to the time. Lastly, if you dip the cookies or drizzle them in chocolate, this has to be done after the cookies have cooled. Wait! You still can’t serve them until the chocolate sets up. This investment in time results in cookies that end up disappearing quickly! I don’t know which I like better… the chewy yet crunchy texture, or the combination of the orange, almond, and chocolate flavors.

Florentine Cookies

Yields 24 six-inch cookies

  • 1 3/4 cups blanched almonds, sliced (about 5 ounces)
  • 3 tablespoons all-purpose flour
  • Finely grated zest of 1 orange (about 2 tablespoons)
  • 1/4 teaspoon fine salt
  • 3/4 cup sugar
  • 2 tablespoons heavy cream
  • 2 tablespoons light corn syrup
  • 5 tablespoons unsalted butter
  • 1/2 teaspoon pure vanilla extract
Chocolate topping (optional):
  • 2 to 4 ounces semisweet chocolate, chopped
Directions
  1. Position a rack in the center of the oven and preheat to 350 degrees F. Line a baking sheet with a silicone baking mat or parchment paper.
  2. Pulse the almonds in a food processor until finely chopped, but not pasty. Stir together the nuts, flour, zest and salt in a large bowl.
  3. Put the sugar, cream, corn syrup and butter in a small saucepan. Cook over medium heat, stirring occasionally, until mixture comes to a rolling boil and sugar is completely dissolved. Continue to boil for 1 minute. Remove from heat and stir in the vanilla, then pour this mixture into almond mixture and stir just to combine. Set aside until cool enough to handle, about 30 minutes.
  4. Scoop rounded teaspoons (for 3-inch cookies) or rounded tablespoons (for 6-inch cookies) of batter and roll into balls. Place on prepared baking sheet, leaving about 3 to 4 inches between each cookie since they spread as they bake.
  5. Bake 1 pan at a time, until the cookies are thin and an evenly golden brown in color, rotating pans halfway through baking time, about 10 to 11 minutes. Cool on baking sheet for 5 minutes, then transfer to cooling racks. Repeat with remaining batter.
Optional chocolate topping
  1. Put the chocolate in a medium sized, heatproof bowl. Bring a saucepan filled with 1 inch of water to a very low simmer; set the bowl over the water, but not touching the water. Stir the chocolate occasionally until melted and smooth.
  • For sandwiches, drop about 1/2 teaspoon chocolate onto the flat side of half of the cookies and press remaining halves onto the chocolate covered halves. Return to rack and let chocolate set.
  • For chocolate decor, drizzle melted chocolate over florentines as desired. Set aside at room temperature until chocolate has set.
Recipe courtesy of http://www.foodnetwork.com/recipes/food-network-kitchens/florentines-italy-recipe/index.html

Stuffed Alaskan Halibut

Wild Alaskan Halibut with bleu cheese, stuffed with mushroom-pine nut purée and Alaskan shrimp.

The other evening after making Salmon en Papillote I had a few tablespoons of mushroom-pine nut purée left over (see recipe here). I’d never made stuffed halibut but felt certain the purée would make an excellent stuffing. To enhance it further, I mixed in several Alaskan shrimp cut into smaller pieces. I made a slice in the halibut exactly as one would do with pita bread and spooned in the stuffing.

Next I rubbed salt and freshly ground pepper into the halibut fillet and set it aside. I then put about three tablespoons of olive oil and one tablespoon of butter in a casserole dish just large enough to hold the fillet, tossed in several cloves of garlic, and heated the dish in an oven set at 375 degrees F (190 C). Once the oil-butter mixture was heated through, I placed the halibut fillet skin side down and baked the fish covered for twenty minutes. Then I topped the fillet with bleu cheese and continued baking till the cheese was melted.

This recipe was as easy as it was delicious – one of the best halibut dishes we’ve had. A 3/4 to one pound fillet prepared this way will serve two.

Ten to 20 pound halibut like this one are perfect for the kitchen.

Four Bourbon Taste Test

The four bourbon blind taste test: Maker’s Mark, Basil Hayden’s (Jim Beam Distillery), Blanton’s (Buffalo Trace Distillery), Knob Creek (Jim Beam Distillery) 

Good alcohol is art. Whether the medium is an amber-hued craft ale, a smokey, peaty Isle Scotch, a complex and subtle Willamette Valley Pinot, a tasty Tanqueray and tonic or any of thousands of other choices, a good drink can be downright sublime. In recent years, Barbra and I have become fans of that quintessentially American spirit, bourbon. Although our favorite has been Knob Creek, a recent article on bourbons in Wine Spectator got us thinking that it would be fun to try other makes. And so, as this weekend finds us in Anchorage, last night we engaged ourselves in a blind taste test of four bourbons.

The Crow’s Nest in the Captain Cook Hotel offers commanding views – of a blazing orange sunset over Cook Inlet on one side, of city lights waking and twinkling against the enveloping dark on the other. The bar carries a nice selection of bourbons, and with plenty of empty seats when we arrived, our bartender was happy to indulge us. We were keen to do a side-by-side of two popular brands: Maker’s Mark and Knob Creek. Past that, we were open to anything. “I have a couple I think you’ll find interesting,” she offered. So while we took in the nighttime views out the floor to ceiling windows, she surreptitiously poured out four measures of bourbon in attractive tumblers, arranged them at the bar, and motioned to us that our taste test was ready.

After a round of sniffing, sipping, swirling and comparing impressions, we agreed on our order of preference. We repeated the test one more time, letting our noses and taste buds explore for anything we might have missed the first time around, after which we called our bartender over to reveal which bourbons were which. The results surprised us.

Maker’s Mark, it turned out, was, hands down, our favorite. We found it to be smooth, light on our tongues, and a little sweet in a very agreeable way. Hints of carmel apple reminded me of autumn days in the western Pennsylvania mountains of my youth. We also found notes of sweet cream and vanilla and a clean finish that invited the next sip.

Our second choice – again by a clear margin over the remaining bourbons – was Knob Creek. This whiskey has a rich amber-red color, and a nice nose. Although we both wanted it to have a fuller finish, like Maker’s Mark this drink has a light roasted sweetness that, for me, evokes autumn leaf festivals and cool evenings warmed by oakwood fires – the image of the oak fire no doubt prompted by the subtle oakiness of the whiskey itself.

Although we went back and forth on the next two drinks, in the end we settled on Blanton’s. We found this bourbon to be crisper – less sweet – than the previous two, drier and, perhaps, a bit lighter. Certainly very enjoyable.

Basil Hayden’s has a distinctive rye taste that, perhaps, with more experience with bourbons we might come to appreciate but, for now at least, comes off a bit fumy and and a little overwhelming. I can imagine that if one did develop a taste for Basil Hayden’s, the characteristics of the rye could be satisfying indeed. Perhaps an analogy could be made with single malt Scotch. In our view, there are no “bad” single malt Scotches, but often times there is nothing quite as satisfying as a couple fingers of Laphroaig with all its up front peatiness and smokiness and its sherry undertones.

I’m not sure what it says about us, that our preferences in bourbon were the exact inverse of the pricing. I guess we’re still a couple of cheap dates!
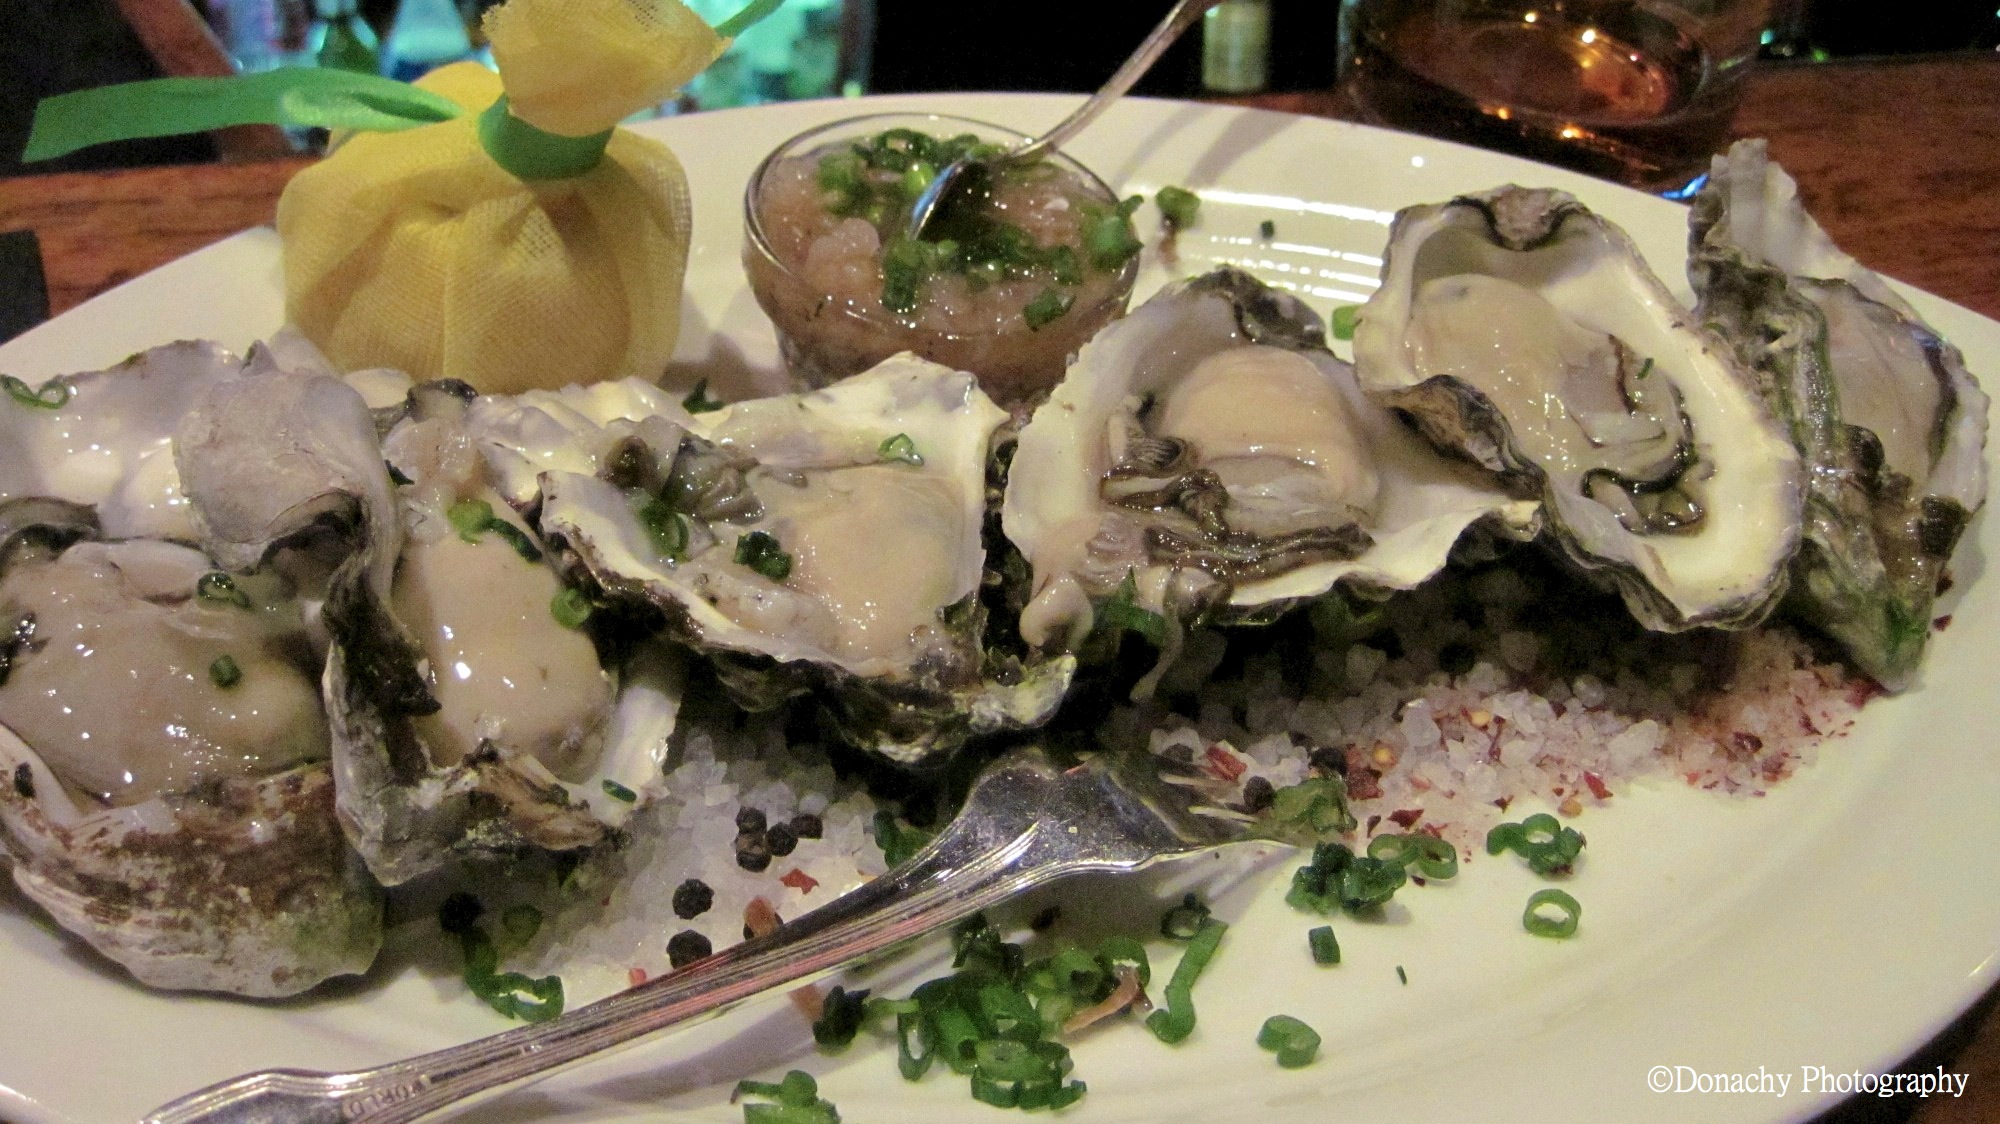
And we incidentally made another discovery. Bourbon is a fine compliment to oysters on the half-shell and would probably pair well with other seafood as well. We splashed a little Blanton’s on these delectable oysters and enjoyed them with a round of Maker’s Mark.

Waste Not Want Not OR Spiced Pear Butter

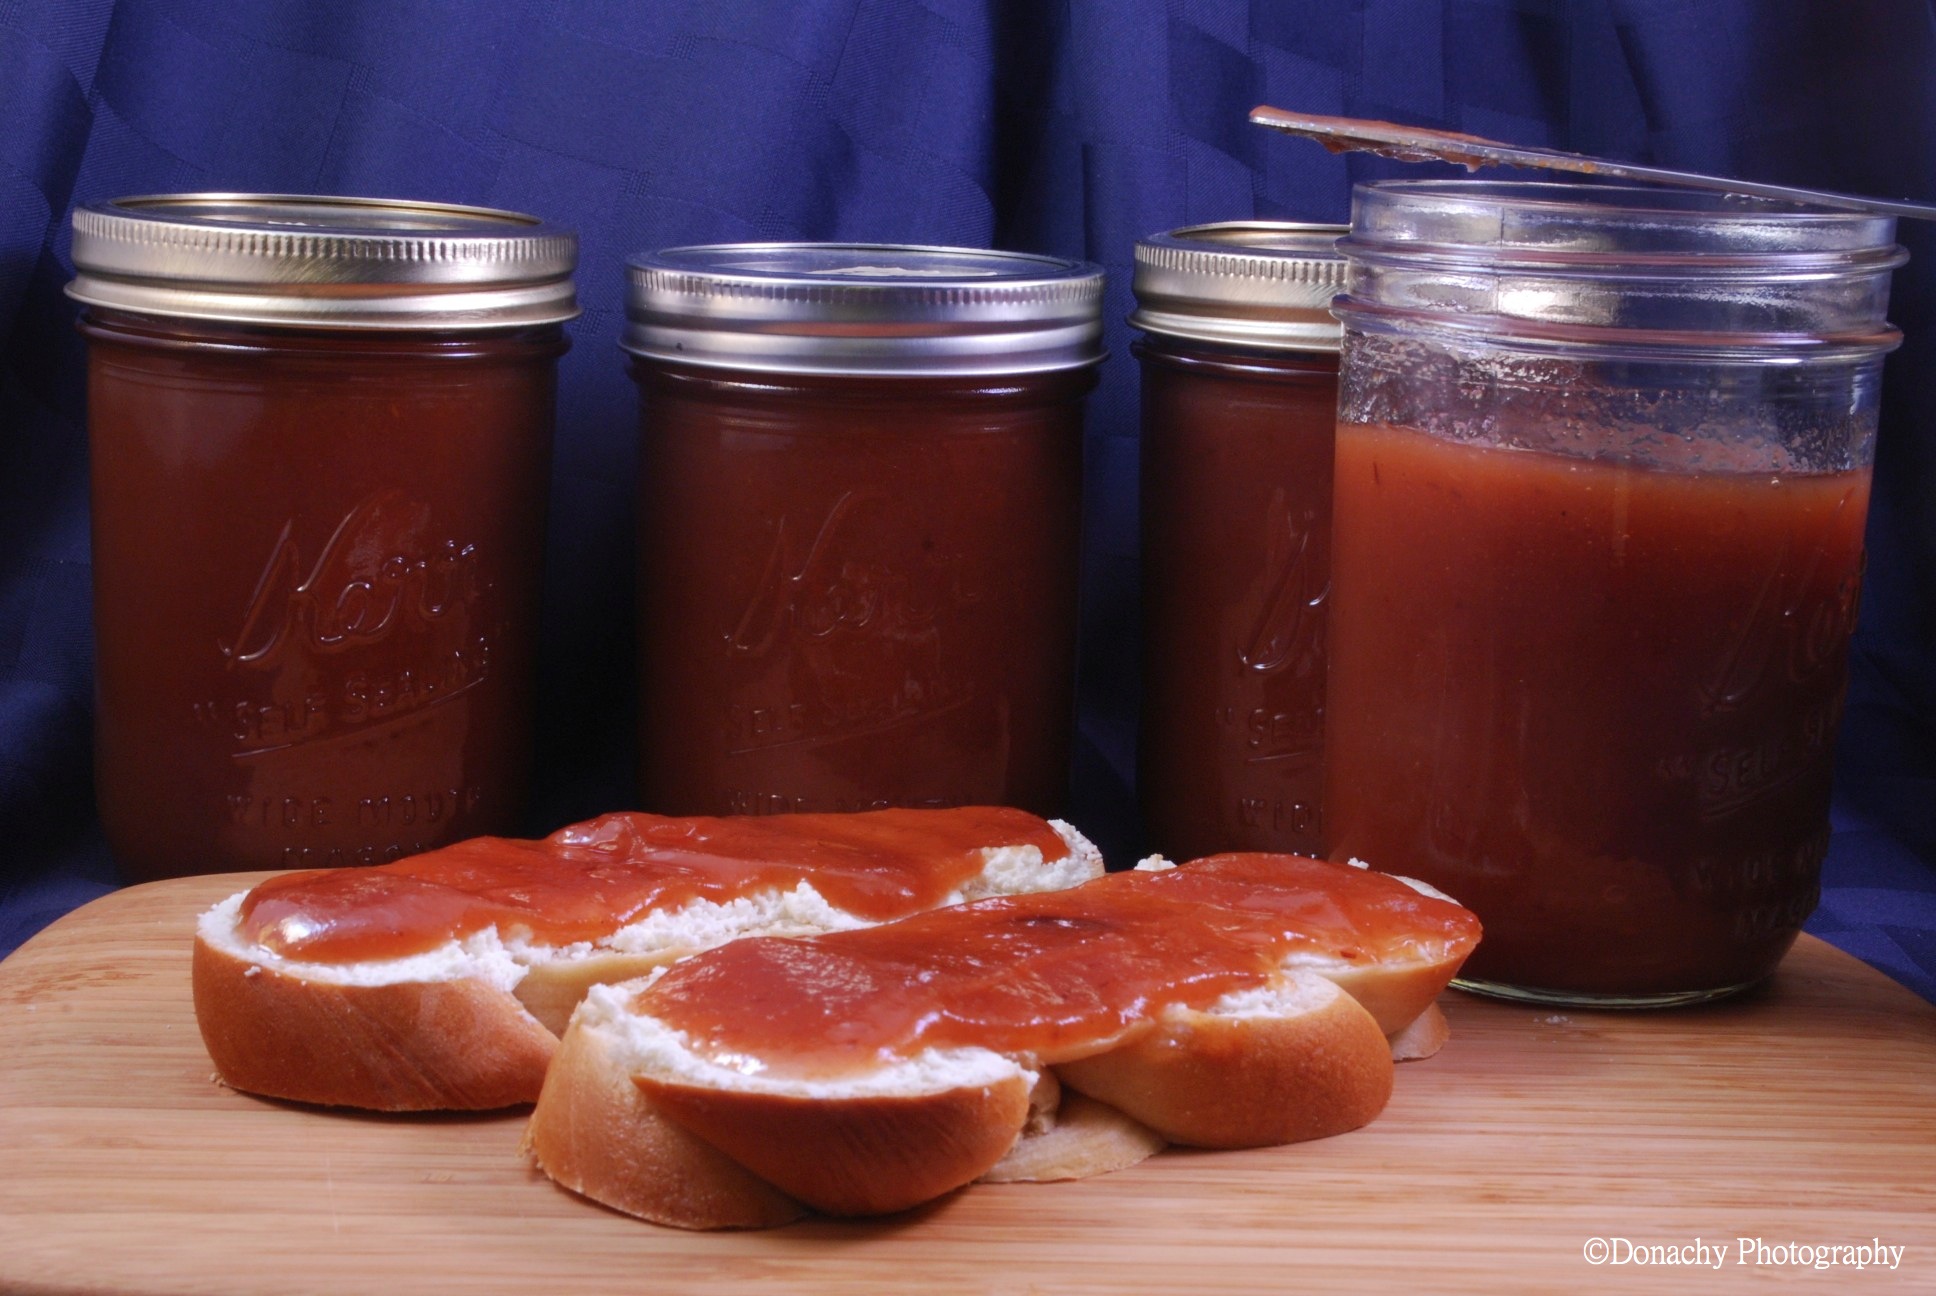
Pear butter and cream cheese slathered on fresh-baked bread and canning jars of just-made pear butter ready for the freezer.

Jack and I try not to waste, especially when it comes to food. When our school’s head cook brought me a box of pears that were too banged up and bruised to serve to students, I gladly took them with the promise of creating something tasty in return.

I bagged up what weighed in at eight pounds of what appeared to be d’Anjou pears. With our supply of maple syrup running low (pancakes and waffles are a weekly feature on our breakfast menu) I reckoned they’d cook down into a fair amount of sweet, lightly spiced pear butter.

Outside it was blowing a gale. I made the walk home in near white-out blizzard conditions only to find my front door knob frozen solid! A snow drift as high as the house had the other door completely buried! After trudging back to school to get help – and fortunately finding one of our maintenance crew who knew exactly what to do – I decided to forego a walk to the store to pick up orange juice, a key element in my most recent batch of pear butter. I did have plenty of lemon juice on hand. Time to experiment.

I have to say this pear butter came out even better than the last. If you picked this up in a cute jar in a boutique gourmet shoppe, you would be happy you spent the $8.

Making pear butter requires an investment of time and effort, but it’s worth it. We taste tested it on Challah bread with a smear of cream cheese. Delicious. We already can imagine filling all the nooks in our weekend waffles with warmed pear butter and chopped pecans. It would be equally tasty on broiled pork chops or grilled chicken.

Ingredients

  • 6 pounds of cored pears cut into cubes (D’Anjou or Bartlett)
  • 1 tbsp dry ground ginger
  • 2 cups water
  • 1 cup lemon juice
  • 4 – 5 cups of sugar
  • 1/2 tsp cardamom
  • 1 tsp orange zest (lemon would be good, too)

Directions

  1. Put cubed pears and ginger into a large pot – preferably one with a thick enough bottom to prevent scorching. Add 2 cups water and 1 cup lemon juice. Bring to a boil. Reduce heat to simmer and cook until pears are soft, 25 – 40 minutes, stirring occasionally. Remove from heat and allow to cool slightly.
  2.  Purée the mixture using food processor, stick or regular blender. Pour puréed pears back into large pot.
  3. Add sugar. Taste after adding 4 cups to see if more sugar is needed. Add cardamom and citrus zest. Taste and adjust seasonings if necessary.
  4. Cook on medium-low heat, stirring often to prevent the purée from sticking to the bottom of the pan and burning. Cook until the mixture is fairly thick. Test by placing a small dollop on a chilled plate: it should not be runny. The cooking-down time can take anywhere from 45 minutes to 2 hours, depending on the batch.
  5. Store in freezer containers or canning jars.
Recipe adapted from http://simplyrecipes.com/recipes/pear_butter/

If you like this post, you might also like:

White Chocolate Chip Pear Butter Bread