Apple Cinnamon Walnut Bread

Walnut, cinnamon, and freshly grated Fuji apples make peanut butter sandwiches something to look forward to.

I love variety in my meals. I love sampling new foods and new food combinations. So it might seem paradoxical that I could happily eat a peanut butter sandwich every day for lunch. Jack… not so much. After a few consecutive days of peanut butter sandwiches, he diplomatically asks if we could change up the lunch menu. This year, I vowed to make lunches more interesting. Chili on rice, calzones, stew on baked potatoes, and salmon sandwiches have satisfied Jack’s need for variety. And so, with time ticking away toward the end of another year in the bush, I looked in the cupboard at the last third of our 80-ounce jar of Adam’s peanut butter. An idea! What if I made peanut butter sandwiches on fruit bread? Let me tell you how well this went over… When I asked Jack if he wanted salmon pizza or a peanut butter sandwich for lunch tomorrow, he chose a peanut butter sandwich! I’m not planning on going back to peanut butter every day, but we are both happy it is still in the rotation.

Apple Cinnamon Walnut Bread

Ingredients

  • 1 3/4 cups all purpose flour
  • 1/2 tsp baking powder
  • 1 tbsp ground cinnamon (we love cinnamon)
  • 1/4 tsp baking soda
  • 3/4 cup granulated sugar
  • 1/2 cup unsweetened applesauce
  • 2 eggs
  • 1 tsp vanilla extract
  • 1 grated Fuji apple (a little more than a cup)
  • 1/2 cup walnuts, chopped coarse

Directions

  1. In a large mixing bowl, combine flour, baking powder, cinnamon, and baking soda. Set aside.
  2. In another mixing bowl, combine sugar and applesauce. Mix well. Add eggs, one at a time, beating well after each addition. Stir in vanilla.
  3. Stir wet ingredients into dry ingredients until just moistened.
  4. Stir in grated apple.
  5. Stir in walnuts.
  6. Pour into a greased bread pan (8 in. x 4 in. x 2 in.)
  7. Bake at 350 degrees F for 55 – 65 minutes, or until a toothpick comes out clean.
  8. Cool for 10 minutes before removing from pan to a wire rack.

We enjoy fruit breads and use the above recipe as a base. It’s easy to substitute different types of fruit and spices. Pear bread with ginger and banana bread with cinnamon and nutmeg are two other favorite fruit breads that make excellent peanut butter sandwiches or breakfast toast.

Marvelous Marbled Chocolate Cheesecake Brownies

Fudge-like brownie batter swirled with chocolate chip cheesecake make this decadent dessert irresistible. 
As we go through our annual shopping list, I have to wonder why I thought I needed twenty pounds of chocolate chips! It is a challenge to shop for a whole year in one fell swoop. In most regards, we were really accurate, but I must have been suffering from a chocolate craving while we were in Costco! I did make it through about five pounds so far. With 15 pounds remaining and big chocolate lovers around, I am inspired to keep baking wickedly chocolate confections.
Marvelous Marbled Chocolate Cheesecake Brownies
Ingredients
  • 1 (8 ounce) package cream cheese, softened
  • 3/4 cup white sugar
  • 1 tsp vanilla
  • 3 eggs
  • 2 cups semisweet chocolate chips, separated
  • 1/4 cup unsalted butter
  • 2/3 cup all-purpose flour
  • 1/2 teaspoon baking powder
  • 1/4 teaspoon salt
Directions
  1. Preheat oven to 350 degrees F (175 degrees C). Grease a 8-inch square baking pan or baking dish.
  2. Combine cream cheese with 1/4 cup sugar, 1 egg, and vanilla in a mixing bowl; beat until smooth. Stir 1 cup chocolate chips into the cream cheese mixture. Set aside.
  3. Fill a saucepan with water and bring to a simmer. Set a heatproof mixing bowl over the water. In the mixing bowl, combine butter with the remaining 1 cup of chocolate chips; stir until just melted and blended together.
  4. Mix in the remaining 1/2 cup sugar and 2 eggs in a bowl. Sift together flour, baking powder, and salt. Stir flour mixture into sugar and egg mixture. Mix in chocolate-butter mixture into flour mixture so that it is evenly blended.
  5. Pour half of the batter into the prepared baking pan. Spread the cream cheese mixture over the chocolate layer. Top with remaining chocolate mixture (this doesn’t need to completely cover the cream cheese layer). Using a knife, swirl the top chocolate layer into the cream cheese to make a marble pattern by cutting the blade through the mixtures in a swirling pattern.
  6. Bake in preheated oven at 350 degrees F (175 degrees C) for 25 to 30 minutes, or until top is cracked and edges pull away from sides of the pan. Cool thoroughly. Cut into 12 to 16 squares. Store in refrigerator or freeze.
We tried the brownies cooled on the counter and chilled in the refrigerator. We preferred them chilled in the refrigerator.

Recipe adapted from http://allrecipes.com/recipe/chunky-cheesecake-brownies/Detail.aspx.

(Almost) Drowning Barbra: Six Years of Bliss On and Off (and in) the Water

Astoria Brunch: Freshly caught greenling fillets wrapped around local bay shrimp and Dungeness crab in a mixture of lemon, olive oil, butter, garlic and tarragon, topped with a thick slice of applewood-smoked bacon and broiled. The corn, donut peaches and blueberries were purchased that morning at the Sunday Market. Pan-fried potatoes, avocado, toasted French bread, and mimosas garnished with blueberries and slices of perfectly ripe donut peach rounded out the meal. Greenling is a wonderful fish, comparable to sole. There’s a story behind the greenling.

Tomorrow marks the sixth anniversary of my first date with Barbra. We met on Match.com at a time in our life when we were each comfortable with who we were and knew what we wanted and did not want in a relationship. In our experience, those three prerequisites allow one to be perfectly honest when using Match.com, which is the key to making it work.

After several weeks of voluminous email correspondence and nearly daily phone conversations, all of which had gone swimmingly well, we decided to meet. At the time, I was living in Astoria, Oregon. Barbra was living in Sacramento, California. Spring break was coming up and I was planning a trip to San Francisco to hang out with a couple of buddies from my navy days. I’d be passing through Sacramento. It was perfect.

Our plan was to meet at Barbra’s house and from there to go downtown for lunch. After lunch, Barbra would give me a quick tour of Sacramento. The whole date was supposed to last about two hours.

So much for plans…

Nine hours, two delicious meals, and the long version of a walking tour of the city later, we reluctantly said our goodbyes. We were already making plans for a second date a few days later when I’d be on my way back to Astoria.

To say that our first date went well is an understatement. At every turn of conversation, we uncovered yet another point of compatibility. Barbra reminds me that I was too shy to hold her hand at first. I remind her that I could tell right away we were going to have lots and lots of time together, and there didn’t seem to be a need to rush anything.

—————————-

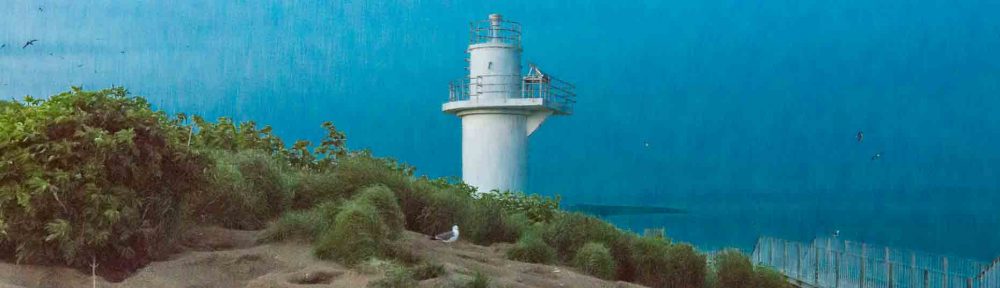
We didn’t go fishing the very first time Barbra visited Astoria. I think it was the second time. She’d never been fishing before, but as an avid outdoorswoman, she was eager to give it a try. So early (early early) one summer morning, I put gear for two in my Toyota Tacoma and we drove in the pre-dawn to Ecola State Park, just north of Cannon Beach. The fishing involved a descent down a steep trail to the beach, and from there a hike out to some rocks exposed at low tide where I could always count on picking up some nice surfperch and greenling.

It was an absolutely gorgeous morning. Barbra was thrilled to see all the life in the tide pools on the hike out – purple and orange ocher sea stars, bright green flower-like anemones, small fish, dark purple sea urchins, and even a large, red, many-armed sun star. Getting to the fishing spot involved a scramble over seaweed covered, mussel encrusted rocks, which Barbra handled with no problem.

True to form, the fish were there. Barbra’s first fish ever was a beautifully colored 15” striped surfperch. In the next couple of hours, we caught enough striped surfperch, red tail surfperch and greenling for several meals. Seagulls, oyster catchers and other seabirds along with seals and sea lions added to the atmosphere. Barbra had a blast, and I couldn’t have been happier. It was time to go.

It was then that I realized I’d committed the cardinal error of rock fishing. We’d stayed too long. The cold tide was rushing in, pouring in like a river through the very channels that made fishing in this locale so productive. We were cut off from the beach, and our rock was disappearing fast.

Still, I thought that if we moved quickly, we could wade to the beach before the water rose any higher. With our gear packed up tightly, we made our way waist-high into the rising water. Suddenly we were trapped. The water ahead of us was too deep to go forward. Behind us, too, the water had deepened. I knew that the moment I lifted my foot, I’d be swept off my feet.

I turned to Barbra. “We’re going to lose our footing. When the water knocks you over, let it put you on your back and just float with it. Don’t fight it. We’ll be OK.”

A second later, we were looking up at blue sky, backs down in the cold Pacific, rapidly being swept out toward open sea. I knew from experience fishing river mouths that at some point the current would slacken and that as it did, with any luck there would be a sandbar shallow enough for us to regain our footing.

I reached toward Barbra. “Give me your hand.” Barbra’s eyes were as big as half-dollars. She said nothing. She held out her hand, I grabbed it, and we floated on our backs, heads pointed toward the sea. As we floated, I let my left leg hang down, probing for bottom. If this plan failed, there were a couple of exposed rocks further out we might be washed into. Beyond that, we’d hit the longshore current, too far from land. Hypothermia would set in…

Suddenly my left sneaker made a familiar scrape against sand. The bar sloped upwards rapidly, just as it should have.

“I’m on sand! Put your feet down.” I raised myself, and helped Barbra to her feet.

We’d been carried out about 50 yards. With the tide still flooding there were no guarantees. Holding Barbra’s hand, I began gingerly following the curving lip of the sandbar back toward shore.

When we finally made it to the beach, we turned around and looked out across the swirling water. The rocks we’d been fishing from were completely gone. The current was still running, but not nearly as hard as it had been. We looked at each other and smiled. “Thought we might end up in Japan for a while there,” I said sheepishly. “Geez, I’m sorry about that.”

“I knew you’d get us out of it,” Barbra replied.

Climbing up the steep trail was a slog in our wet clothing. At the truck we took inventory. Other than a thoroughly cold soaking, we were fine. Even Barbra’s camera equipment came out of the ordeal unscathed. We climbed in, I turned on the engine, blasted the heat, and we headed home.

The day was still young. Back at my apartment, I took a hot shower. While Barbra got cleaned up, I walked the three blocks down to the Sunday Market and got us a couple of coffees from The Rusty Mug and blueberries, donut peaches and some salt-and-pepper corn from market vendors. Coming up the stairs to my apartment, I could hear a CD Barbra had chosen from my collection.

It was a Johnny Cash album…

What a woman!

Rustic Moose Pot Pie

Lean wild game, roasted to perfection, sliced into bite-sized cubes and baked in a pie topped with a hearty whole wheat crust is the kind of meal that can fend off consecutive days of negative 20 degree cold.

When a friend recently presented us with a two-pound moose roast, we were thrilled. But we were also a bit perplexed. Looking over the meat, I couldn’t find even a trace of fat. Add that to the fact that neither one of us cooks roasts, and I was at something of a loss as to what to do. “Stew,” was the suggestion I most frequently came across. “Stew or stir fry,” was a friend’s suggestion.

We love good stew. In fact, we have enough caribou stew in the freezer to see us through the end of the school year. So that was out. Stir fry, too, is a regular dinner item. I wanted to do something traditional but new for us.

In the end, I did roast the moose. Inspired by a recipe for lamb from the cookbook Nobu West by Nobu Matsuhisa, I marinated the roast in miso seasoned with garlic and ginger before putting it in the oven. Despite my best efforts it came out a bit drier than I had hoped, although the miso marinade helped to caramelize the roast when I pan-seared it prior to roasting. I served the finished roast sliced thin with a tosa-zu dipping sauce along with carrots and parsnips cut into long, thin strips and sautéed in a combination of olive oil, butter, garlic and soy sauce.

Dinner that night started with scallop, shrimp and smoked quail egg chawan mushi, segued to roasted beats with pan-crisped pine nuts, was followed by cedar planked shrimp on mushrooms and culminated with the moose roast. For dessert, Barbra brought out individual baked apples capped with pastry. Inside each apple was apple pie filling. The dessert was delicious – and fun, and the whole-wheat pie crust topping the apple gave us the idea of making a large pot pie stuffed with leftover moose, vegetables and gravy.

Regarding the recipe below, a note about bouillon: We’ve become fans of Better Than Bouillon products. In our opinion, the flavor is superior to other soup bases we’ve tried.

Rustic Moose Pot Pie

Ingredients:

  • 1 3/4 cups water
  • 1 1/2 tablespoons “Better Than Bouillon Beef Base” (or other bouillon, or use beef broth)
  • 1 bay leaf
  • 1 teaspoon dried rosemary
  • 1 2/3 cups potatoes, cut into 1/2″ cubes, skin on
  • 4 tablespoons olive oil
  • 1/3 cup flour
  • 1/2 pound roasted moose meat, cut into 1/2″ cubes
  • 1/2 cup sweet corn
  • 1/3 cup celery, diced coarse
  • 1/2 cup carrots, sliced into discs or chopped coarse
  • 1/3 cup broccoli florets, cut coarse
  • (Optional) 1/3 cup mushrooms, chopped coarse
  • 1/2 rounded teaspoon cumin
  • 1 teaspoon dried sage
  • several generous grinds freshly cracked black pepper
  • salt, to taste

Directions:

  1. Preheat oven to 375 °F. **Baking time and temperature may vary depending on type of crust used.**
  2. Place the water in a pot and heat over medium-high heat. Stir in enough beef bouillon for a strongly flavored base. Add bay leaf and rosemary. Bring to a simmer.
  3. Add potatoes. You will simmer potatoes till just tender, but do not overcook. When potatoes still have about 5 minutes of cooking to go, add the carrots. When there is about 1 minute, add all the remaining vegetables. Continue simmering until potatoes are just tender and remove from heat. (They will continue cooking in the pie.)
  4. Use a strainer to separate potatoes and vegetables from the beef stock. Remove bay leaf and place potatoes and vegetables in a large bowl. Return beef stock to original pot.
  5. Place approximately 4 tablespoons olive oil in small frying pan and heat over low to medium-low heat. When oil is heated, slowly stir in flour. Continue stirring until mixture thickens. Remove from heat.
  6. Heating beef broth over medium heat, stir in oil and flour mixture. Combine thoroughly. This will result in a thick gravy.
  7. To the bowl that already has the potatoes and vegetables, add the meat, gravy and the remaining seasonings and mix together.
  8. Pour meat and vegetable mixture directly into a deep pie dish. Cover with a crust. Be sure to make holes in the crust to allow steam to escape. Brushing on a beaten egg will help create a golden brown crust.
  9. Place on baking sheet and bake at 375 °F for 25 – 30 minutes or until crust is golden brown.

Serve piping hot with big glasses of Old Vine Zinfandel.

Bison Joes with Roasted Bell Peppers

Roasted bell peppers and ground bison combined with freshly baked buns for a memorable version of an America Classic.

One of the challenges of living hundreds of miles beyond the road system is that we frequently can’t get the ingredients we want for cooking. With the school year rapidly drawing to a close (fewer than eight weeks remain now) and an abundance of ground bison in our freezer, Barbra had been requesting Sloppy Joes. “I’ll make the buns!” she promised. Problem is, the village store hasn’t had onions since early January. The last shipment was frozen solid and had to be tossed out. We’re out as well, and I couldn’t quite imagine Sloppy Joes without diced sweet onions mixed in with the meat and sauce.

And then, out of the blue, a friend gave us two green bell peppers. Roasted and skin peeled, these would provide the tangy sweetness I was looking for. I had a large carrot in the fridge that needed to be used, so I diced and sautéed it and added it to the ingredients as well.

Mixed together with an off-the-cuff sauce, our Bison Joe’s came out great – more savory than sloppy, and sweet enough to please the kid in us.

Bison Joes with Roasted Bell Peppers

Ingredients

  • 1 pound ground bison
  • 5 cloves garlic, chopped fine
  • 2 bell peppers, cut in half, stems and seeds removed
  • 2/3 cup finely chopped carrots
  • olive oil, as needed
  • 1/2 cup Sloppy Joe sauce (below)
Directions for roasting bell peppers:
  1. Place a baking sheet (a good, thick one is best) into oven and preheat to 500 °F.
  2. Using a brush, spray bottle or fingers, thoroughly cover bell pepper halves with light olive oil, canola oil or other oil that will withstand high temperatures.
  3. When oven is preheated, place bell peppers open side down on baking sheet. Roast until peppers soften, skin begins to loosen, and outside begins to brown. Turn the peppers over and continue to roast until desired color is achieved. (You will see at least some spots burned black. How much of this you want is up to you. I go for just a little black.)
  4. Remove peppers from baking sheet, place in paper bag and close. This will help steam the skins loose.
  5. When cool enough to handle, peel off the skin.
  6. Dice the peppers (about 1/4″ pieces) and set aside.
Directions for bison, carrots and garlic:
  1. Add about 2 tablespoons olive oil to a large frying pan and heat over medium heat. Add ground bison. Breaking up the meat and stirring, cook until evenly browned. Pour out on paper towels to drain off oil and fat and set aside.
  2. Add about 1 tablespoon olive oil to a medium frying pan and heat over medium to medium-low heat. Add carrots, stirring frequently. Just before done, add the garlic and cook an additional 1 to 2 minutes. Place in a small bowl and set aside to cool.
Sloppy Joe Sauce
Ingredients
  • 1/3 cup ketchup
  • 1/4 cup Dijon mustard
  • 1/2 tablespoon Worcestershire sauce
  • 1 tablespoon Cholula sauce
  • 1 tablespoon soy sauce
  • 1 teaspoon cumin
  • 1 teaspoon dried oregano
  • 1/2 teaspoon basil
  • couple dashes powdered cinnamon
  • 1/2 teaspoon chili powder
  • several grinds freshly cracked pepper
  • 2 tablespoons olive oil

Directions:

  1. Add all ingredients to a non-reactive bowl and mix thoroughly. Add the garlic and carrots (above). Add the bell peppers. Add additional chili powder, cumin or Cholula for more of a kick.
  2. Place the browned bison in a large skillet. Heat on medium heat and add enough sauce to coat the meat. Beyond that, how much sauce to add is a matter of cook’s choice. Mix thoroughly, cooking and stirring till everything is hot.

Serve on toasted buns or toasted bread with a frosty mug of root beer.

Cedar Planked Sweet Alaskan Shrimp on Mushrooms

Cedar planks add fire-cooked aroma and rustic class to seafood. The planks work in ovens as well as on the grill. In making this dish, I supplemented a few Crimini caps given to me by a friend with pieces of dried oyster mushrooms.

We are convinced that one of Alaska’s best kept secrets is that it is a food-lover’s paradise. Many Alaskans harvest wild game such as moose, Sitka deer, caribou, mountain sheep and ptarmigan. Ranched reindeer, bison and elk are available as well.

The growing season may be short, but with long hours of sunshine, markets in central and southeast Alaska are typically full of locally grown produce. Strawberries, blueberries, blackberries, raspberries, cloudberries, currents and more can be found growing wild or purchased at local markets, making Alaska one of the best places on earth to get a slice of pie or a jar of jam. Meanwhile, foraging for mushrooms and edible plants, including seaweed, remains an important part of the culture up here. Not long ago, we were treated to a salad featuring young fireweed shoots, and the seaweed salads we’ve had have been delicious. While the wines we pour with this bounty are shipped up, we don’t have to go far at all to enjoy superbly crafted local beers.

But the centerpiece of Alaskan food is without a doubt seafood, starting with salmon. All five Pacific species are abundant, and they all have their place in the kitchen. Fresh halibut is a revelation on the palate, not to mention one of the most versatile fishes one can cook with. People who eat a lot of fish often find that they end up preferring various species of delicately flavored rockfish. Our own top choice is sea-run Dolly Varden – a char with pale orange flesh, a delicate flavor, and just enough fat to be self-basting. Aside from these fin fish, there are oysters, sea scallops, clams and several species of crabs, all of which benefit from Alaska’s clean, cold seas.

And, of course, there are shrimp. Known as amaebi in Japan, the shrimp of Alaska’s waters are prized for their natural sweetness. The recipe offered below has many possible variations. For example, try a shiso leaf instead of the tarragon, freshly picked chanterelles or Portabellos instead of Crimini mushrooms, or, for a lighter flavor, sea salt instead of soy sauce. Ginger, lime zest, sherry or a sprinkling of sake would add yet another dimension.

Cedar Planked Sweet Alaskan Shrimp on Mushrooms

Ingredients

  • cedar or alder plank, soaked for at least 2 hours
  • 12 Alaskan shrimp, peeled, deveined, butterflied, tail on, and if large enough, lightly scored
  • 12 fresh mushroom caps or 12 appropriately sized pieces of any good mushroom
  • 2 tablespoons clarified butter
  • 2 cloves garlic
  • 1 tablespoon soy sauce
  • 1 teaspoon dried tarragon
  • freshly cracked pepper
Directions
  1. Preheat oven broiler to hot (500 °F).
  2. Heat clarified butter in frying pan over medium heat. Add garlic and mushrooms. Add soy sauce, sprinkling on mushrooms and in butter, and move mushrooms around to coat with butter and soy sauce. Cook till mushrooms are just cooked, turning once.
  3. Remove mushrooms from pan and place on plank. Sprinkle each piece with dried tarragon, or add leaves of fresh tarragon. Place shrimp on mushrooms, fixing in place with toothpicks. Add freshly cracked pepper.
  4. Place plank in oven and broil for 3 – 5 minutes.

If you make more than a few of these, your guests will not have room for dinner. They are addicting. They’d be terrific prepared on a grill, too, and would pair beautifully with hot sake.

Butter Toffee Almonds

Plain, cayenne pepper, or rock salt. We liked all three. Which will you make?

We don’t like to visit friends empty-handed, especially when we invite ourselves over to watch a sporting event on TV. In bush Alaska, there aren’t six-packs of beer or bottles of wine to grab at the store. Our ready gift is usually something we’ve created in the kitchen. Recently we were running late for one of the March Madness basketball games and had nothing already prepared, so a few whirls in the kitchen and we had buttered toffee almonds – three ways. The original plain version is quite tasty. Two other versions were made by sprinkling cayenne pepper on some for that back-of-your-throat-bite and by sprinkling large grains of sea salt for another pleasant surprise. All three versions were tied for first place. This recipe was finished in 15 minutes. Lucky for us, the walk over in sub-freezing temperatures cooled the almonds enough to eat as soon as we entered our friends’ home.

Butter Toffee Nuts Recipe

Ingredients

  • 1 cup sugar
  • 1 cup butter (2 sticks)
  • 3 tablespoons water
  • 3 cups whole almonds (or use 3 cups peanuts)
Directions
  1. Use a deep, heavy-bottomed saucepan to heat all of the ingredients, except the nuts. Stir the mixture constantly to prevent scorching. Using a candy thermometer and medium heat, bring the mixture to 300 degrees. The temperature will rise as the water is boiled off, and this can happen quickly, so be prepared to lower the heat or remove the candy from the heat as needed.
  2. As soon as the mixture reaches the desired temperature, remove it from the stove and add the nuts. Mix until all nuts are coated. Pour the nut mixture onto a greased cookie sheet spread into an even layer. Let fully cool. This step works well on parchment paper.

Recipe adapted from http://www.life123.com/food/candies-fudge/toffee/making-butter-toffee-almonds.shtml.

Scallop and Shrimp Chawan Mushi with Smoked Quail Eggs

Chawan mushi combines two of my favorite things: custard and an element of pleasant surprise. Although the custards served to me (mostly by my grandmother) in my youth were invariably sweet, it was love at first spoonful when I had my first taste of chawan mushi in a Tokyo restaurant. On that occasion, I would have been happy just to enjoy the small ramekin of savory soupy custard that came with my meal. But when one of those spoonfuls revealed a sweet shrimp, and another a tender boiled quail egg, I was full-blown, head-over-heals gone.

Japanese diners seem to think of chawan mushi more as a soup than a custard, and I have to admit that over time, I have come to prefer this dish fairly loosely set. In addition to fresh, grilled or smoked seafood (a bit of smoked salmon makes a nice finishing piece), fresh vegetables such as peas, butter beans, lotus root or mushrooms, or a tender piece of salty grilled chicken, beef or wild game all work well. Creative cooks may want to experiment with the basic dashi recipe or substitute chicken or beef broth. A pinch of smoked sea salt adds another dimension to this versatile dish which can be served hot to take the chill of a winter evening or refreshingly cold on a warm summer day.

Below are the directions for Scallop and Shrimp Chawan Mushi with Smoked Quail Eggs – with much appreciation to a Japanese friend who mailed us a package of smoked quail eggs, thus inspiring this dish. By the way, chawan means tea cup; mushi means steaming.

The Watercourse, a signed and numbered giclée by Whitehorse, Yukon Territory artist Nathalie Parenteau serves as the backdrop for this All-Clad poacher. With its raised tray, it’s perfect for steaming chawan mushi either in an oven or on a stove top. In the past, I’ve improvised with a large round kettle fitted with an inverted shallow wicker basket. The same kettle also works with an inverted metal strainer that happens to fit.

Jack’s Dashi

Ingredients

  • 2 cups water
  • sheet of dried kombu (Japanese kelp) about 4″ x 4″ (about 5 grams)
  • 1 teaspoon “Better than Bouillon Lobster Base” (or make traditional dashi with 1/4 cup dried bonito flakes)

Directions

  1. Add two cups of water and the kombu to a pan. Heat over medium heat.
  2. Just before the water boils, remove the kombu. Turn off heat and stir in the lobster base bouillon.
  3. Strain through cheese cloth or fine-mesh strainer to remove stray pieces of kombu (or bonito flakes, if those are used). The lobster bouillon base will create a slightly darker dashi than bonito flakes. In the finished chawan mushi, this will create an attractive cream color.
  4. Set aside to cool.

Scallop and Shrimp Chawan Mushi with Smoked Quail Eggs

Ingredients

  • 6 small ramekins, preferably with loosely fitted lids. Plastic wrap with a small puncture (to allow steam to escape) can be used to cover the ramekins if lids are not available.
  • 2 cups dashi (see recipe above)
  • 3 large eggs
  • 1 tablespoon soy sauce
  • 6 sea scallops
  • 6 sweet shrimp, peeled, deveined, tails removed (Alaskan shrimp are similar to the ama-ebi of Japan and are perfect for this dish)
  • 6 smoked quail eggs
  • (optional) sea salt to taste
  • (optional) 2 tablespoons good sake

Directions

  1. In a bowl, whisk eggs until smooth. Make sure dashi is cool (so it won’t cook the eggs) and stir into egg mixture. Add soy sauce (and sake, optional) and mix together, but avoid mixing so vigorously that foam is created. Taste for appropriate saltiness. If more salt is desired, use sea salt. Set mixture aside.
  2. Slice scallops depth-wise into three or four parts. Place scallops and 1 shrimp each into the ramekins.
  3. If there are bubbles or foam on the egg and dashi mixture, use a spoon to remove. The finished chawan mushi should be smooth. Cover the scallops and shrimp with the egg and dashi mixture so that ramekins are about 2/3 full. Cover each ramekin with a loosely fitting lid or punctured piece of plastic wrap.
  4. Arrange the covered ramekins in a steamer and gently steam for 12 minutes, until mixture is loosely set.
  5. Turn off heat. Place a smoked quail egg atop each chawan mushi, cover with lids again, and keep them in the steaming pan so that the custard continues to set and the egg warms through – approximately 3 – 5 additional minutes.

This dish makes a delicious appetizer, can be served as one would serve a soup, or as part of the main meal. It will keep nicely in the refrigerator for a day or two. Our village in bush Alaska is dry, so sake is not an option. But I highly recommend you include it, as it really compliments the flavors of this dish – and pairs well as a drink served with the finished chawan mushi.

Rosemary Kalamata Olive Loaf

Aromatic and flavorful, tonight this rosemary kalamata olive loaf will accompany a moose roast. Roasted lamb, too, would be a good choice, and we anticipate it pairing well with Italian or Greek dishes, as well. This morning we served toasted slices with olive oil with halibut omelets. During the baking process, our kitchen was filled with the irresistible scent of rosemary. We agreed it was one of the best savory breads we’ve ever had.

This is another recipe from 300 Best Bread Machine Recipes by Donna Washburn and Heather Butt. Monitor the dough during the kneading process to make sure the amount of flour/moisture is right. Because the kalamata olives added moisture, I found I needed to add a little more flour than is indicated below.

Olive Rosemary Loaf

Ingredients

  • 1 cup water
  • 3/4 cup kalamata olives, pitted and chopped coarse, extra moisture gently squeezed out in paper towels
  • 1 tsp salt
  • 1 tbsp granulated sugar
  • 2 tbsp extra virgin olive oil
  • 3 1/4 cups all purpose flour
  • 1/4 cup fresh rosemary (or 2 tsp dried)
  • 1 1/4 tsp yeast

Directions

  1. Measure ingredients into baking pan in the order recommended by the bread machine manufacturer. Insert pan into the oven chamber. Start your machine. During the kneading phase, check to make sure the dough is of proper consistency. Add flour or water as needed.

Chocolate Truffle Cookies with Pecans

Dedicated to fully addicted chocoholics, this chocolatey chocolate with chocolate-chip cookie is not for people who just “like” chocolate. Are you getting how chocolatey these are? 

This low-flour cookie is dense and fudge-like. Because the dough is quite sticky, I recommend using a cookie scoop and then rolling the chilled dough in a coating such as chopped nuts, confectioner’s sugar or coconut in order to make handling the dough easier. This extra touch also enhances the taste, texture and the presentation.

Chocolate Truffle Cookies

makes 3 dozen cookies

Ingredients

  • 2 cups semisweet chocolate chips, divided equally
  • 6 tablespoons butter
  • 3 eggs
  • 1 cup white sugar
  • 1 1/2 teaspoons vanilla extract
  • 1/2 cup all-purpose flour
  • 2 tablespoons unsweetened cocoa powder
  • 1/4 teaspoon baking powder
  • 1/4 teaspoon salt
  • 1 cup finely chopped pecans

Directions

  1. In a microwave or in a bowl warmed over a pan of simmering water, place the butter and 1 cup of chocolate chips and melt together, stirring occasionally until smooth. Remove from heat and set aside to slightly cool.
  2. In a large bowl, beat eggs and sugar until thick and pale, about 2 minutes. Stir in the vanilla and the chocolate mixture until well mixed.
  3. In a separate bowl, combine the flour, cocoa powder, baking powder and salt. Gradually stir into the chocolate mixture. Fold in remaining 1 cup chocolate chips. Cover dough and chill for at least an hour or overnight.
  4. Preheat oven to 350 degrees F (175 degrees C). Roll chilled dough into 1 inch balls. Roll dough balls to coat with chopped pecans. Place on ungreased cookie sheets so they are 2 inches apart.
  5. Baking time will vary depending on how chilled the dough is when it goes into the oven. Place cookies into preheated oven. Check at 9 minutes. Finished cookies should be puffed up and slightly cracked on top. This may take up to 15 minutes. Allow cookies to cool on baking sheet for 5 minutes before removing to a wire rack to cool completely.

This recipe was adapted from http://allrecipes.com/recipe/chocolate-truffle-cookies/detail.aspx.