Alaskan Seafood Fettuccini with Shrimp, Sea Scallops and Salmon

Freshly made fettuccine tossed in olive oil and Italian seasonings and topped with a medley of Alaskan seafood sautéed in olive oil, garlic and tarragon.

Tarragon has long been among our favorite all-around herbs for many seafood dishes, and it really shines in this simple-to-prepare entrée. Sometimes referred to as dragon’s herb or dragon’s-wort, tarragon adds a gentle sweetness that hints at anise or fennel, but is more subtle.

The basic dish evolved from a piece of advice an older gentleman – an immigrant from Italy – shared with me some years ago when he observed that in his opinion the best tasting and easiest pasta dish is made by sautéing chopped garlic in olive oil and tossing the pasta in that and nothing more. Perhaps a little basil, marjoram or oregano might be added, he allowed.

In this dish, I’ve added chopped sweet onion, tomatoes and three kinds of seafood to the olive oil and garlic. Tarragon, sea salt and freshly cracked pepper flavor the seafood. When I lived in South Carolina, I used to make this dish with white shrimp which I was able to cast a net for, and instead of salmon, I used freshly caught striped bass or pompano.

For two servings:

Pasta Ingredients

  • pasta for two people (fettuccini, angel hair or spaghetti)
  • 1 tsp dried oregano or 1 tbsp fresh
  • 1 tsp dried basil or 1 tbsp fresh
  • 3 tbsp extra virgin olive oil
Directions:
  1. Cook pasta according to directions.
  2. Drain pasta. Place in large bowl. Add olive oil and herbs and toss.
Seafood Ingredients
  • equal portions of wild salmon fillet (skin removed, or not), sea scallops and shrimp. Use about 1/4 pound seafood per person or slightly more.
  • 1/4 cup chopped sweet onion
  • 3/4 cup diced tomatoes, canned or fresh, seeds removed
  • 1 1/2 tbsp chopped garlic
  • 3 tablespoons olive oil
  • 1 tbsp dried tarragon or 3 tbsp fresh
  • sea salt to taste
  • freshly ground pepper to taste

Directions:

  1. Cut salmon into 1/2-inch to 3/4-inch cubes. Slice sea scallops into 3 or 4 slices. Peel and devein shrimp.
  2. In a bowl, mix together seafood, garlic, tarragon, sea salt and pepper. Set aside.
  3. Add olive oil to a frying pan and heat over medium-high heat.
  4. Add onions and cook for two minutes, stirring occasionally.
  5. Add remaining ingredients. Stir frequently for about 1 1/2 to 3 minutes. Avoid overcooking. (Remember: seafood will continue cooking after being removed from heat.)
  6. Serve pasta. Top with seafood medley.
  7. Add additional ground pepper, grated Parmesan, pine nuts or a sprig of fresh tarragon.

Enjoy this with a crisp, well-chilled sauvignon blanc.

Homemade Flour Tortillas (Sans Lard)

These homemade tortillas are a little thicker and more airy than store-bought. They are definitely tastier and healthier!

For the past few years, we’ve used frozen, uncooked tortillas from Costco. One thing that separates the tortillas from Costco from run-of-the-mill grocery store fare is that they have to be lightly fried right before serving. The downside is that, like most tortillas, they are made with lard. The quest began for a tortilla recipe which could be made at home that had healthier ingredients.

Right from the beginning, I could see that my main challenge would be rolling the dough thin enough (without having overly thin spots or holes). Of course, there are purpose-deisgned tortilla presses, but acquiring another gadget flies in the face of streamlining our galley.

After searching through virtual stacks of recipes on the Internet, I found a blog offering a recipe for a “Texas tortilla.” The author promised a healthy, puffy, tasty Tex-Mex style tortilla. Armed with a recipe, a rolling pin, and sheets of parchment paper, I finally achieved my goal of homemade flour tortillas. I’ve tried substituting one cup of wheat flour for one cup of white flour, resulting in a heartier tortilla. Each time I’ve made them, they’ve come out tasty, and I’m getting faster at it. And they come out a little rounder each time, too!

Homemade Flour Tortillas

Ingredients

  • 2 cups all-purpose flour
  • 1 1/2 tsp baking powder
  • 1 tsp salt
  • 2 tsp vegetable oil
  • 3/4 cup room temperature milk

Directions

  1. Sift together flour, baking powder, and salt.
  2. Mix in oil.
  3. Slowly add in milk. Stir until a loose, sticky ball is formed.
  4. Turn out onto a lightly floured surface and knead for 2 minutes.
  5. Place ball of dough in bowl. Cover with damp cloth and let rest for 20 minutes.
  6. Break dough into 8 even pieces. Roll each piece into a ball. Cover with damp cloth and let rest for 10 minutes.
  7. Take one dough ball and flatten by hand into a circle. Place flattened dough on lightly floured surface. Cover with parchment paper. Roll out with rolling pin, just as you would a pie crust. The result should be a flat, circular tortilla about 8″ in diameter and 1/8″ or less thick. Continue with remaining dough balls. Stack finished tortillas, using parchment paper to keep them separate.
  8. In a hot, dry skillet, cook tortillas about 30 seconds on each side. I use wooden chopsticks for flipping. Keep cooked tortillas wrapped under a clean cloth towel until ready for serving.

Tortillas can be prepared a day in advance and kept them in the refrigerator to save preparation time.

This recipe was adapted from http://homesicktexan.blogspot.com/2007/03/and-end-to-my-quest-flour-tortillas.html.

Enchiladas Suizas with Spanish Rice

Cheesy and subtly spiced, enchiladas suizas satisfied hearty appetites after a day of cross-country skiing.

With just four weeks remaining in the school year, we’re increasingly looking at our pantry to figure out what needs to be used up or given away before we leave for the summer. This enchilada recipe was inspired by two cans of roasted green chile peppers we received from a friend who is leaving our village and not returning. I made my own tortillas, which I will blog about separately. We served these savory enchiladas with Spanish rice prepared in our rice cooker.

Enchiladas Suizas

Ingredients

Seasoned broiled chicken:

  • 4 boneless, skinless chicken thighs (enough for 3 cups cooked cubed chicken)
  • Penzeys Southwest rub, or any other mildly fiery cumin and chili pepper based rub
Green chili sauce:
  • 2 tbsp butter
  • 2/3 cup chopped onion
  • 2 tbsp all-purpose flour
  • 1 1/2 cups chicken broth
  • 8 oz. chopped green chile peppers
  • 4 cloves garlic, chopped coarse
  • 3/4 tsp salt
  • 1 tsp cumin
Additional ingredients:
  • 6 8-inch flour or corn tortillas
  • oil for frying tortillas
  • 1 1/2 cups shredded mild white cheese such as Monterey Jack (I used mozzarella because that was on hand.)
  • 1 1/2 cups shredded medium-aged cheddar cheese (We love Tillamook!)
  • 1 cup sour cream (thinned with a few tbsp of water to a consistency slightly thicker than heavy cream)
  • jalapeño slices for a finishing touch

Directions:

Seasoned broiled chicken:

  1. Coat broiling pan with oil. Position oven rack near top of oven. Place broiling pan in oven and preheat on broil.
  2. Rub chicken thighs with Southwest rub.
  3. Broil chicken for approximately 15 minutes or until cooked through. Set aside to cool. When cool, cut into 1/4 inch thick by 1/2 inch long pieces. Set aside.
Green chili sauce:
  1. Melt butter in pan over medium heat. Sauté onion in butter until soft. Stir in garlic. Add flour and stir until flour, onions, and garlic are incorporated. Add broth. Add chiles, salt and cumin. Stir until well mixed. Simmer mixture for 15 minutes. Set aside.
Assembling the enchiladas
  1.  Preheat oven to 350 degrees F.
  2. Combine cheeses, reserving about half for the topping.
  3. Quickly fry tortillas in oil. Do not crisp them.
  4. Dip both sides of tortilla in chili sauce mixture. Place about 3 tbsp of chicken down center of tortilla. Top with about 2 tbsp cheese mixture. Roll the tortilla and place into 9 x 13 glass baking dish, seam side down. Follow same procedure with the remaining tortillas.
  5. Spoon remaining chili sauce mixture on top of enchiladas. Spread evenly. Spoon thinned sour cream on top of chili sauce. Spread evenly. Sprinkle reserved cheese on top of sour cream. Garnish with jalapeño slices.
  6. Bake uncovered in preheated oven for 20 minutes.
  7. Serve with salsa and Spanish rice.

Spanish Rice Recipe for Rice Cooker

Ingredients

  • 2 tbsp olive oil
  • 2/3 cup  finely chopped onion
  • 3 cloves garlic, chopped coarse
  • 2 1/2 cups white rice
  • 3 cups chicken broth
  • 1 heaping tbsp tomato paste
  • 1 tsp oregano

Directions

  1. Sauté onion and garlic in olive oil until softened. Set aside.
  2. Mix chicken broth and tomato paste until combined. Add oregano. Stir.
  3. Place rice in rice cooker.
  4. Pour in chicken broth mixture. Add in onion mixture. Stir.
  5. Cook rice on white rice setting.
  6. Stir before serving.

Chocolate Orange Meringue Pie

A mountain of perfectly peaked meringue sits atop a decadent chocolate-orange pudding pie.

The flipped meringue cookies gave me new confidence with meringue. I felt ready to attempt a meringue pie. Luckily, there is still plenty of chocolate in our ever diminishing pantry. Since friends were coming to dinner, it was the perfect day to attempt this culinary feat.

I read many recipes on many sites. I was warned about weeping meringue and problems with humidity. Winter air in the Arctic is like air in the driest desert and I wasn’t scared off by a few tears from frothy egg whites. I was ready for the challenge. The process of making the pie was long and satisfying. Each step looked and tasted delicious. The filling thickened up beautifully. The meringue browned in just the right way. At the end of an Arctic-Mexican meal featuring enchiladas and Spanish-style rice, everyone agreed that the chocolate orange meringue pie was impressive to look at… and then it disappeared!

Chocolate Orange Meringue Pie

Ingredients

  • 1 9-inch pie crust, baked
  • 1 3/4 cups granulated sugar, separated into 1 1/2 cups and 1/4 cup
  • 5 tbsp unsweetened cocoa powder
  • 4 tbsp all purpose flour
  • 1 pinch salt
  • 5 eggs, yolks and whites separated
  • 2 cups milk
  • 1 tsp orange zest
  • 1 tbsp unsalted butter
  • 2 tsp vanilla extract
  • 1/4 tsp cream of tartar

Directions

  1. For chocolate filling: In a medium pot, mix together 1 1/2 cups of granulated sugar, cocoa powder, flour and salt. Stir in egg yolks and milk. Stir in orange zest. Whisk until well blended. Cook over medium heat, stirring constantly. Cook until filling has the consistency of pudding, about 10 minutes. Turn heat off.
  2. Stir in vanilla and butter. Stir until both are incorporated.
  3. Pour filling into baked pie shell. Refrigerate to set for 4 hours or overnight.
  4. When you are ready to make the meringue, take the pie out of the refrigerator.
  5. Preheat oven to 375 degrees F.
  6. For meringue: In a non-reactive bowl beat egg whites until foamy. Add cream of tartar. Continue beating eggs until soft peak stage (peaks will sag when you remove beaters). Add 1/4 cup sugar a tablespoon at a time, allowing sugar to dissolve between additions. Continue beating until stiff peaks form and egg whites are stiff and glossy.
  7. Spread the meringue over the pie completely. You can make decorative peaks by using a dull knife to shape the meringue.
  8. Place pie in oven on a low rack. Bake for 10 minutes until meringue is golden brown.
  9. Chill for two hours before serving.

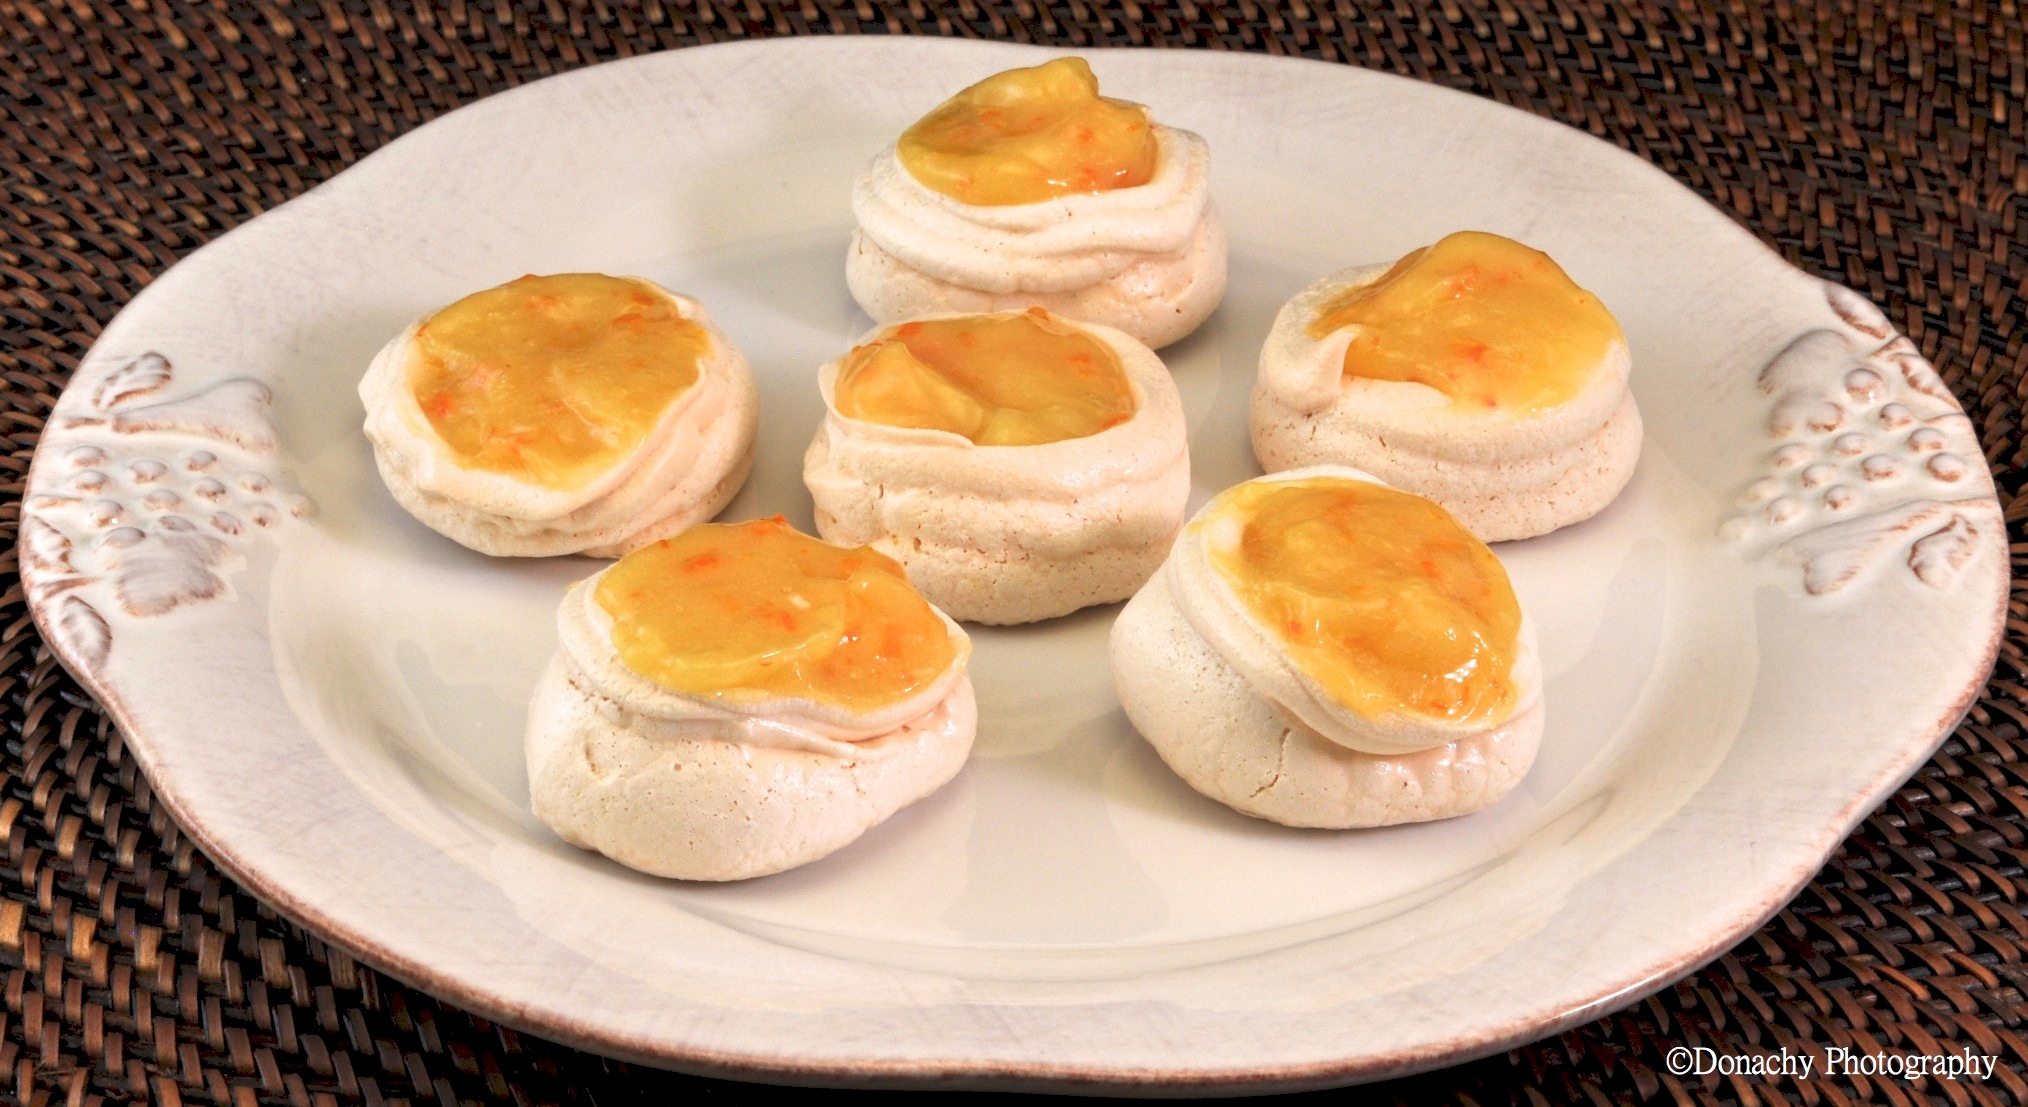
Flipped Lemon Meringue Cookies

Imagine the tart creaminess of lemon meringue infused with orange zest sitting on a crisp, airy cookie ready to be devoured in one scrumptious bite. You’ll flip when you taste these cookies!

You know those beautiful Parisian macarons? Smooth and glossy, perfectly round and filled with creamy flavors? This cookie recipe allowed me to practice with the elements of the macaron – especially the meringue. And I got to play with a Kitchen Aid mixer for the first time.

Jack and I do our best to keep our kitchen to a minimum and have been debating about whether this appliance is worth its weight in counter space. Recently, we borrowed a Kitchen Aid mixer to take for a test drive. Our thoughts? This machine is pretty incredible. It beat the egg whites and confectioners’ sugar into a consistency we doubt we could have achieved by hand or even with a hand-held mixer — and after 20 minutes of steady mixing, no one was tired! The meringue was stiff and glossy and fluffy, just like it’s supposed to be. Even after scooping the meringue into a Ziploc and piping it out, it didn’t loose any volume. I think that was due to the mixer. The meringue baked perfectly, despite my inexperience in piping. We’ll see how often we use this mixer, but we’re sold on it for heavy mixing jobs.

The cookies took time in that leisurely Sunday kind of way. First I made the lemon curd and put it in the refrigerator to chill. After a while, I made the cookie shell. Then, when the shell and the curd were both cooled, I assembled the cookies. I found it easy to eliminate the evidence of my first attempts at piping, which were not pretty, but were tasty!  The technique which I settled on was to pipe the meringue in a spiral, starting in the center, with the last two spirals going vertical. This made a nice little cup for the lemon curd.

Flipped Lemon Meringue Cookies

Ingredients:

For Lemon Curd –

  • 1/2 cup granulated sugar
  • 1 large egg and 1 egg yolk
  • 1/2 cup lemon juice
  • 2 tsp orange zest
  • 3 tbsp melted unsalted butter

For Meringue –

  • 4 egg whites
  • 2 cups confectioners’ sugar

Directions

  1. In a medium pot, mix together curd ingredients, except butter (granulated sugar, egg and egg yolk, lemon juice and orange zest).
  2. Whisk continually over medium heat until mixture thickens and coats a spoon (about 10 minutes). Stir  in melted butter.
  3. Pour into a sealed container and refrigerate until cold.
  4. While the curd is chilling, make the meringue cookies.
  5. Preheat oven to 250 degrees F.
  6. Take the 4 egg whites and beat on medium speed until they develop soft peaks (peaks will bend when you remove beaters)
  7. Beat eggs whites at high speed while adding confectioners’ sugar by the tablespoon, making sure the sugar is mixed in before adding next tablespoon. The final product should have stiff peaks and be somewhat glossy and thick.
  8. Pour into a piping bag with a small tip. (I used a Ziploc bag with the corner cut off).
  9. Pipe a tight spiral from the center out, layering the outside spiral twice so you have about an inch-diameter cookie with a cup to hold the curd.
  10. Bake for 60 minutes on a parchment lined baking sheet. Slight cracking is OK. The cookies should easily come off the parchment paper when finished. Let cool.
  11. Fill meringue cookie with lemon curd.
  12. Store in covered container in refrigerator.

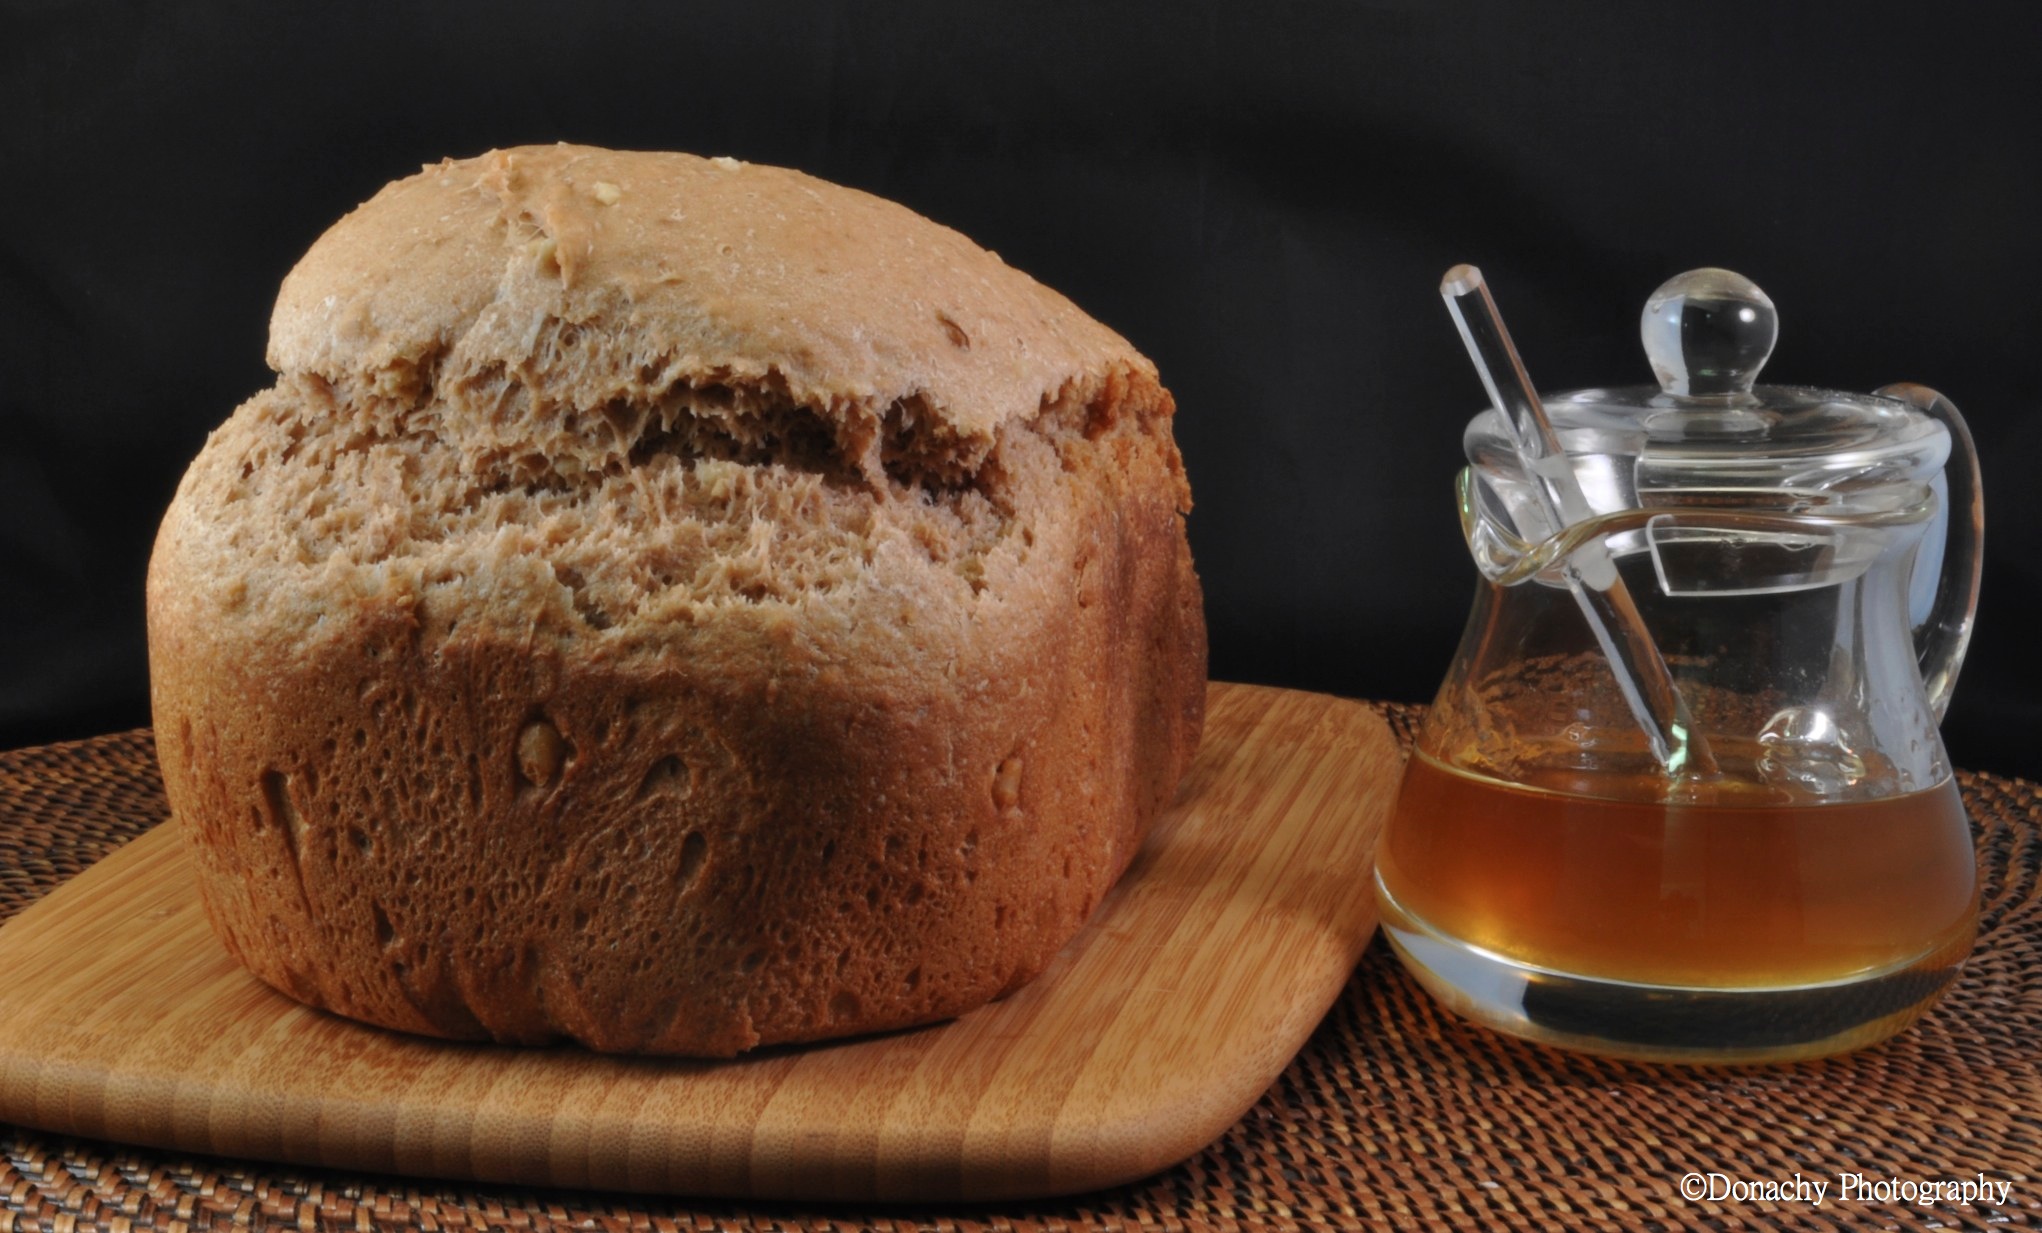
Bread Machine Oatmeal Walnut Wheat Bread

This hearty but soft wheat bread has crunchy walnuts and a hint of honey. The aromas while baking are magnificent! Jack says each bread I make is his new favorite. I think he really means it, too.

Oatmeal Walnut Wheat Bread

Ingredients

  • 1 1/4 cups water
  • 1/4 cup nonfat dry milk
  • 1 1/4 tsp salt
  • 2 tbsp olive oil
  • 1 tbsp honey
  • 1 tbsp molasses
  • 1 cup wheat flour
  • 2 cups all purpose flour
  • 1/2 cup quick-cooking oats
  • 1/3 cup chopped walnuts
  • 1 tsp instant yeast

Directions

  1. Place ingredients in bread machine according to manufacturer’s instructions.
  2. Start machine
  3. Wait impatiently for cycle to finish armed with butter and honey and a knife.

Recipe adapted from 300 Best Bread Machine Recipes by Donna Washburn and Heather Butt.

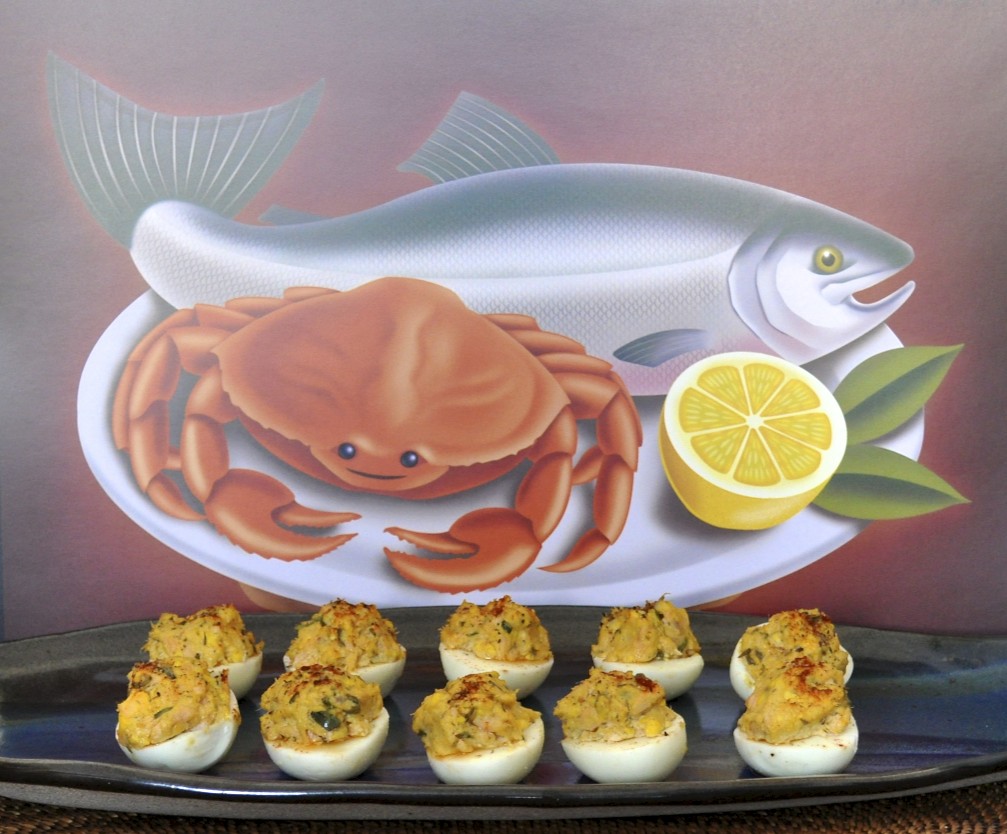
Alaskan Salmon Stuffed Eggs

Wild salmon is the key to these super-tasty deviled eggs. This is recipe #6 in the Salmon Challenge.

Deviled eggs are always a favorite appetizer, and this recipe works well with canned sockeye, smoked salmon, or fresh salmon that’s been grilled or broiled. Variations on the basic recipe are endless.

A note on boiling eggs: It’s surprising how many different ways various cookbooks and Internet sites suggesting boiling eggs. What this seems to suggest is that it’s not as simple a task and one might think. Here’s my two-cents, for what it’s worth.

Don’t start with the freshest eggs. Eggs that are a a few days old, or older, work better. Place cold eggs in cold, unsalted water. Bring to a boil. Cook eggs on a low boil – just above a simmer – for 13 minutesDrain off the hot water and immediately cover eggs with cold tap water. Roll eggs to crack the shells (this can be done while they’re still in the pan of there aren’t too many eggs) and keep them in cold water with shells, refreshing the water if it becomes warm. Let the eggs cool in the water, then roll them on a flat surface and peel off the shells. Wait until eggs are thoroughly cool before cutting them.

I’ve tried several methods of boiling eggs. This one works well again and again, with very few problems such as green egg yolks, shells sticking to eggs or overly done or underdone eggs.

Ingredients:

  • 6 large eggs
  • 3 to 4 ounces salmon, broken apart or cut until small pieces (canned sockeye, freshly grilled Chinook, or smoked salmon, for example)
  • 4 anchovy fillets, chopped fine
  • 3 spinach leaves, chopped fine (optional)
  • 2 tsp capers, chopped fine
  • 2 tablespoons mayonnaise (or 1 1/2 tablespoons mayonnaise & 1/2 tablespoon Dijon mustard)
  • freshly ground pepper to taste
  • 1 tsp dried tarragon (or, of course, use fresh)
  • garnish with a sprinkle of paprika and a fresh grind of black pepper and, perhaps, a tarragon leaf or piece of fresh spinach

Directions:

  1. Hard boil the eggs. Slice peeled eggs in half. Remove the yolks and place into a mixing bowl. Mash the yolks with a fork until evenly broken up and set aside.
  2. In a separate bowl, thoroughly mix together all the other ingredients except the garnish. Then add this mixture to the yolks and mix together with a fork. Do not make this too pasty. You should be able to see pieces of caper, tarragon and salmon.
  3. Use a spoon or cookie scoop to stuff the mixture into the eggs.
  4. Garnish with paprika, pepper, etc.
  5. Keep chilled until ready to serve.

These could be served on shiso leaves for added visual and gustatory attractiveness.

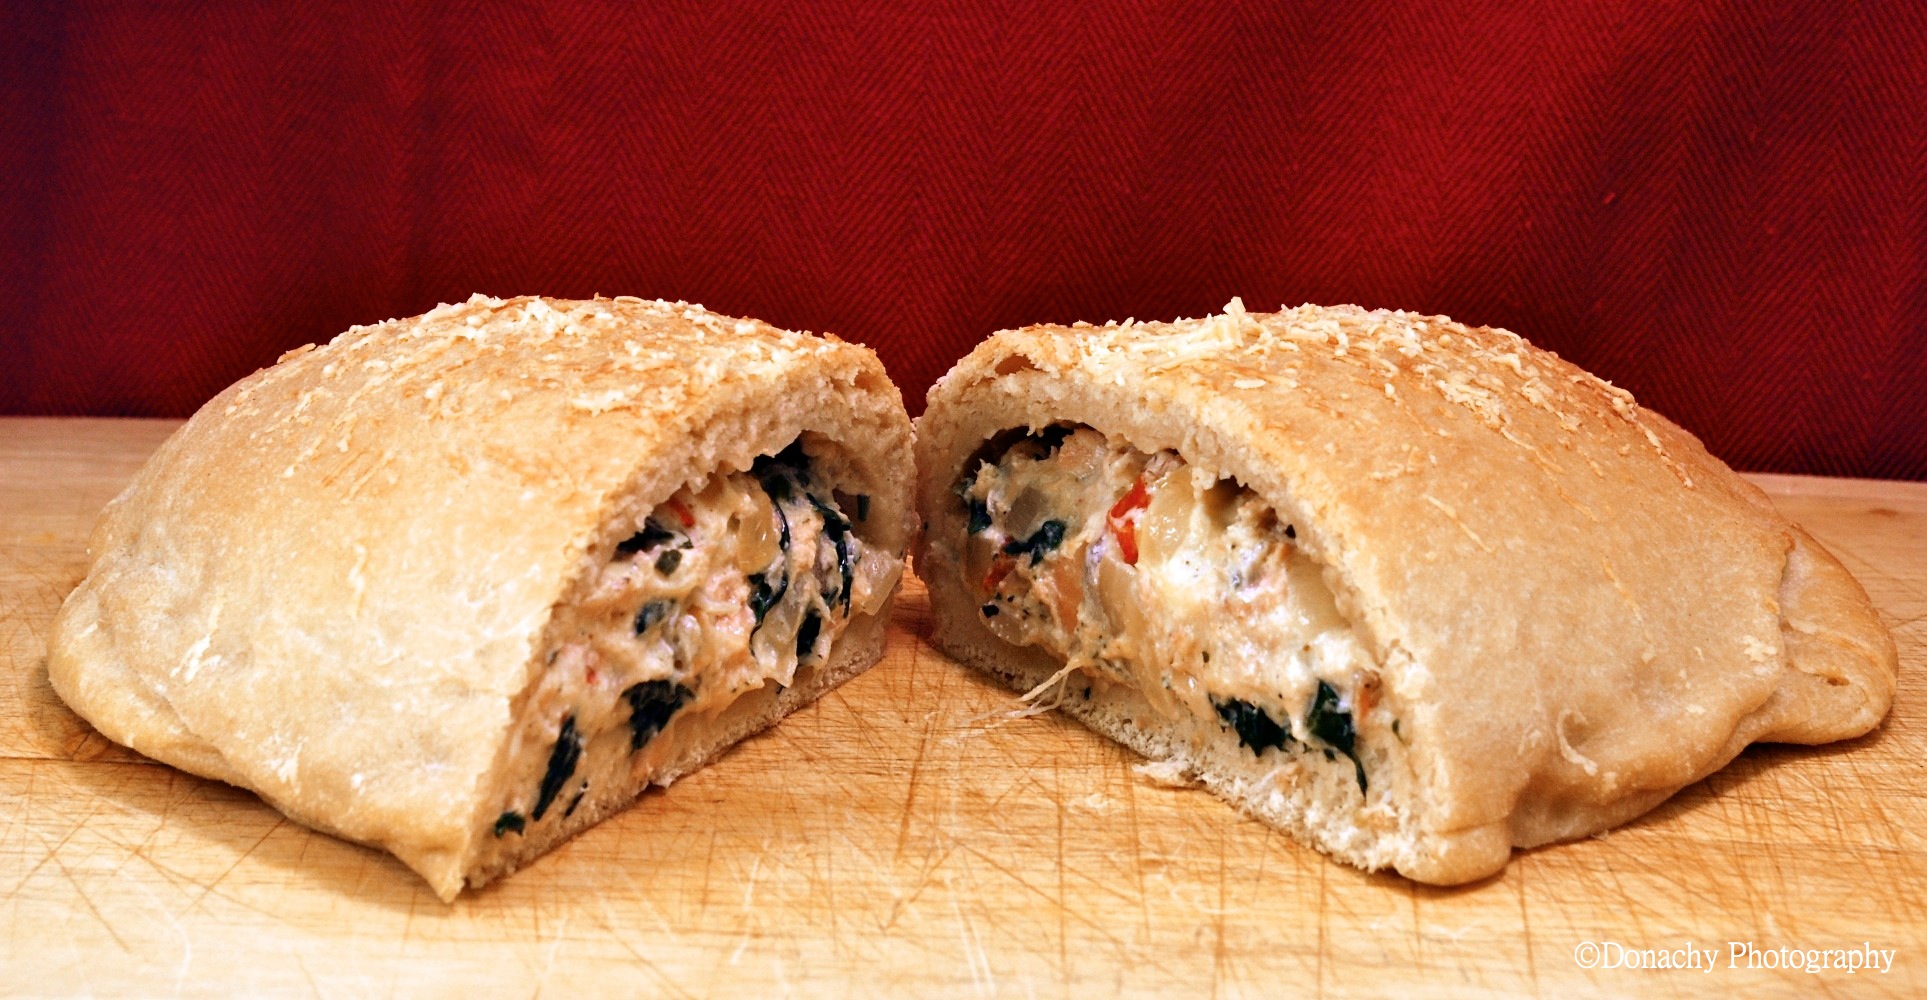
Salmon Calzone

Number four in the Salmon Recipe Challenge. Savory salmon in a creamy cheese mixture enhanced with red bell peppers and spinach; all neatly wrapped in a warm Parmesan crust.

The salmon challenge was intended for Jack. After all, he is the master chef. But after a night of studying (I’m going for a master’s in education technology), I relaxed by surfing cooking and baking blogs where I came across a photo of a delicious-looking calzone. “Wouldn’t a salmon stuffed calzone be divine?” I thought.

I would start this recipe by saying that we dusted off our favorite mechanical kitchen device, our Zojirushi bread machine, but the truth is this machine never has time to collect dust. We use it once a week on slow weeks and more frequently than that on most weeks. We love our Zojirushi bread machine so much that we wrote a review on it for the company from which we bought it. Among the advantages a good bread machine offers is that it solves the often vexing problem of having the right environment for dough to rise.

The calzone dough is a standard pizza dough recipe adapted from the book 300 Best Bread Machine Recipes by Donna Washburn and Heather Butt.

Dough Ingredients

  • 1 1/2 cups water
  • 1/4 nonfat dry milk
  • 1 1/2 tsp salt
  • 2 tbsp granulated sugar
  • 3 tbsp vegetable oil
  • 4 cups bread flour
  • 1 tsp yeast
  1. Measure ingredients into baking pan in the order recommended by the manufacturer. Select dough cycle.
  2. Remove dough to a lightly floured board. Cover with a large inverted bowl and let rest for 10 – 15 minutes. Divide dough into 10 portions. Roll out each into a 6-inch circle and let rest.
  3. Prepare filling.
                            .
Filling Ingredients
  • 2 tbsp olive oil
  • 1 onion, chopped
  • 4 cloves garlic, chopped fine
  • 1 red bell pepper, chopped
  • 2 generous handfuls of fresh spinach, cleaned and stemmed
  • 1 fillet salmon, approximately a pound
  • 8-oz. brick of cream cheese, softened (simply leave out at room temperature)
  • 3/4 cup ricotta cheese
  • 1 1/2 cups grated Swiss cheese
  • 2 tsp dry tarragon
  • 2 tsp dry oregano
  • salt and pepper to taste
  • 2 tbsp Extra Virgin Olive Oil
  • 1/4 cup grated Parmesan cheese

4. In medium skillet, heat olive oil over medium heat. Add onion and sauté for 4 – 5 minutes. Add bell pepper; sauté for 3 – 4 minutes until crisp-tender. Add garlic and spinach and cook until spinach is wilted. Set aside.

5. Season salmon with salt and pepper. I also added a garlic herb mix. Broil salmon, skin side down. After salmon cools, flake salmon and set aside.
6. In large bowl, beat cream cheese until soft and fluffy. Gradually add ricotta cheese, beating until combined. Stir in onion mixture, tarragon, oregano, salt and pepper, then add Swiss cheese and flaked salmon.

7.  Place filling on one half of each circle. Fold calzone over, sealing the edges tightly with your fingertips making a scalloped edge. Cover and let rise in a warm, draft-free place until doubled in volume, 30 – 45 minutes. Meanwhile, preheat oven to 375 degrees F.

8. When calzones are formed, brush with 2 tablespoons Extra Virgin Olive Oil and sprinkle with 1/4 cup grated Parmesan cheese.

9. Bake in preheated oven for 20 – 25 minutes, or until the calzones sound hollow when tapped on the bottom.

These calzones were terrific out of the oven. They make great lunches, too.