Sea Buckthorn Berry Almond Cake

sea buckthorn almond cake n

Moist, sweet almond cake with tart sea buckthorn berries baked in – served atop warm vanilla bean custard, this is a sophisticated and  flavorful dessert. Serve with sea buckthorn wine or an ice wine.

Berries are our favorite fruits. In Mongolia, we have added a new berry to our culinary collection – sea buckthorn. With 15 times the vitamin C of oranges, it’s no wonder Mongolians have long sought out this berry for its healthful benefits! We found the berries we used in this cake in our local grocery store. We’ll be on the lookout for this hardy plant in the fall in order to harvest our own.

This almond cake lends itself to pairing with a tart fruit such as currants. I made a cranberry version earlier which I adapted for the sea buckthorns. The almonds and the almond extract give the cake a delicious base that would work with a number of flavors. The cake is delicious without fruit as well.

Sea Buckthorn Berry Almond Cake

Ingredients

  • 1 cup all-purpose flour
  • 1 cup granulated sugar
  • 1/4 tsp salt
  • 1/2 cup whole almonds pulverized to the consistency of coarse flour
  • 1/2 cup unsalted butter, melted
  • 3 eggs, well beaten
  • 3 tsp almond extract
  • 1/2 tbsp dried orange zest or 1 tbsp fresh orange zest
  • 2 cups sea buckthorn berries (or another tart berry like cranberry)

Directions

  1. Preheat oven to 350 degrees F (175 C). Grease a 9-inch springform pan.
  2. Combine the flour, sugar, and salt in a medium bowl.
  3. Mix in almonds.
  4. Stir in butter, beaten eggs, almond extract, and orange zest.
  5. Fold in some of the berries. Reserve some to sprinkle on top of cake.
  6. Spread the batter into the greased pan.
  7. Sprinkle remaining berries atop cake. Slightly press them into batter.
  8. Bake for 40 minutes, or until a wooden pick inserted near the center comes out clean.
  9. Serve warm with whipped cream, ice cream, or warm vanilla custard.

Chocolate Orange Pecan Crinkle Christmas Cookies

chocolage orange pecan crinkle cookies n

Who can resist a cookie with a powdery sugar overcoat and dark chocolate peeking out from the crinkles?

When I was young, I would seek out those chocolates the shape of an orange that had to be banged on a table in order to get the slices to come apart – Terry’s Chocolate Orange, I think they were called. The reward? Delicious orange-slice-shaped wedges of chocolate infused with orange flavor. With this holiday favorite in mind, I added essence of orange to my chocolate crinkles. I also put in chopped pecans for another layer of flavor and a little crunch. Voila, a new holiday favorite is created!

Chocolate Orange Pecan Crinkles

Ingredients

  • 1 cup Dutch process cocoa powder
  • 1 1/2 cups granulated sugar
  • 1/2 cup vegetable oil
  • 4 eggs
  • 1 tsp pure vanilla extract
  • 1 tsp orange extract
  • 1/2 tbsp orange zest
  • 2 cups all purpose flour
  • 2 tsp baking powder
  • 1/2 tsp salt
  • 1 cup chopped pecans
  • 1/2 cup confectioner’s sugar

Directions

  1. In a large bowl, whisk together cocoa powder and granulated sugar.
  2. Stir in vegetable oil.
  3. Mix in eggs, one at a time.
  4. Stir in vanilla and orange extracts and zest.
  5. Sift flour, baking powder and salt into the cocoa mixture.
  6. Fold in chopped pecans.
  7. Refrigerate for about 45 minutes so the dough is nice and firm.
  8. Place confectioner’s sugar in a zip top bag.
  9. Preheat oven to 350 degrees F (175 C). Line a baking sheet with parchment paper.
  10. Using a cookie scoop, or a small ice cream scoop, scoop out a dough ball and drop it in the confectioner’s sugar, making sure it is well covered.
  11. Place sugar covered dough balls on parchment-lined baking sheet. Repeat until you’ve filled a baking sheet with 12 cookies.
  12. Bake for 15 minutes. Let cool on baking sheet for a minute before removing to wire rack.

Makes 30 generous cookies.

Smokey Chipotle Meatloaf with Poached Egg on Pan-Fried Beer Bread: Now That’s a Meatloaf Sandwich!

meatloaf sandwich poached egg n

Egg yolk flowing like lava over delicious meatloaf and melted gouda cheese. We haven’t even put the chipotle sauce on yet… 

My grandmother made meatloaf. My mother made the same meatloaf. Ground beef, an egg or two, breadcrumbs, milk, a dash of salt, a few grinds of pepper. Put it in a loaf pan, top it with ketchup, bake it, slice it, serve it with mashed potatoes. Not as tasty as a grilled hamburger… In fact, those meatloaf recipes of the past weren’t as good as a lot of things, and so for many of us this traditional dish has fallen by the wayside.

Time to look at meatloaf in a new way. Think of the following recipe as a foundation to come up with your own twist on this iconic American comfort food.

We served slices of the finished meatloaf on pan-toasted beer bread, one side of which was covered with melted gouda cheese. The poached egg on top – not an idea original to us – was perfect. After five miles of hiking through the city of Ulaanbaatar on a sunny, sub-freezing day in Mongolia, we had little difficulty polishing off these hot, hearty sandwiches.

Smoky Chipotle Meatloaf Sandwich

Ingredients

  • 1/3 pound thick-cut bacon, diced small
  • 1 tbsp olive oil
  • 3/4 cup onion diced fine
  • 3/4 cup yellow or orange bell pepper diced fine
  • 1 large egg
  • 1 cup diced crimini mushrooms (or other fresh mushroom)
  • 1/2 tbsp soy sauce
  • 1/2 tbsp Worcestershire sauce
  • 1/2 tsp powdered chipotle chili pepper
  • 1/2 tsp smoked paprika
  • 1/2 tbsp dry oregano
  • 1 tsp smoked sea salt (or use regular salt)
  • a few grinds black pepper
  • 1 1/2 pounds ground beef
  • 2 cups fresh bread crumbs
  • 2 cups grated mozzarella
  • 1/2 cup milk
  • 1/2 cup chipotle barbecue sauce (see recipe below)

Directions

  1. Grease a 9″ x 5″ loaf pan with butter. You will need a sheet of aluminum foil to cover this pan.
  2. Set oven rack to center position and preheat oven to 350 degrees F (175 C).
  3. In a pan over medium heat, fry bacon until thoroughly cooked but not crisp. Remove bacon and set aside. Save bacon grease in pan.
  4. Over medium heat, add olive oil to bacon grease. Add diced onions and cook for about 1 minute, stirring occasionally. Add diced bell peppers and continue cooking and stirring occasionally till onions turn translucent and bell peppers are soft. Remove onions and bell peppers from pan and set aside to cool.
  5. Place egg in a large bowl. Add soy sauce, Worcestershire sauce, powdered chipotle, paprika, oregano, salt and black pepper. Whisk together.
  6. To the egg mixture, add all remaining ingredients except the barbecue sauce. Gently fold everything together with your hands. Keep in mind that while you do want everything evenly mixed together, the less you handle the ground beef, the better the texture of your baked loaf will be.
  7. Place meat mixture in greased loaf pan, pressing down as you would a hamburger. Slightly indenting the center will result in a finished loaf with a more even top, as the center will rise when baking.
  8. Top the loaf with chipotle barbecue sauce, cover pan with aluminum foil and place in oven.
  9. Bake for 20 minutes. Remove foil and continue baking for 40 minutes.
  10. Remove loaf from oven. Let rest for 10 minutes. Gently flip the loaf out onto a serving platter.
  11. Melt a slice of gouda cheese on pan-fried toast made from rustic bread. Place a slice of meatloaf on the toast with the cheese, slather the other slice of toast with additional chipotle barbecue sauce, place a poached or easy-over egg atop the meatloaf and dig in.

Chipotle Barbecue Sauce

Ingredients (When adding the seasonings, begin with a little and add more to taste.)

  • 6-ounce can tomato paste
  • 1 tbsp Dijon mustard
  • 1 tbsp honey
  • 1 tbsp soy sauce
  • 1 tbsp Worcestershire sauce
  • 2 cloves minced garlic
  • 1/2 tsp smoked sea salt
  • 1 tsp dry oregano
  • 1/2 tsp smoked paprika
  • 1/2 tsp powdered chipotle chili pepper
  • couple grinds black pepper
  • water, as necessary, to achieve desired consistency. The sauce should be fairly thick.

Directions

  1. Combine ingredients in a pot.
  2. Simmer over low heat for about 10 minutes, stirring frequently.

Pan-fried Toast

  1. Place about 1 tbsp of good olive oil in a frying pan for each slice of bread to be toasted.
  2. Over medium heat, bring oil to a soft sizzle.
  3. Reduce heat to medium-low and place the bread slices in the pan and fry for about 2 minutes on each side, until surface is golden and crispy.
  4. For an extra kick of garlic, coat one side of each slice with olive oil and top with minced garlic. Take care not to burn the garlic. This is a family favorite.

Blueberry Crunch Muffins – Betcha Can’t Eat Just One! Makes a Great Cake, Too

blueberry streusel cake n

A slice of moist cake stuffed with blueberries and topped with crunchy streusel makes for a great start to any day.

Jack says muffins are cake. Whether you use fresh or frozen blueberries, a batch of these muffins is easy to whip up anytime. They’re a favorite with fried eggs and fresh fruit for a tasty, satisfying brunch. Today, I made the recipe again, but in a 9-inch springform pan for a lovely snack to go with afternoon tea. A warm slice of this cake with a scoop of vanilla bean ice cream would be an indulgent way to end a dinner – and an absolutely wrong way to begin your day!

Streusel-Topped Blueberry Muffins

Ingredients

Muffin dough

  • 1 1/2 cups all-purpose flour
  • 3/4 cup granulated sugar
  • 1/2 tsp salt
  • 2 tsp baking powder
  • 1/3 cup vegetable oil
  • 2 eggs
  • 1/3 cup plain yogurt
  • 1 cup fresh blueberries or thawed frozen blueberries

Streusel Topping

  • 1/2 cup brown sugar
  • 1/3 cup all-purpose flour
  • 1/4 cup unsalted butter, melted
  • 1 1/2 tsp ground cinnamon
  • 1/8 tsp nutmeg

Directions

  1. Preheat oven to 400 degrees F (200 degrees C). Grease muffin tin or line with muffin liners.
  2. Combine 1 1/2 cups flour, 3/4 cup sugar, salt and baking powder in a large bowl.
  3. Mix oil, egg and yogurt in a medium bowl.
  4. Stir oil mixture into flour mixture until just mixed.
  5. Fold in blueberries.
  6. Fill muffin cups right to the top.
  7. Mix together streusel topping ingredients.
  8. Place even amounts of topping on each muffin.
  9. Bake for 20 minutes in a preheated oven. A wooden stick inserted into center of muffin will come out clean when muffins are done.

Makes 12 streusel-topped blueberry muffins.


Secrets for Fluffier Country Butter Biscuits

buttery biscuits n

Hot from the oven, these beautiful country-style biscuits have a down-home balance of crunchy peaks and crannies and buttery fluffiness. They’ll disappear faster than you can say “Breakfast is served!”

There are two tricks to fluffy biscuits. The first is use frozen butter. I use a cheese grater to add it to the dough while it’s still frozen. The grated butter pieces are just the right size to stir into the flour for even distribution. As the biscuits bake, buttery pockets are created and the steam released causes the dough to rise and become flaky.

The other trick is to tear the dough into biscuits instead of cutting it. Alternatively, you can use a cookie scoop to create the biscuits. Both methods produce fluffier biscuits than laying out the dough and cutting it. A traditional method of making biscuits is to use a water glass to cut them. Don’t. The glass seals the dough edges which inhibits the dough’s ability to rise. Tearing the dough is quick and allows for minimal handling. The edges of the ripped biscuits bake up into satisfyingly crunchy peaks and crannies.

Rustic Fluffy Butter Biscuits

Ingredients

  • 2 cups all purpose flour
  • 1 tbsp baking powder
  • 1 tsp salt
  • 1 tbsp granulated sugar
  • 1/3 cup unsalted butter, frozen
  • 1 cup whole milk

Directions

  1. Preheat oven to 425 degrees F (220 degrees C). Cover baking sheet with parchment paper and set aside.
  2. In a large bowl, whisk together the flour, baking powder, salt, and sugar.
  3. Grate frozen butter into flour mixture using a cheese grater with large holes.
  4. Stir butter into flour mixture until it is evenly mixed.
  5. Gradually stir in milk until dough just pulls away from the side of the bowl. Do not overstir.
  6. Turn dough out onto a floured surface and knead until dough sticks together. It will be craggy looking.
  7. Pull off pieces sized to your liking and gently flatten them to about 1 inch thick.
  8. Place pieces on baking sheet.
  9. Bake for 11 – 13 minutes. Edges will be golden brown when done.
  10. Let cool slightly before serving. Serve warm or room temperature.

As buttery as these are, Jack still slathers them with butter and adds honey. I like them “as is” unless we have a favorite homemade jam on hand.

Day 3: Tsagaan Suvarga, The Gobi Desert’s White Cliffs – Gazelles and Ger Life

camel skull & white cliffs n

In the distance, Mongolia’s Tsagaan Suvarga – The White Cliffs. In the foreground, a camel skull. A zud (harsh winter) can wipe out hundreds of thousands or even millions of livestock. And yet a hardy breed of people thrive here and in a land where humans and their herds of animals have coexisted with nature for millennia, wild animals are surprisingly abundant.

As we continued our journey south, the land unfolding before us bore little resemblance to what we had imagined the Gobi would be like. Throughout the journey, our van passed through nearly endless mixed flocks of passerines – wheatears, larks, buntings and sparrows. Eagles, hawks, ravens and vultures soared overhead. And there were times when gazelle seemed to be everywhere.

barbra photo camel n

Initially, we had no idea what to expect from the domesticated Bactrian camels we encountered, so we approached with caution. As it turned out, they were even-tempered and in some cases not opposed to having their heads scratched. With thick coats of fur, sturdy legs, heavily muscled bodies and the capacity to go for a full week without water, these magnificent animals have evolved to thrive in one of the world’s harshest environments.

“Would you ride one?” Barbra asked playfully motioning toward the group of camels standing a few meters from us. I could tell by the smile on her face and the twinkle in her eyes that she was in.

“Maybe,” I replied with some hesitation. They appeared to be docile enough.  “But not in circles in some tourist camp. If I get on a camel, it’s going to be to go somewhere.”

In fact, we’d get our opportunity in a couple of days. Between seeing several mammal and bird species that were new to us and after eating and drinking things we’d previously only read about (and in a couple of instances had never heard of) this proved to be a trip of firsts.

gazelle bull vocalizing n

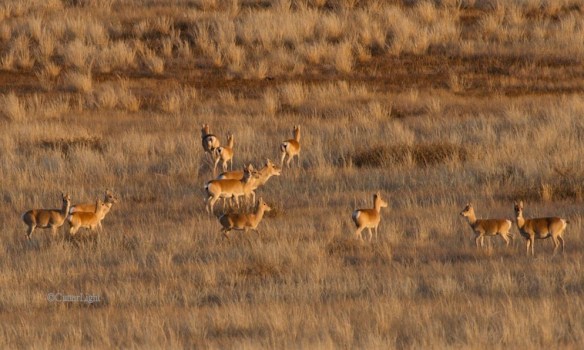
A thick-necked buck (center) vocalizes an alarm to his group of females and young. Mongolian gazelle (Procapra gutturosa) are the definition of skittish. It took our group several attempts before we began to learn how to approach these shy animals closely enough to get decent photographs.

Almost constantly on the move and sometimes covering thousands of square miles in a given year, Mongolian gazelle have adopted a nomadic lifestyle well-suited to the arid steppe and desert. Hunted both legally and illegally, their numbers remain robust at more than a million individuals. On our trip from Ulaanbaatar to the Gobi, we encountered thousands.

gazelle galloping kicking up dirt n

Pounding hooves and flying dirt. Standing about as tall as a man’s knee at the shoulder, these diminutive ungulates are capable of speeds up to 40 miles an hour (65 kph). (Click any of these photos to enlarge them.)

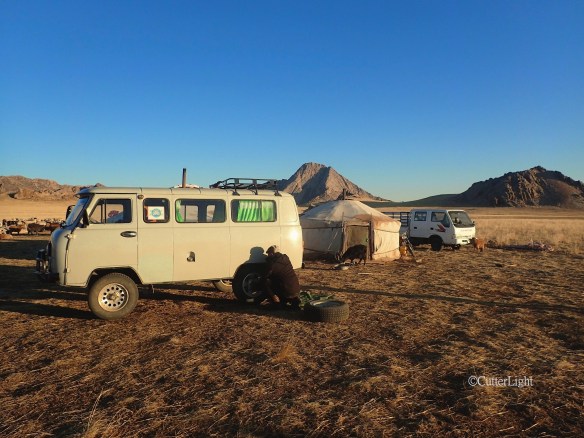
With seven of us in the van along with camera gear, sleeping gear, cooking gear, small chairs, tubs of food, extra water, eight three-liter boxes of wine, gifts for our host families, day packs and clothing bags rattling over steppe and desert, you might suspect we felt crowded and uncomfortable. It amazed us that we did not. We never tired of seeing the wildlife and landscapes and anticipating what might be around the next hill.

Nonetheless, after a day of bouncing across the open range, we were always happy to pull into our next ger, meet our hosts, and settle in.

hostess airating tea horizongtal

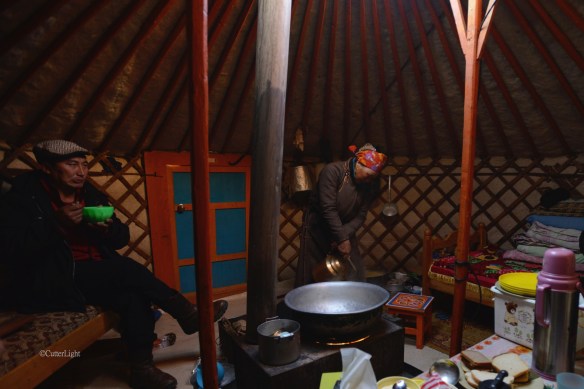
Our hostess aerates a steaming pot of yamani suute tsai (suu – te – tsay) . Goat milk tea is a staple beverage in many Mongolian gers. Adamant non milk drinkers, Barbra and I loved the warmth, nutrition and flavor of this drink and came to look forward to a steamy bowl of it (or of the equally delicious temeeni suite tsai – camel milk tea) before dinner each evening. 

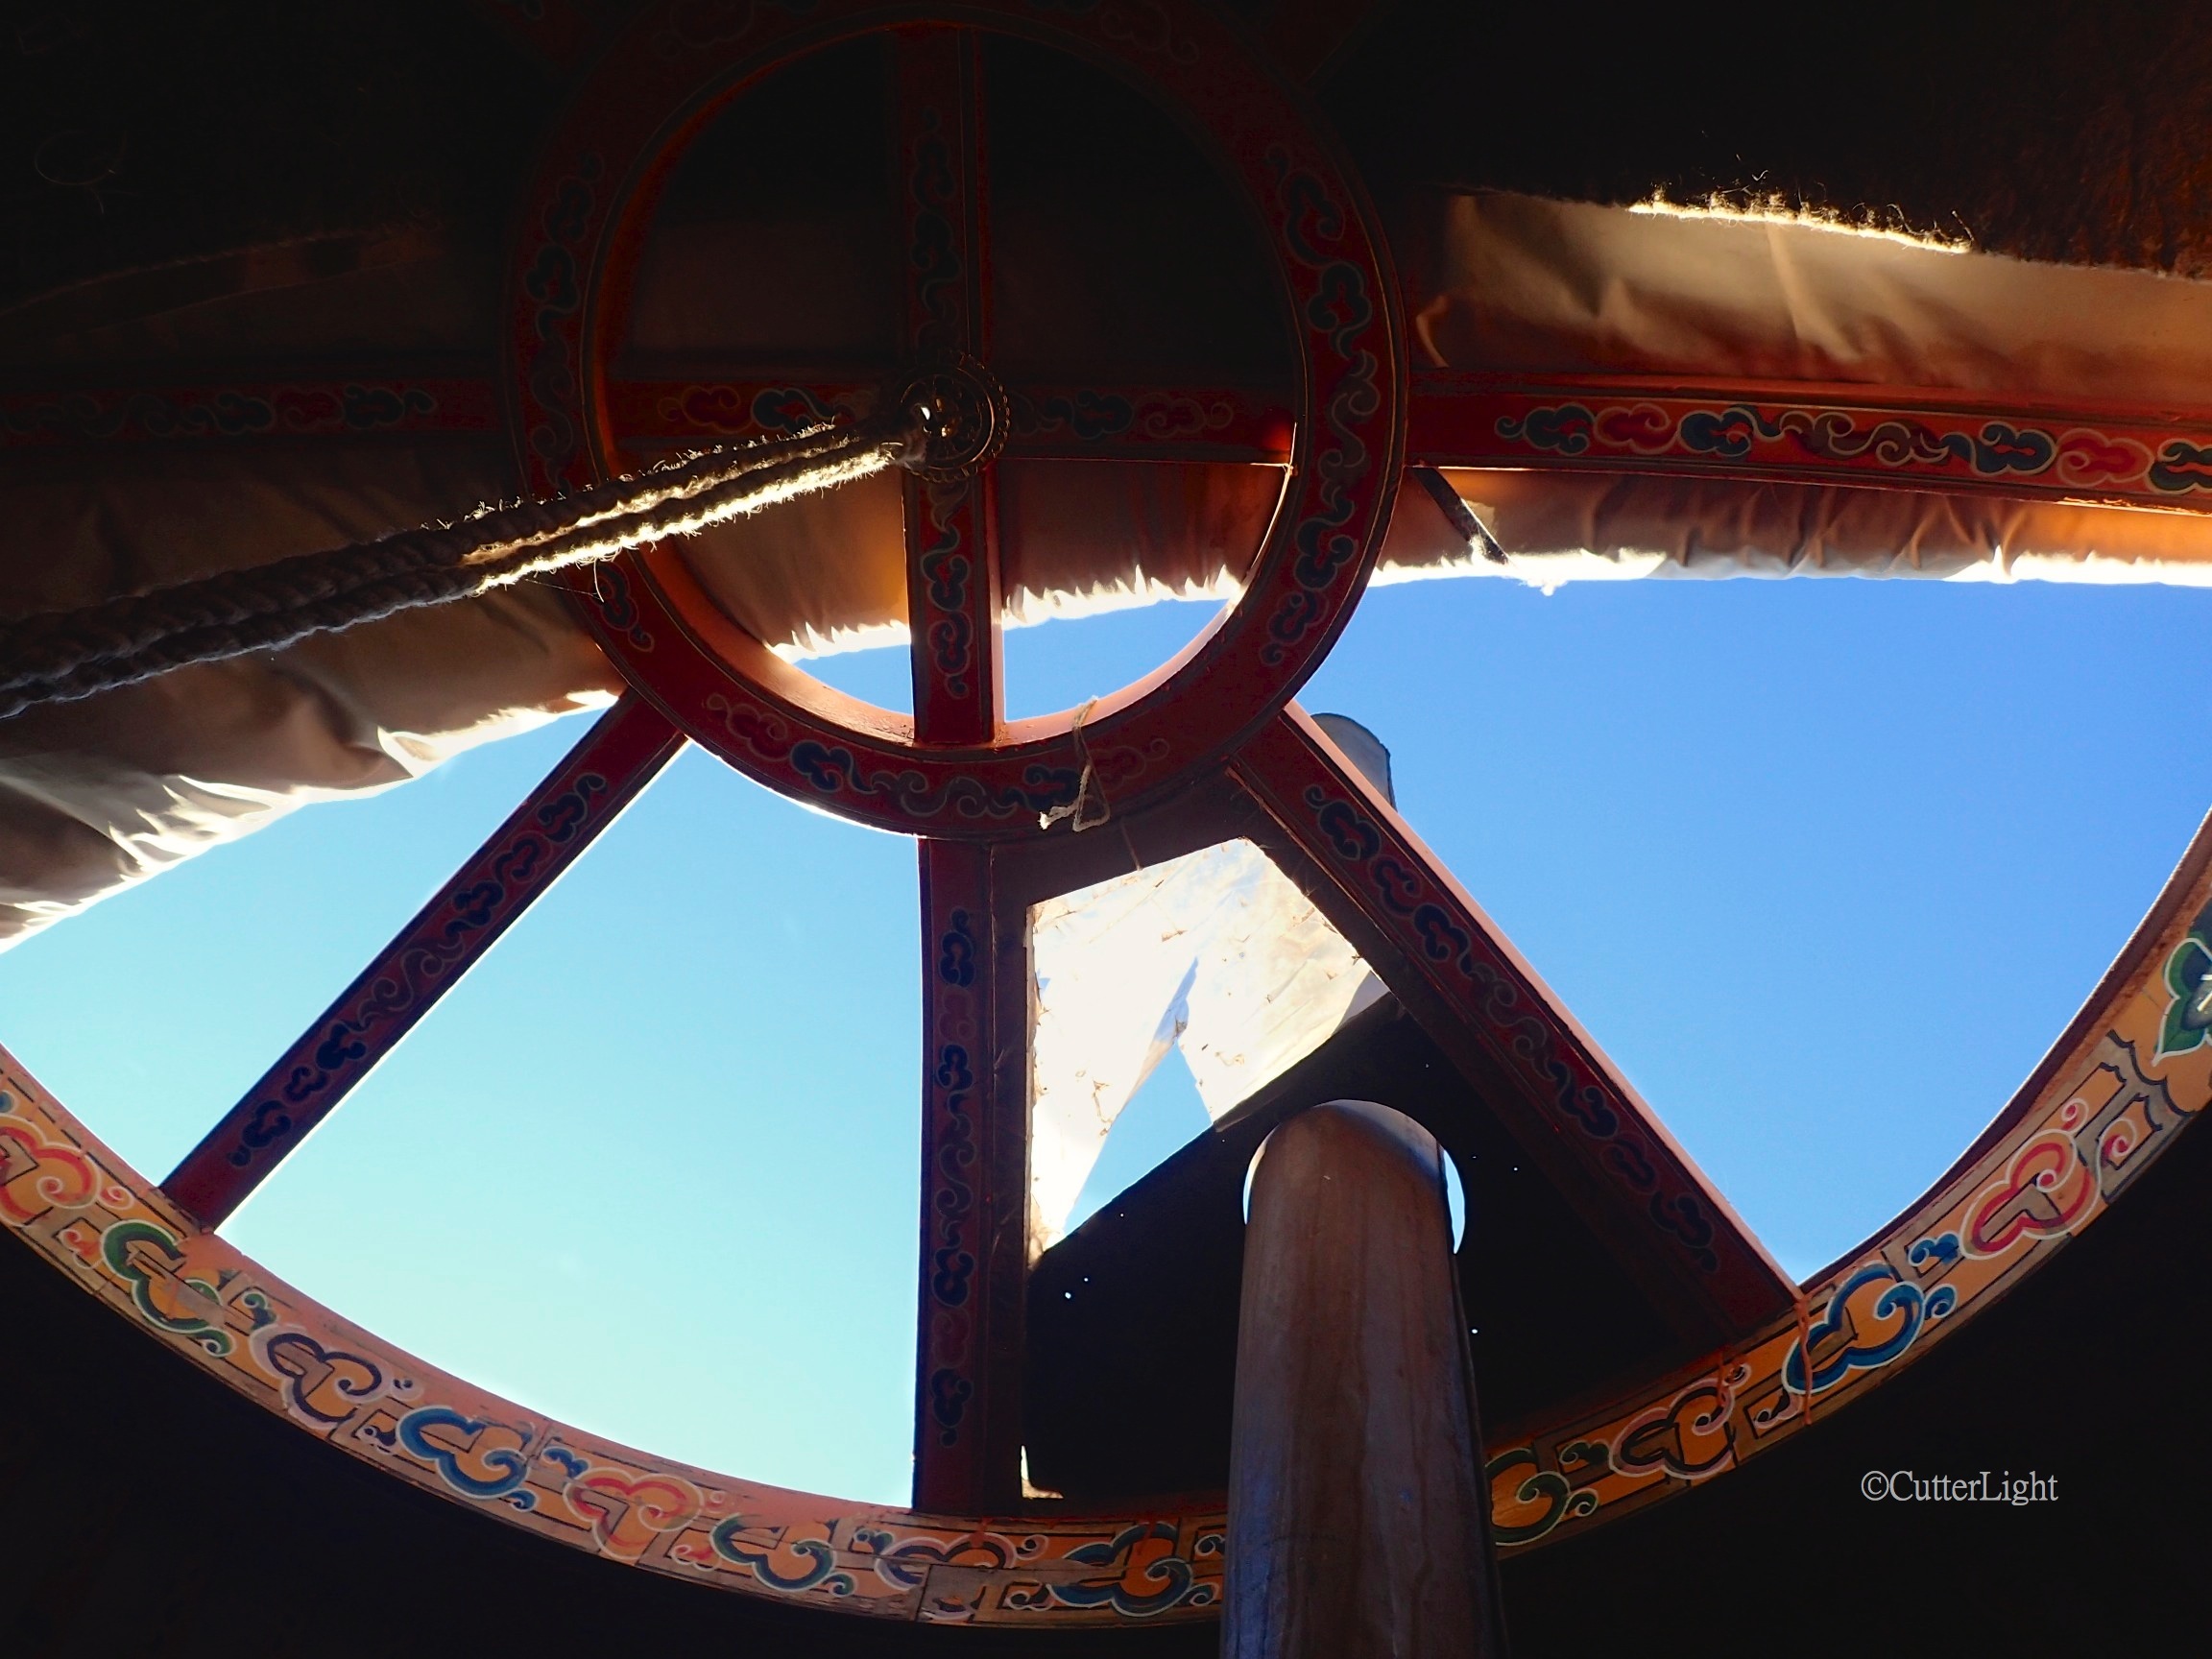
Gers are eminently well-suited to the life of nomadic herdsmen and their families. Round and with conical roofs, there are no flat walls or edges to catch the wind. Covered with felt, they are well insulated. At around 500 square feet, (46 square meters) these one-room homes are an answer to the “tiny house” movement’s quest for a comfortable, efficient living space.

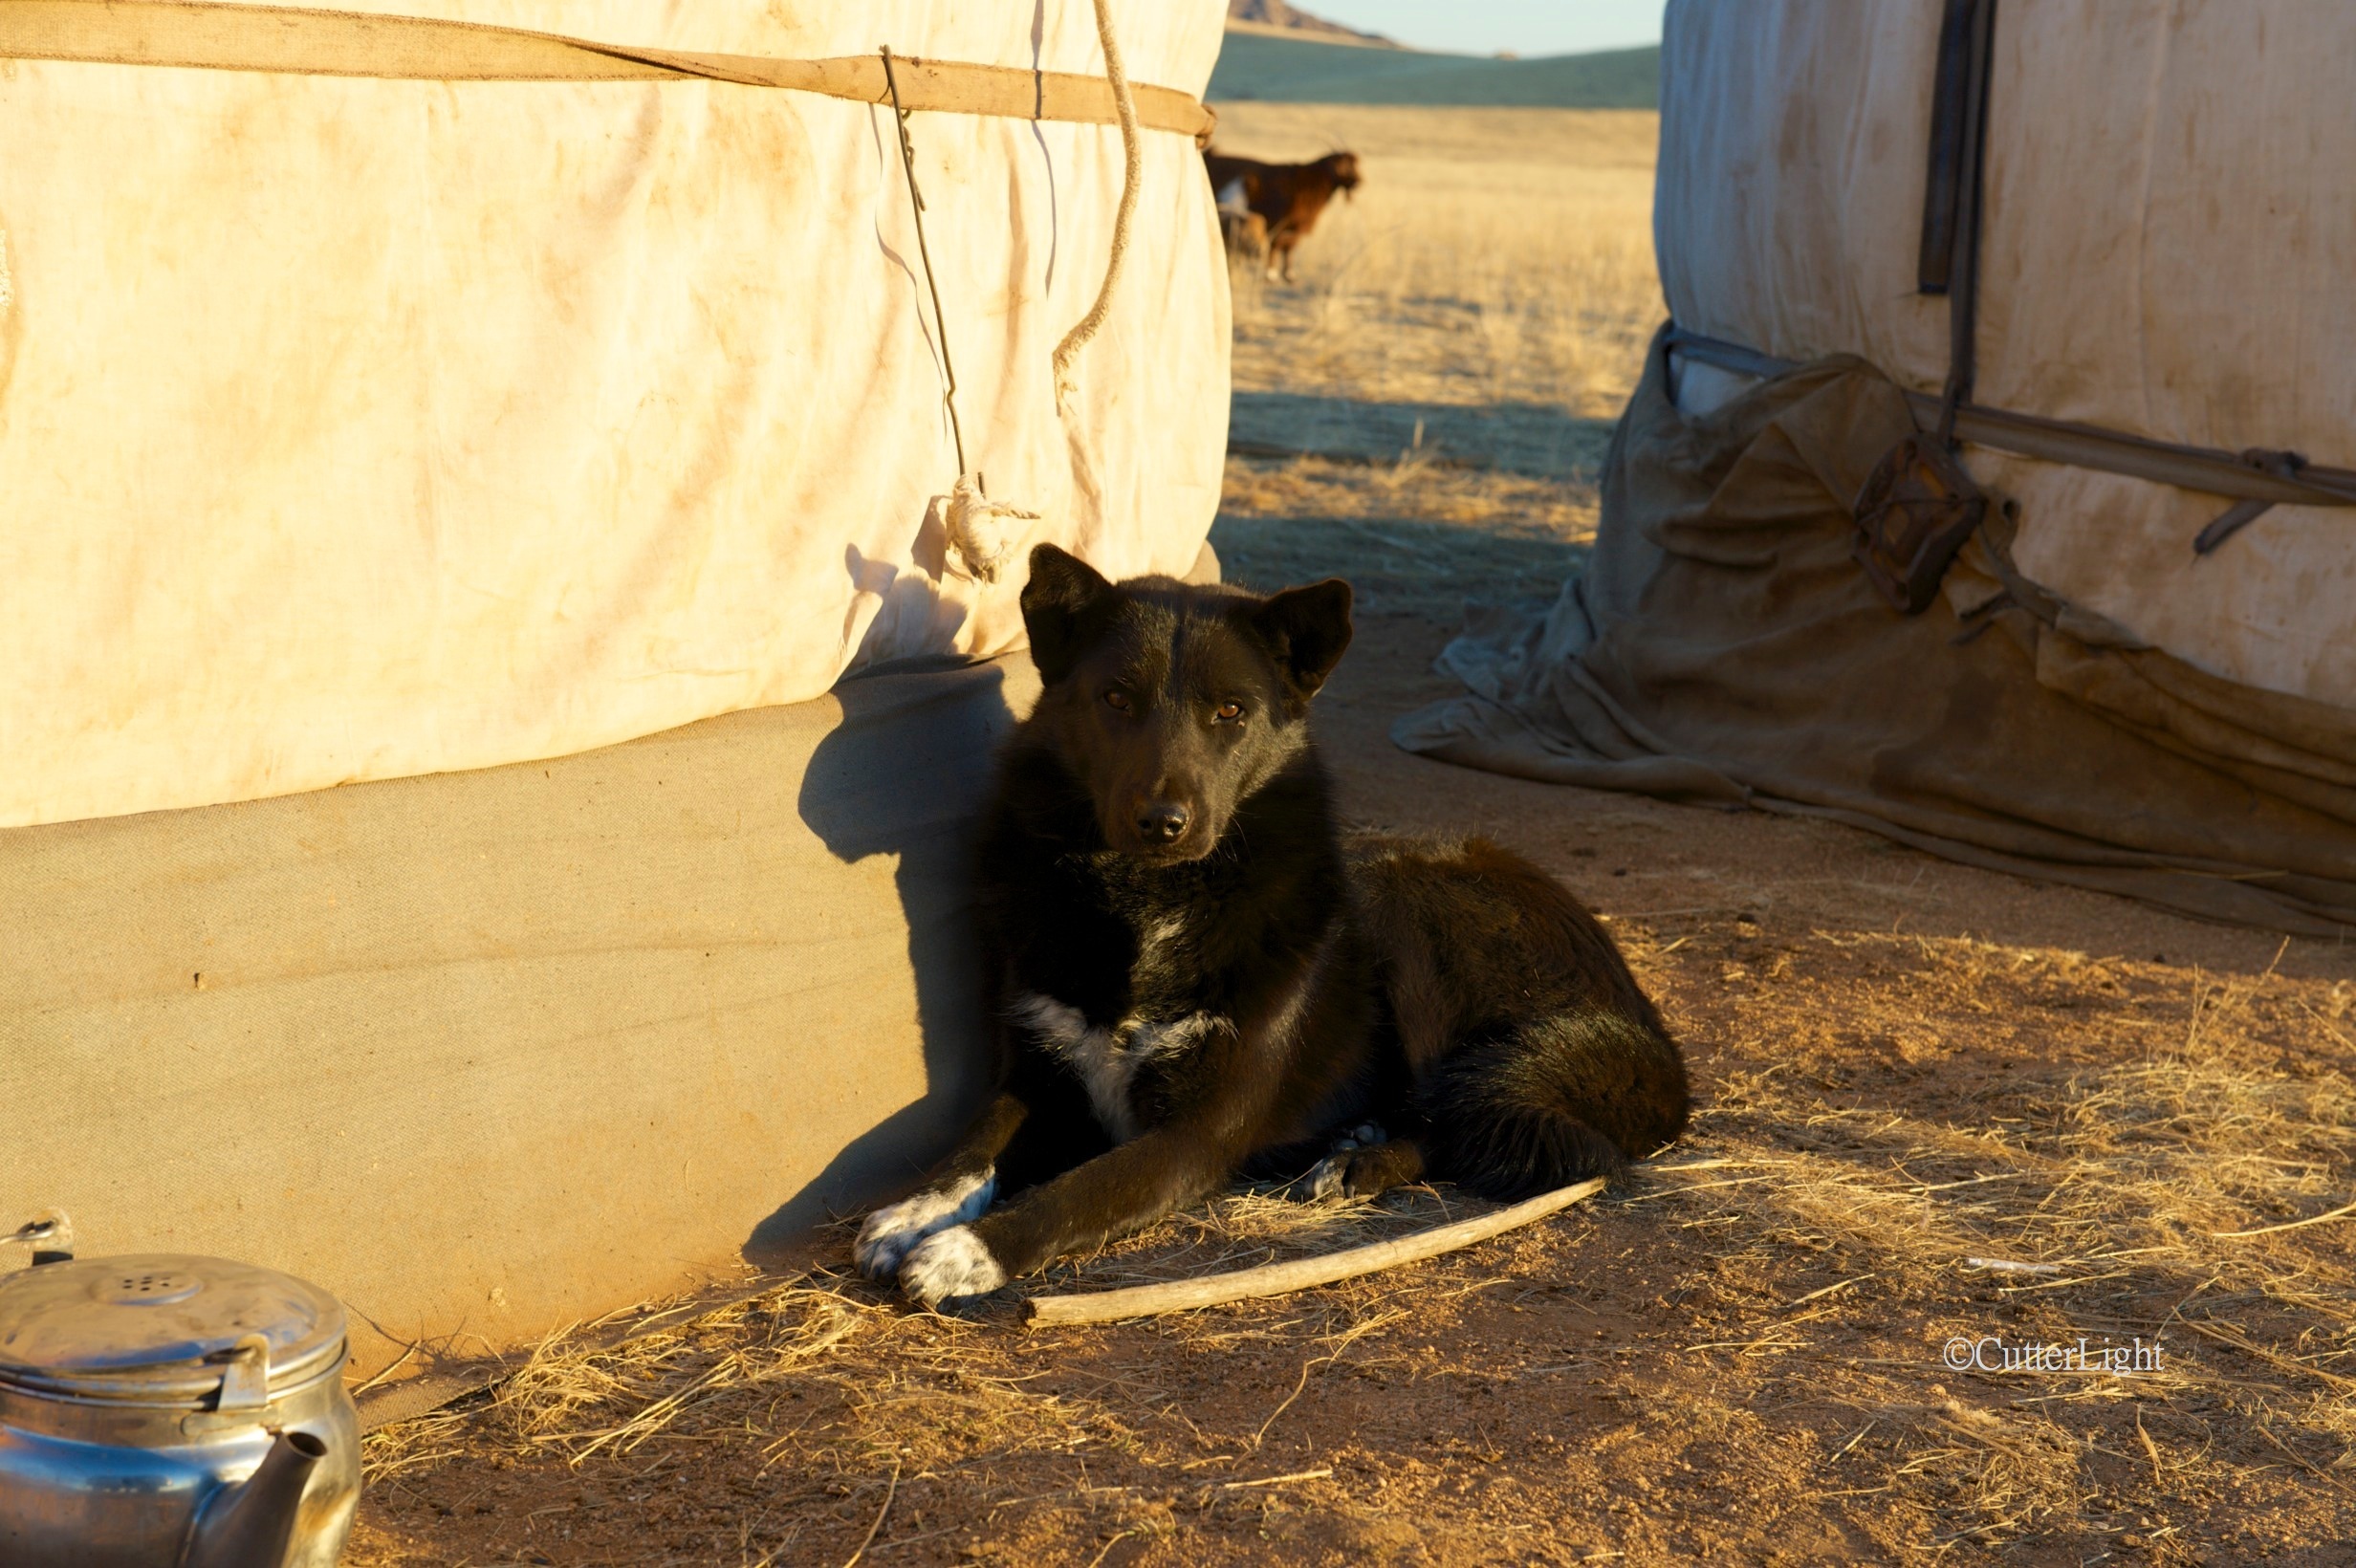
In modern times, many gers feature solar panels and batteries to power TVs and lights. A centrally-positioned steel stove, generally fueled with dry dung, serves as both a cook-stove and a heating system. Typical gers are appointed with wooden-framed beds, a small dining table, a few chairs, and perhaps a chest of drawers or two, all generally brightly colored. If you look around carefully, you’re likely to notice a rifle tucked away somewhere; wolves are still a threat to livestock in many locales, and foxes are common. There is no running water.

red motorcycle & ger n

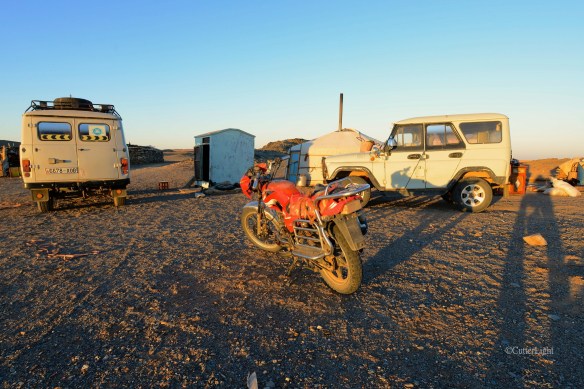
Although many herdsmen tend their animals on horseback, motorcycles have proved their usefulness as well.

OLYMPUS DIGITAL CAMERA

In the last remaining light of the day, our host prepares a young sheep for dinner. His wife used the entrails to whip up the best country sausage we’ve ever tasted. Nothing was wasted. As the eldest in our group, I was offered dibs on the heart, kidneys, lungs, blood sausage, liver and the highly prized, succulently fatty tail. Some of these were epicurean firsts. Salted and otherwise very lightly seasoned, all were quite toothsome. The cigarette, which our host hand-rolled prior to beginning this chore, never left his lips.

nimka & ger life n

Breakfast. Our driver, Nimka, relaxes with a bowl of goat milk tea in which homemade sausage from the previous night’s meal is steeping.

Jack sipping goat milk tea w sausage n

Following Nimka’s lead, I have a bowl of the same. It was absolutely delicious.

rustic bucket & Ladle n

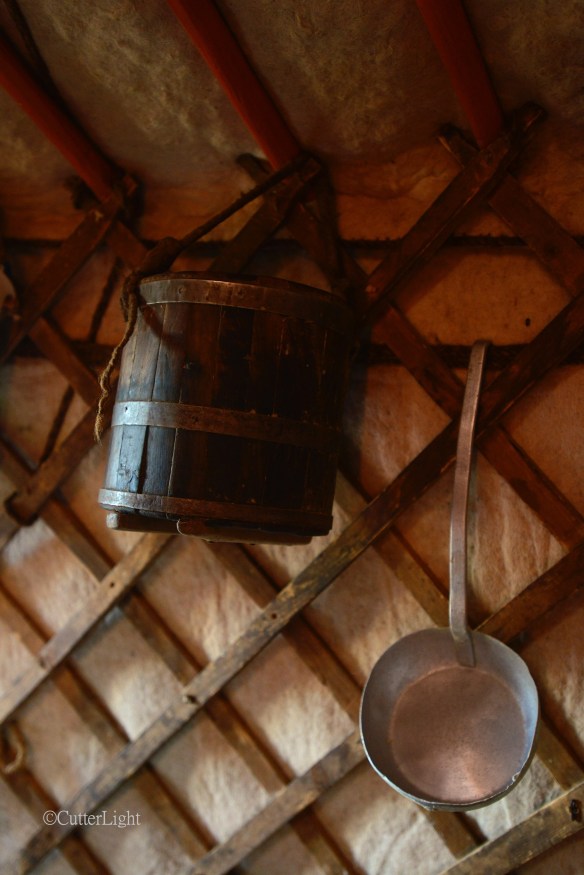
No doubt the key to the excellent flavor of everything was its freshness. Here is the bucket our hosts used for milking the goats.

photographer jack @ white cliffs n

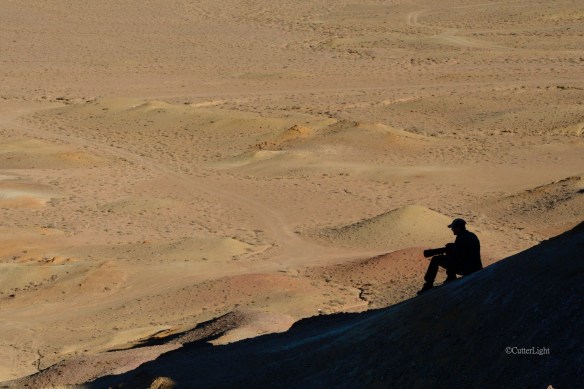
Looking out over the desert plain from a vantage point on the White Cliffs. Day by day, hour by hour, we found ourselves falling in love with this country.

Next stop: Yolin Am Canyon: Remnants of the Gobi’s last glacier. Ibex, Picas, Raptors and more…

Super Fluffy Frittata: Brunch is Served


fluffy frittata n

Bacon? Smoked salmon? Leaks? Mushrooms? Smoked cheese? Pick your ingredients and bake them into this deliciously fluffy frittata.

We love our weekends – time to cook a special breakfast or brunch and linger over it with a second cup of coffee and a good book of poetry. Adaptable to a wide range of ingredients, frittatas are among our favorite weekend breakfasts.

One key to turning out a great frittata is to use the right pan. We’ve been using Swiss Diamond nonstick cookware for years and are big fans. Sunny-side up, scrambled, or easy over, eggs slow-cooked over low heat in these pans are a revelation. And although the word frittata has its etymological roots in the Italian friggere, which means “fried,” we usually bake ours. Sautéing vegetables before they go into the egg mixture brings out their sweetness, drives off excess moisture and allows for a richer balance of flavors. And the key to a super fluffy frittata? Separate out the yolks and whip the whites into fluffy peaks, then fold them into whatever mixture of egg yolks, cheese, meat and vegetables you’ve prepared. Here’s how we made ours this morning.

Ingredients (Serves 4)

  • 8″ nonstick, oven-safe frying pan with lid. Swiss Diamond pans have heavy bottoms and non-stick cooking surfaces that are perfect for this, and they’re oven safe.
  • 2 strips thick bacon
  • 1/3 cup yellow bell pepper, chopped coarse
  • 1/3 cup onion, chopped coarse
  • 1/3 cup fresh mushrooms, chopped coarse
  • 1 clove garlic, chopped coarse
  • 1 tablespoon butter + 1 tablespoon extra virgin olive oil (for sautéing vegetables)
  • 2 tbsp white wine, sherry or mirin
  • 1 tablespoon olive (for frittata pan)
  • 1 cup shredded cheese such as smoked gouda
  • 4 eggs
  • smoked sea salt (or regular sea salt)
  • freshly ground black pepper
  • 1/2 teaspoon ground chili pepper, separated into equal portions. We used Penzeys Southwest Seasoning which is a blend of sweet ancho, oregano, cayenne pepper, cumin, chipotle pepper and cilantro.
  • Caviar (optional)

Directons

  1. Adjust oven rack to center position and preheat oven to 325 degrees F (160 degrees C)
  2. Cut bacon into small pieces. In a medium-sized pan, fry over medium heat till edges are crisp. Drain on paper towels.
  3. Wipe excess bacon grease from pan. Add butter and olive oil. Heat over medium till just sizzling. Add onions and sauté for two minutes, stirring occasionally. Add white wine, bell peppers, sea salt, black pepper and ground pepper, stirring occasionally. If necessary, turn heat up slightly to drive off excess liquid. Cook till onions turn translucent. Remove from heat and transfer to a bowl to cool slightly (so that when added to the egg yolks, they don’t cook them).
  4. Separate egg yolks and whites into two sufficiently large bowls.
  5. Use a blender or whisk attachment to whip egg whites to fluffy peaks. Set aside.
  6. To the egg yolks, add vegetables, bacon, shredded cheese, remaining ground pepper, and additional salt and black pepper to taste. Mix thoroughly.
  7. Gently fold egg whites into egg yolk mixture.
  8. Add olive oil to 8″ frying pan. Pour mixture into pan. Cover with lid and place into preheated oven. Check in 15 minutes. Expect total cooking time to be about 25 minutes.
  9. Garnish with caviar and serve hot.

We enjoyed our frittata with sautéed mushroom caps, summer squash, big mugs of coffee and Czeslaw Misosz’s poetry anthology, A Book of Luminous Things. 

Ulaanbaatar to the Singing Dunes of Khongoryn Els – Eight Days in Mongolia’s Gobi Desert: Part I

gers & horses in big country n

Roughly 75 miles (120 km) from Ulaanbaatar, grazing horses and the first ger we stayed in are dwarfed against vast grasslands rimmed in mountains. Although the mountains appear low, the grasslands themselves are over 4,000 feet above sea level. With abundant wildlife, few villages and virtually no paved highways, the Mongolian steppe is one of the world’s great high plains wildernesses.

We have no idea how our driver, Nimka, and our guide, Otgo, found the first ger we stayed in. Pitch dark except for the wash of the Milky Way in the night sky and the headlights from our van, Nimka steered from one set of indistinct dirt tracks in the grass to another. My insistence that we stop for a look at herds of gazelle coupled with our late-in-the-day start from Ulaanbaatar, Mongolia’s capital, had us arriving well after dark.

And then, suddenly, there it was. A faint glow gradually assumed the round shape of a nomadic family’s home. Nimka eased the van to a stop, introductions were made, and we soon were inside. A bowl filled to brimming with airag – fermented mare’s milk – was ladled out from a large leather bag hanging on one side of the ger’s wall and passed around.

OLYMPUS DIGITAL CAMERA

Proudly displayed on a rustic, hand-decorated wooden frame, this leather bag contains airag, the fermented mare’s milk that is the traditional welcoming offer in many gers throughout Mongolia. Slightly sour, slightly alcoholic, slightly sweet…

In addition to the airag, the couple who owned the ger prepared a large wok-shaped pot of mutton stew – hearty fare and welcome as we hadn’t eaten since noon. This was our first experience staying with a family in their ger, and initially it was a bit awkward. Our hosts spoke no English. We spoke almost no Mongolian. Would it be OK to take photos? Should we bring in a box of wine and offer it? And, uh… is there an outhouse or something?

Our guide Otgo, spoke excellent English and quickly helped us get acclimated. Upon entering a ger, one is to move clockwise. The oldest male in the party (in this case, me) is expected to sit at the “top” of the ger, directly across from the door. We’d be rolling out sleeping bags at bedtime. As for an outhouse… pick a bush, clump of tall grass or rock outcrop to duck behind, and for the “big jobs,” dig out a hole with the heel of your shoe.

OLYMPUS DIGITAL CAMERA

With a diameter of around 25 feet (7.6 meters), a typical ger has about 500 square feet (46 square meters) of living space. The ger’s centerpiece is a steel stove with a wok-like pot designed to fit perfectly. Outside temperatures at night dipped to freezing in mid-October, but a steady feed of dry manure kept the ger warm to roasting. 

OLYMPUS DIGITAL CAMERA

The stove’s chimney extends through an opening in the center of the ger. The sun hadn’t been up long when we sat down to breakfast: coffee, tea, cheese and bread and jam.

OLYMPUS DIGITAL CAMERA

After breakfast, Nimka got to work changing one of the tires on his tough, Russan-built four-wheel drive van. This was the first of four flats during our eight-day trip.

OLYMPUS DIGITAL CAMERA

Freshly-made aaruul, a type of dried milk curd, cures in the early morning sun atop the roof of the ger. Once it’s dry, aaruul can be kept almost indefinitely. This was the food that fueled Chinggis Khan and his armies as they conquered the largest area of land ever to fall under one empire. Tasting like sour milk, aaruul is an acquired taste for most non-Mongolians.

horse with beautiful mane & tail n

Legendary for their endurance, the horses of Mongolia are sturdy, tough and beautiful. 

horse brand n

There essentially are no fences in the Mongolian countryside.

mongolian dog n

Dogs such as this handsome fellow are an integral part of herders’ lives. While not abundant, wolves are still part of the Mongolian landscape. This guy was quite friendly, as were most of the dogs we encountered.

1st ger landscape w cattle n

A string of cattle makes its way along tire tracks that pass for the local road near the first ger we stayed at. Over the next few posts, we will share more of what we saw and experienced on our trip to the Gobi, including encounters with thousands of Monglian gazelle, countless birds of prey, groups of Siberian ibex, dinosaur fossils, exotic traditional Mongolian cuisine, a sojourn into the desert by camel, and even a pit viper. Stay tuned!

Brownie Blondies, Blond Brownies, Brownie Double Deckers… Hey, Brownies!

brownie blondies n

When faced with a difficult choice such as brownies or blondies, my answer is both! We love dense, chewy brownies, and lots of Dutch processed cocoa makes the brownie layer in this recipe super chocolatey. Slightly caramelizing the brown sugar gives the blondie layer a rich caramel flavor. There doesn’t seem to be a clever portmanteau to name these bits of deliciousness… How about Double Decker Blondie Brownies?

Every couple of weeks I have a bake sale in my classroom. Students save up tickets and can buy various privileges, or they can choose to spend their earnings on Barbra’s Bakery. Everyone wins, right? I get to bake and they get to enjoy freshly made items created just for them. The tasty products keep them earning tickets!

Last Friday, I asked my students for some ideas. They were smitten with the blondies I’d previously whipped up and suggested a double-decker version of blondies and brownies sandwiching a layer of chocolate frosting. I love sweets, but that sounded too sweet. However, the double-decker idea was intriguing. The key would be to somehow keep the layers separate for an appealing visual effect, like a black and tan beer.

The trick turned out to be first partially baking the brownie layer and then gently layering on the blondie dough before the final bake. The concoction was a big hit with the students and also with all the lucky adults who got to participate in the tasting.

Brownie Double Deckers

Ingredients

For the brownie

  • 1 1/4 cups dutch processed cocoa
  • 1 1/4 cups all purpose flour
  • 1 tsp salt
  • 1 1/2 cups unsalted butter, melted
  • 3 cups granulated sugar
  • 5 eggs
  • 2 tsp vanilla extract

For the blondie

  • 2/3 cup unsalted butter
  • 2 cups brown sugar
  • 2 eggs
  • 2 tsp vanilla extract
  • a little less than 2 cups all purpose flour
  • 1 tsp baking powder
  • 1 tsp salt

Directions

  1. Preheat oven to 375 degrees F (190 degrees C).
  2. Line a 9 x 13 inch baking dish with foil and generously butter. Set aside.
  3. Sift together dry brownie ingredients – flour, cocoa, and salt – in a large bowl.
  4. In a medium bowl, mix together melted butter and granulated sugar.
  5. Mix in one egg at a time until all 5 eggs are thoroughly mixed in.
  6. Stir in vanilla extract.
  7. Stir dry ingredients into wet.
  8. Pour brownie batter into baking dish and bake for 20 minutes. Brownie should be just starting to set.
  9. While brownie is baking, make blondie dough.
  10. Place butter and brown sugar in a medium pot. Stir over medium heat until mixture is just melted.
  11. Let mixture cool for a few minutes, then stir in eggs and vanilla.
  12. Stir in flour one cup at a time.
  13. Stir in baking powder and salt. Do not overmix.
  14. After the brownies have baked for 20 minutes, reduce oven temperature to 350 degrees F (175 degrees C).
  15. Carefully spoon blondie mixture on top of brownies. Gently spread blondie mixture to cover brownies. Don’t worry about making the dough perfectly even, it will spread during baking.
  16. Bake double-decker for an additional 30 minutes. A toothpick inserted in the center of the brownies will come out clean when it is done.
  17. As delicious as these smell straight out of the oven, they taste best when totally cool. We served ours with freshly brewed cups of chai tea.

Recipe adapted from Rachel Ray.

Mongolian Scones: An Airy, “No Cream” Version of a Breakfast Favorite

Mongolian Scones w egg n

“Mongolian” scones, a lighter and fluffier version of their English cousin, are quick to make and a delicious start to our day in the coldest capital in the world, Ulaanbaatar.

We are part of a foodie network in Ulaanbaatar (UB) where one of the most common questions is, “Can you get ______ ingredient here?” Although UB is a thriving city of over a million inhabitants, Mongolia is still a developing country where certain items can be difficult to come by. Heavy whipping cream is one example. When we finally tracked some down, the price tag was the equivalent of 28 US dollars for a one liter container. The cost and inconvenience associated with certain items has been fostering invention as we experiment with substitutions to our recipes.

Our “Mongolian” scones are our answer to the question, “What can I substitute for heavy cream in scones?” The answer is yogurt, which is inexpensive and readily available in Ulaanbaatar’s grocery stores. The result is a lighter, less crumbly scone.

For this version, we used a large cookie scoop, overfilled, to create mounded scones. It is typical to create scones in a disc shape and to then cut them into wedges. The mounded shape allowed a nice rise and more crunchy surface area in one perfectly portioned breakfast scone to accompany our Mongolian eggs and delicious, thick-sliced Mongolian bacon.

Mongolian scones stacked n

A large cookie scoop portioned this dough into sixteen scones. An ice cream scoop would work well for slightly larger scones.

Mongolian Scones with Cranberry and Pecans

Ingredients

  • 2 cups all-purpose flour
  • 1/4 packed brown sugar
  • 1 tbsp baking powder
  • 1/4 tsp ground nutmeg
  • 1/4 tsp salt
  • 1 tsp dried orange peel, or fresh orange zest
  • 1/4 cup unsalted butter, chilled and diced
  • 3/4 cup dried cranberries
  • 1/2 cup chopped pecans
  • 1 tbsp granulated sugar
  • 2 small eggs (Mongolian stores typically carry smaller eggs than are sold in America)
  • 3/4 cup plain yogurt

Direction

  1. Preheat oven to 375 degrees F (190 degrees C).
  2. Cover baking sheet with parchment paper and set aside.
  3. Stir flour, brown sugar, baking powder, nutmeg, salt and orange peel together in a large bowl.
  4. Stir cranberries and pecans into the flour mixture.
  5. In a small bowl, whisk granulated sugar and eggs together. Mix in yogurt.
  6. Pour wet ingredients into dry.
  7. Stir ingredients until fully incorporated with a rubber spatula. Dough will be very sticky.
  8. Scoop out generous cookie scoops (2 tbsp or more) of dough and drop mounds on baking sheet.
  9. Bake for 15 minutes, until scones are golden brown.
  10. Enjoy fresh out of the oven with a fried egg and a slice of bacon.