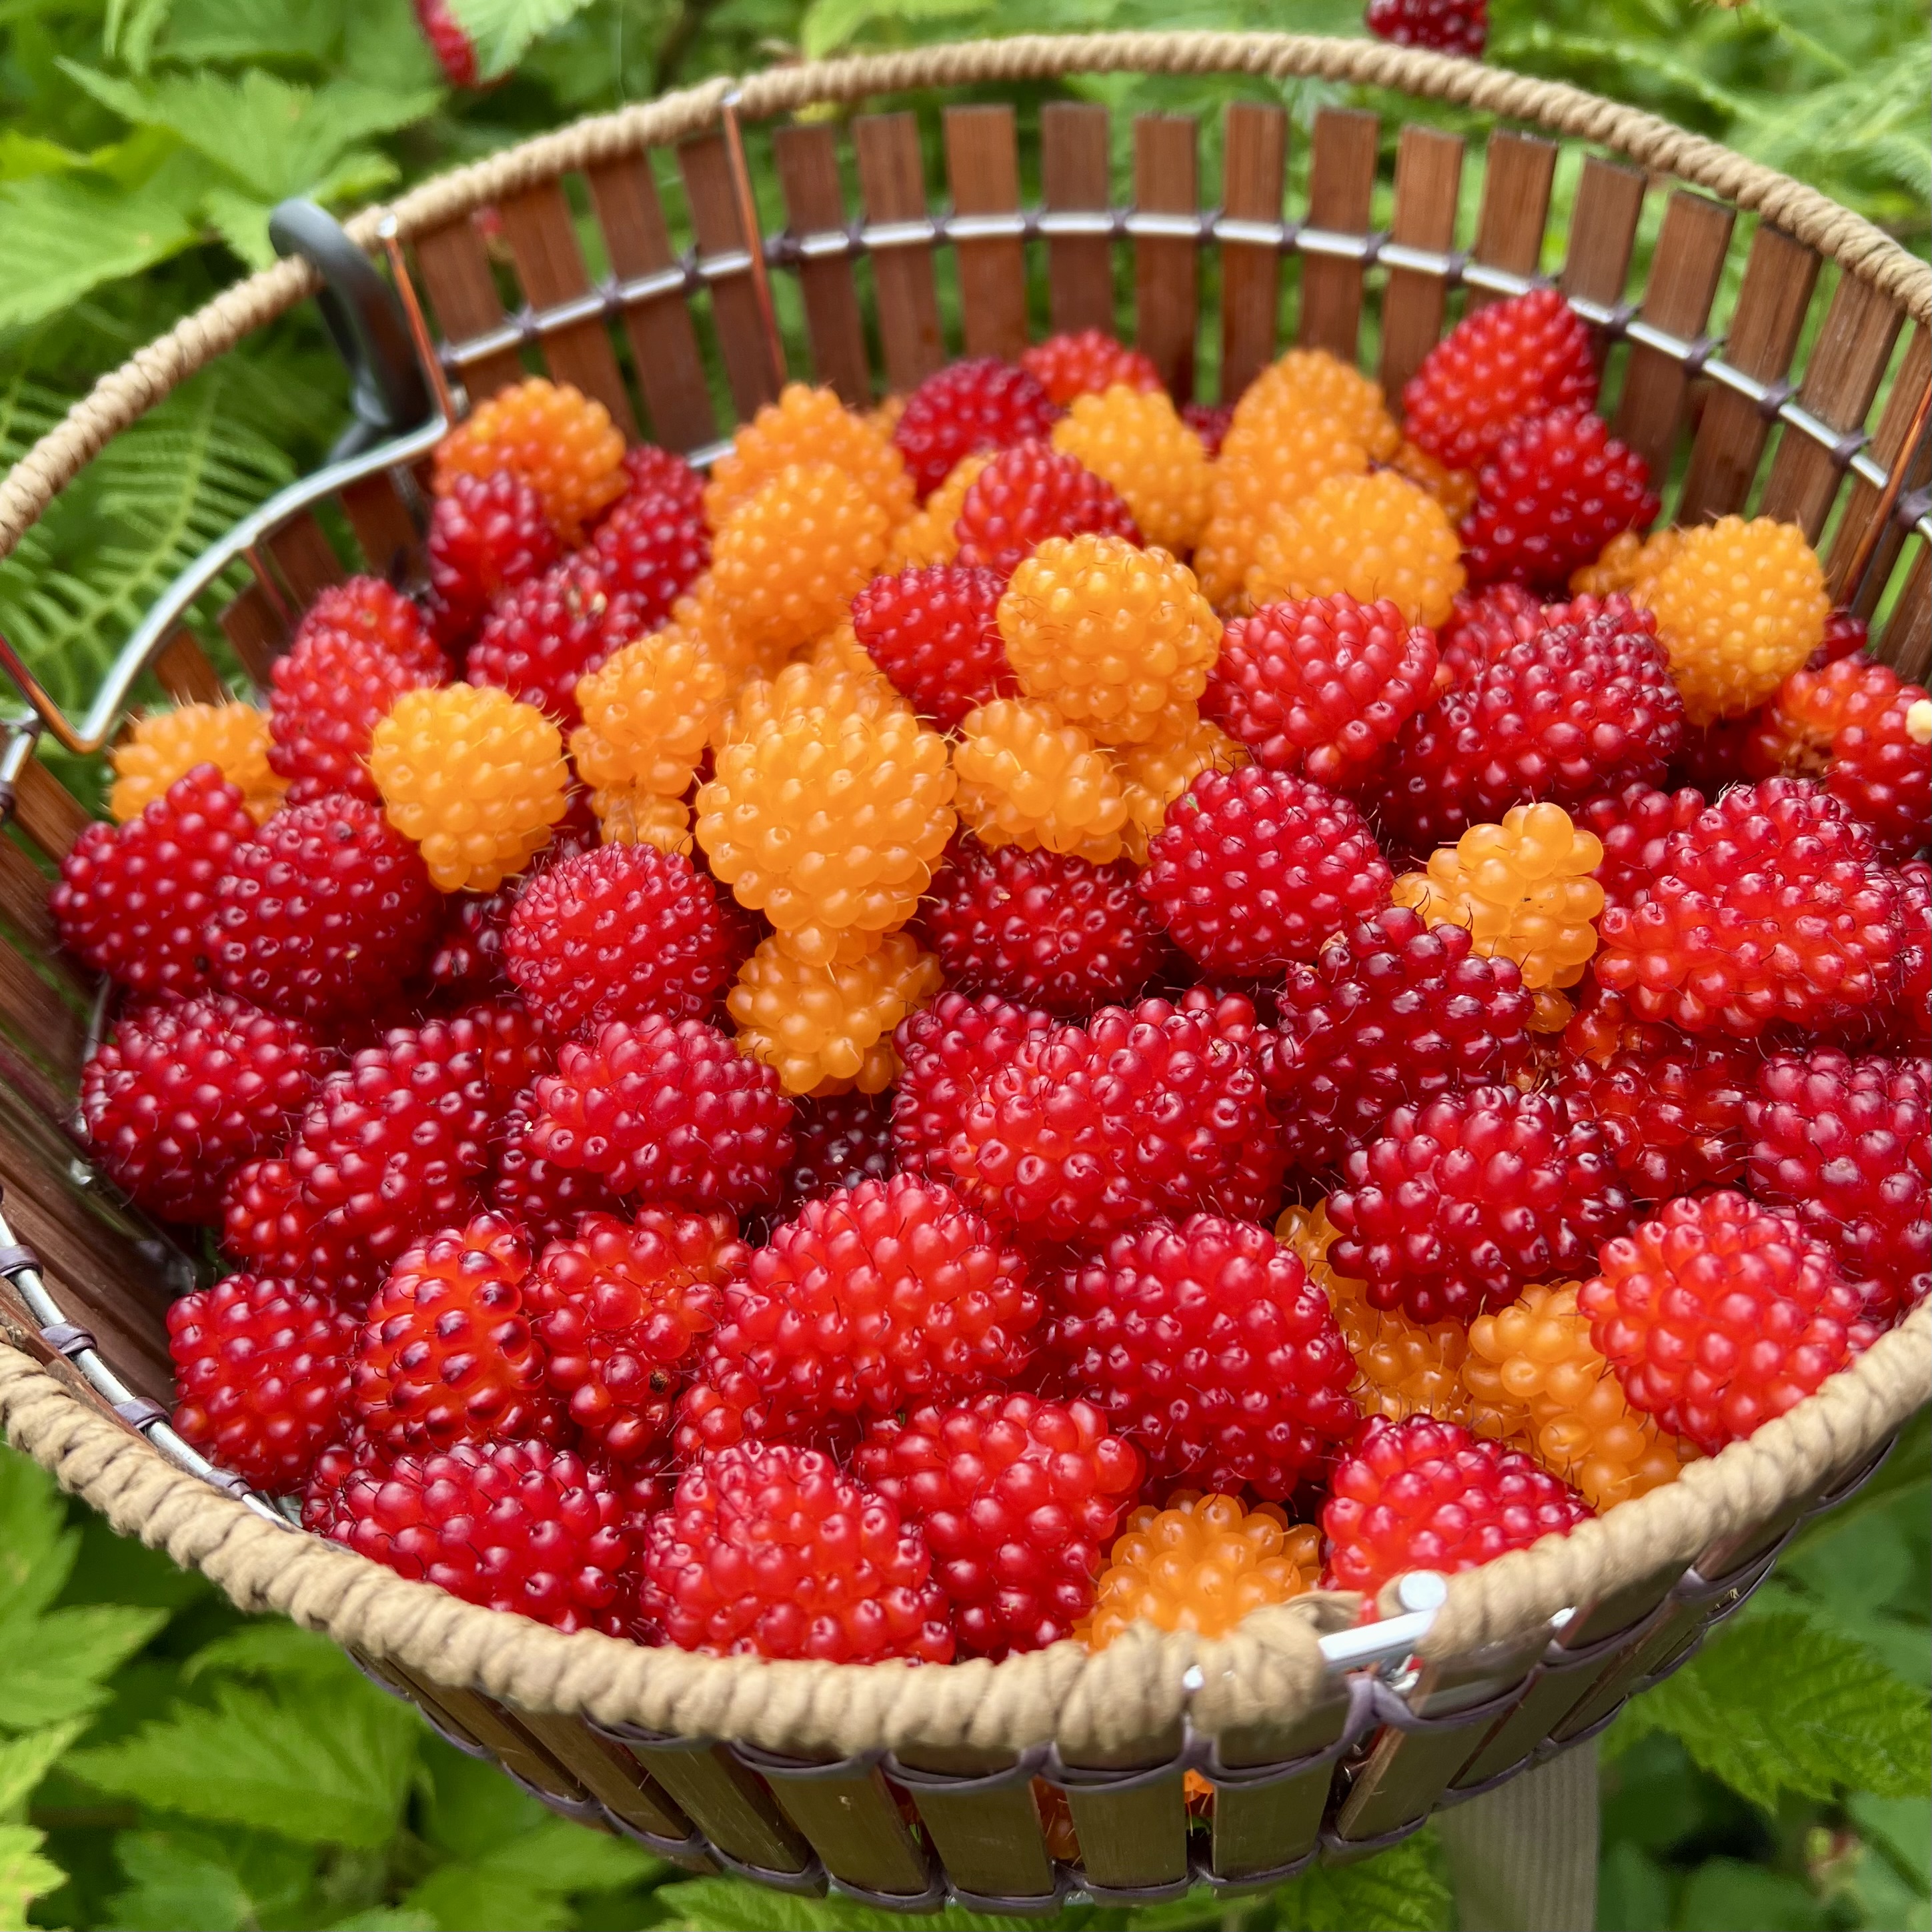
Dessert for Any Season – Frozen Salmonberries

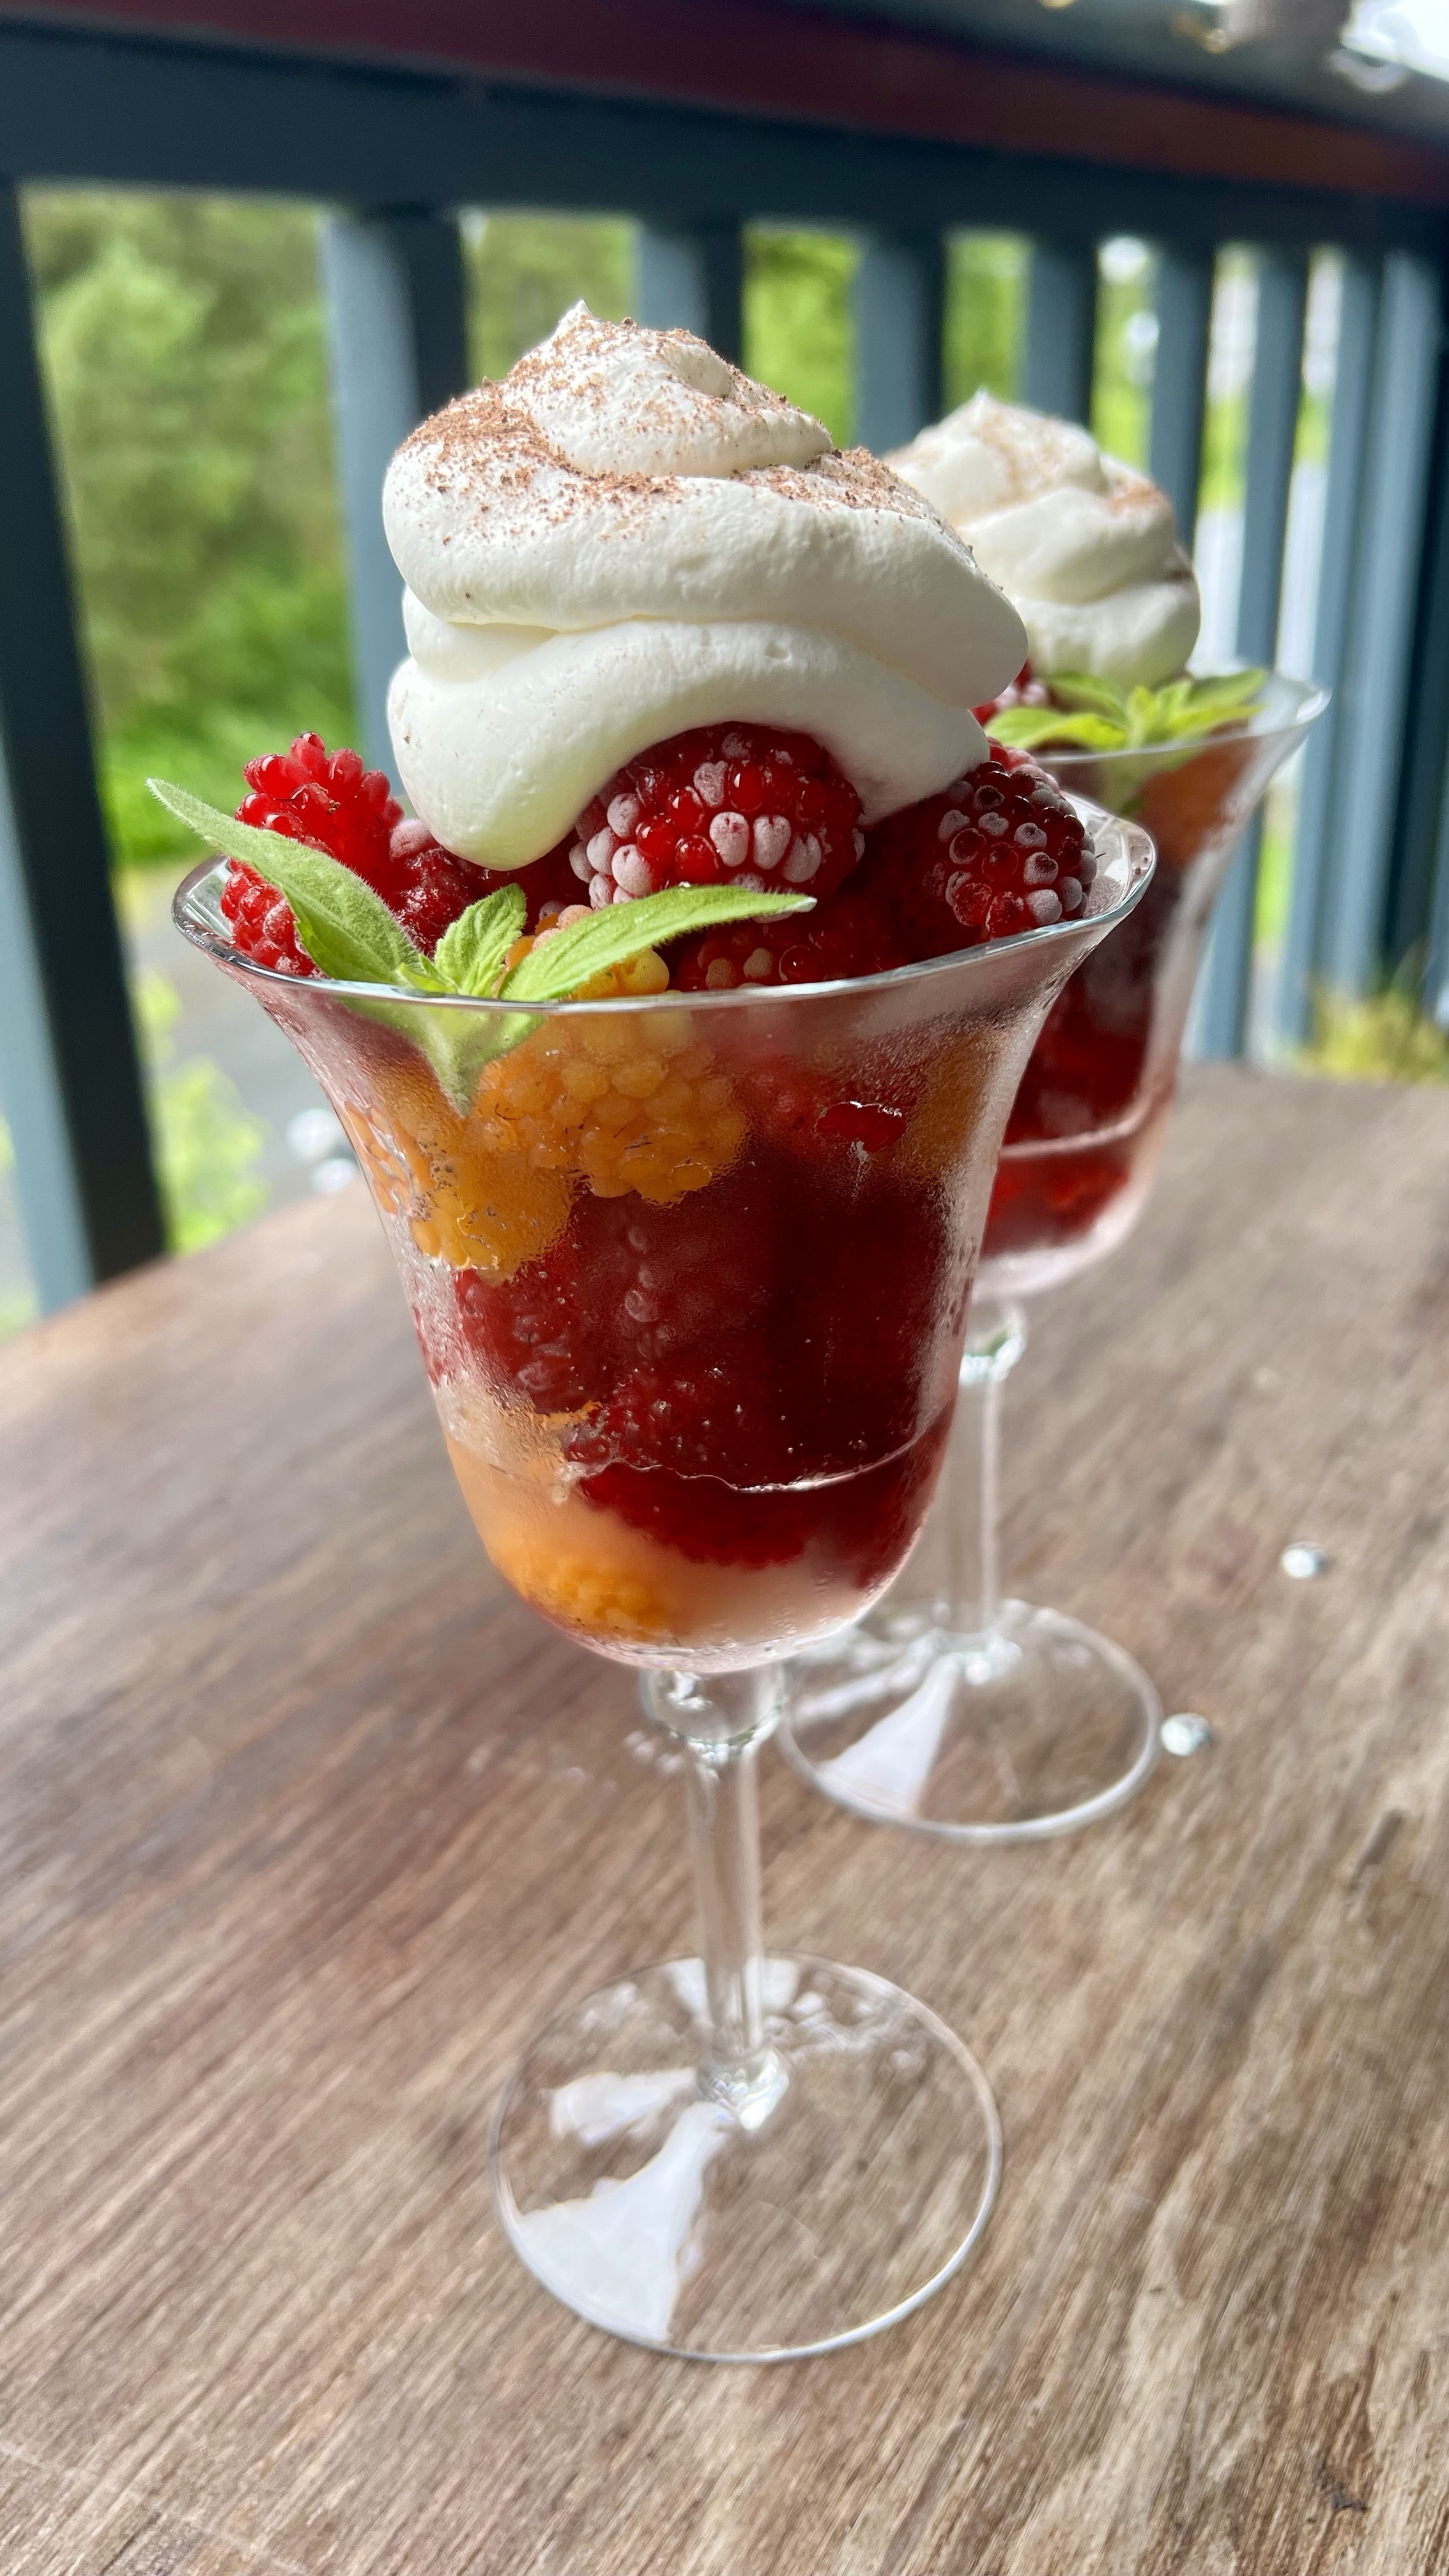
This is a favorite Jack creation. The elegance of the delectable array of salmonberries brings a wow-factor to meals all throughout the year.


#salmonberries #foragingalaska #dessert #frozenberries #chefdonachy #alaskacooking #food #foodphotography #eatingwelloffthebeatenpath #alaskafood #alaskabush #fooddestination #moose&malbec

Waiting, waiting, waiting… or Double Chocolate S’more Cookies

The flower petals have dropped. Tiny, hard berries are taunting me with their promise. It will be quite some time before they will be ripe and ready for picking. Normally, when I can’t stand the wait for this summer’s fruit, I usually have last year’s berries stashed in my freezer to bake with while I oh-so-patiently wait for this year’s fruit to mature. With the move this year, we gifted our stash to friends at the Lake. So, I wait.

We all know I’m not really going to wait to play in the kitchen. 😉 Now that I have not one, but two grocery stores nearby, I don’t have to keep a stocked pantry like we did at the Lake. But pantry items do drive inspiration. We mailed quite a bit of dry goods that we hadn’t used up. Boxes of pasta, pounds of rice and cans of pumpkin puree didn’t trigger any ideas. There was this bag of mini-marshmallows tucked away. I had purchased them for hot cocoa. What about hot cocoa cookies? Rocky road bars? Marshmallow thumbprints? None of these ideas appealed to me. Then I thought s’mores! I am a s’mores fan, but only in small quantities. I enjoy the summertime fireside treat in ones or twos. What if the essence of chocolate, graham crackers, and toasted marshmallows were featured in cookies instead of their original over-sweet form? The result? A chewy cookie with bursts of chocolate, crunches of graham cracker, and bites of gooey marshmallow. 

The recipe was a successful distraction until the real show starts. (C’mon berries!) Between now and then, I will keep myself occupied with processing spruce tip syrup. And maybe figuring out a way to bake with pasta, rice, and pumpkin? Or not.

Double Chocolate S’more Cookies – small batch

Ingredients

  • 1 cup all-purpose flour
  • 3 tbsp dutch-processed cocoa powder
  • 1/4 cup graham cracker crumbs
  • 1 tsp baking soda
  • Pinch salt
  • 1 stick unsalted butter, room temperature
  • 1/2 cup packed brown sugar
  • 1/4 cup granulated sugar
  • 1 tsp pure vanilla extract
  • 1 large egg
  • 1/2 cup semi-sweet chocolate chips 
  • 1/2 cup mini marshmallows (and a few extra for finishing)
  • 1 sheet graham cracker, roughly chopped

Directions

  1. Preheat oven to 375°F.
  2. Line a baking sheet with parchment paper.
  3. In a bowl, whisk together flour, cocoa powder, graham cracker crumbs, baking soda, and salt. Set aside.
  4. Using electric mixer, beat butter and sugars until light and fluffy. 
  5. Mix in vanilla. 
  6. Mix in egg. 
  7. Slowly add in flour mixture. Mix until incorporated.
  8. Fold in chocolate chips, marshmallows and chopped graham cracker.
  9. I used a 1 1/2 tbsp cookie scoop to spoon out 12 portions of dough to place on prepared cookie sheet.
  10. Bake cookies for 10 minutes. 
  11. Quickly remove baking sheet from oven and add a few more marshmallows on each cookie. Place back in the oven for 2 additional minutes.
  12. When done, cookies will be firm on the edges and soft in the middle. Allow to cool for about 5 minutes on sheet before removing to cool completely on a wire rack.
  13. Repeat steps 9 – 11 with remaining dough.

The Promise of Flowers and a Plot Twist

Light and creamy vanilla cheesecake drizzled flooded with wineberry syrup. Just building the anticipation for berry-picking season.

For most, I imagine spring flowers sow hope for warmer weather and start dreams of sunny summer adventures. The flowers of this particular spring were different for me.

For the last two summers, Jack and I have spent countless hours studying and identifying all the flowers we could find in the surrounding areas of Chignik Lake. It was a beautiful education. The flowering season began with chocolate lilies and ended with tiny white yarrow with lilac-colored geranium sustaining throughout. Along the growing months from May through October, a rainbow of blossoming gems ebbed and flowed. Although I loved seeing and identifying all the blooms, the flowers that gave me the most joy were the ones that I knew would transform into fruit. As we hiked through the months, I would monitor the progress of my miniature crops as they turned from tiny bud to flower to hard little fruit, and then to the final stage of delectable berry treasures that were ready to harvest. 

Whenever Jack and I visit different places, we regularly look for flowers. It is interesting to us to see which flowers we have learned about at the Lake which also grow in other places. As it turns out, we are now in a new place. Yes, a surprising plot twist.

We would not have guessed we were going to make a move…even as late as this recent February. A principal job was opening at my school and I was just about finished with my credentialing coursework. We loved our community and our home. We have close friends and a deep connection to Chignik Lake. But life happens. Way leads to way. Turned out the way that opened was a door we had been keeping an eye on for a long time. 

If you’ve been following our story for a long while (like thirteen years long), you’ll remember that our whole Alaska adventure began with a summer-long trip. It was one of those once-in-a-lifetime trips that people do. A hobby at that time had been running destination half marathons. Jack found an interesting destination that would align this hobby with a blend of other interests like road-tripping, camping, boating, and of course visiting Alaska. With just six days to make it up the Al-Can, launching our trusty C-Dory in Valdez, and boating over to the destination Salmon Jam Half Marathon in Cordova Alaska, we would start a journey that we had no idea would change our life. On the way home from that Epic Alaska Summer Adventure, we decided that Alaska would become home. In the way life sometimes circles and spirals, we find ourselves back in Cordova. This time, it is not a travel destination, but a new home.

A common thread in all of our our Alaskan homes has been the opportunity to forage for interesting edible plants. How fortunate are we to live in a big beautiful state that offers so many wild foods…among my all-time favorites – berries! We discovered many flowers on our initial hikes on the trails in the Chugach National Forest. I’m happy to report blueberry, low bush and high bush cranberry, salmonberry, currant, nagoonberry and lots of strawberry flowers. Now, in this new place, I get to follow my familiar summertime tradition of monitoring all of these flowers’ progress from bud to fruit. With any luck, we’ll find lots to harvest later this summer.

Jack suggested I share my process for making wineberry (aka nagoonberry) syrup. Most people find the process to be tedious. It’s pretty simple, actually. After picking the precious gems from your secret spot, take them home and xxxxxxx xxxxxxx xxxxxxxxxx xxxxxxx xxxxxxx xxxxx xxxxxxxx xxxxxx. For each cup of processed berries add 1/4 cup of water. Simmer the berries until soft. Smash the mixture with a potato masher. Separate the juice from the pulp by suspending a cheesecloth over a . Every time I try to publish this, it gets redacted. I guess the FBI doesn’t want it shared – (Fruit and Berry Interagency). 😉

For this creation, I used a no-bake cheesecake recipe adapted from a blog I follow, Sally’s Baking Addiction. I modified it to make a 4-inch version, which is perfect for two hungry writers, or can be served to four for a nice little sweet bite at the end of a meal. I like the no-bake version to complement fruit syrups because it is light and airy but still retains the tanginess of the flavor you’d expect from a cheesecake.

4-inch No Bake Cheesecake

Ingredients

Crust

  • 1/2 cup graham cracker crumbs
  • 1.5 tbsp brown sugar
  • 3 tbsp unsalted butter, melted

Cheesecake

  • 1/4 cup + 1 tbsp heavy whipping cream
  • 6 oz. cream cheese, room temp
  • 2 tbsp granulated sugar
  • 1/2 tbsp powdered sugar
  • 1 tbsp sour cream
  • 1/2 tsp lemon juice
  • 1/2 tsp pure vanilla extract

Directions

  1. To make the crust, stir together crust ingredients. Pour into a 4-inch springform pan. Use the back of a spoon to pack the crust tightly against the bottom and sides of the pan. Place pan in freezer while the filling is being made.
  2. Using an electric mixer fitted with a whisk attachment, whisk heavy cream until stiff peaks are formed. Scrape whipped cream into a separate bowl.
  3. Using the original bowl you used for whipping cream, beat cream cheese and granulated sugar together until smooth.
  4. Add powdered sugar, sour cream, lemon and vanilla. Beat again until mixture is smooth.
  5. Gently fold whipped cream into cream cheese mixture.
  6. Spread cheesecake filling into prepared crust.
  7. Cover with plastic wrap and let cheesecake chill and set. I left it in the fridge for about 18 hours.
  8. When ready to serve, loosen the chilled cheesecake by running a knife around the perimeter of the pan before springing it open. I prefer to serve the cheesecake without any syrup and let my guests adorn their own. It definitely adds to the anticipation and the wow factor.

Breakfast Panna Cotta – Turning Ordinary Into Extraordinary

A breakfast fit for a celebration – now where’s my champagne?

As it happens sometimes, we received a random box of ingredients, this time thanks to the Farmers to Families program. The box included a variety of items that someone defined as household staples. Included were roasted chicken quarters, hot dogs, potatoes, apples, milk, and yogurt. Jack quickly turned out a delicious soup with the chicken, potatoes, and other veggies we had in our fridge. My challenge was the yogurt. I usually make our own yogurt, so we already had more than enough for our regular menu. 

Living in a small village, we often gift extra food amongst our neighbors. For example, if someone gets an extra order of canned pumpkin or tahini (real examples), we share. When that happens, the resulting cooking challenge always strikes me as our own episode of Chopped. We don’t like to let anything go to waste. So the puzzle of the yogurt needed to be attended to right away.

I had just finished re-reading The Tutka Bay Lodge Cookbook and was in the middle of another pastry chef cookbook when the box arrived. I already had Panna Cotta on the brain. I wondered if Panna Cotta could be made with yogurt instead of cream. Panna Cotta is a wonderful gelatinized dessert that can become a delicious canvas for a variety of fruit. The name is derived from Italian and means “cooked cream.” In my experiment, it would be cooked yogurt. So, yes, this is not a true Panna Cotta. My version has the same vanilla bean canvas and the same structure. That’s where the similarity ended.

I tested different dishes and glasses for serving the Panna Cotta including wine glasses and ramekins. I think they all worked beautifully. My breakfast Panna Cotta definitely tasted like a rich vanilla yogurt. But it made for a gorgeous and delicious breakfast presentation – layers of crunchy granola, chewy dried fruit, zippy tart berries, and a drizzle of last summer’s wineberry syrup. The same visual layers can be accomplished in any clear glass if ramekins are not available. With just a bit of chilling time and not too much effort, you too can turn ordinary into extraordinary.

Breakfast Panna Cotta

Ingredients

  • 1 1/2 tsp powdered gelatin (1 package)
  • 3 cups plain yogurt
  • 1/2 cup milk
  • 1 tsp vanilla paste
  • 2/3 cup granulated sugar
  • granola
  • dried fruit
  • frozen or fresh berries
  • berry syrup

Directions

  1. Place gelatin in a small bowl. Pour a couple of tablespoons of the milk into the gelatin and mix. Let set for about 5 minutes.
  2. In a medium mixing bowl, whisk together the remainder of the milk, yogurt, vanilla and sugar.
  3. Place about 1/2 cup of the yogurt mixture into a small pot. Warm mixture while stirring constantly.
  4. Add gelatin mixture to pot.
  5. Whisk mixture until gelatin is dissolved. Let cool for 5 minutes.
  6. Pour gelatin mixture back into the original yogurt mixture in the medium bowl. Mix thoroughly.
  7. Divide the panna cotta into 6 ramekins or glasses. 
  8. Cover with plastic wrap and chill overnight in the refrigerator.
  9. To serve, layer on granola, dried fruit, berries and berry syrup of your choosing.
  10. Alternatively, run a knife around the edge of the ramekin, dip the ramekin in hot water and unmold onto a serving plate prepared with a bottom layer of granola. Top panna cotta decoratively with remaining ingredients.

Dungeness Crab Cakes

Sweet Dungeness Crab – all you’ll want is a spritz of lemon.

For as long as I can remember I’ve ordered crab cakes in restaurants. They are, I think, the most difficult seafood fritter, patty or cake to get right. The best I’ve had were served at McCormick’s in Portland some years ago. They came with hollandaise sauce and I used to have them for breakfast with a cup of black coffee or a glass of Pinot Gris, after which I’d walk up the street to Powell’s to look at books or to write.

Thanks to the Dungeness in our freezer, I’ve been experimenting. Crab is difficult because it’s more important to get the seasonings right than with other seafood and then you’ve got to cook the cakes just so. If the cakes are very good, lemon is all you’ll want.

Dungeness Crab Cakes

Ingredients

  • ½ pound cooked Dungeness or Blue Crab meat. If it seems too wet, it is. Squeeze the excess moisture out with paper towel or through a strainer. Take extra care to make sure there is no shell.
  • seasonings: Crab is very sweet. It needs something. I use a blend of dried powdered peppers such as Aleppo, Ancho, Cayenne, Chipotle. The idea is that you want to balance the sweetness of the crab with something that pulls your pallet in a different direction. This actually serves to underscore the sweetness of crab, its signature trait. In addition to the above types of spice, smoked paprika, nutmeg and tarragon can also be added. Dill or fennel? I wouldn’t. I seldom spice anything exactly the same twice. The key here is the spicy pepper.
  • soy sauce: as desired
  • 1 or 2 shallots, diced fine, sautéed till soft in olive oil, removed from pan and set aside to cool
  • ¼ cup red bell pepper, diced, sautéed in olive oil, removed from pan and set aside to cool
  • 1 egg, beaten with a little soy sauce whisked in. Provided you don’t add too much spice to the cakes themselves, you can also add a couple shakes of Cholula here.
  • panko: approximately the same amount in volume as the crab meat. Start by mixing in about half the volume. That won’t feel like enough, so add more till it seems about right – not to wet, not too dry.
  • Olive oil and Butter

Directions:

  1. In a large bowl, mix together the crab, seasonings, shallots, bell peppers, soy sauce and egg. Hands work best for this. Then mix in the panko. Shape the cakes into patties. Keep them fairly small so that they are easy to turn and they stay together.
  2. In a frying pan on medium heat, add enough olive oil and butter in equal parts to shallow-fry the cakes. When the oil is hot, set the timer for 4 minutes and add the cakes. Cover the pan and cook for 1 minute, then lower the temperature to a little below medium. It is important to check the cakes periodically to make sure the bottom side is browning the way you want.
  3. At 4 minutes, gently turn the cakes over and continue cooking uncovered. Occasionally spoon some of the oil-butter mixture on top of the cakes.

These are the best crab cakes I’ve ever had. All I ever want with them is a spritz of lemon. When Barbra and I pick a whole crab and dip it in herbed lemon-butter, we almost always go for a buttery, oaked Chardonnay. But these cakes want something lighter and more fruit forward, so Pinot Gris or similar pairs well.

Don’t Discard the Discard Sourdough Crackers

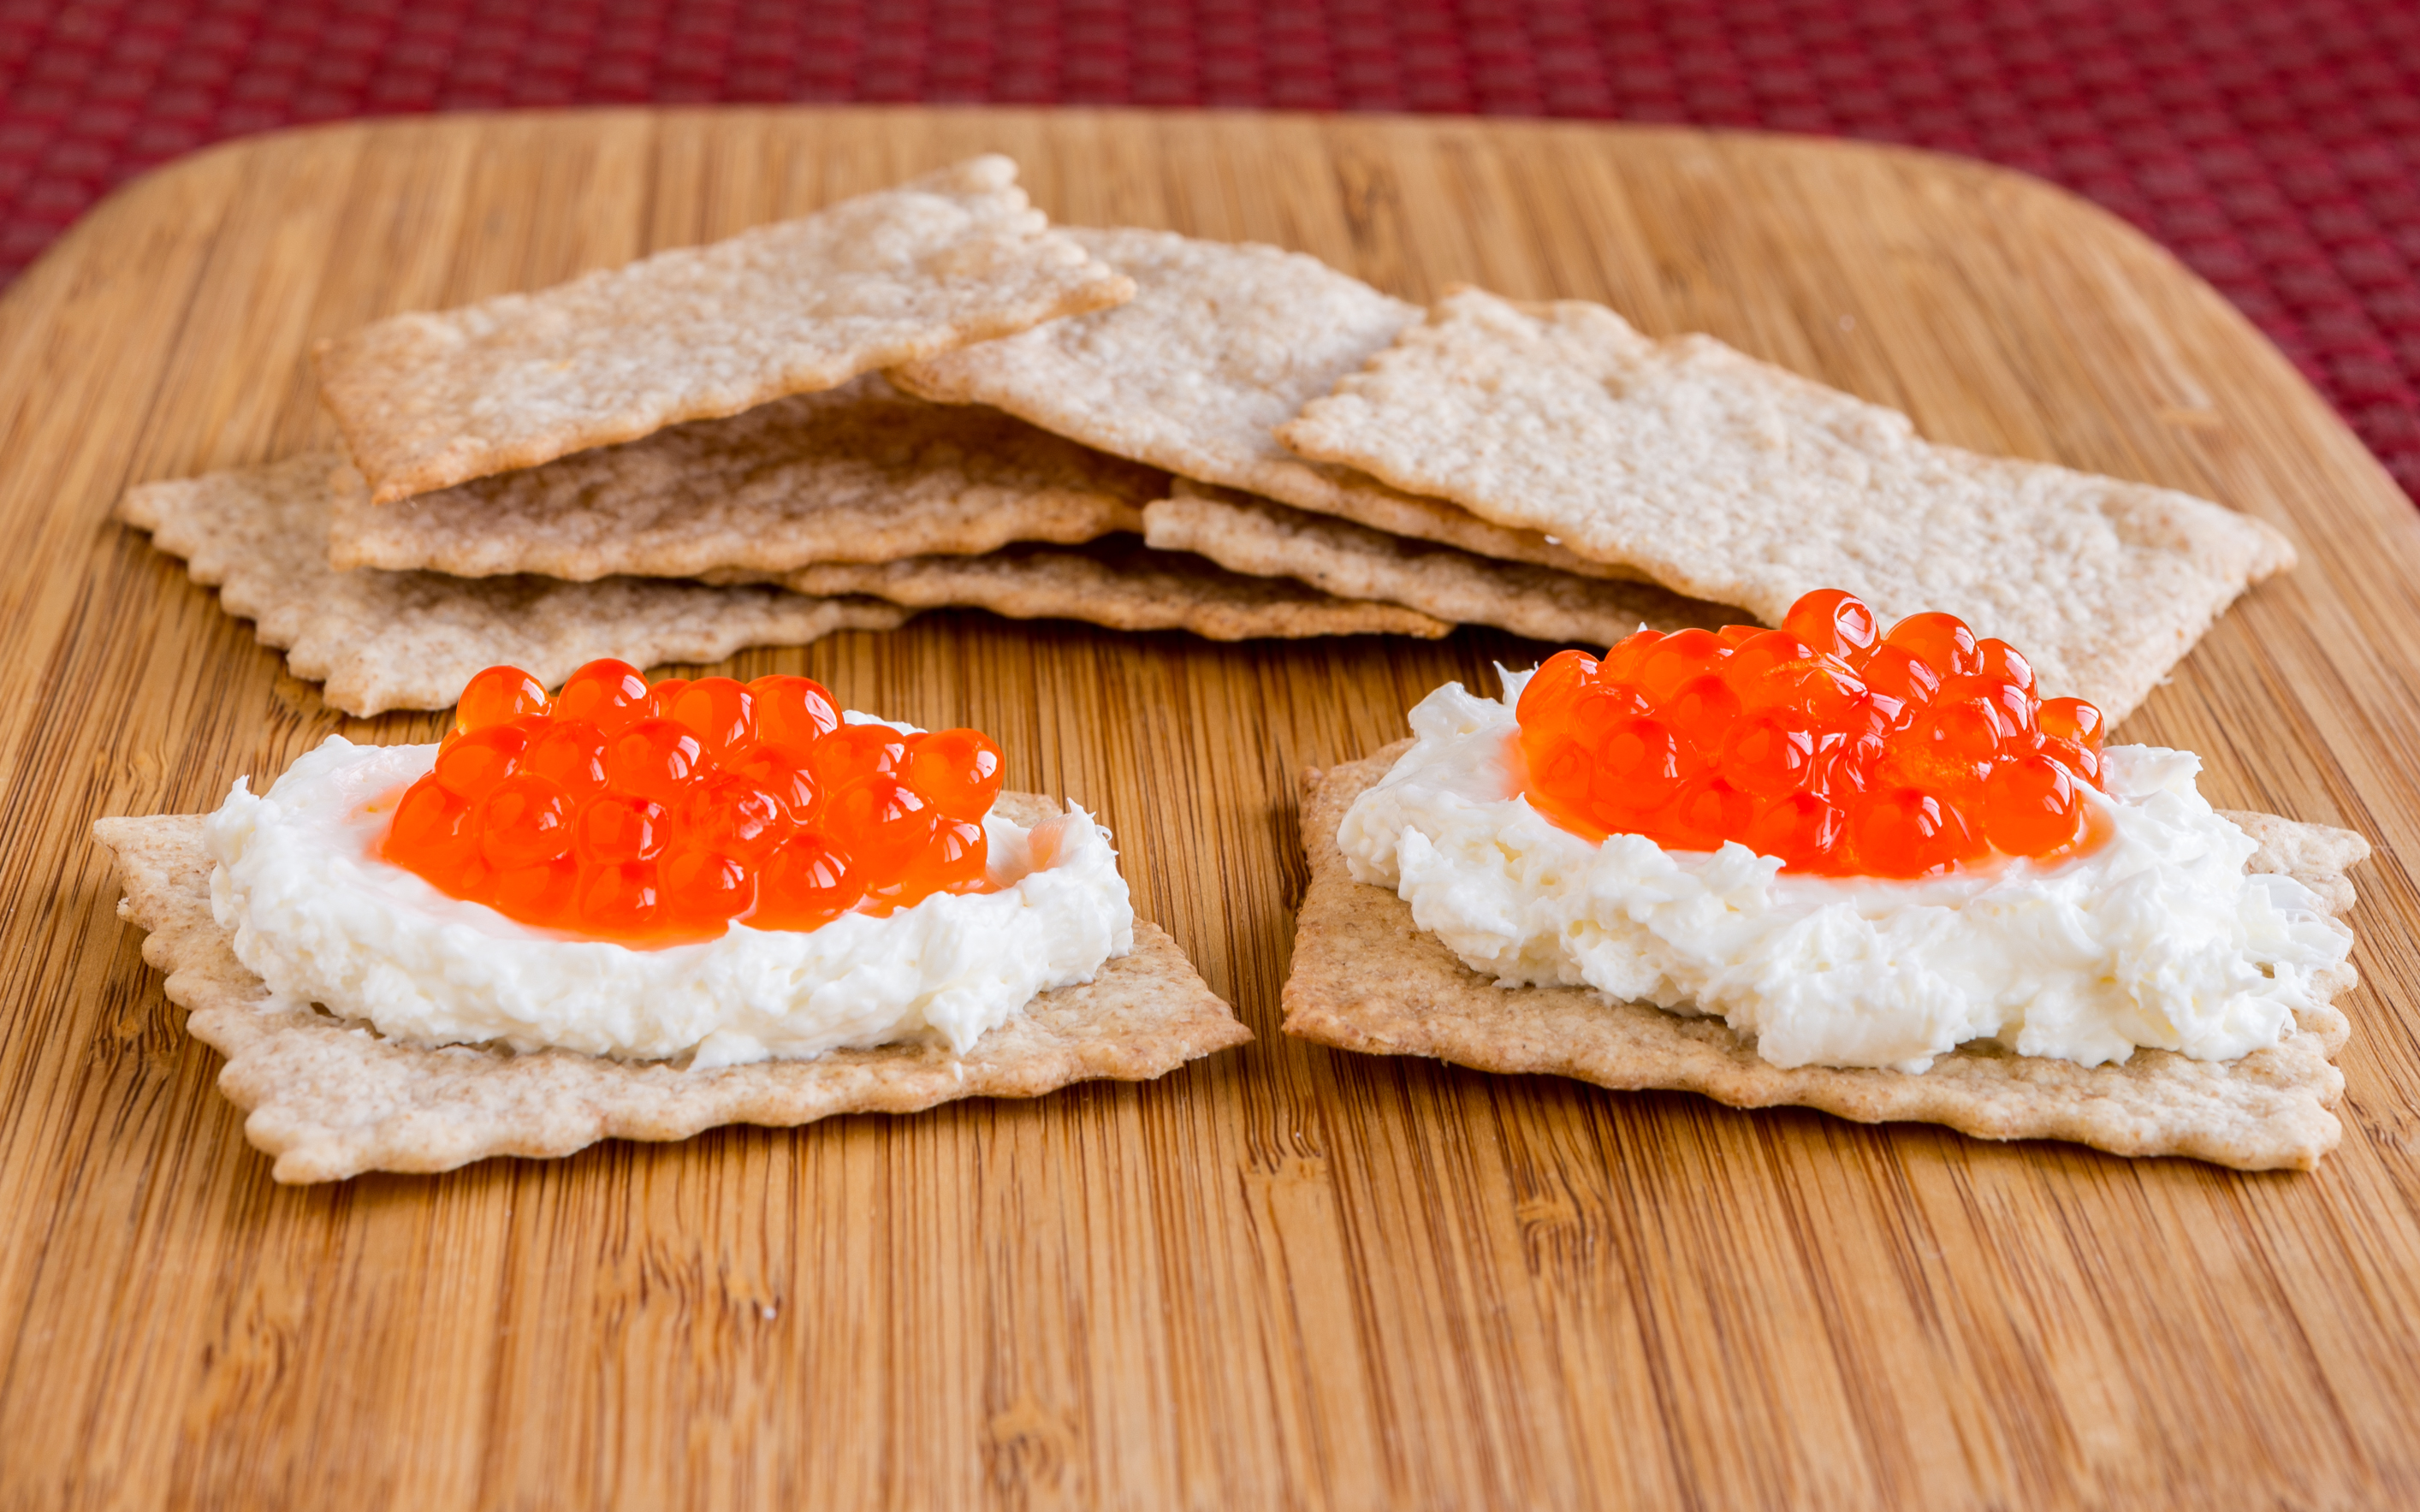
Delightfully crispy and packed with flavor: cheese-like tang, garlic, onion, with a hit of salt. You’ll never discard your discard starter again.

One day, I noticed a friend had posted on a community webpage that she had extra sourdough starter if anyone wanted it. It made me wonder about extra starter – a problem I don’t seem to encounter. Due to a combination of where we live and our predisposition to avoid waste, we generally don’t have “extra.” Of course, shortly after coming to the conclusion that we’d never have extra starter, I had a week where I skipped making sourdough loaves and wound up with “extra starter.” One of my recipe books recommended discarding the extra. What?! I decided to taste it, to see if the flavor would inspire a recipe. Tasting raw starter was a bad idea. Yuck! 

After a bit of research, I decided to tinker with a cracker recipe I found on the King Arthur Flour website. My first batch came out wonderfully flavored, but too soft. The problem was the thickness. My rolling pin and I could not get the dough thin enough. The solution came to me after rolling lasagna noodles – the pasta machine! If you’ve only ever thought of your pasta machine as a noodle machine, think again. Besides wonderfully flavored and textured linguini and spaghetti, I’ve also cranked out perfect bowties, ravioli and even wonton wrappers. This seemingly single-purposed machine helps perfectly roll sourdough to make satisfyingly crunchy crackers.

If you don’t have a pasta machine, I highly recommend the Atlas model we have. It is a heavy beast, but it is a kitchen tool that’s made the cut every time we’ve had to pack up and move. If you don’t want to add another item to your cupboards, a rolling pin will still work with this recipe. Be patient and aim to roll a thickness of about 1/16”.

The finished crackers have a tangy cheese-like flavor from the sourdough starter. This in combination with a mixture of onion and garlic and a hit of grey sea salt make these crackers very addicting. Serve with the complementary topping of your choice. Or enjoy their flavor unadorned, as I usually do.

Don’t Discard the Discard Sourdough Crackers

Ingredients

  • 1 cup whole wheat flour
  • 1/2 tsp sea salt
  • 1 tsp granulated shallots (onion powder would work, too)
  • 1 tsp granulated garlic
  • 1 cup sourdough starter, unfed
  • 4 tbsp unsalted butter, melted
  • olive oil for brushing
  • coarse salt for sprinkling on top (I like grey sea salt)

Directions

  1. Mix first 6 ingredients to form a smooth dough.
  2. Tightly cover in plastic and refrigerate for at least 30 minutes. I often refrigerate for several days.
  3. Preheat oven to 350 degrees F.
  4. Cover a baking sheet with parchment paper or reusable liner.
  5. Cut off 1/4th of refrigerated dough and roll until it’s about 1/16” thick. I roll it like it is pasta on the pasta machine down to the 5th setting.
  6. Placed rolled dough on prepared baking sheet.
  7. Using a knife, or pastry roller, cut dough into cracker shapes. There is no need to move the crackers apart.
  8. Brush dough with olive oil.
  9. Sprinkle with coarse sea salt.
  10. Bake for 9 minutes.
  11. Crackers will be lightly browned when done.
  12. Let cool on wire rack. Store cooled crackers in an airtight container at room temperature.
  13. Repeat with remaining dough.

Lingonberry Flaugnarde Pour Deux

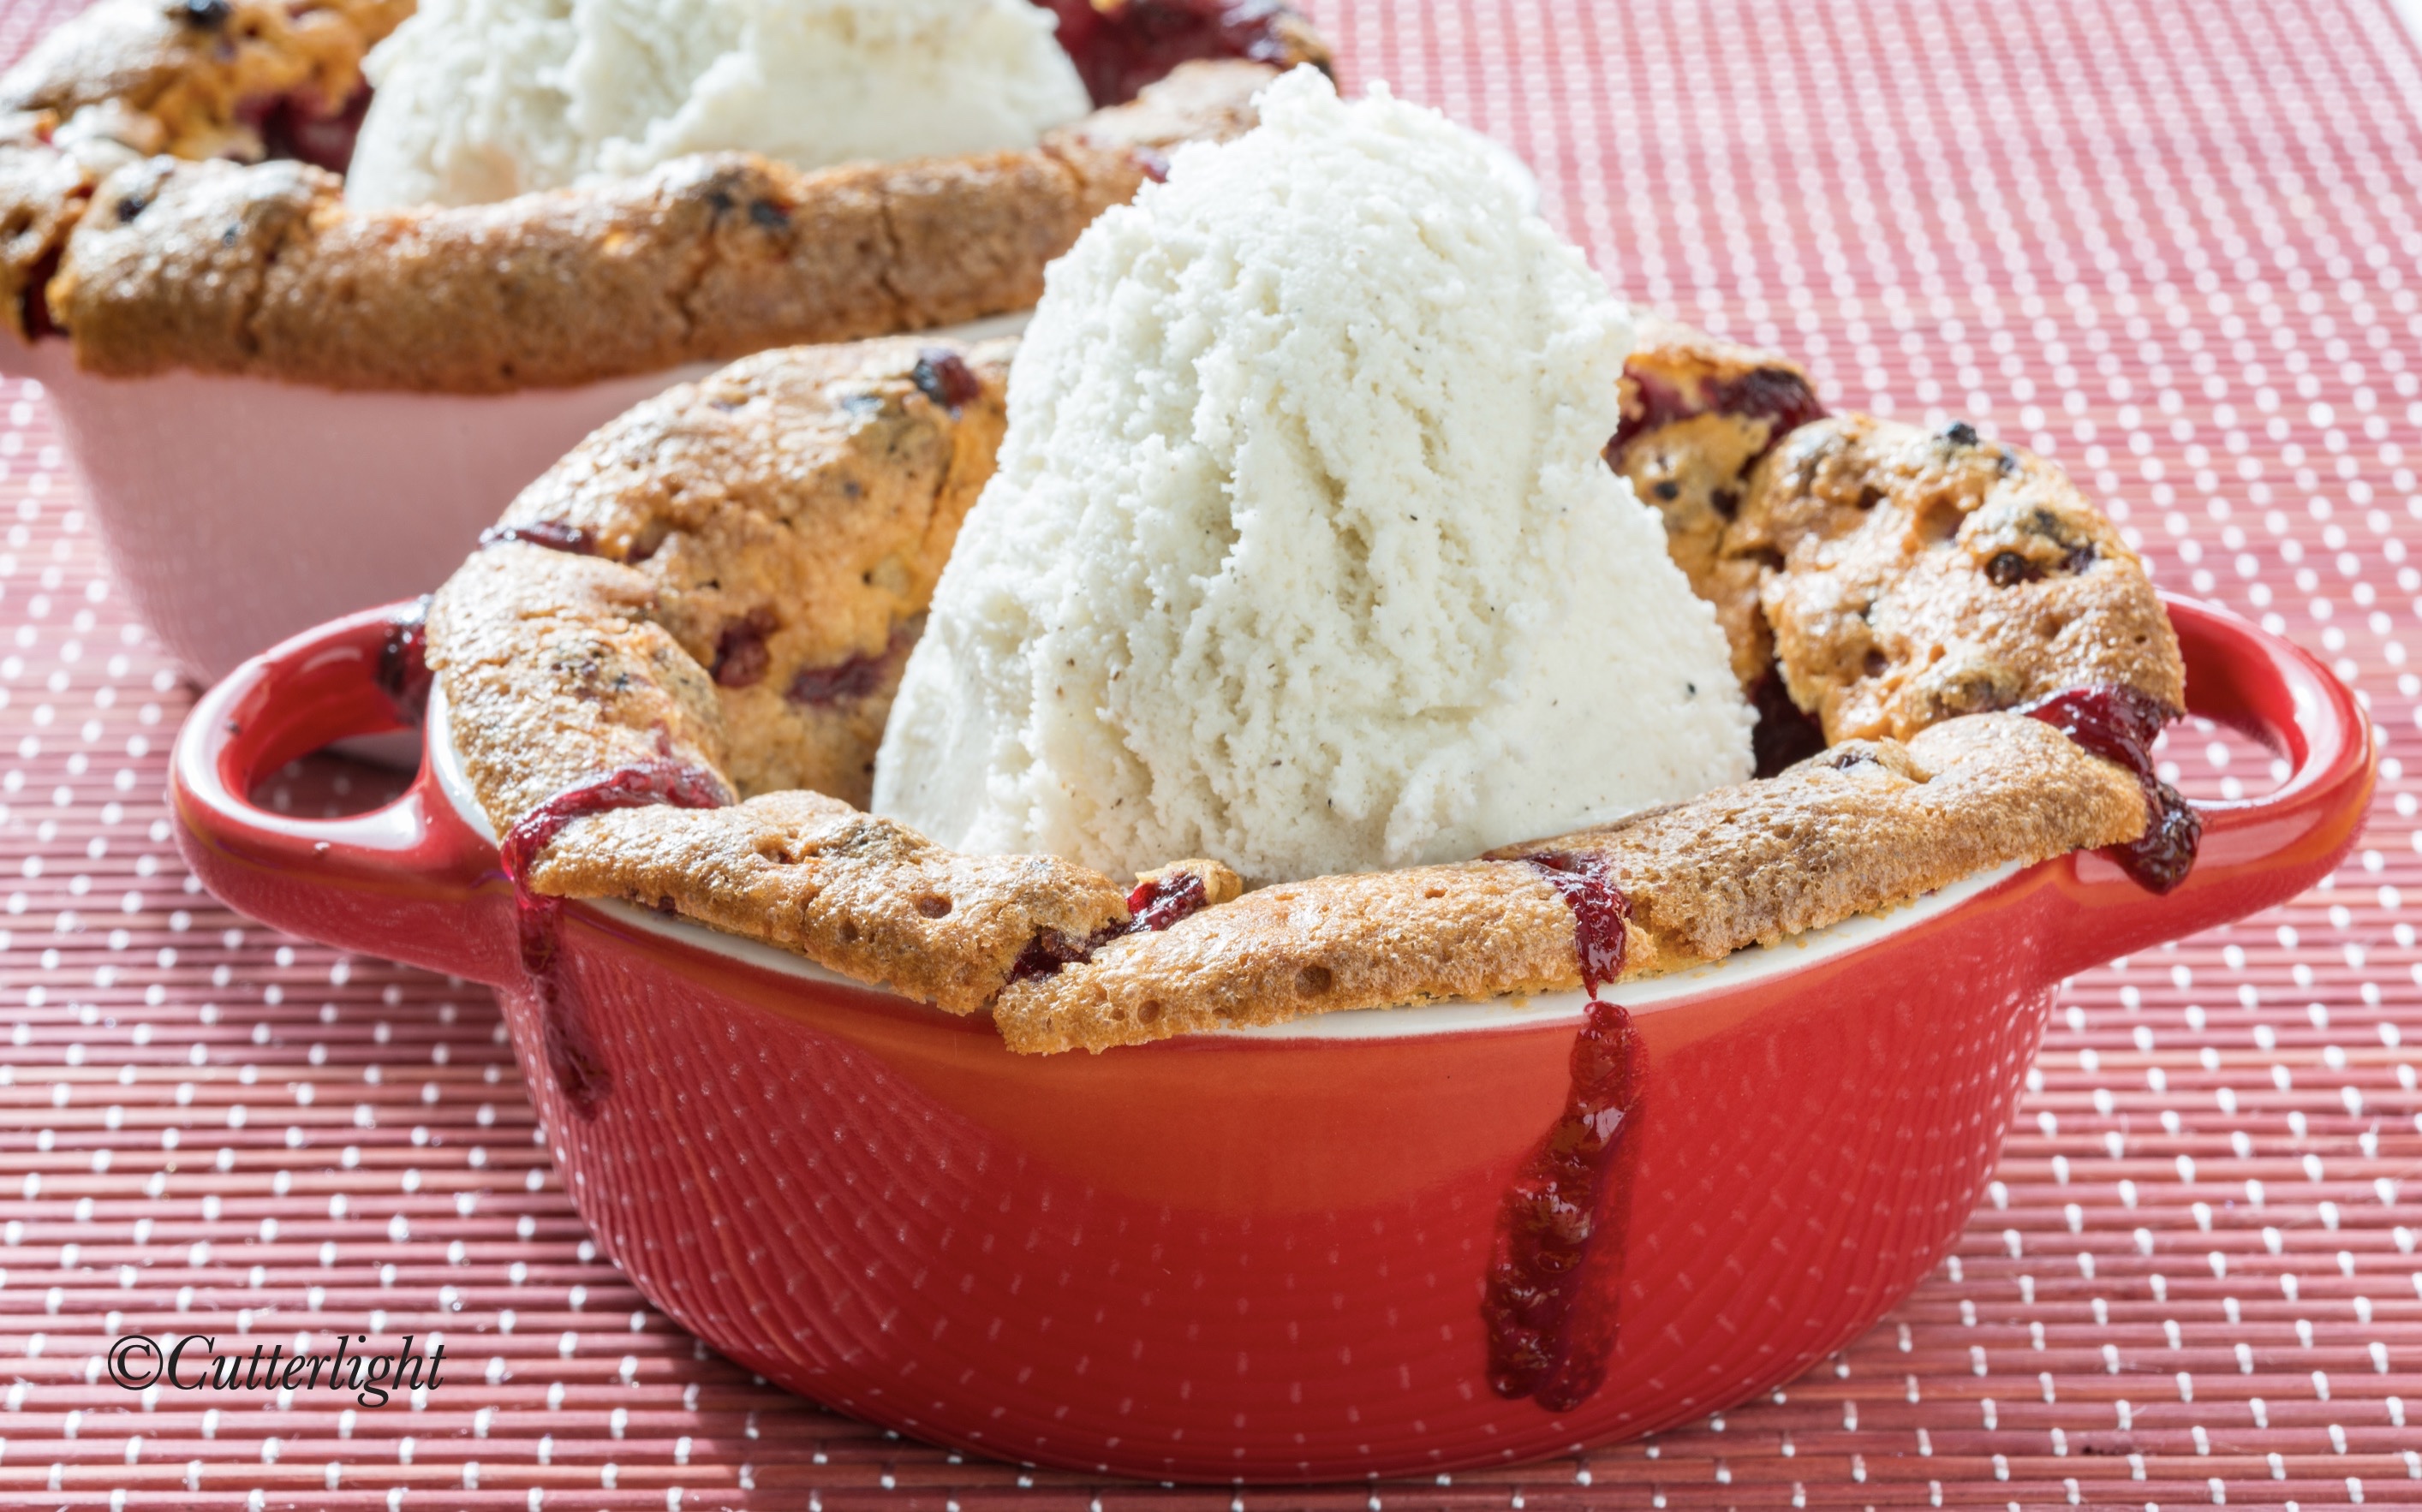
Flaugnarde is a lovely French name for a baked dessert which has fruit baked into a batter. The flaugnarde process creates a lightly crisped crust and a thick custard-like middle. Topped with ice cream, you’ll have a grand slam last course to any meal.

Lingonberries, known around here as low bush cranberries, are the last berry we forage for before we tuck in for winter. Collectors of these sour, flavorful gems are advised to wait until after the first frost for the best berries. We’ve learned that as long as the berries are fully red, the freezer also seems to do the same trick of enhancing their subtle sweetness.

Last year we found a killer spot for lingonberries across the lake. Looking back on the calendar where we kept noteworthy events, I noted that our several gallons of lingonberries in the freezer were collected in only two picking sessions. Now that’s a great spot!

Lingonberries can be used for cranberry recipes and vice versa. We’ve made lingonberry relish to go with roast turkey or moose, lingonberry breads to accompany poached egg breakfasts, and lingonberry juice for a hot spiced drink to warm up with on cold winter nights.

One of the tastiest recipes I’ve made with lingonberries is a version of Cranberry Chess Pie. It’s creamy filling packs a cranberry-orange, sweet-sour flavor punch inside a beautiful flaky pastry dough crust. This is the recipe I was channeling when I came up with a crustless version, which was supposed to be a little lighter on the calories. I can’t say I was successful with the calorie reduction. But I can say, it was incredibly delicious. I told Jack that I wished I could record his mmmming and ooohhing while he was eating this dessert. That would have been worth a thousand words.

Although this dessert is perfectly delicious on its own, I highly recommend serving it while it’s still warm with a scoop of vanilla bean ice cream. The dish will come out of the oven with a beautifully browned dome top. While it’s cooling, the flaugnarde will fall, creating a hollow perfectly shaped for a scoop of ice cream.

Lingonberry Flaugnarde

Ingredients

  • 1/2 cup + 2 tbsp granulated sugar
  • 1/4 cup unsalted butter, melted
  • Pinch salt
  • 1 extra large egg or 2 small eggs
  • 2 tbsp flour
  • 1 1/2 tbsp Greek yogurt
  • 1 tsp almond extract
  • 1 1/2 cups lingonberries

Directions

  1. Grease two 8 oz ramekins. Set aside.
  2. Heat oven to 375 degrees F (190C).
  3. In the bowl of a stand mixer, add sugar, butter, and salt. Mix together.
  4. Mix in eggs.
  5. Mix in flour.
  6. Mix in yogurt and almond extract.
  7. Mix well.
  8. Stir in lingonberries.
  9. Divide mixture into the prepared ramekins.
  10. Bake until top is golden brown and filling is firm, about 50 minutes.
  11. Cool ramekins on wire rack.
  12. Top warm flaugnarde with scoops of vanilla bean ice cream. Devour immediately.

Salmonberry Sour Cream Crumble Cake for Four (Or two. Or one.)

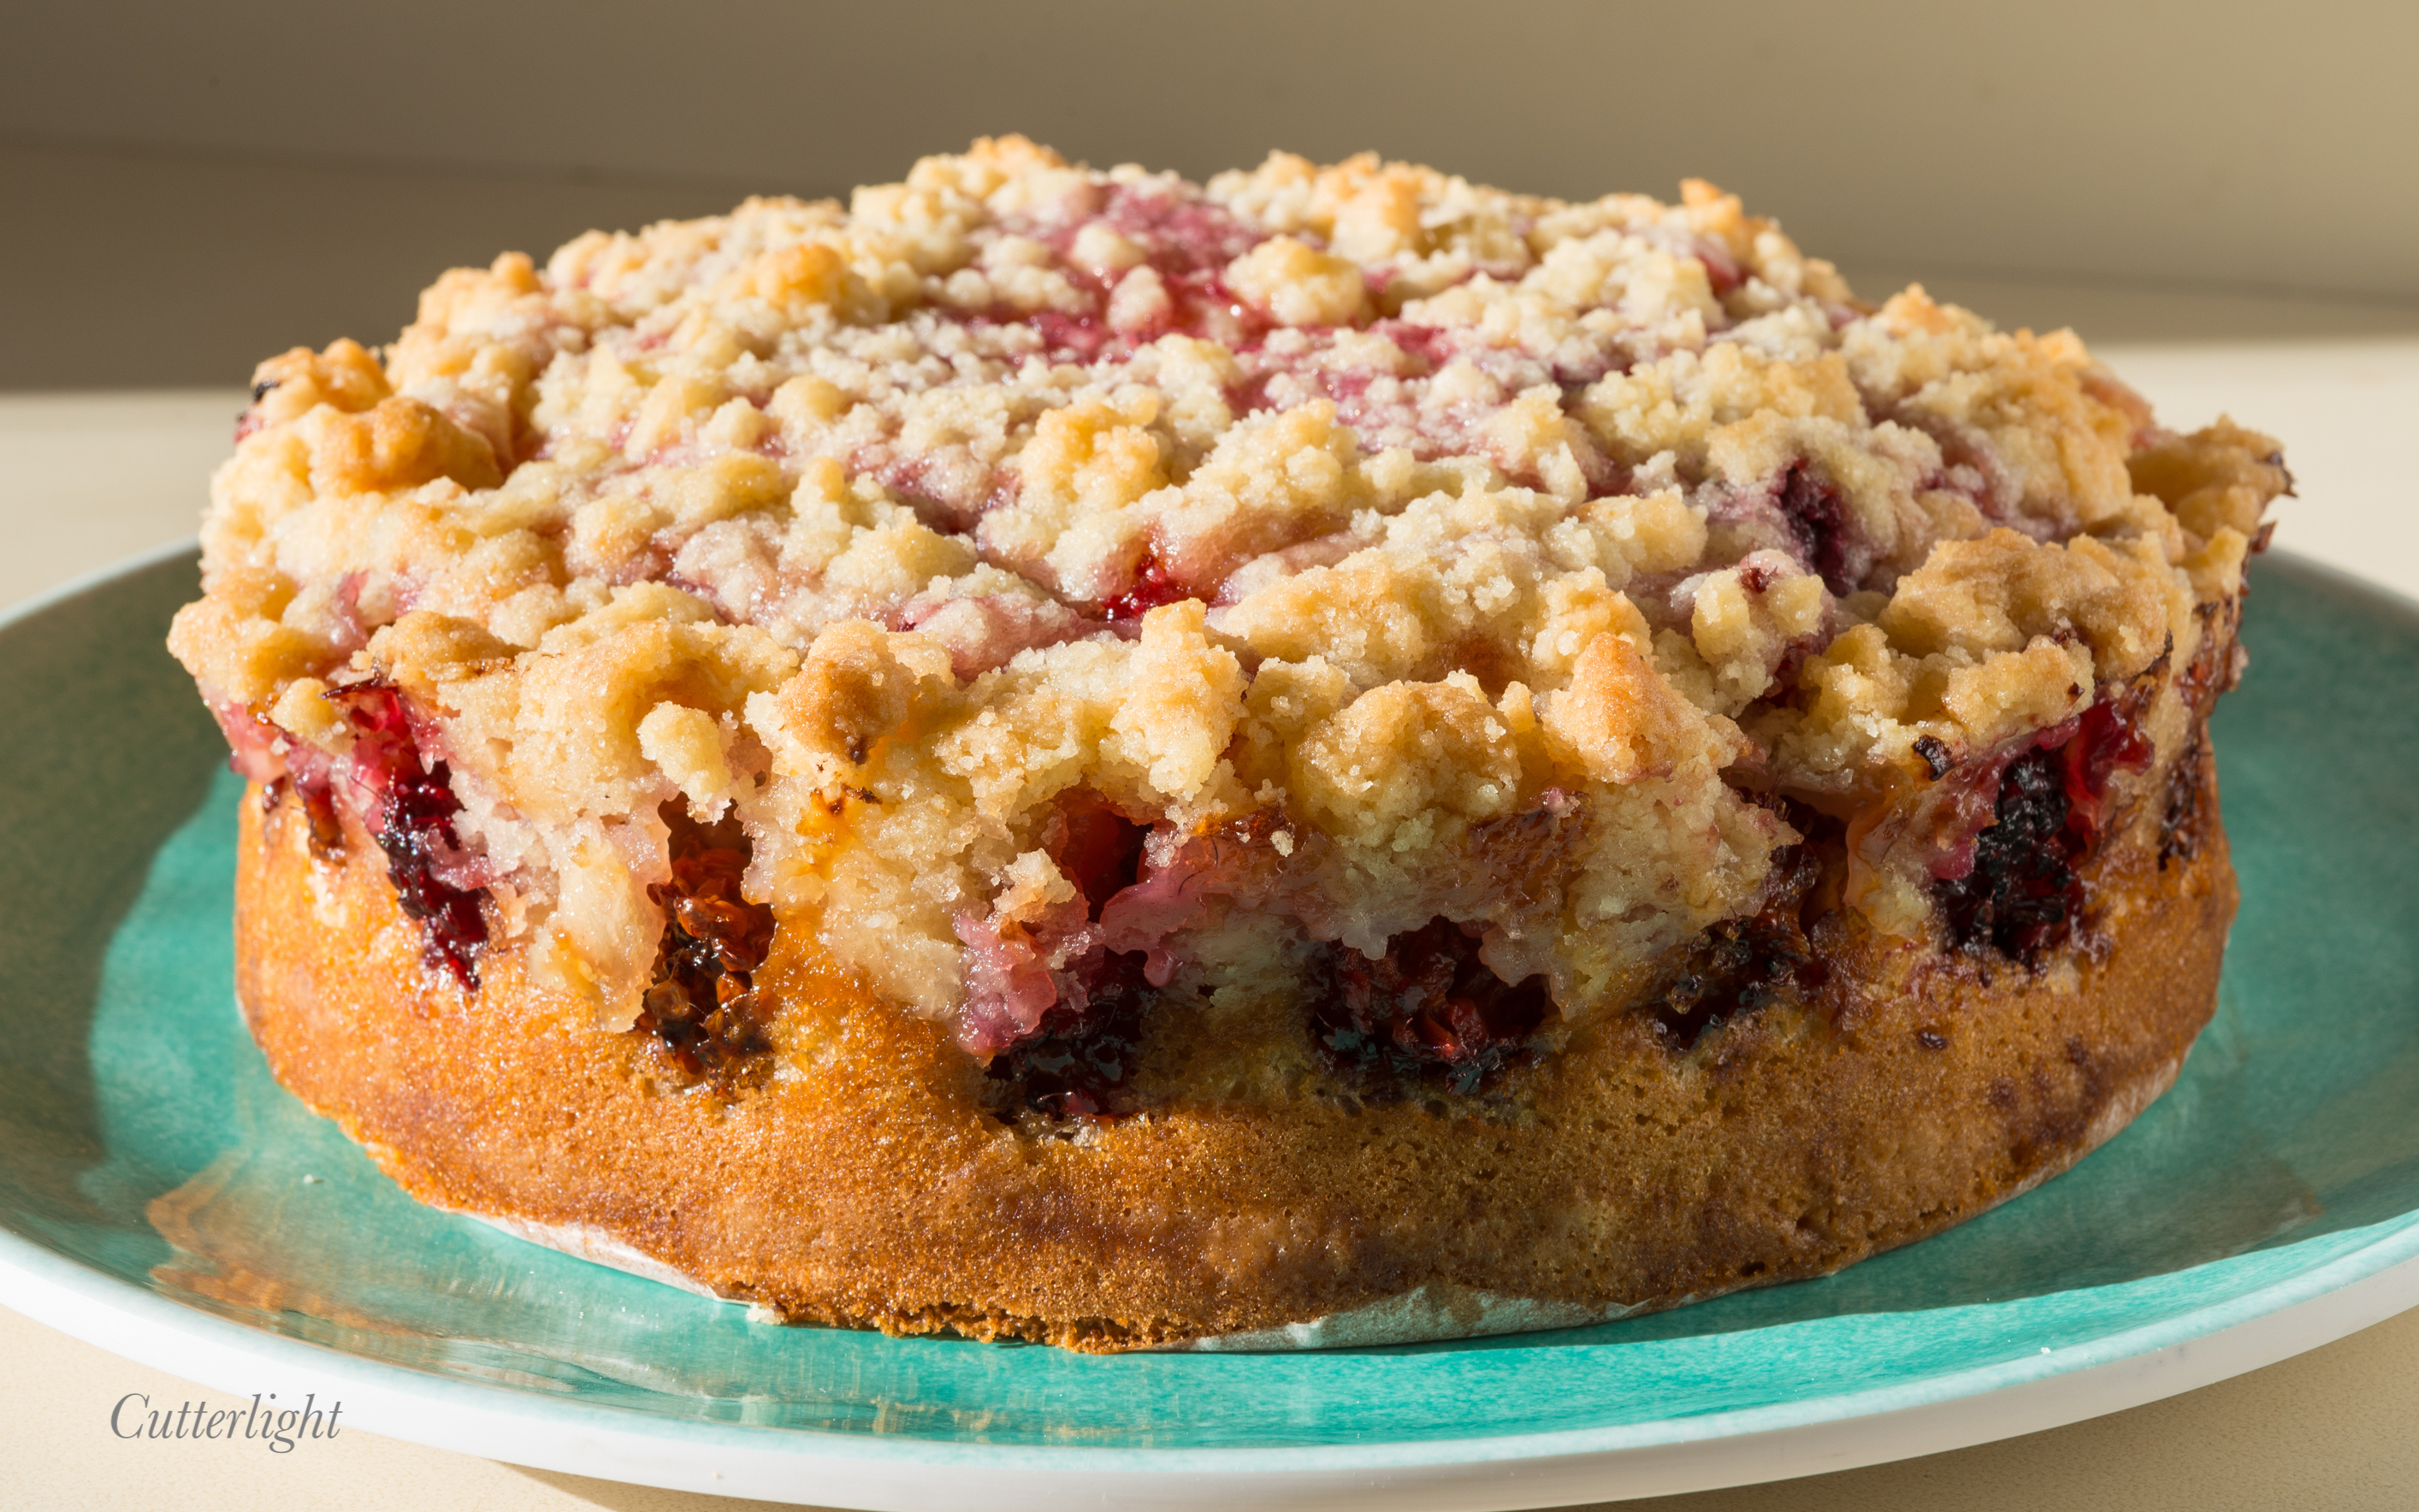
Salmonberry crumb cake

Springtime in Mongolia meant every kind of weather. Recently, this similarity to Chignik Lake has seemed to be especially true. A few days ago the lunchtime thermometer read 42 degrees under sunny skies and only a few patches of a deep snow that had blanked the landscape remained. We were inspired to go for a Honda ride to look for whatever new growth we might find. That was a few days ago…

Yesterday, we awoke to drizzly rain that morphed into melty, wet snow. Next thing we knew, we were immersed in a blizzard that blanketed us in again in a winter wonderland. This morning, the new day greeted us with broken skies, gusts of wind, a thermometer registering a chilly 16°, and new skim ice near the shoreline.

The warmth streaming in through our windows a few days ago prompted thoughts of summer – fishing, berry picking, mushroom hunting, boating, and the like. But the honda ride confirmed that even though the warmth of the sun is returning, the land is still in a deep wintery slumber. The blizzard kept me indoors, antsy – I really wanted a taste of summer, even though I know it is still months away. There is nothing more evocative of Alaskan summers than berries. Last year, we picked gallons of wild berries and carefully preserved them in our freezer – blueberries, raspberries, salmonberries, wineberries and lingonberries. Lately, I’ve been favoring the blueberries to top my oatmeal or to mix in with homemade yogurt. But to satisfy my craving for a  summer creation, I found myself drawn to the beautiful, multi-colored gems that are salmonberries. They have a tangy, sweet-sour flavor that pairs perfectly with almond – an ingredient I wanted to feature.

I was very happy with how this cake turned out. The diminutive dessert was just right for the two of us to share. The berries baked into the batter, retaining their jewel-like beauty. The cake was delectably moist. The flavors incorporated the lovely balance of natural sweet and sour. Each bite was complimented by the crumbly sweet almond topping. Full disclosure – it was intended for two desserts. We managed to finish the whole thing off in one delicious fell swoop.

Salmonberry Sour Cream Crumble Cake for Four (Or two. Or one.)

Ingredients

Topping

  • 1/2 cup all purpose flour
  • 1/3 cup granulated sugar
  • 1/2 tsp almond extract
  • 4 tbsp unsalted butter, melted

Cake

  • 3/4 cup + 2 tbsp all purpose flour
  • 1/2 cup granulated sugar
  • 1 tsp baking powder
  • 1/4 tsp baking soda
  • Pinch salt
  • 1 extra large egg (1 1/2 large eggs)
  • 1/2 cup sour cream
  • 1/2 tsp almond extract
  • 1 1/2 cups salmonberries (if frozen, let thaw and drain off extra liquid)

Directions

  1. Heat the oven to 350 degrees F (180C).
  2. Line bottom of 7-inch springform pan with parchment paper. Grease the sides of the pan with butter. Set aside.
  3. In a small bowl, mix together topping ingredients. Stir with a fork until mixture is crumbly. Set aside.
  4. For the cake, in another bowl, whisk together flour, sugar, baking powder, baking soda and salt. Set aside.
  5. In a bowl of a stand mixer, mix together eggs, sour cream and almond extract.
  6. Add flour mixture for cake into the egg mixture. Beat until smooth, about 2 minutes.
  7. Pour batter into prepared springform pan.
  8. Top with salmonberries.
  9. Sprinkle crumble mixture evenly over berry layer.
  10. Bake until topping is golden brown the the center is cooked, about 40 minutes. Test this with a toothpick. It should come out clean when inserted into the middle of the cake.
  11. Let cake cool on wire rack in the pan for 20 minutes before removing springform sides.
  12. Cut into slices and serve warm or at room temperature.

Three Cheese Dungeness Crab Ravioli

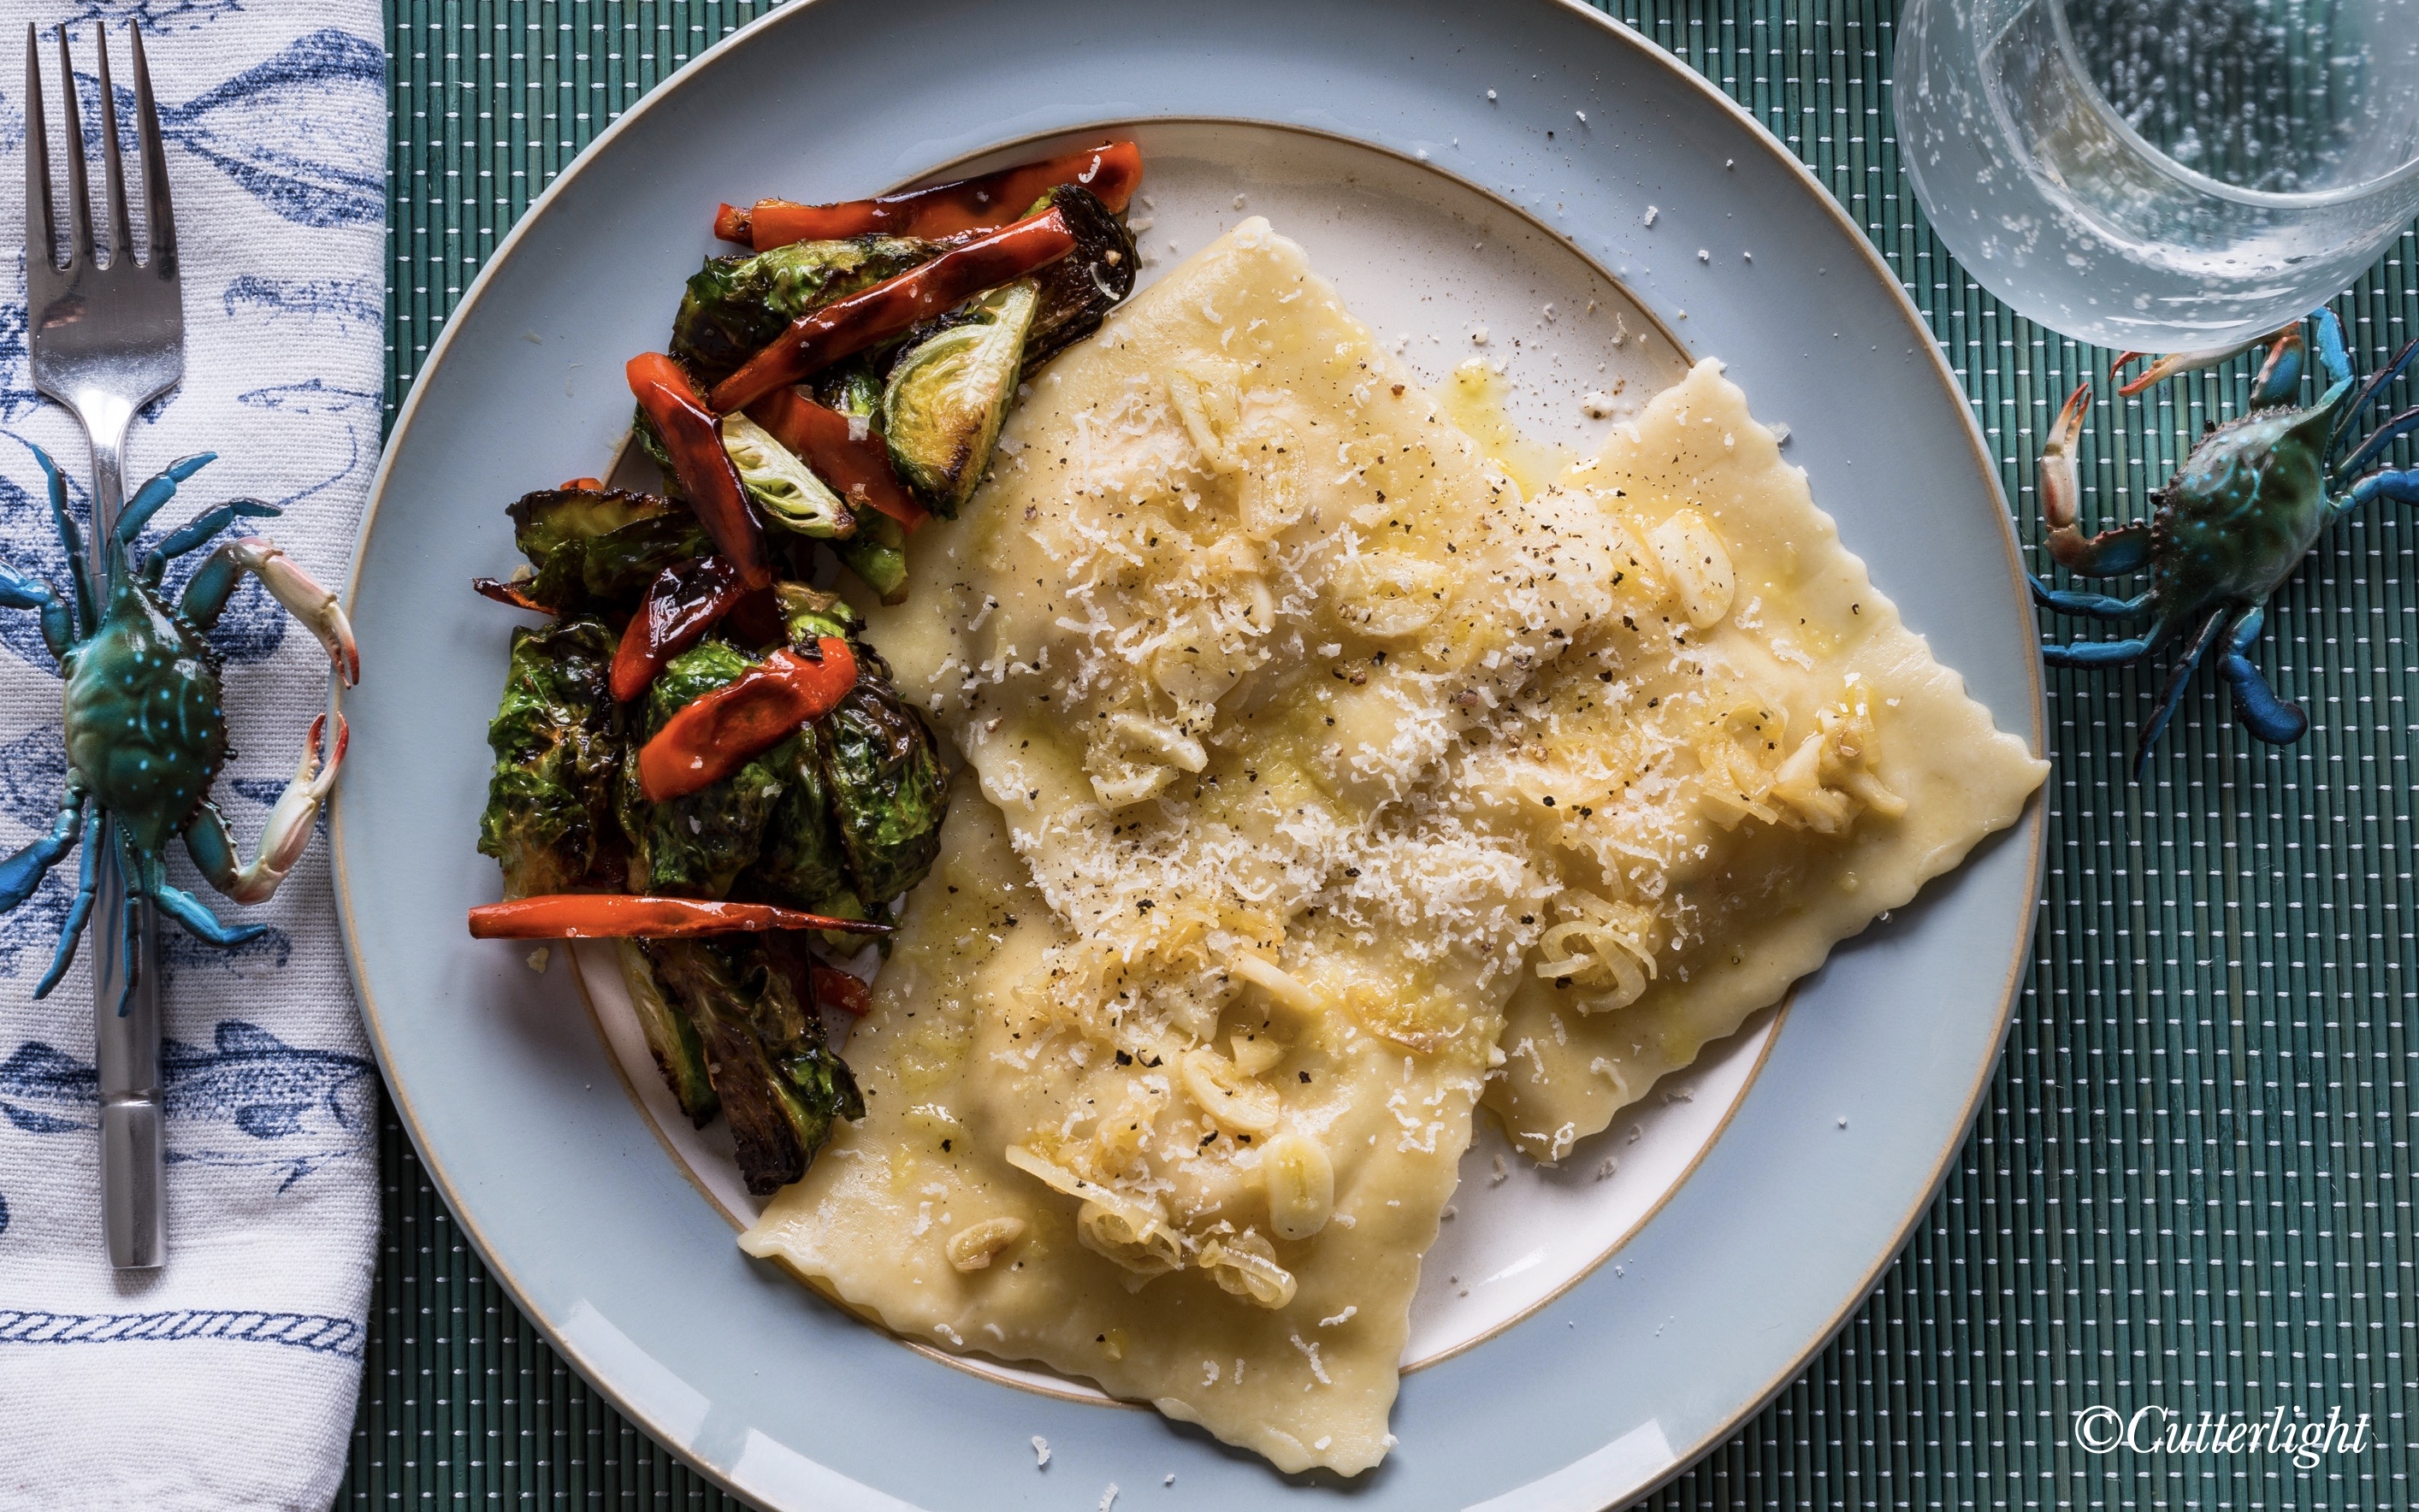
Dungeness Crab RavioliGiant ravioli stuffed with creamy cheese and sweet Dungeness Crab. Happy 2021 from The Lake!

“Jack?” It was Donny on the phone. “Come down to the beach and get some crab! Bring a tote. There’s lots!”

I’d been photographing kinglets in a copse of spruce trees a two-minute walk from my house when I got the call. Crab?! I didn’t waste any time retracing my steps. Back home I went straight to the living room window. Sure enough, there was Donny talking with a man and a woman I didn’t recognize who had nosed an unfamiliar skiff into the lakeshore. On the beach near Donny were three or four large tubs. I set my camera gear aside, grabbed a bright pink plastic tote, slipped my feet into boots and made my way down to the scene.

The skiff and its occupants were with the Alaska Department of Fish and Game. Apparently, they’d been sampling the Dungeness Crab population in the Chignik estuary and nearby waters and with a good haul of the tasty crustaceans had made the six-mile run up the river to share the bounty. I greeted Donny, introduced myself to the ADFG crew, and surveyed the tubs heaped with crab. There were indeed “lots.”

“Go ahead and fill that tote,” Donny advised. “And make sure you get some big ones.”

They were good-looking crabs. Legal males. Clean, shells filled out, two-pounds on average, still kickin’, sea-scented.

That night, quite literally everyone in the village of Chignik Lake feasted on fresh Dungeness Crab. All 50-something of us.

Barbra and I spent a good bit of that evening steaming Dungies three at a time in our big soup kettle. We picked two that night for dinner, complimented  with a bottle of Chard. The rest were frozen for later use. We did this by first freezing the crabs in regular zip-seal plastic bags. Similar to berries and other fragile items, once the crabs are frozen hard they can be vacuum-packed without being crushed. Frozen this way, the crabs are perfect and keep a long time. Which is a good thing; we ended up with a lot of crab.

The ravioli? Once you’ve got the pasta made, there’s really nothing to it.

I combined equal amounts of mozzarella, goat and feta cheeses along with a blend of Italian herbs. To this mixture, I added an equal amount of Dungeness Crab and hand-tossed the ingredients together.

Meanwhile, Barbra rolled out the pasta and cut it into nice, big three-and-a-half inch squares, filled them with the crab and cheese mixture and crimped them closed with a pastry roller. It is important to use a sharp tool for the crimping. It helps to ensure that the ravioli remains sealed.

To avoid crowding these large raviolis, I used two pots, each with a good amount of water. Once the water came to a boil, I added the ravioli. After three minutes, I gently flipped them to ensure even cooking of the pasta and the filling – a total of six minutes.

Meanwhile, in a small skillet on a back burner, I heated extra virgin olive oil over medium heat. When it was hot, I added shallots and garlic sliced as thin as I could manage along with a tablespoon of butter and a couple of healthy pinches of sea salt. This is a wonderfully simple accompaniment for delicately flavored pasta. I finished the dish with a grind of black pepper and a bit of grated Parmigiano-Reggiano.

By the way, these raviolis freeze well. Simply lay them out on a cookie sheet, freeze them solid, and then pack them in plastic bags. Cook them frozen, adding a minute to the overall boiling time.

With a surfeit of tasty Dungies in the freezer, expect more crab recipes in the coming weeks!

The Chignik Jack: Panko Crusted Coho Jack Salmon Stuffed with Dungeness Crab

panko crusted salmon stuffed with Dungeness crab

The perfect marriage of River & Sea – Dungeness-stuffed whole jack salmon.

Each year we try to take a couple of char or salmon in the pound-and-a-half to three-pound range, the perfect size for presenting head and tail intact. When I lived in South Carolina, I sought Puppy Drum (small Red Drum), Speckled Sea Trout, Summer Flounder and keeper-sized Striped Bass for these dishes. If I lived in the American midwest, I’d target Walleye or bass from cold water. In Japan, small suzuki (Japanese Sea Bass), hirame (Olive Flounder) and kurodai (Black Porgy) fit the bill.

The salmon in the photo was about 17 or 18 inches in length and weighed just over a pound-and-a-half. Jack is the name given to precocial male salmon that mature early and return to the river after only a year at sea. Were I running a restaurant, I’d offer this dish as a special and call it The Chignik Jack, as in,

“What’ll it be, Mac?”
“I’ll have the Chignik Jack.”

The recipe here couldn’t be more straightforward. The stuffing is comprised of the back meat of a Dungeness Crab, steamed or boiled and lightly seasoned, perhaps a bit of fresh lemon juice added to the cleaned meat. Crab meat tends to be wet, so use paper towels to gently squeeze out excess moisture from the cooked meat. You might even heat the meat in a dry, non-stick skillet to remove additional moisture.

The fish is scaled, gilled, gutted and cleaned. Spritz the stomach cavity with lemon juice, rub in a little salt, add the crab meat and then roll the fish in panko that you’ve seasoned with salt and Italian-style herbs. This is a relatively light dish; you don’t need any batter, just the seasoned crumbs.

Meanwhile, set the oven to 400° F and put enough olive oil on a broiling sheet or pan to cover it and heat it on a center-positioned rack till the oil is hot. I use a heavy, rectangular, well-seasoned cast iron pan for this kind of cooking, but a thinner baking sheet will work. The fish should sizzle when you place it on the pan. After about 4 minutes, check the down side to make sure it’s not browning too quickly. Continue baking for a total of about 8 minutes, and then carefully turn the fish to the other side. It can help to have someone man an additional spatula to help with this.

Bake for another 8 minutes, again checking  halfway through to make sure the skin and panko are browning properly. In the above fish, I set the oven to broil for the final couple of minutes to further crisp the presentation side. The tail came out crunchy as a potato chip – a delicacy in its own right. And speaking of delicacies, don’t forget the cheek meat just in back of the jaw; the scallop-like morsel has a texture unlike any other part of the fish.

Paired with a buttery chardonnay, this is a lovely meal to enjoy with your best friend.