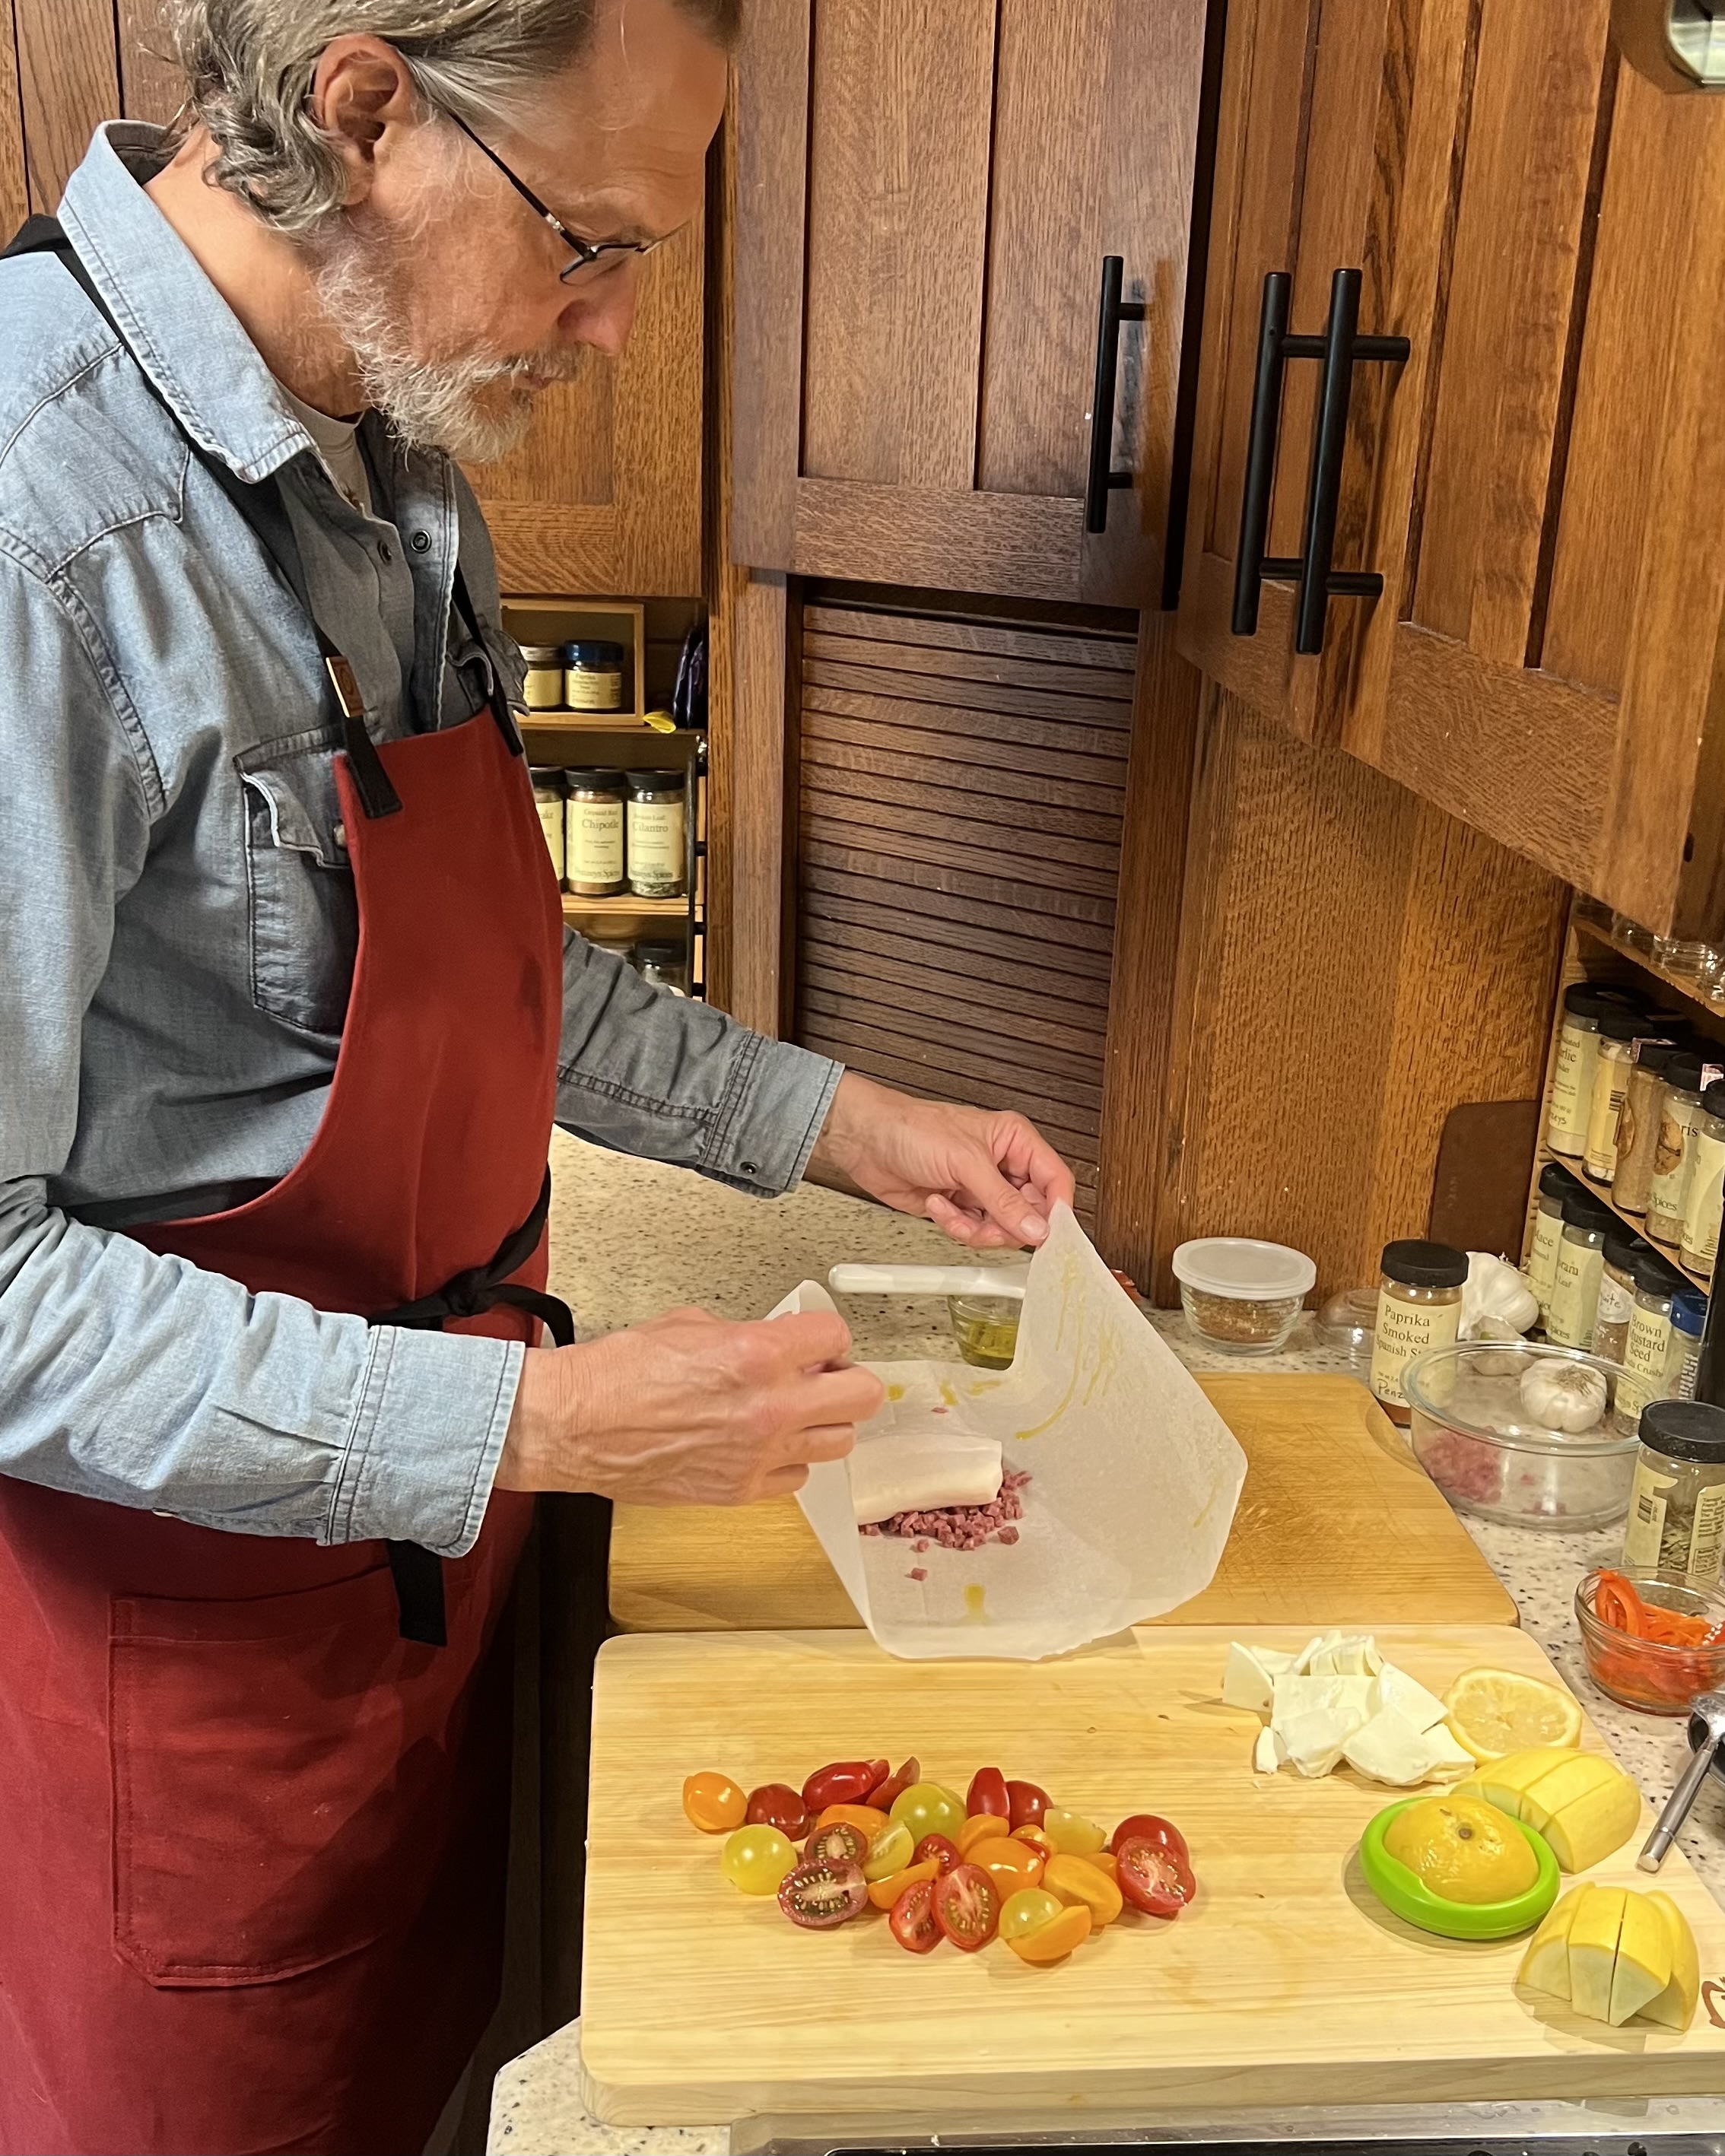
Chef Jack doing his magic. Preparing halibut on a bed of chopped venison sausage to be grilled en papillote. So grateful for the kindness of sharing neighbors.
The deal is “you pick me 5 cups of berries and I’ll make you a pie.” We stumbled onto a blueberry bush Loaded with berries. In no time at all, we had 5 cups in the bag. Seems like all agreed, it turned out pretty fantastic.
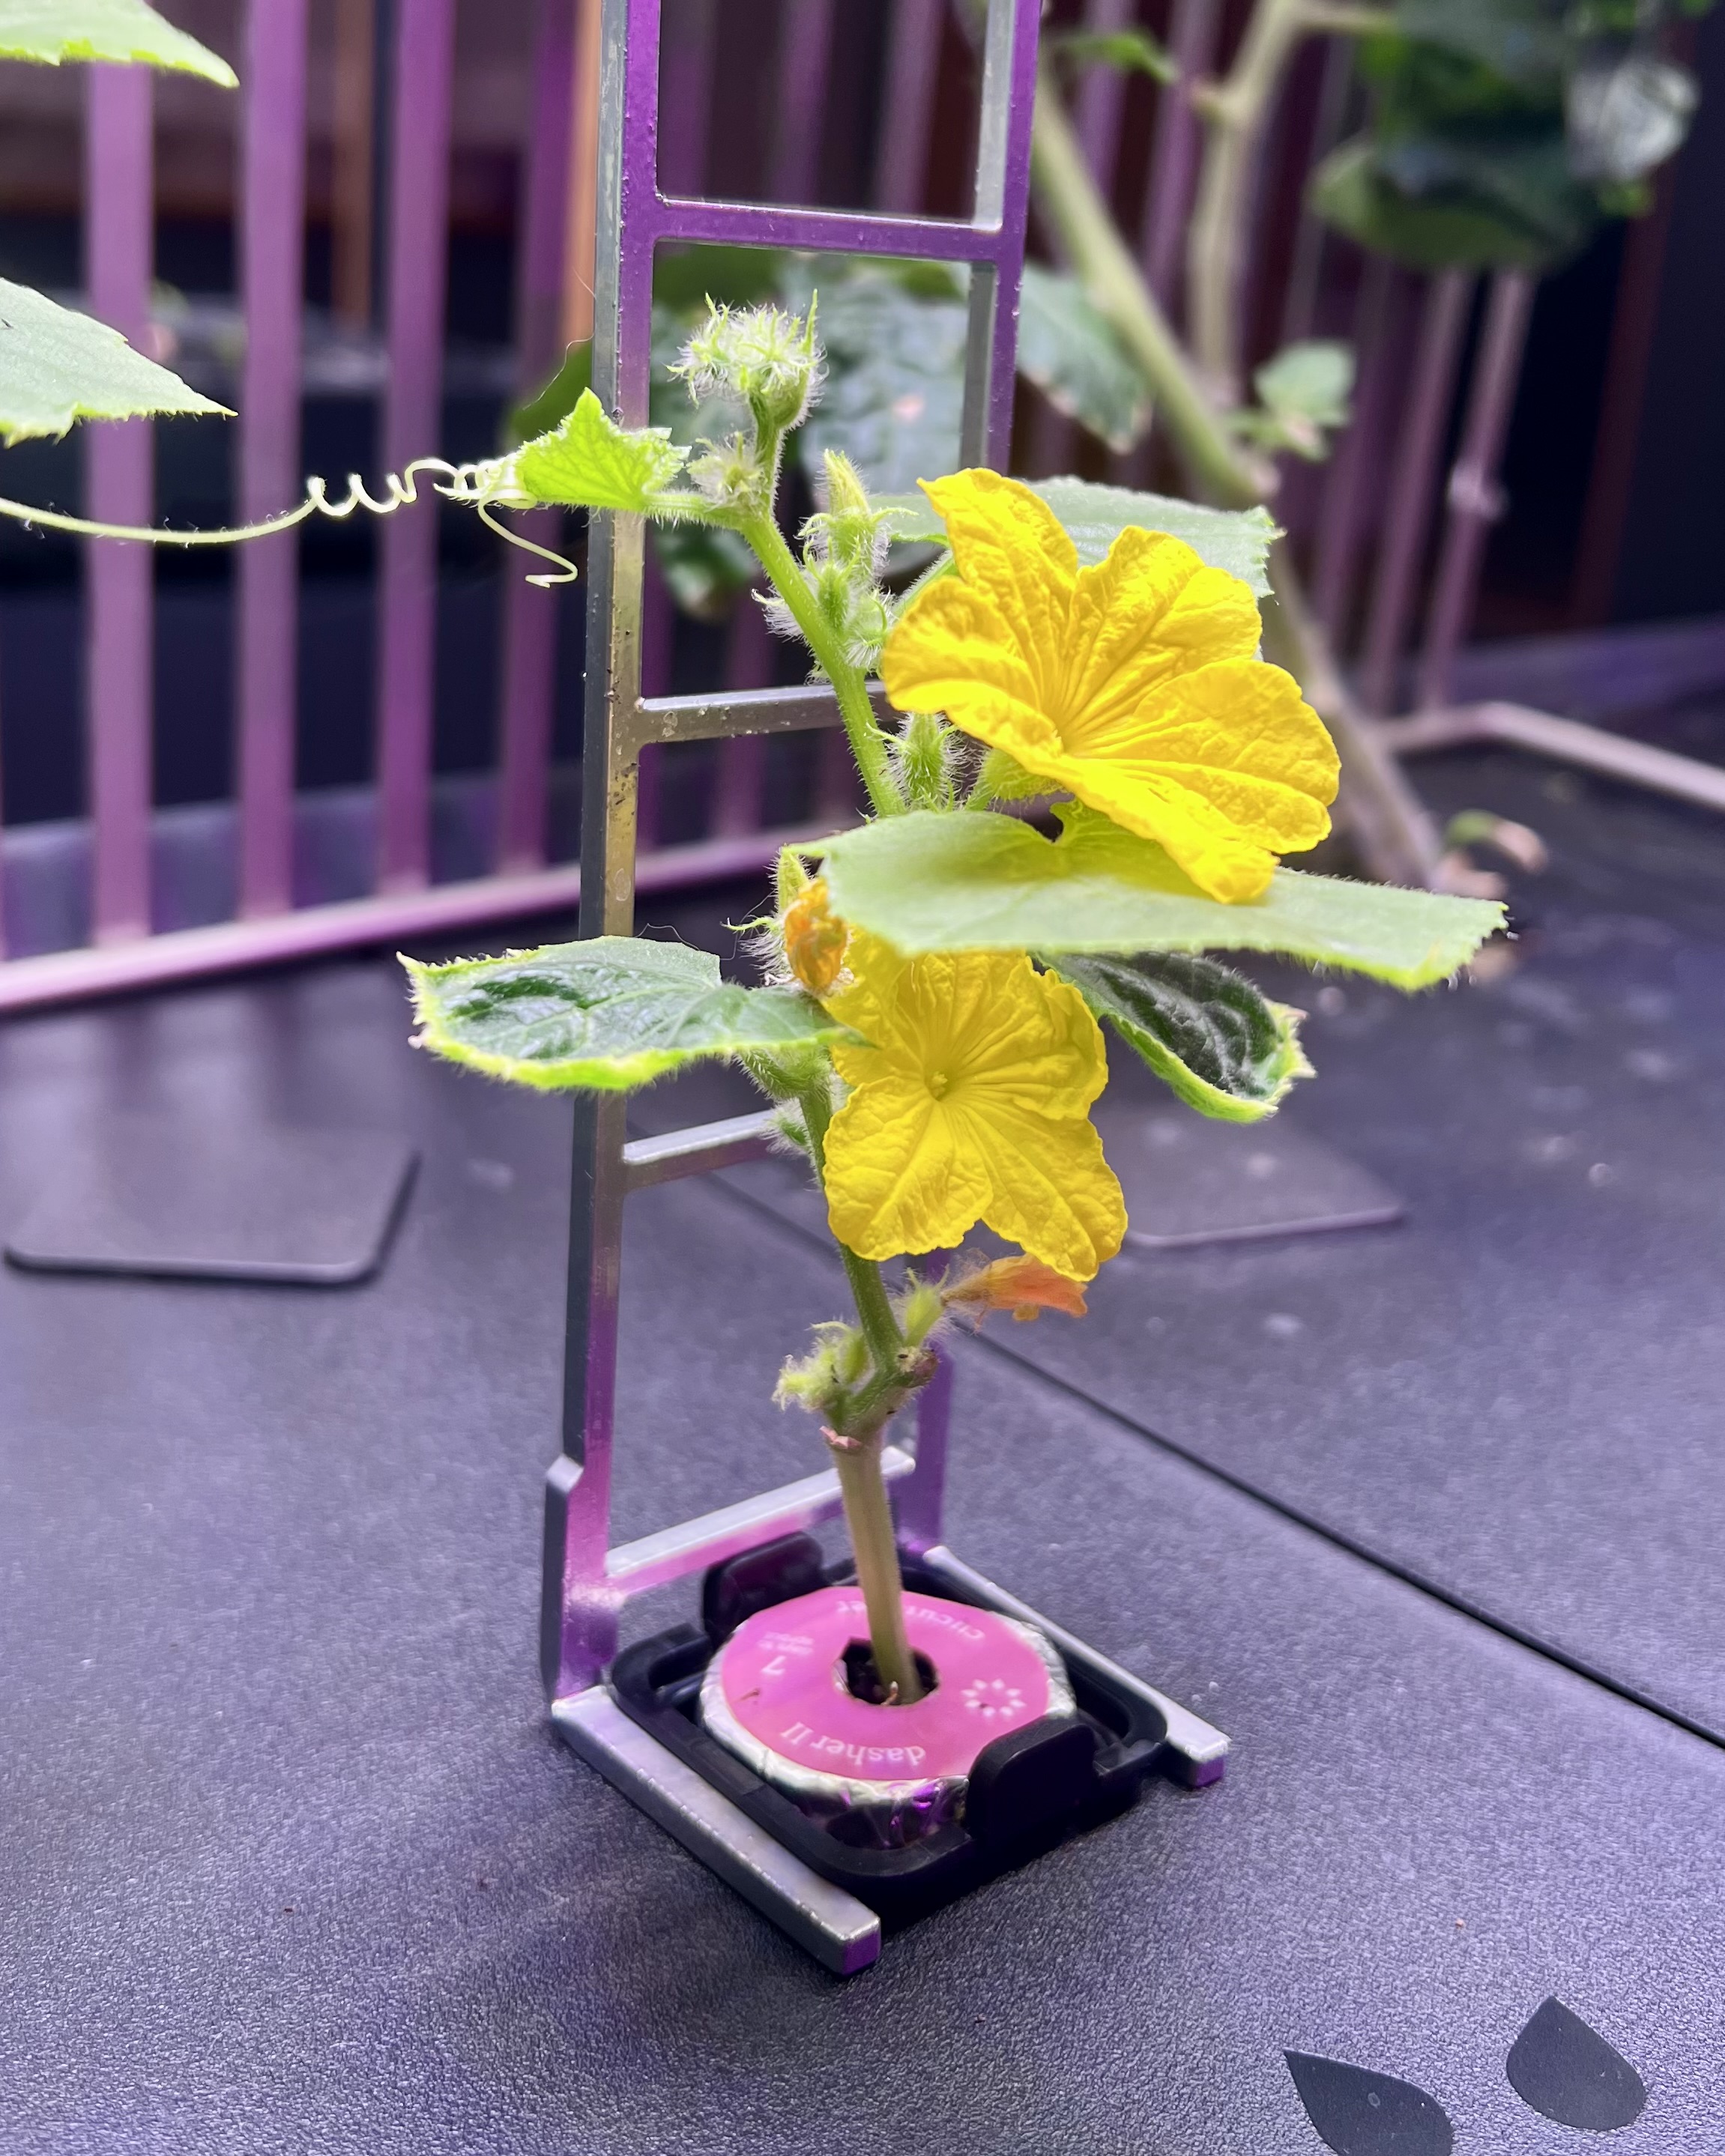
Part of our Alaskan culinary experimentation includes producing fruit and vegetables in a year-round hydroponic garden. We’ve been wildly successful growing our own gourmet lettuces. This little cucumber cutie is flowering like crazy. A little hand pollination and patience will answer the question – will it or won’t it bear fruit?
Jack is working his magic today. He’s perfecting a soup recipe baked in stoneware and topped with puff pastry. Spoiler alert? Your guest will crack into the perfectly baked pastry to find wild Alaskan Dungeness Crab. Yes, please!
The flower petals have dropped. Tiny, hard berries are taunting me with their promise. It will be quite some time before they will be ripe and ready for picking. Normally, when I can’t stand the wait for this summer’s fruit, I usually have last year’s berries stashed in my freezer to bake with while I oh-so-patiently wait for this year’s fruit to mature. With the move this year, we gifted our stash to friends at the Lake. So, I wait.
We all know I’m not really going to wait to play in the kitchen. 😉 Now that I have not one, but two grocery stores nearby, I don’t have to keep a stocked pantry like we did at the Lake. But pantry items do drive inspiration. We mailed quite a bit of dry goods that we hadn’t used up. Boxes of pasta, pounds of rice and cans of pumpkin puree didn’t trigger any ideas. There was this bag of mini-marshmallows tucked away. I had purchased them for hot cocoa. What about hot cocoa cookies? Rocky road bars? Marshmallow thumbprints? None of these ideas appealed to me. Then I thought s’mores! I am a s’mores fan, but only in small quantities. I enjoy the summertime fireside treat in ones or twos. What if the essence of chocolate, graham crackers, and toasted marshmallows were featured in cookies instead of their original over-sweet form? The result? A chewy cookie with bursts of chocolate, crunches of graham cracker, and bites of gooey marshmallow.
The recipe was a successful distraction until the real show starts. (C’mon berries!) Between now and then, I will keep myself occupied with processing spruce tip syrup. And maybe figuring out a way to bake with pasta, rice, and pumpkin? Or not.
Double Chocolate S’more Cookies – small batch
Ingredients
1 cup all-purpose flour
3 tbsp dutch-processed cocoa powder
1/4 cup graham cracker crumbs
1 tsp baking soda
Pinch salt
1 stick unsalted butter, room temperature
1/2 cup packed brown sugar
1/4 cup granulated sugar
1 tsp pure vanilla extract
1 large egg
1/2 cup semi-sweet chocolate chips
1/2 cup mini marshmallows (and a few extra for finishing)
1 sheet graham cracker, roughly chopped
Directions
Preheat oven to 375°F.
Line a baking sheet with parchment paper.
In a bowl, whisk together flour, cocoa powder, graham cracker crumbs, baking soda, and salt. Set aside.
Using electric mixer, beat butter and sugars until light and fluffy.
Mix in vanilla.
Mix in egg.
Slowly add in flour mixture. Mix until incorporated.
Fold in chocolate chips, marshmallows and chopped graham cracker.
I used a 1 1/2 tbsp cookie scoop to spoon out 12 portions of dough to place on prepared cookie sheet.
Bake cookies for 10 minutes.
Quickly remove baking sheet from oven and add a few more marshmallows on each cookie. Place back in the oven for 2 additional minutes.
When done, cookies will be firm on the edges and soft in the middle. Allow to cool for about 5 minutes on sheet before removing to cool completely on a wire rack.
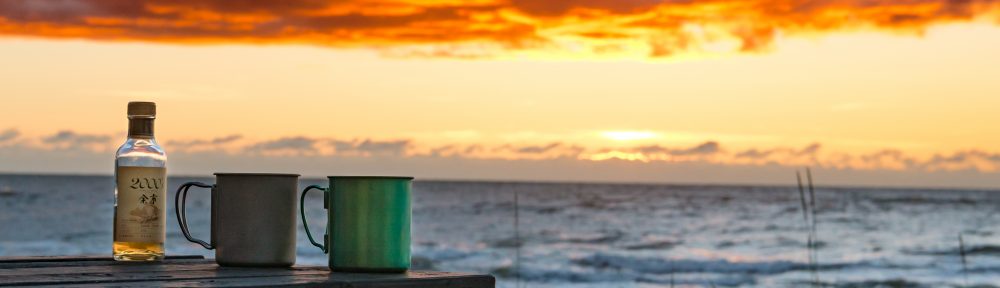
Light and creamy vanilla cheesecake drizzled flooded with wineberry syrup. Just building the anticipation for berry-picking season.
For most, I imagine spring flowers sow hope for warmer weather and start dreams of sunny summer adventures. The flowers of this particular spring were different for me.
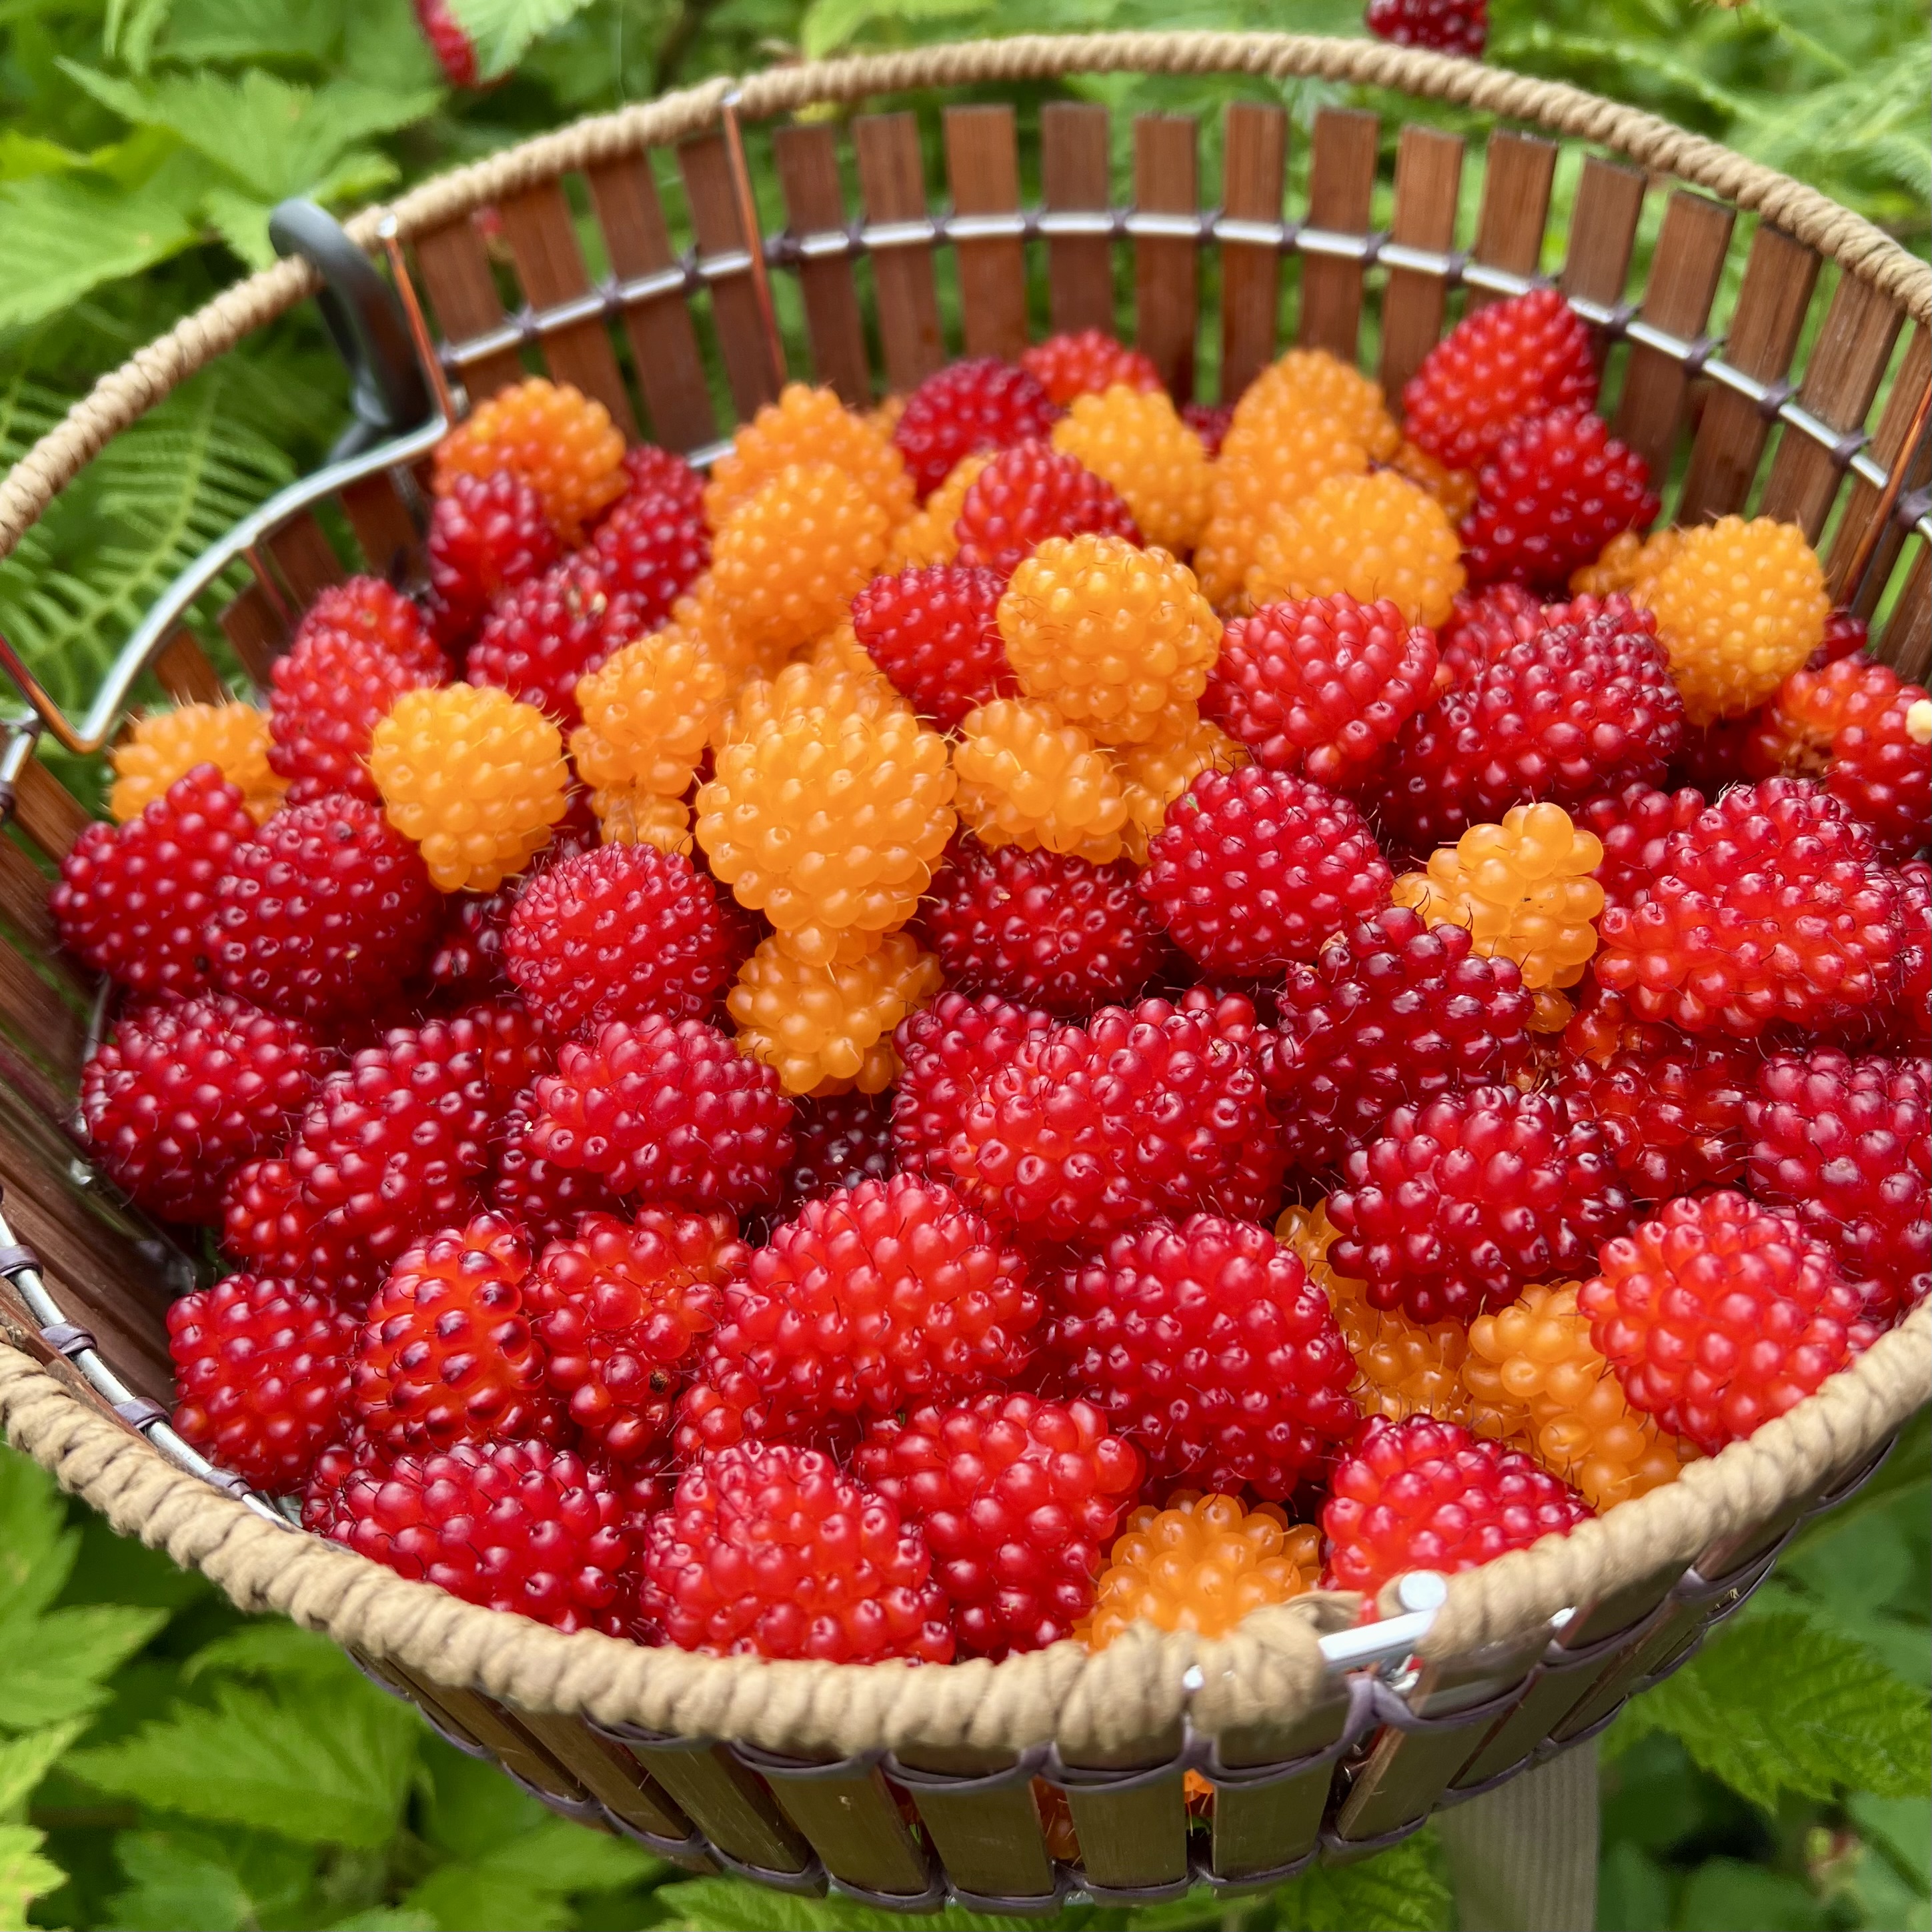
For the last two summers, Jack and I have spent countless hours studying and identifying all the flowers we could find in the surrounding areas of Chignik Lake. It was a beautiful education. The flowering season began with chocolate lilies and ended with tiny white yarrow with lilac-colored geranium sustaining throughout. Along the growing months from May through October, a rainbow of blossoming gems ebbed and flowed. Although I loved seeing and identifying all the blooms, the flowers that gave me the most joy were the ones that I knew would transform into fruit. As we hiked through the months, I would monitor the progress of my miniature crops as they turned from tiny bud to flower to hard little fruit, and then to the final stage of delectable berry treasures that were ready to harvest.
Whenever Jack and I visit different places, we regularly look for flowers. It is interesting to us to see which flowers we have learned about at the Lake which also grow in other places. As it turns out, we are now in a new place. Yes, a surprising plot twist.
We would not have guessed we were going to make a move…even as late as this recent February. A principal job was opening at my school and I was just about finished with my credentialing coursework. We loved our community and our home. We have close friends and a deep connection to Chignik Lake. But life happens. Way leads to way. Turned out the way that opened was a door we had been keeping an eye on for a long time.
If you’ve been following our story for a long while (like thirteen years long), you’ll remember that our whole Alaska adventure began with a summer-long trip. It was one of those once-in-a-lifetime trips that people do. A hobby at that time had been running destination half marathons. Jack found an interesting destination that would align this hobby with a blend of other interests like road-tripping, camping, boating, and of course visiting Alaska. With just six days to make it up the Al-Can, launching our trusty C-Dory in Valdez, and boating over to the destination Salmon Jam Half Marathon in Cordova Alaska, we would start a journey that we had no idea would change our life. On the way home from that Epic Alaska Summer Adventure, we decided that Alaska would become home. In the way life sometimes circles and spirals, we find ourselves back in Cordova. This time, it is not a travel destination, but a new home.
A common thread in all of our our Alaskan homes has been the opportunity to forage for interesting edible plants. How fortunate are we to live in a big beautiful state that offers so many wild foods…among my all-time favorites – berries! We discovered many flowers on our initial hikes on the trails in the Chugach National Forest. I’m happy to report blueberry, low bush and high bush cranberry, salmonberry, currant, nagoonberry and lots of strawberry flowers. Now, in this new place, I get to follow my familiar summertime tradition of monitoring all of these flowers’ progress from bud to fruit. With any luck, we’ll find lots to harvest later this summer.
Jack suggested I share my process for making wineberry (aka nagoonberry) syrup. Most people find the process to be tedious. It’s pretty simple, actually. After picking the precious gems from your secret spot, take them home and xxxxxxx xxxxxxx xxxxxxxxxx xxxxxxx xxxxxxx xxxxx xxxxxxxx xxxxxx. For each cup of processed berries add 1/4 cup of water. Simmer the berries until soft. Smash the mixture with a potato masher. Separate the juice from the pulp by suspending a cheesecloth over a . Every time I try to publish this, it gets redacted. I guess the FBI doesn’t want it shared – (Fruit and Berry Interagency). 😉
For this creation, I used a no-bake cheesecake recipe adapted from a blog I follow, Sally’s Baking Addiction. I modified it to make a 4-inch version, which is perfect for two hungry writers, or can be served to four for a nice little sweet bite at the end of a meal. I like the no-bake version to complement fruit syrups because it is light and airy but still retains the tanginess of the flavor you’d expect from a cheesecake.
4-inch No Bake Cheesecake
Ingredients
Crust
1/2 cup graham cracker crumbs
1.5 tbsp brown sugar
3 tbsp unsalted butter, melted
Cheesecake
1/4 cup + 1 tbsp heavy whipping cream
6 oz. cream cheese, room temp
2 tbsp granulated sugar
1/2 tbsp powdered sugar
1 tbsp sour cream
1/2 tsp lemon juice
1/2 tsp pure vanilla extract
Directions
To make the crust, stir together crust ingredients. Pour into a 4-inch springform pan. Use the back of a spoon to pack the crust tightly against the bottom and sides of the pan. Place pan in freezer while the filling is being made.
Using an electric mixer fitted with a whisk attachment, whisk heavy cream until stiff peaks are formed. Scrape whipped cream into a separate bowl.
Using the original bowl you used for whipping cream, beat cream cheese and granulated sugar together until smooth.
Add powdered sugar, sour cream, lemon and vanilla. Beat again until mixture is smooth.
Gently fold whipped cream into cream cheese mixture.
Spread cheesecake filling into prepared crust.
Cover with plastic wrap and let cheesecake chill and set. I left it in the fridge for about 18 hours.
When ready to serve, loosen the chilled cheesecake by running a knife around the perimeter of the pan before springing it open. I prefer to serve the cheesecake without any syrup and let my guests adorn their own. It definitely adds to the anticipation and the wow factor.
A breakfast fit for a celebration – now where’s my champagne?
As it happens sometimes, we received a random box of ingredients, this time thanks to the Farmers to Families program. The box included a variety of items that someone defined as household staples. Included were roasted chicken quarters, hot dogs, potatoes, apples, milk, and yogurt. Jack quickly turned out a delicious soup with the chicken, potatoes, and other veggies we had in our fridge. My challenge was the yogurt. I usually make our own yogurt, so we already had more than enough for our regular menu.
Living in a small village, we often gift extra food amongst our neighbors. For example, if someone gets an extra order of canned pumpkin or tahini (real examples), we share. When that happens, the resulting cooking challenge always strikes me as our own episode of Chopped. We don’t like to let anything go to waste. So the puzzle of the yogurt needed to be attended to right away.
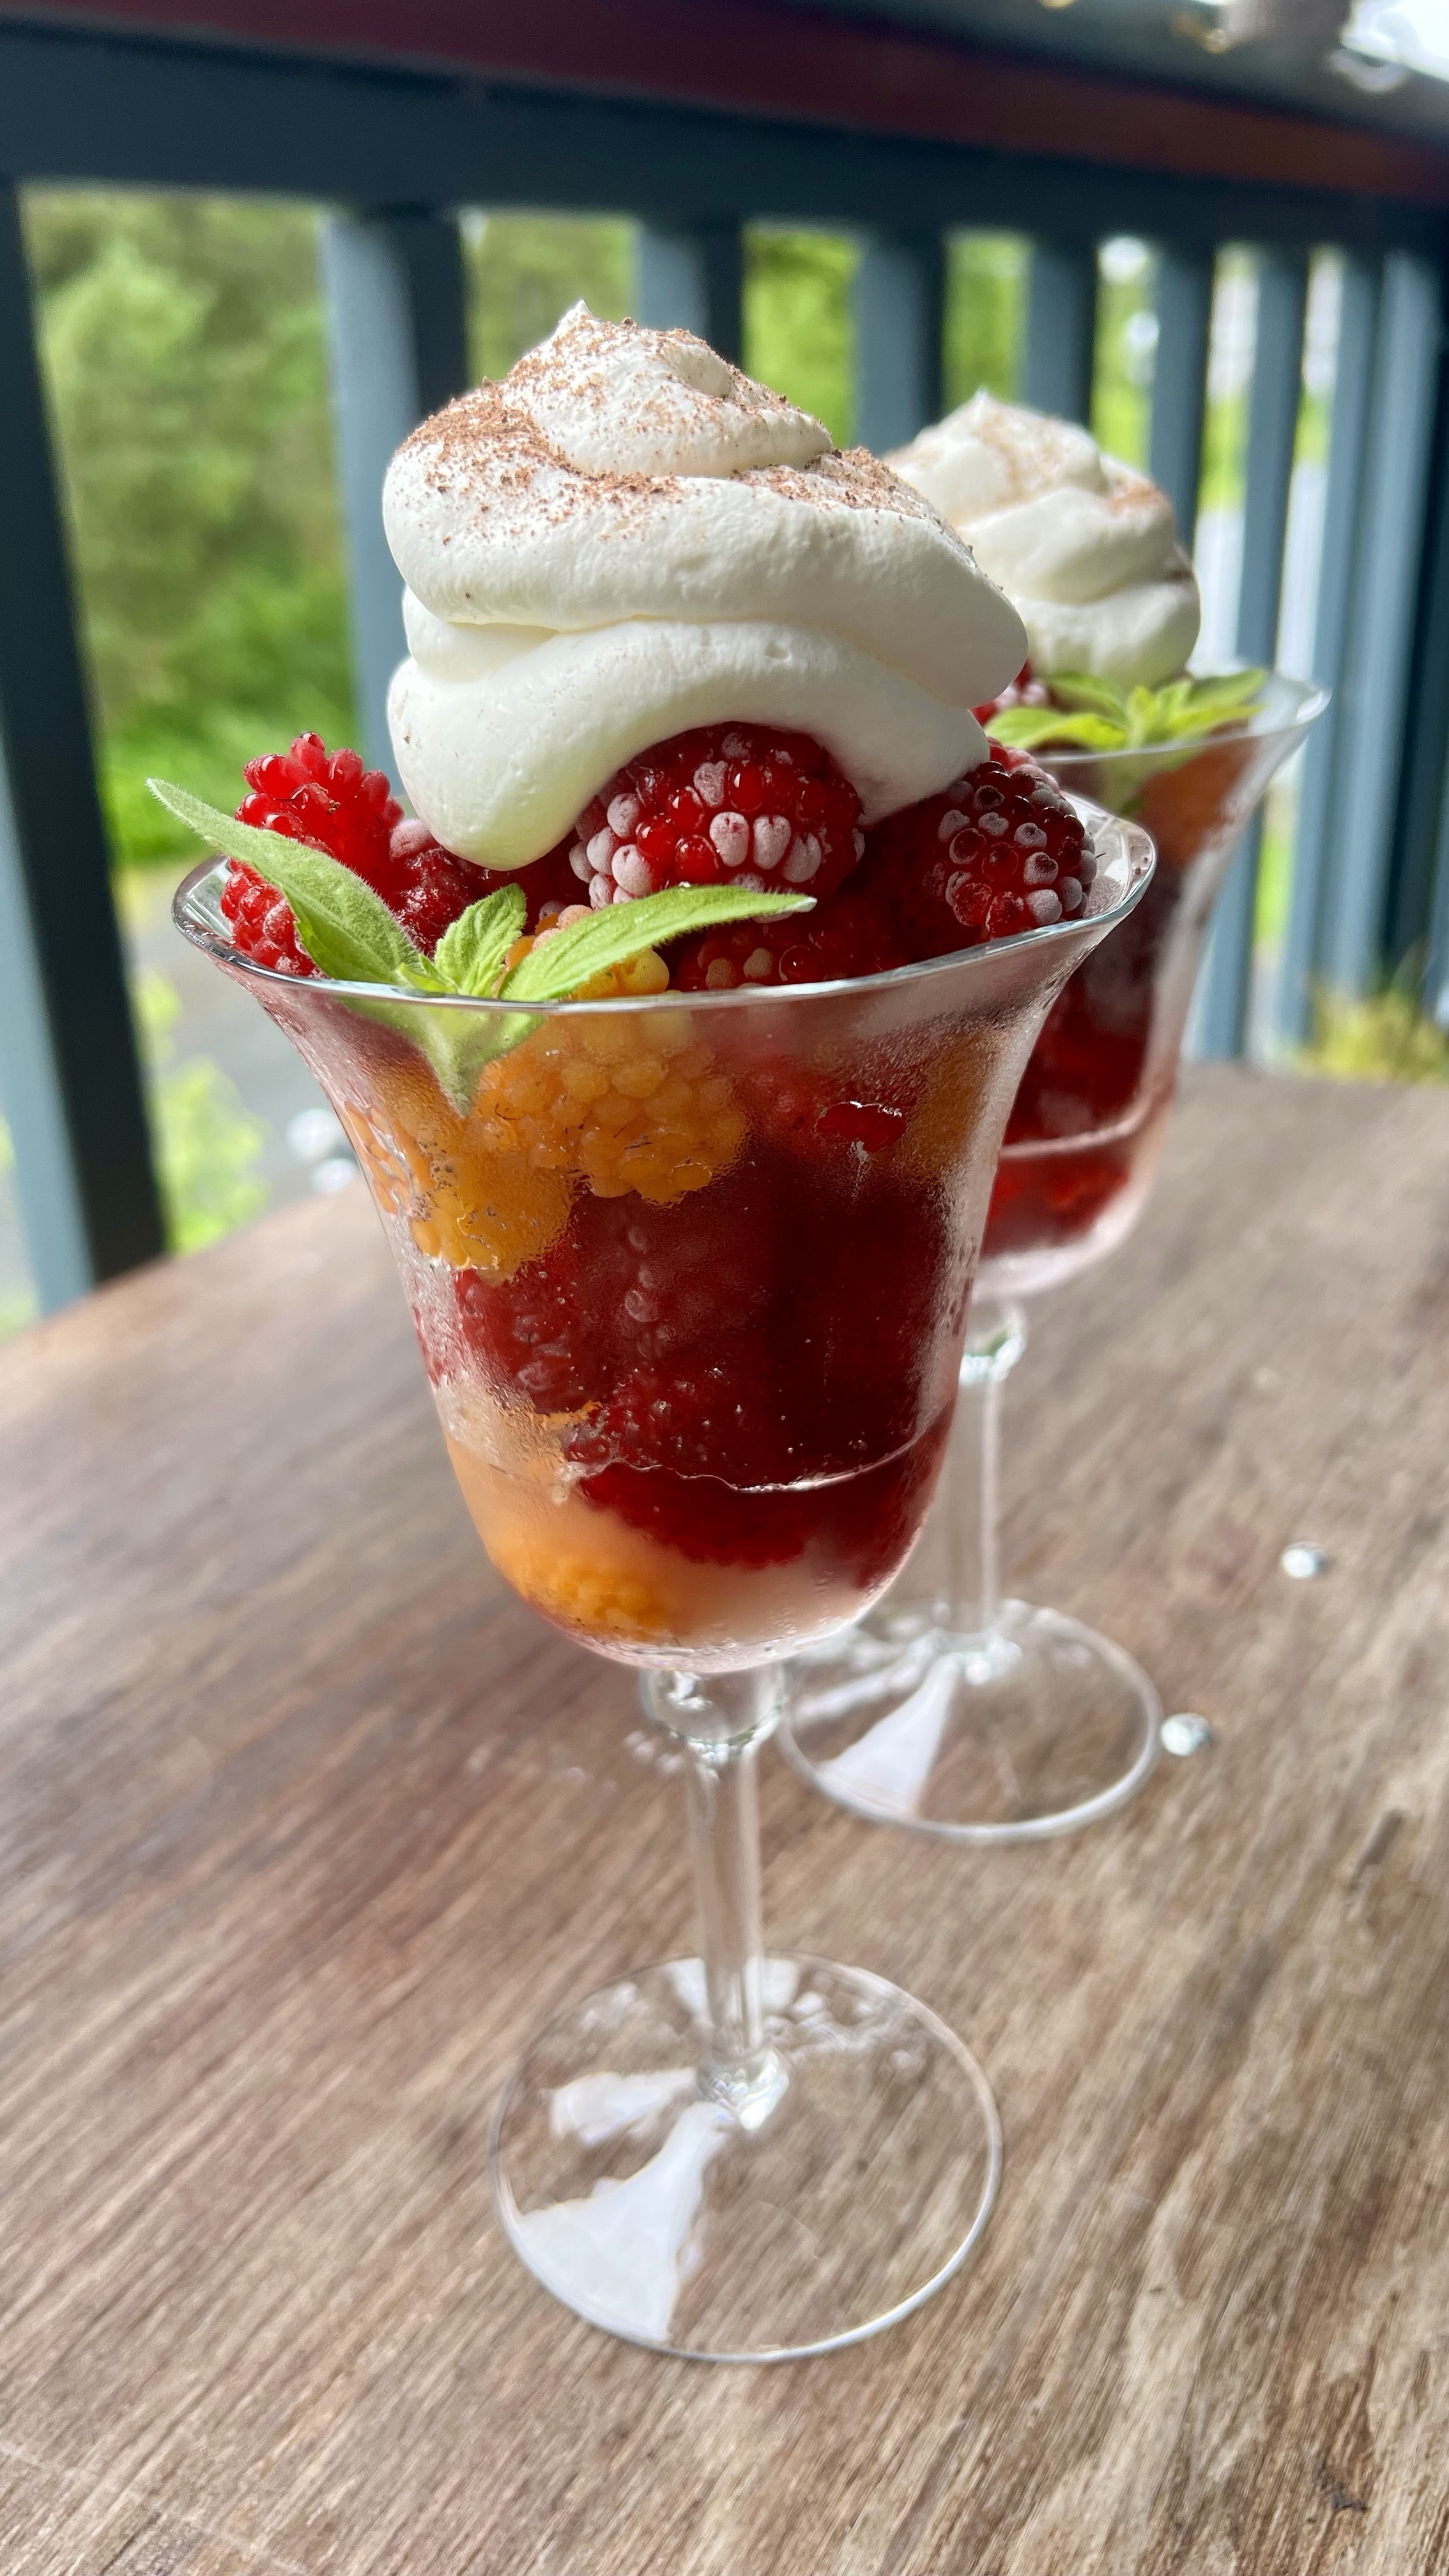
I had just finished re-reading The Tutka Bay Lodge Cookbook and was in the middle of another pastry chef cookbook when the box arrived. I already had Panna Cotta on the brain. I wondered if Panna Cotta could be made with yogurt instead of cream. Panna Cotta is a wonderful gelatinized dessert that can become a delicious canvas for a variety of fruit. The name is derived from Italian and means “cooked cream.” In my experiment, it would be cooked yogurt. So, yes, this is not a true Panna Cotta. My version has the same vanilla bean canvas and the same structure. That’s where the similarity ended.
I tested different dishes and glasses for serving the Panna Cotta including wine glasses and ramekins. I think they all worked beautifully. My breakfast Panna Cotta definitely tasted like a rich vanilla yogurt. But it made for a gorgeous and delicious breakfast presentation – layers of crunchy granola, chewy dried fruit, zippy tart berries, and a drizzle of last summer’s wineberry syrup. The same visual layers can be accomplished in any clear glass if ramekins are not available. With just a bit of chilling time and not too much effort, you too can turn ordinary into extraordinary.
Breakfast Panna Cotta
Ingredients
1 1/2 tsp powdered gelatin (1 package)
3 cups plain yogurt
1/2 cup milk
1 tsp vanilla paste
2/3 cup granulated sugar
granola
dried fruit
frozen or fresh berries
berry syrup
Directions
Place gelatin in a small bowl. Pour a couple of tablespoons of the milk into the gelatin and mix. Let set for about 5 minutes.
In a medium mixing bowl, whisk together the remainder of the milk, yogurt, vanilla and sugar.
Place about 1/2 cup of the yogurt mixture into a small pot. Warm mixture while stirring constantly.
Add gelatin mixture to pot.
Whisk mixture until gelatin is dissolved. Let cool for 5 minutes.
Pour gelatin mixture back into the original yogurt mixture in the medium bowl. Mix thoroughly.
Divide the panna cotta into 6 ramekins or glasses.
Cover with plastic wrap and chill overnight in the refrigerator.
To serve, layer on granola, dried fruit, berries and berry syrup of your choosing.
Alternatively, run a knife around the edge of the ramekin, dip the ramekin in hot water and unmold onto a serving plate prepared with a bottom layer of granola. Top panna cotta decoratively with remaining ingredients.
Sweet Dungeness Crab – all you’ll want is a spritz of lemon.
For as long as I can remember I’ve ordered crab cakes in restaurants. They are, I think, the most difficult seafood fritter, patty or cake to get right. The best I’ve had were served at McCormick’s in Portland some years ago. They came with hollandaise sauce and I used to have them for breakfast with a cup of black coffee or a glass of Pinot Gris, after which I’d walk up the street to Powell’s to look at books or to write.
Thanks to the Dungeness in our freezer, I’ve been experimenting. Crab is difficult because it’s more important to get the seasonings right than with other seafood and then you’ve got to cook the cakes just so. If the cakes are very good, lemon is all you’ll want.
Dungeness Crab Cakes
Ingredients
½ pound cooked Dungeness or Blue Crab meat. If it seems too wet, it is. Squeeze the excess moisture out with paper towel or through a strainer. Take extra care to make sure there is no shell.
seasonings: Crab is very sweet. It needs something. I use a blend of dried powdered peppers such as Aleppo, Ancho, Cayenne, Chipotle. The idea is that you want to balance the sweetness of the crab with something that pulls your pallet in a different direction. This actually serves to underscore the sweetness of crab, its signature trait. In addition to the above types of spice, smoked paprika, nutmeg and tarragon can also be added. Dill or fennel? I wouldn’t. I seldom spice anything exactly the same twice. The key here is the spicy pepper.
soy sauce: as desired
1 or 2 shallots, diced fine, sautéed till soft in olive oil, removed from pan and set aside to cool
¼ cup red bell pepper, diced, sautéed in olive oil, removed from pan and set aside to cool
1 egg, beaten with a little soy sauce whisked in. Provided you don’t add too much spice to the cakes themselves, you can also add a couple shakes of Cholula here.
panko: approximately the same amount in volume as the crab meat. Start by mixing in about half the volume. That won’t feel like enough, so add more till it seems about right – not to wet, not too dry.
Olive oil and Butter
Directions:
In a large bowl, mix together the crab, seasonings, shallots, bell peppers, soy sauce and egg. Hands work best for this. Then mix in the panko. Shape the cakes into patties. Keep them fairly small so that they are easy to turn and they stay together.
In a frying pan on medium heat, add enough olive oil and butter in equal parts to shallow-fry the cakes. When the oil is hot, set the timer for 4 minutes and add the cakes. Cover the pan and cook for 1 minute, then lower the temperature to a little below medium. It is important to check the cakes periodically to make sure the bottom side is browning the way you want.
At 4 minutes, gently turn the cakes over and continue cooking uncovered. Occasionally spoon some of the oil-butter mixture on top of the cakes.
These are the best crab cakes I’ve ever had. All I ever want with them is a spritz of lemon. When Barbra and I pick a whole crab and dip it in herbed lemon-butter, we almost always go for a buttery, oaked Chardonnay. But these cakes want something lighter and more fruit forward, so Pinot Gris or similar pairs well.