Homemade Ricotta Cheese – As Easy as 1, 2, Cheese!

ricotta cheese n

A beautiful round of “ricotta” cheese made in our very own kitchen. Easy to make and delicious to eat! 

When will lived in the small rural village of Point Hope, Alaska, ricotta cheese was nearly impossible to get. The main way to acquire this cheese was by way of a kindly person hand-carrying it in on a flight from Anchorage. The desire to cook with ricotta and the scarcity of this cheese prompted us to learn how to make it. As it turned out, it was simple.

Living in the city of Ulaanbaatar in the dairy-loving country of Mongolia, you would think any cheese we would like would be at our fingertips. Interestingly enough, we have never seen ricotta in any of the grocery stores we frequent. Fortunately, milk as well as vinegar are readily available – all we need to make our own “ricotta.” We place ricotta in quotes to avoid the argument that what we are making is not authentic ricotta. The ricotta we turn out in our kitchen is delicious and works well in any recipe that calls for ricotta cheese.

So, in a few easy steps, you, too, can make your own ricotta cheese. You can use the initial warm ricotta to create delicious savory or sweet spreads. You can also let it dry out a little longer to make terrific pasta fillings or ricotta gnocchi.

Homemade Ricotta Cheese

Ingredients

  • 5 cups milk (I use whole, but 2% fat or more would also work.)
  • 2 tbsp white vinegar

Directions

  1. Heat milk to about 165 degrees F (74 degrees C) over medium heat.
  2. Stir in vinegar. You will notice the milk split into curds and whey. Let cool slightly.
  3. Hang double layer of cheesecloth in a plastic storage container. You can also line a strainer with cheesecloth and place over a bowl for the same purpose.
  4. Pour heated milk into cheesecloth to separate out the whey.
  5. Let drain for at least 30 minutes before using. The longer you drain, the drier the end result will be.

Stovetop Pizza – A Fast, Tasty Option Better than Delivery!

stove top pizza n

Twenty minutes from conception to the plate. Delicious stovetop pizza. Yes, we love anchovies. Can you spy those salty little morsels?

Awhile ago, someone shared a recipe for a homemade scratch pizza that could be made from start to finish in one pan on the stovetop. Intriguing. We usually make batches of pizza crusts which we partially bake and keep at the ready in our freezer. Of course, making our traditional crusts from yeasted dough takes time, not to mention space in the freezer. So we tried the stovetop pizza to see if this speedy pizza would cut the mustard.

What we discovered is a terrific method for making pizza in a galley, in a small camper kitchen, or anytime you want to quickly whip up a pizza. Heck, this is faster than ordering a pizza to be delivered!

The fifty dollar question… How’s the crust? No doubt, whether you make it in a wood-fired oven, a regular oven or over a grill, a traditional crust has a fuller flavor and better texture. But this quick homemade crust is quite good. Experiment with the heating till you get it just right, and you’ll end up with a crust that has better taste and texture than just about any ready-made frozen pizza or the soggy stuff delivered to your house. If one person creates the dough while the other whips up a sauce and grates the cheese, you can make one of these in 20 minutes! The crust is nice and crispy and is substantial enough to handle a lot of toppings. Use a non-stick pan such as those made by Scanpan or Swiss Diamond, and you won’t believe how easily the pizza slides out of the pan and onto a cutting board. Magical! And clean-up’s a piece of cake. So, the final verdict is four thumbs up. This is definitely a recipe that will go into our main collection.

20 Minute Stovetop Pizza

Ingredients

  • 1 cup all purpose flour
  • 1 tsp yeast
  • 1 tsp granulated sugar
  • 1 tsp salt
  • 2/3 cup warm water (105 degrees F/41 C)

Directions

  1. Whisk together flour, yeast, sugar and salt in a large pan. Make sure to use a pan with a fitted lid. We use an 11-inch (28 cm) pan.
  2. Stir water into the flour mixture. Mix well.
  3. Evenly spread dough on the bottom of pan using a rubber spatula.
  4. Top with your favorite toppings.
  5. Cover pan with fitted lid. Cook pizza for 5 minutes on heat a little hotter than medium.
  6. Continue cooking pizza for 10 more minutes on medium heat. Either vent the lid during this cooking or wipe out the condensation on lid to avoid a soggy pizza.
  7. Slide the pizza out onto a cutting board and enjoy!

Little Ringed Plover

Plover Little Ringed UB 2015 n

Little Ringed Plover, Charadrius dubius, Tuul River, Ulaanbaatar, Mongolia. Nikon D4, Nikkor 200-400mm lens, 1.4 teleconverter.

At about six inches (15 cm) from bill to tail and weighing just an ounce and a half or so (40 g), little ringed plovers are common along the Tuul River near Ulaanbaatar. Their small size, pale pink legs and bright yellow eye rings are diagnostic. These wary little birds seem to bob their heads and scurry back and forth along the shoreline constantly, hence the Latin “dubius” which means moving to and fro. They’re ground nesters. Among the shoreline rocks and pebbles, their light brown or grey speckled eggs are virtually invisible. As fall approaches, little ringed plovers migrate to Africa where they spend the winter.

We’re now at 40 species and counting in our urban birding adventures in and around Ulaanbaatar.

Rich and Beautiful Braided Swiss Bread – Züpfe

zupfe bread n

Rich and buttery Swiss bread provides a beautiful and delicious centerpiece for brunch. 

My bread-baking goal upon moving to Mongolia was to bake all of my favorite breads without the aid of my trusty Zojirushi bread machine that I relied on heavily in Alaska. The tiny house we will eventually live in will not have room for such an extravagant machine, so it was time to wean myself off of this terrific invention. In Alaska, I enjoyed throwing all my ingredients into a machine, going for a walk and coming back to beautiful finished doughs ready to shape and bake. These days, I’m finding that I really enjoy the process of manually bringing all the individual ingredients together to form delicious and beautiful breads. There is something satisfying about kneading dough and knowing, by touch, if it needs more of something.

The final bread on the list from my Alaska days to make from scratch was züpfe. I was introduced to this braided Swiss bread when I was young. I loved it. It could have been because of its soft, almost creamy texture or the lovely Swiss braids. I would eat as much of it as I was allowed. As an adult, I still love the flavor and the texture. The braids are fun to create and give an impressive finish. Bring this bread to your next dinner party instead of the traditional bottle-of-wine and see what happens.

Züpfe

Ingredients

  • 2 1/4 tsp active dry yeast
  • 1 1/3 cups warm milk (105F/41C)
  • 1 egg yolk
  • 2 tablespoons butter, melted
  • 3 1/2 cups bread flour
  • 1 tsp salt
  • 1 egg white
  • 1 tablespoon water

Directions

  1. In a large bowl, dissolve yeast in warm milk. Let stand until creamy, about 10 minutes.
  2. Add the egg yolk, butter, 2 cups of bread flour and salt. Stir well to combine.
  3. Stir in the remaining flour, 1/2 cup at a time, mixing well after each addition.
  4. When the dough has pulled together, turn it out onto a lightly floured surface and knead until smooth and elastic, about 8 minutes.
  5. Divide the dough into 3 equal pieces and roll each piece into about a 14-inch long log. Braid the pieces together and place on a parchment-covered baking sheet. Pinch the ends of the braids well so they don’t come undone.
  6. Cover with a damp cloth and let rise until doubled in size, about 1 hour.
  7. Preheat oven to 425 degrees F (220 degrees C).
  8. In a small bowl, beat together egg white and water. Brush risen loaf with egg wash and bake in preheated oven for 20 to 25 minutes, until golden brown.

Red-billed Chough: Corvids are Cool

Red-billed chough

Striking a regal pose after a morning of catching grasshoppers: Close cousins of crows, ravens, jays and magpies and adaptable to both urban and wilderness environs, choughs are common around Ulaanbaatar.

chough convention n

The convention: On the crest of this rocky hill, there were dozens of choughs. A hundred. Maybe more. Many of them were gathered around a cluster of chough feathers near these rocks. A fox? A kite? An eagle or hawk? Some predator had diminished their numbers by one. The entire flock was concerned.

choghs flock of n

Choughs in dawn light, hanging together, winging their way across the mountains and steppe near Ulaanbaatar.

Mini Matcha Cheesecakes with Shortbread Crust

Matcha cheesecake n

Delightfully green and chock-full of flavor, these mini desserts are sure to please a mini crowd. 

The smooth texture and familiar flavor of cheesecake draws us time and again to this delicious and decadent dessert. The beauty of homemade cheesecake is that it is a perfect canvas for so many creative ideas. The traditional vanilla flavor is sumptuous. But it is so easy to add, top, or infuse. I’ve been wanting to play some more with the matcha green tea powder I have in my pantry. I wanted to make a small sized cheesecake but I don’t have a small cheesecake pan. So I made small cheesecakes in a standard-sized muffin tin in order to turn out a small batch. These would be a lovely dessert to share at our next dinner party invite.

Ingredients

Crust

  • 1 1/2 cups all purpose flour
  • 1/3 cup granulated sugar
  • 1 egg, beaten
  • 1/2 cup butter, melted

Filling

  • 1 package of cream cheese, 250 grams, softened to room temperature
  • 1/2 cup granulated sugar
  • 1 large egg, beaten
  • 1 tsp vanilla extract
  • 1 tbsp matcha tea powder

Directions

  1. Preheat oven to 300 degrees F (150 degrees C). Line 8 standard-sized muffin tin cups with paper liners.
  2. In a medium bowl, mix together crust ingredients.
  3. Evenly divide crust mixture into lined muffin tin cups. Press down to form bottom of cheesecakes.
  4. Bake crusts for 5 minutes. Let cool.
  5. In a large bowl, whisk together filling ingredients. There should be no lumps and all ingredients should be mixed well.
  6. Divide filling evenly into paper lined cups.
  7. Bake cheesecakes until set, about 16 – 18 minutes. Centers should not jiggle.
  8. Refrigerate cheesecakes for 3 hours before serving.

Cranberry Banana Bran Muffins

muffins cranberry banana bran nSuper moist muffins bursting with cranberry and banana flavor and , shhhh, healthful bran. 

I inherited a bag of bran from a friend who moved from Ulaanbaatar earlier this summer. Had she not explained that the cyrillic words translated to wheat bran, I would have never guessed. There is a section in most grocery stores here in Ulaanbaatar that houses a variety of mysterious products that, I think, come from Russia. Sometimes I can decode the cyrillic and figure out what the items are. In most cases, I leave them alone. Now that I understand the cyrillic word for wheat bran, I can see that this ingredient is readily available in the stores we shop.

A week or so ago, I made my first bran muffins with my new pantry. They came out pretty well. They definitely had a bran flavor, which is to sat that they tasted like they were good for us. Partnered with an egg and a freshly brewed cup of coffee, we enjoyed daily breakfasts with that batch. Our test question when rating our recipes is, “If you got this ____ in a restaurant, would you be happy?” The bran muffins I made were good, but not impressive by any measure.

By contrast, today’s bran muffins are absolutely impressive and we would be delighted were they served to us in a restaurant or café. While there’s still enough bran in them to warrant the title “bran muffin,” the ripe bananas provide moistness and flavor the former muffins lacked and the cranberries add much-needed texture. The soured milk also adds moisture and a buttermilk flavor. When I put all the ingredients together, I was concerned that the batter would be too liquidy. It turns out the bran absorbs some of the liquid, so the ratio of liquid to dry ingredients was perfect. Not only did the muffins pass our test question, we’ve already eaten four muffins in one morning. That’s the true test.

Cranberry Banana Bran Muffins

Ingredients

  • 2 large eggs
  • 2/3 cup packed brown sugar
  • 1 cup ripe banana, mashed
  • 1 cup milk soured with 1 tbsp lemon juice
  • 1/4 cup light oil, such as canola
  • 1 tsp vanilla extract
  • 1 cup wheat bran
  • 1 3/4 cup all-purpose flour
  • 1 1/2 tsp baking powder
  • 1/2 tsp baking soda
  • 1 tsp ground cinnamon
  • pinch salt
  • 1 cup dried cranberries

Directions

  1. Grease 12-muffin tin. Set aside.
  2. Preheat oven to 400 degrees F (200 degrees C).
  3. In a small bowl, mix together wet ingredients. Set aside.
  4. In a large bowl, whisk together bran, flour, baking powder, baking soda, cinnamon and salt.
  5. Pour wet ingredients into dry and whisk until smooth.
  6. Fold in cranberries.
  7. Pour batter into muffin tin. Each muffin cup will be full.
  8. Bake for 20-25 minutes. Muffins will be lightly browned and a wooden pick inserted into the middle of muffin will come out clean when done.
  9. Let cool in pan on wire rack for about 5 minutes before removing.

4th of July Appetizer or Anytime Snack: Who’s Up for a Quail Egg Slider?

sliders quail egg n

Inspired by food truck fare, bar menus and backyard grills everywhere, these miniature burgers are the perfect summertime hors d’oeuvre.

Here in Mongolia, it can be tough to find the ingredients we’re looking for. Seafood? Forget it. And if we hadn’t smuggled in… er, I mean brought with us a full collection of spices, we’d be scrambling to find much of anything past pepper, paprika, cinnamon and coriander. Interestingly enough though, fresh quail eggs are easy to come by. Thus, the wheels of invention start spinning.

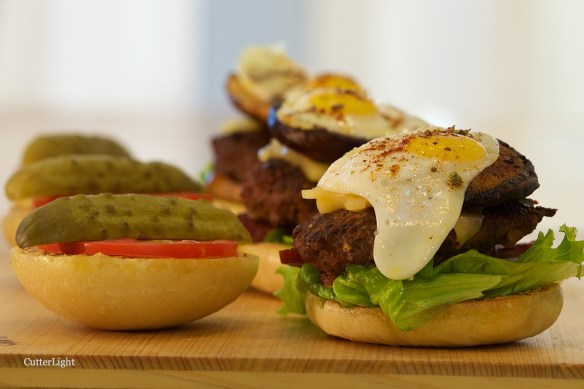
Tossing an egg on top of a sandwich is a time-honored tradition. And sliders – those miniature hamburgers served as an appetizer or traditionally in sets of three as a main entrée – have been around for decades. But this dressed up version of a classic sandwich, complete with thick bacon, a chipotle-and-soy-sauce seasoned patty, swiss cheese, a nice, big sautéed mushroom cap and topped with a perfectly fried sunny-side-up quail egg brings things up a notch.

As for the quail eggs themselves, they’re loaded with nutrition – research has put them at three to four times the nutritional value of typical chicken eggs. But with comparatively large yolks and shells lined with a tough membrane, they can be tricky to work with. Crack the eggshell on a sharp edge such as the side of your frying pan, then, taking care not to break the yolk, use a small knife to cut the egg open. Cook these eggs at a lower temperature than you would cook a chicken egg; they’ll still cook faster.

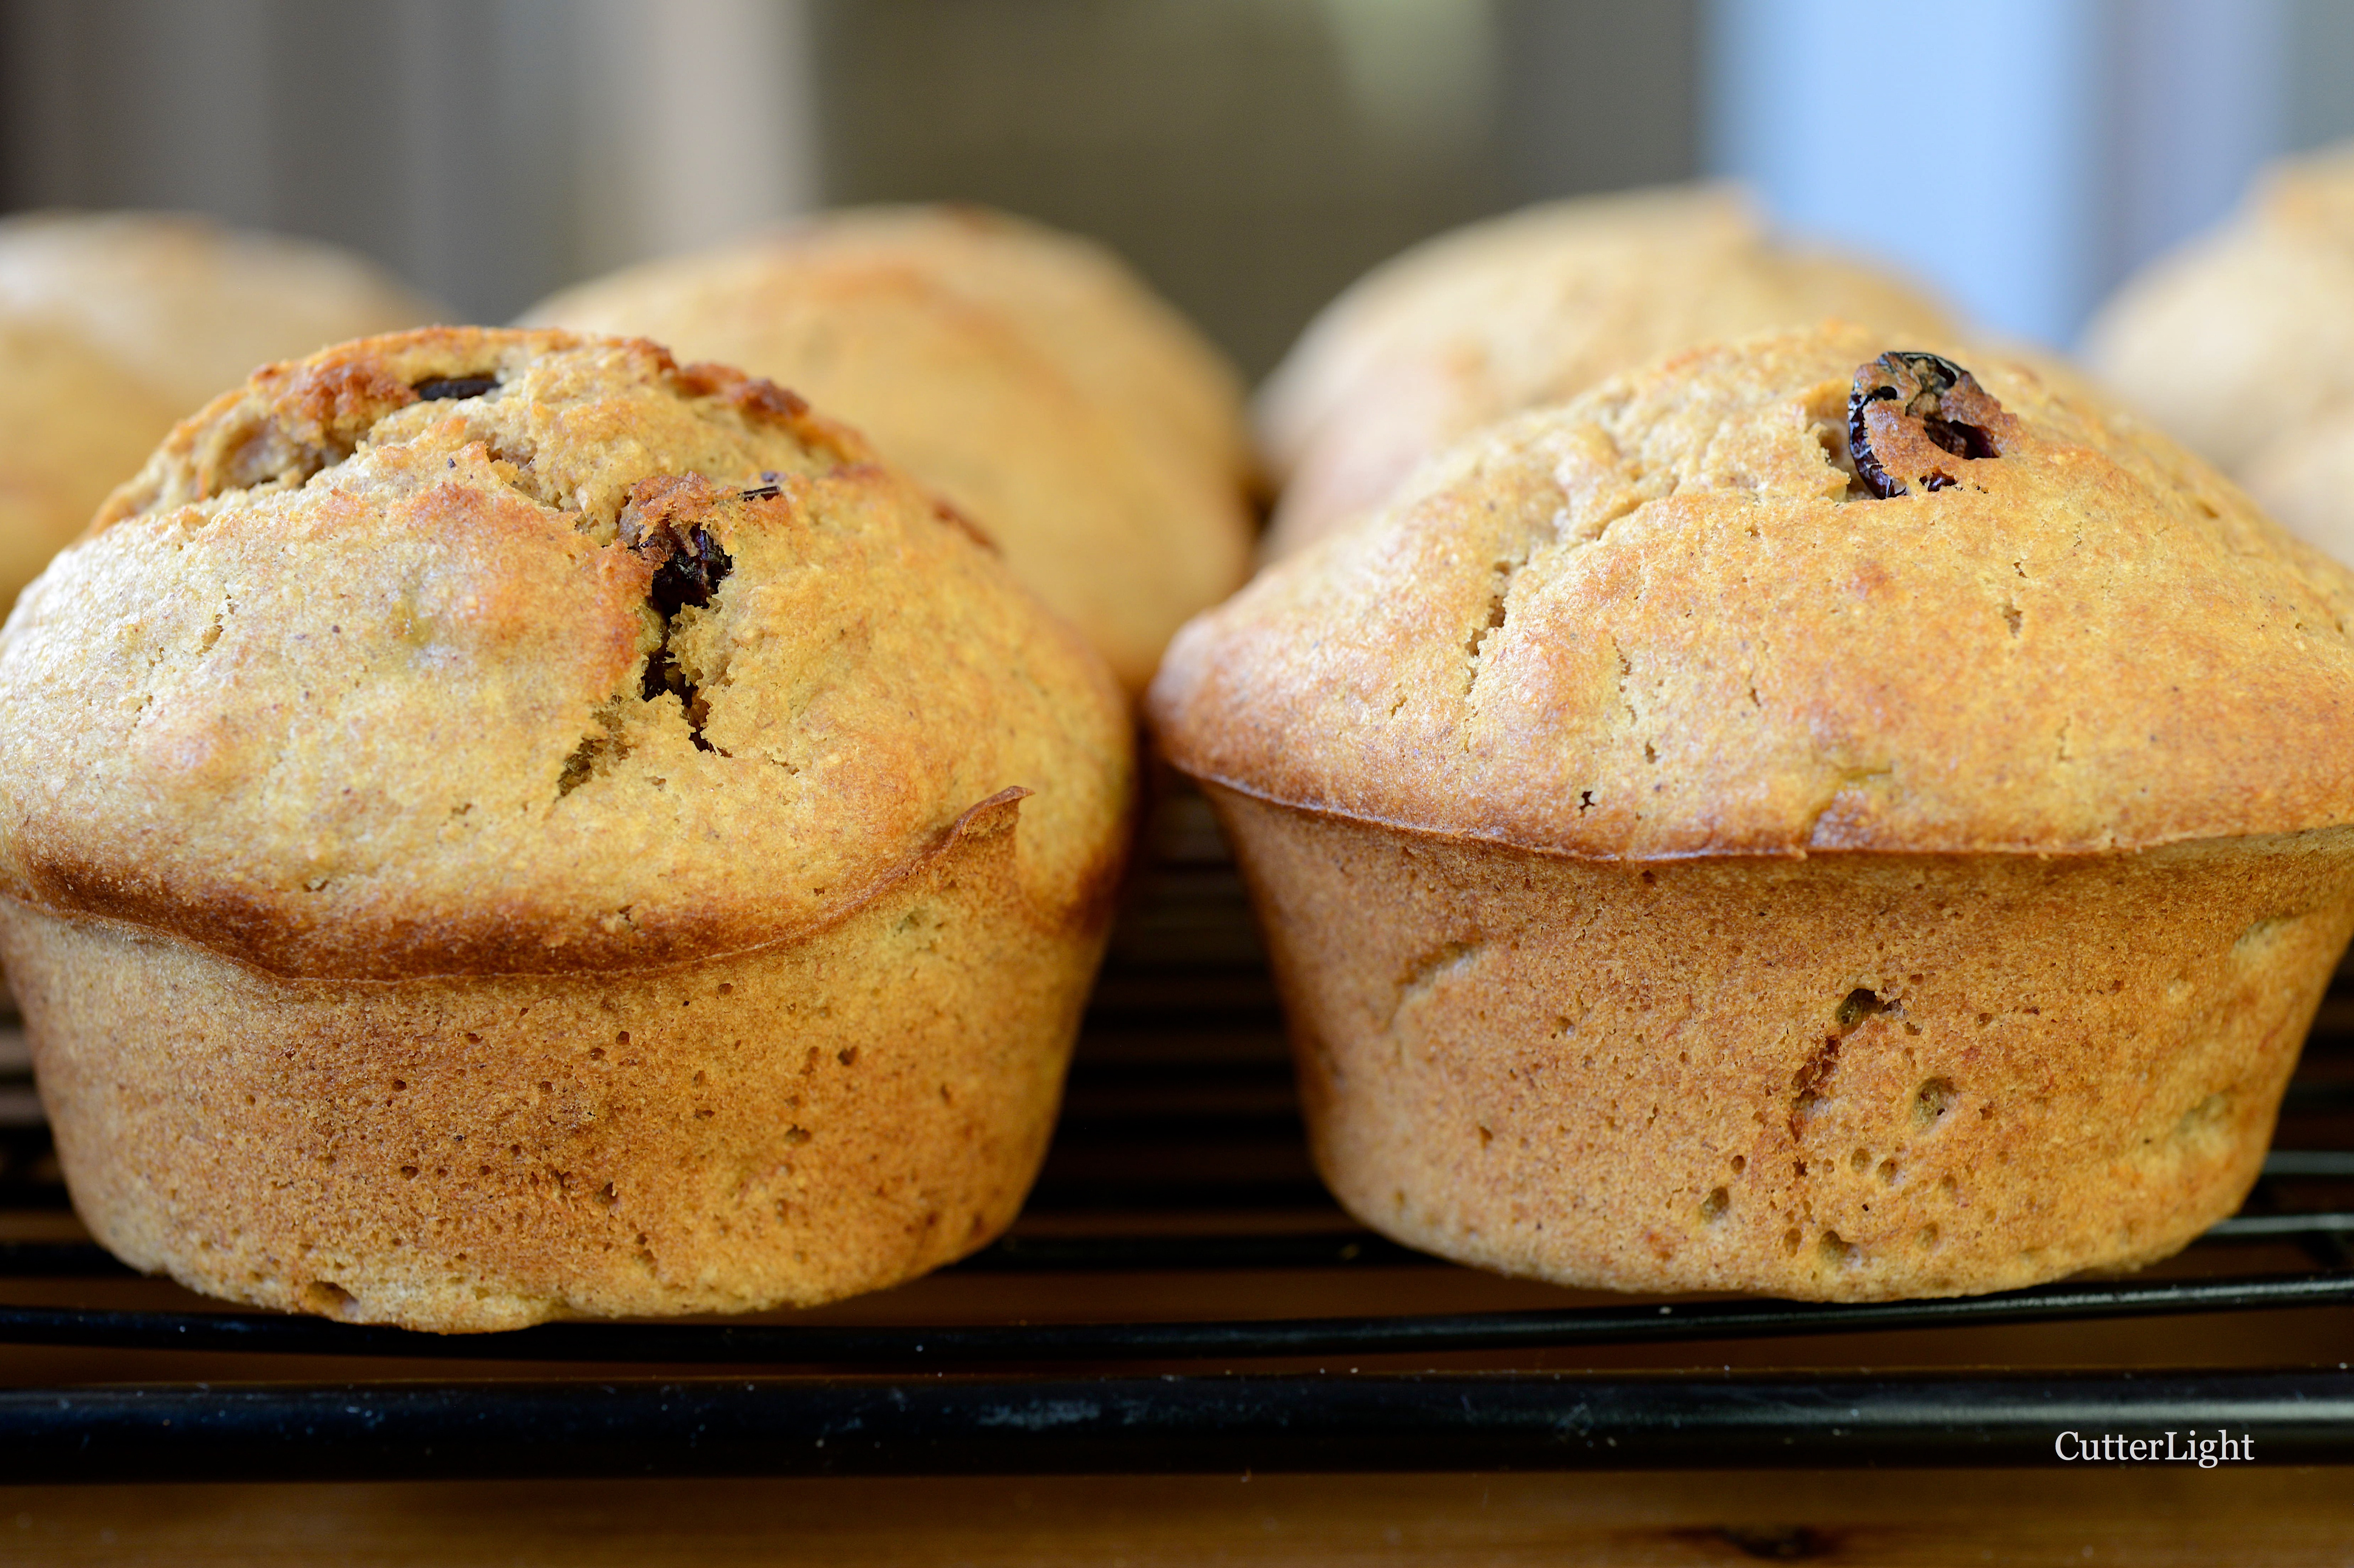
See our Slider Bun recipe here: Miniature Slider Buns

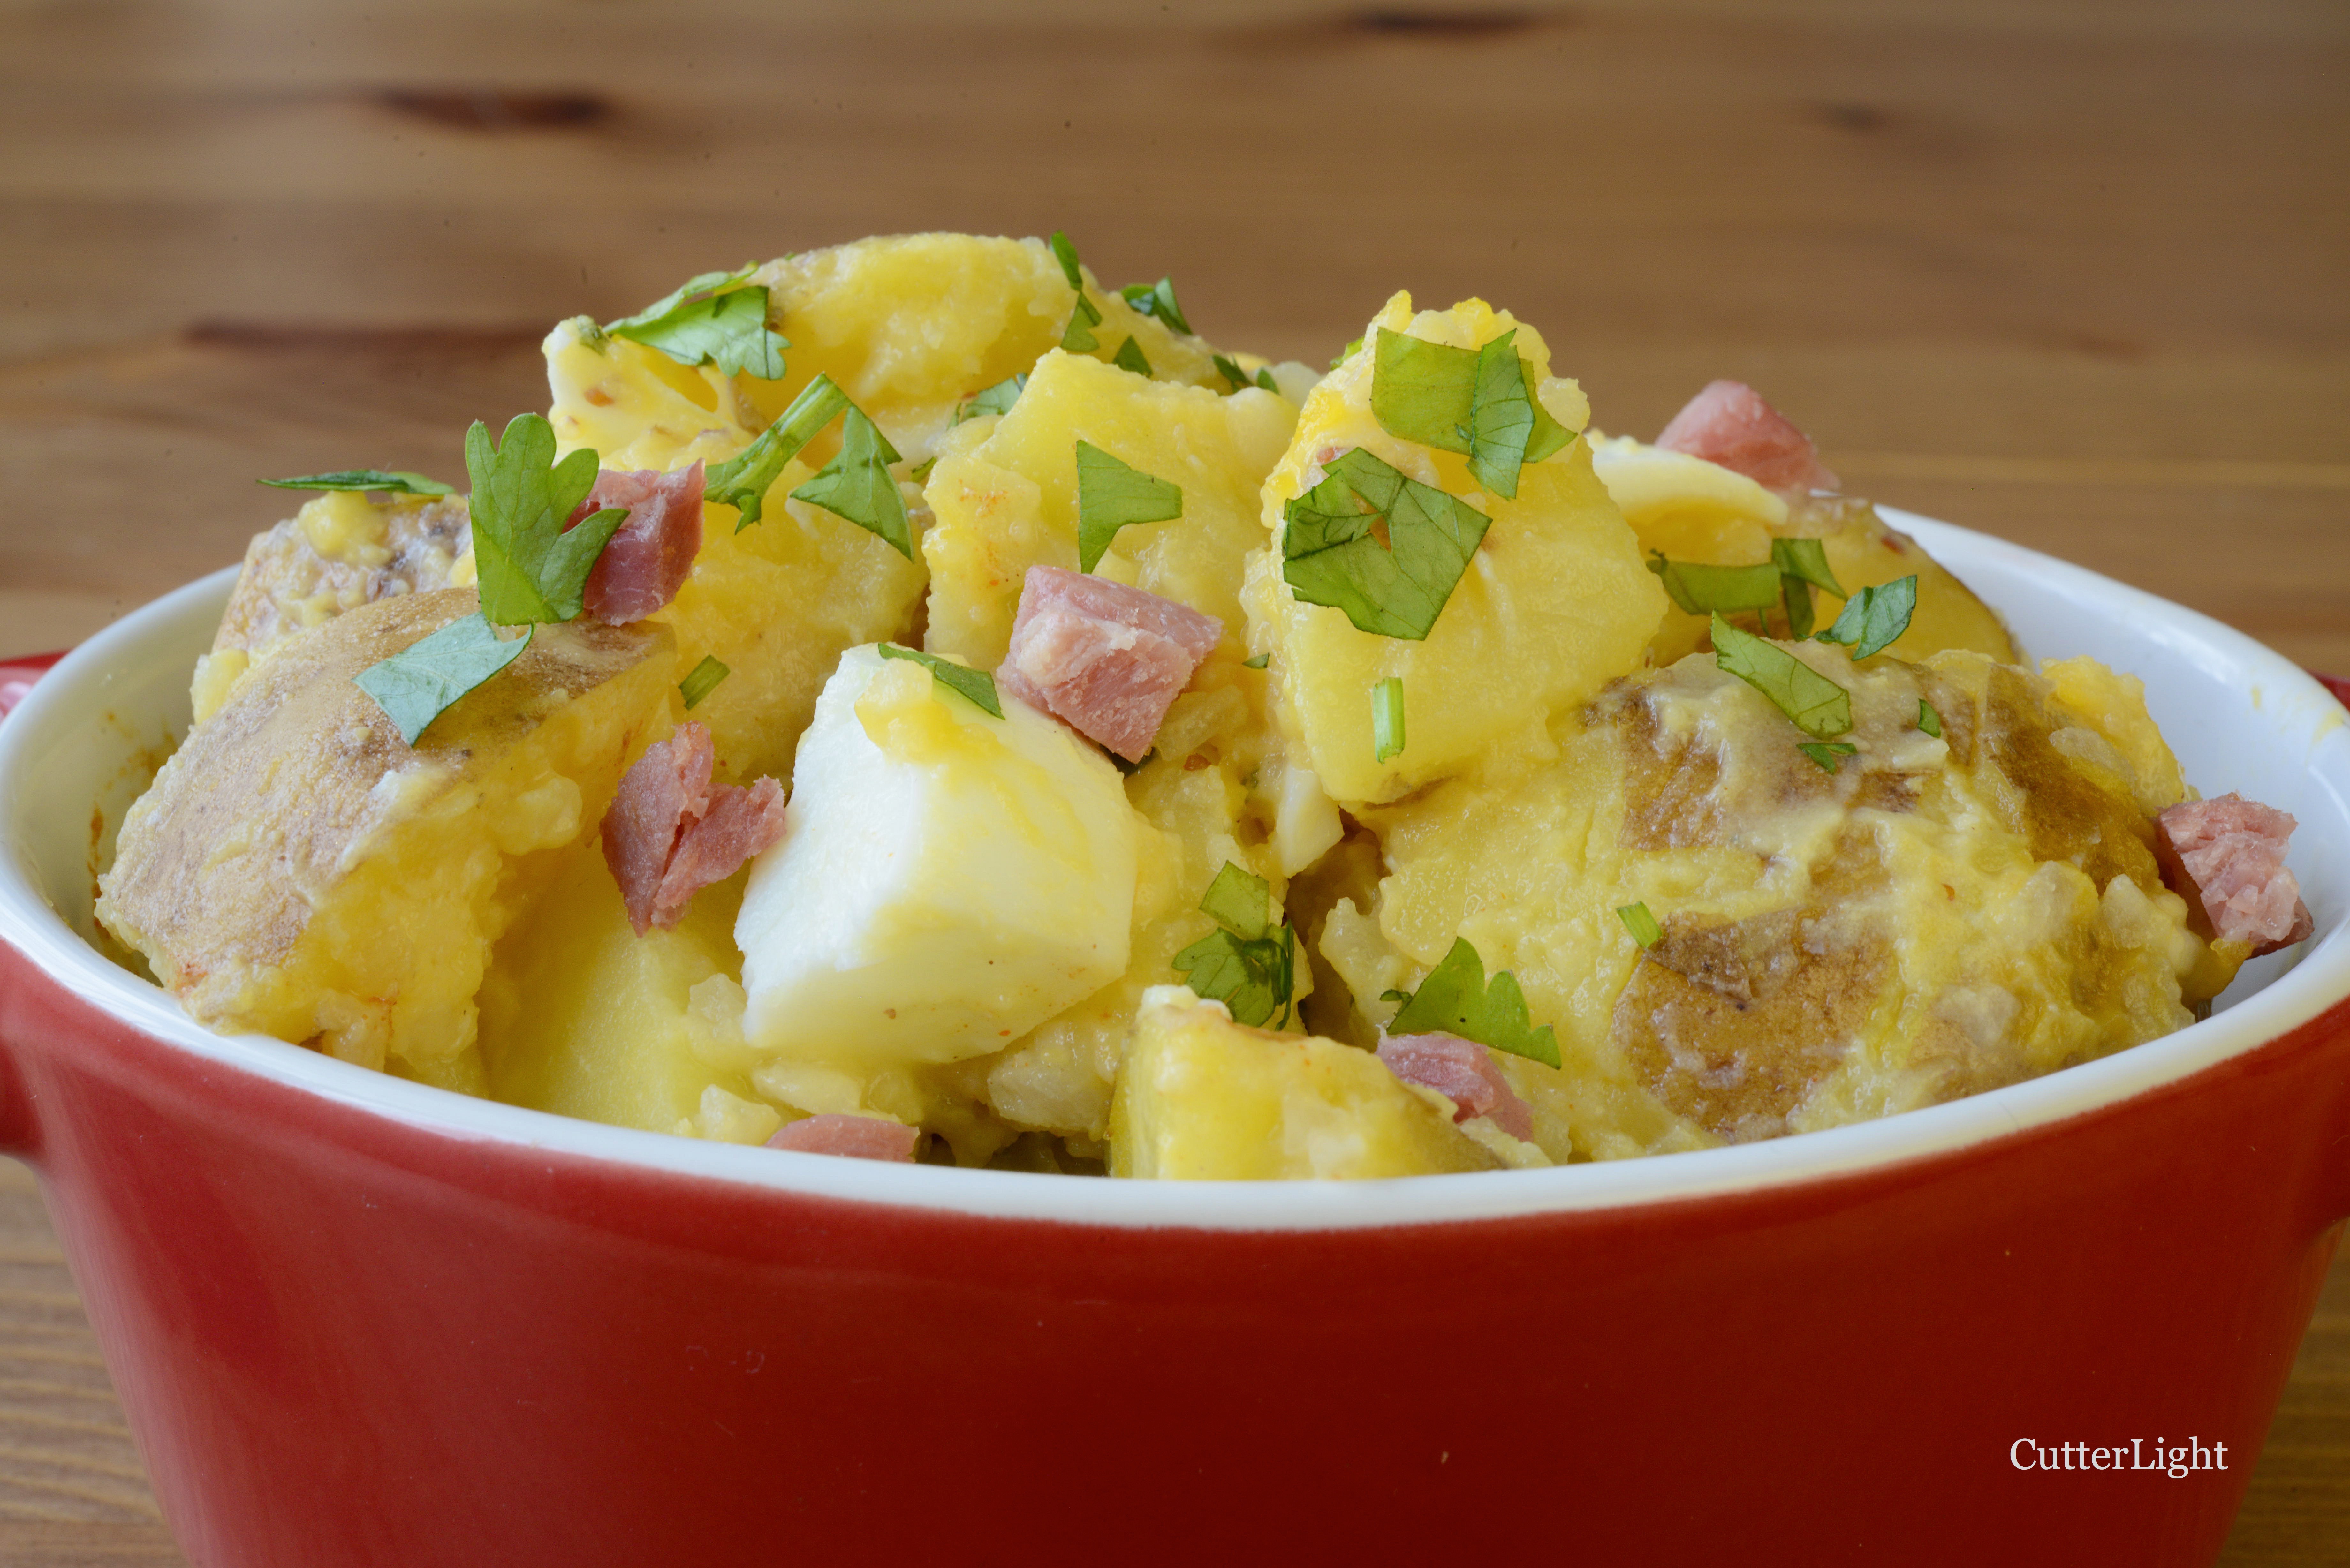
For terrific Potato Salad options to serve with these sliders, see: Pennsylvania German Potato Salad or Roasted Potato and Caramelized Onion Salad.

Quail Egg Sliders

Ingredients (for about 9 sliders)

  • 2 1/2″ to 3″ slider buns (Ours averaged 2 3/4 inches. See the recipe here.)
  • your favorite mustard
  • lettuce
  • olive oil
  • Bacon, enough to cover each bun
  • 1 pound ground beef
  • 1 tbsp soy sauce
  • 1/2 tbsp powdered chili pepper seasoning such as Penzeys Southwest Seasoning. (We used our own blend of equal parts powdered smoked chipotle chiles, powdered ancho chiles and oregano.)
  • black pepper
  • slices of Swiss cheese cut to the size of the patties
  • mushroom caps or slices of mushrooms, approximately the diameter of the buns
  • smoked sea salt
  • quail eggs
  • a few additional pinches of the above chipotle seasoning or similar seasoning (for the eggs)

Directions

  1. Place mushroom caps in a bowl. Toss with a little olive oil and some smoked sea salt and black pepper. Set aside.
  2. Combine the ground beef, soy sauce, powdered chili seasoning and a few grinds of black pepper. Don’t overwork the beef. Shape into patties slightly larger than the buns. Use your finger to put a small indentation in the center of each burger. (This will ensure that as the hamburger shrinks in diameter and plumps up as it cooks that it remains large enough to cover the bun and stays fairly flat.)
  3. Fry bacon in a frying pan. Drain on paper towels and set aside. Keep some of the bacon grease.
  4. Add a little olive oil to the pan along with reserved bacon grease. Heat over medium heat till sizzling hot.
  5. Add the patties to the hot pan. Cook for 2 minutes to get a good sear on one side. Flip, lower the heat a little, place the slices of Swiss cheese on top of the patties and cook for 3 additional minutes. Remove to a plate covered with a paper towel to drain. Cover plate with a pan lid or place in warm oven to keep warm. Save all or some of the grease in the pan.
  6. Add the mushroom caps to the hot pan. Add additional olive oil if necessary. Sauté mushrooms until they begin to soften, but don’t overcook. You want them to retain some firmness. Remove and drain on paper towels.
  7. Meanwhile, as you’re cooking the patties, sautéing the mushrooms and so forth, slice and toast the buns open side down in a pan with a little hot oil. Spread with mustard.
  8. Add a tablespoon of olive oil to a clean, non-stick frying pan. Over medium-low heat, bring the oil to cooking temperature. Carefully crack the quail eggs and add them to the pan. The whites should begin cooking slowly, but these eggs are so small that even on low heat, they’ll be completely done in about three minutes.
  9. Meanwhile, start building your sliders: bun, mustard, lettuce, bacon, burger with cheese, mushroom cap, sunny-side-up quail egg.
  10. Add a pinch of chipotle seasoning to the eggs and serve sliders open-face with a pickle, a slice of tomato, and Pennsylvania Potato Salad or Roasted Potato and Caramelized Onion Salad.

Black-Veined White Butterfly

Black-veined white (Aporia crataegi), Ulaanbaatar, Mongolia.

For a few days in late June, maybe a week, these black-veined whites (that’s their name) were everywhere. In the air, in the bills of birds, sipping on purple flowers. And then they were gone. In that one week, they were beautiful…

Summertime Salad – Pennsylvania German Potato

Pennsylvania Potato Salad n

Sweet and sour, savory custard-like dressing sets this potato salad apart from the traditional.

Summer celebrations, potluck gatherings and warm weather inspire me to prepare delicious cold salads so we’re ready for anything. We enjoyed our roasted potato and caramelized onion salad so much, we wanted to try another potato salad. I thumbed through a 30-year old cookbook a friend gave me from her toss-before-I-move pile. It was one of those community collection recipe books. Many of the recipes were tried and true, but not particularly inspired. But in between a lima bean salad and a recipe for marinating mushrooms, there was a Pennsylvania German potato salad that sounded delicious. Seeing how Jack is the expert on all things Pennsylvania (compared to me, anyway), I asked him if he ever had this salad. He remembered many summertime meals featuring this style of potato salad when he was growing up in Pennsylvania.

Inspired by Janet Jokinen, author of the original recipe, I set out to create my own version of Pennsylvania German potato salad. I cut the sugar and upped the flavors by adding German-style stone-ground mustard, seasonings, and, of course, bacon. My favorite thing about the salad is the dressing. Cooking the egg-based dressing in a double boiler produces a rich, savory custard. We made a double batch of the dressing to keep in the refrigerator in anticipation of future potato salad cravings.

Pennsylvania German Potato Salad

Ingredients

  • 6 large potatoes, cooked and diced into bite-sized pieces
  • 1 cup chopped celery
  • 3 hard-boiled eggs, diced
  • chopped chives to taste
  • 4 slices thick cut bacon – diced, cooked, and drained
  • smoked paprika
  • chopped parsley

Dressing

  • 7 tbsp granulated sugar
  • 1 tbsp all purpose flour
  • 2 tsp German mustard
  • 1 tbsp salt
  • 2 tbsp dried minced onions
  • 2 eggs, beaten
  • 2/3 cup apple cider vinegar
  • 1 tbsp water

Directions

  1. Bring water to a simmer in bottom of double boiler.
  2. Mix dressing ingredients in top of double boiler.
  3. Stir dressing continuously over simmering water until thickened. Dressing will coat back of wooden spoon when done.
  4. In a large bowl, combine potatoes, celery, diced eggs, chives, and bacon.
  5. Toss potato mixture with dressing.
  6. Garnish with smoked paprika and chopped parsley.
  7. Serve warm or chilled.