Rustic Char

char-rustic-in-pan-n

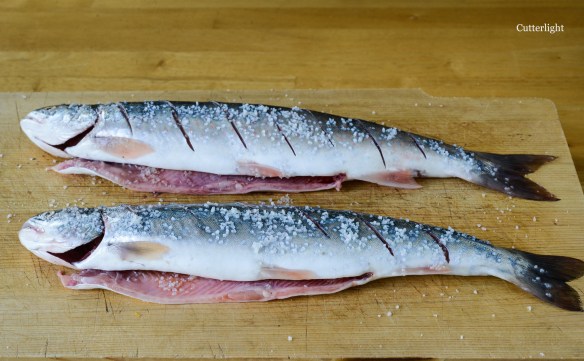
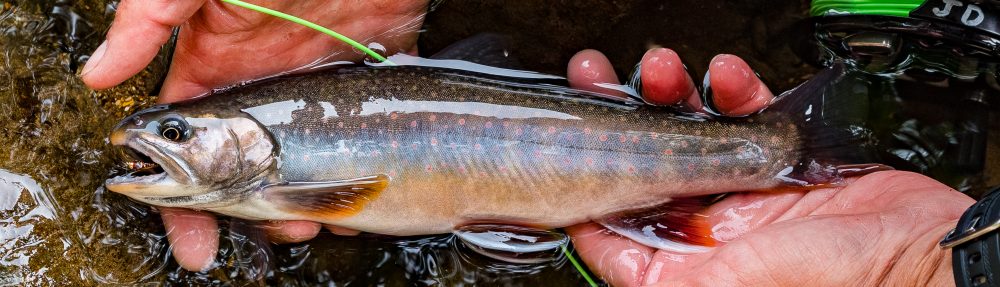
A great pleasure in life is obtaining seasonally fresh ingredients to take back to the kitchen. With Dolly Varden char at their fattest in fall and entering local streams, now is the time to go out and get them. Brookies and small lake trout shine equally well in this simple, exceptionally satisfying dish, as do Arctic char which are sustainably farmed and available in markets.

Char generally have a flavor that is richer than trout but lighter than most salmon. The keys to this dish are hearty vegetables, fresh charr, thyme, butter or quality olive oil and a good white wine. Add a spritz of lemon juice and a dash of salt and pepper. Don’t get hung up on specific ingredients; this is camp-style fare at its finest. And by all means, if you live where fresh herbs are available, substitute them for the dried herbs we use here in Chignik Lake.

rustinc-char-photo-n

This dish can easily be made in one pan. Simply hold the fish in reserve and add to the vegetables during the last half of cooking. Otherwise, prepare in two pans as follows.

The vegetables:

Ingredients

  • 3 or 4 cups hearty vegetables such parsnips, carrots, potatoes, sweet potatoes, butternut squash, pumpkin, etc. chopped coarse
  • sweet onion, chopped coarse
  • approximately 8 to 10 garlic cloves, cut in half
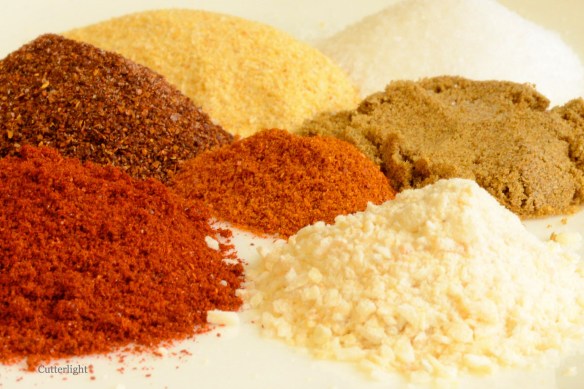
  • 1/2 tbsp thyme (dry)
  • 1/4 tbsp rosemary (dry)
  • 1 tablespoon olive oil
  • 1 tablespoon butter
  • 1/4 cup white wine
  • sea salt and freshly ground pepper to taste

Directions

  1. Add butter and olive oil to pan and heat over medium-high heat.
  2. Add vegetables and seasonings, turning to ensure everything is well coated and seasoned.
  3. Add wine, stir and cover pan. Reduce heat. Stir occasionally. When done, a fork will easily pass through vegetables.

The fish:

Ingredients

  • 1 fresh char of about 2 lbs, gutted, head and tail removed, rinsed and patted dry
  • 1 tablespoon olive oil
  • 1 tablespoon butter
  • 1/2 tbsp thyme
  • 1/2 tbsp tarragon (optional)
  • 1/2 tbsp marjoram (optional)
  • lemon juice
  • splash or two of white wine
  • sea salt and freshly ground pepper to taste
  • additional olive oil or butter for prepping fish

Directions

  1. Sprinkle lemon juice inside and outside of fish.
  2. Use fingers or a brush to cover fish inside and out with a light coating of butter or olive oil. Gently rub thyme and other herbs (if used) inside cavity and outside. Cut fish into three or four pieces and set aside.
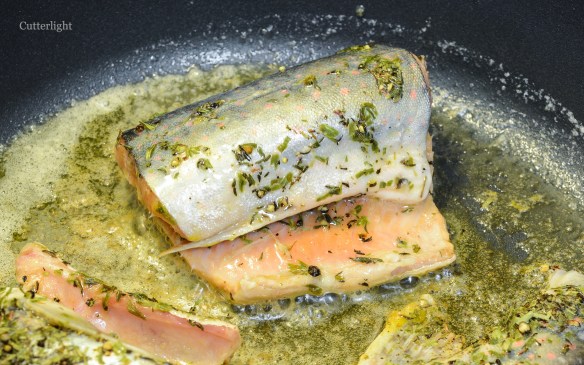
  3. Place butter and olive oil in a pan and heat over medium-high heat.
  4. When oil/butter are hot enough to sizzle, add fish pieces. Add salt, pepper and a splash of white wine. Cover and lower heat to medium-low. Cook for six minutes.
  5. Gently turn fish. Sprinkle salt and pepper and add a splash of white wine. Cook for six minutes.
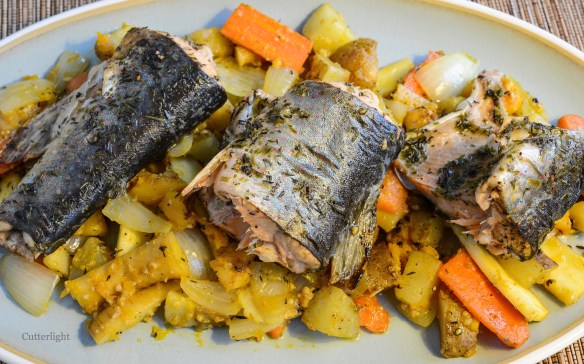
  6. Fish is done when flesh is opaque inside the cavity.
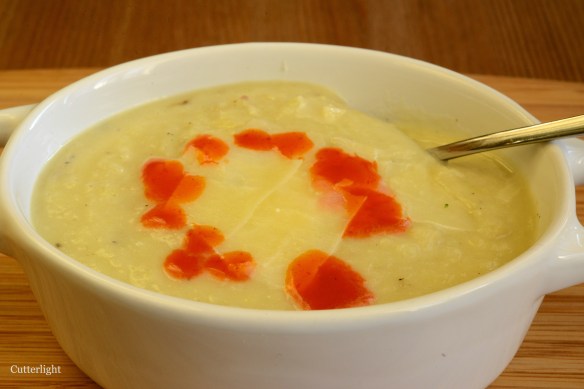
  7. Arrange vegetables on plates or serving platter, top with fish and serve piping hot with a favorite Chardonnay, Viognier or dry Riesling.

Dolly Varden Shioyaki (Salted, Grilled Char)

char-shioyaki-n

As the autumn air grows clear and crisp, Dolly Varden – close relatives of brook trout – are ascending streams on annual spawning runs. Salted and grilled over charcoal, there is no finer way to celebrate the coming of fall.

The small, icy-cold, brilliantly crystalline stream that flows less than 100 meters from our home has suddenly become positively choked with char. Only a week ago, the pools were bereft of anything but a smattering of fingerling salmon parr and equally diminutive juvenile Dolly Varden. The scene changed overnight when we woke to see the mountains rimming Chignik Lake gleaming with the season’s first snow. As the day warmed and the snow melted, the village stream filled to its brim with fresh snowmelt as clear and bracing as an Alaska September morning. Apparently that’s the signal Chignik Lake’s char were awaiting. When I checked that evening, each of the lower pools was packed with one of our favorite fish – Dolly Varden char. To be sure, there were no trophies among them, although a couple appeared to be pushing 16 inches. That’s fine. Eight to 12 inch fish (20 to 30 cm) are the perfect size for one of our very favorite foods – fresh char salted and grilled over charcoal.

I first encountered this simple but elegant fare while living in Japan. At festivals, fairs and inns in mountain villages, ayu (a trout-like fish highly regarded in Japan and South Korea) and iwana (white-spotted char very similar to Dolly Varden, Arctic Char and Brook Trout) are salted, skewered on bamboo sticks and roasted over hot coals till their skin turns a crisp golden-brown. With very small char, the bones are soft; it is common practice to eat the entire fish from tail to head.

char-salted-slashed-n

Char Shioyaki (Salted Grilled Char)

Ingredients

  • 8-to-16-inch char, gutted and gilled but with head left intact. (Brook Trout, Dolly Varden or Arctic Char)
  • Sea Salt (We have found coarse gray sea salt, Sel Gris, to be best for complimenting salmon, trout and char.)
  • Wooden skewers, soaked in water to prevent them from burning (Bamboo is traditional, but skewers fashioned from hardwoods such as alder, peach, apple, hickory and similar woods also work well.)

Directions

  1. Prepare a charcoal grill or campfire. (Alternatively, fish can be broiled on a baking sheet on the top rack of the oven.)
  2. Thoroughly clean stomach cavity and gills from fish. Do not scale. Leave head intact. Rinse in cold water and pat dry with paper towels.
  3. Using a very sharp knife, make shallow oblique cuts spaced about 1″ apart through the skin. Avoid cutting too deeply.
  4. Run sharpened skewer into fish’s mouth and through the body, making sure fish is securely skewered.
  5. Liberally salt the fish inside and outside.
  6. Placed directly on a very hot grill. To prevent skin from sticking to grill, do not move fish. Turn only once, gently loosening with a spatula if necessary. Roast till skin, tail and fins are crisp and golden brown, eyes are white and opaque, and meat is splitting where slashed. Alternatively, fish can be roasted on roasting stick over hot coals.

Serve with cider, a favorite bourbon, sake, or Pinot Gris.


New Favorite Appetizer: Ikura on Avocado

ikura on avadado n

With freshly cured salmon roe on hand and avocados just arrived from The Big City, we put one and one together. Wow! Perfect with a Sauvignon Blanc while grilling salmon. Click here for the ikura recipe.

And if you’re out in Bush Alaska and no Sauvignon is on hand, how about a home-brewed beer or a sparkling glass of Soda Stream fizzy water?

The Magic of Freshly Cured Ikura (Salmon Roe Caviar)

ikura fresh in clear glass n

In The Bell Jar, Sylvia Plath describes eating an entire bowl of caviar by herself. Which sounds a little piggish. Certainly we would never do such a thing. No, never. The happy little seal… well, he’s not talking.

Making your own ikura (salmon roe caviar) is easy.  The recipe, linked below, continues to be one of Cutterlight’s most popular.

Click here for the recipe: Ikura: Curing Salmon Eggs

This batch came from a Sockeye salmon, and although chum salmon eggs are the traditional choice due to their large size, the ripe eggs of any species of salmon or trout work well.

Bizarre Food or a Gourmet Delicacy? Sautéed Salmon Shirako on Polenta

Shirako on polenta n

This Japanese delicacy hasn’t quite caught on in America… yet. But as more and more people try it, they’re discovering what many residents of the Atlantic Gulf Coast have known for generations: this stuff is delicious!

Not long ago daughter Maia reported from Japan that she had just tried shirako. “What?!” I asked in astonishment. “Really? How was it?”

“Oshikatta yo!”

“Hontou ni?”

“Hontou ni!”

Translation: She had dined on the milt sacs of cod and found them to be delicious. “Really?”   “Really!”

With this conversation in mind, I looked dubiously at the pair of milt sacs I’d just removed from a freshly caught Sockeye salmon. I’d done some reading and discovered that “white roe” – the milt sacs of mullet – are a traditional delicacy along the Gulf Coast of America. Packed with nutrition, they definitely belong in the Super Food category as well. “Well, why not,” I mused. “They look like they’re made to be rolled in corn meal, fried up and served with grits.”

That’s all there is to it. And yes, they were delicious. Really!

Sautéed Shirako

Ingredients

  • Fresh milt sacs from salmon, cod, mullet or similar fish
  • corn meal
  • freshly ground black pepper
  • salt or soy sauce
  • olive oil (or butter or bacon fat)

Directions

  1. Heat a tablespoon or two of olive oil, butter or bacon fat in a skillet over medium heat.
  2. Sprinkle a tablespoon or two of cornmeal on a cutting board or plate. Add a little freshly cracked black pepper.
  3. Rinse milt sacs in cold water. Pat dry but leave a little dampness (so cornmeal will attach).
  4. Rolls sacs in cornmeal.
  5. When oil hot enough to gently sizzle, carefully place the sacs in the skillet. Add a few dashes of soy sauce or sprinkle with salt. Lower heat to medium-low.
  6. Sauté for 3 minutes. Gently turn and sauté other side for two or three additional minutes, longer if the sacs are particularly large. Both sides should be crisp and golden.
  7. Serve piping hot with grits or polenta.

Homemade Chewy Ramen Noodles

ramen n

Homemade ramen – the adult (just better) version of that ten-cent package we used to subsist on in college.

Mongolians love their noodles. It is a staple food available in any grocery. Any Mongolian woman knows how to whip up a batch of noodles from scratch and cut them to perfection. I think nearby influences have brought in another version of a popular noodle – ramen. There are lots of tasty ramen shops around Ulaanbaatar. Some shops feature windows into the back where you can see highly skilled noodle makers tossing, spinning, stretching, and cutting dough by hand with a wizard’s touch.

I always liked ramen. But my ramen memories had always included that super-salty instant soup that I used to buy in my early college years. Both Jack and I have fond memories of throwing something into that soup to make it more healthful and more tasty. Now, I have been exposed to beautiful bowls of tasty, chewy ramen noodles swimming in flavorful broth and topped with hard boiled eggs, vegetables, and different meats. On a cold day in Ulaanbaatar, there is nothing more satisfying than a giant bowl of ramen.

Being an experienced pasta maker, I thought there was nothing to making ramen noodles. I even thought they were probably just spaghetti noodles. With that in mind, I made a batch of spaghetti and handed it over to Jack for the creation of soup. That didn’t work. Turns out, it isn’t that simple. The noodles got soggy and fell apart. My pasta-making ego was bruised. After a spell, I decided to give it a try again, this time armed with some research. What gives ramen noodles that necessary chewiness? After reading through a few websites, I decided to experiment. It seems that ramen noodles need something called an alkaline salt. One website cited that the origin of the noodles is from a place where the water has a high minerality which contributes to the texture. The most common ingredient for this alkaline salt is called kansui, which can be purchased in Chinatown. As there is no “Chinatown” in Ulaanbaatar, I needed to make my own. Thank goodness for the internet. A quick search revealed that kansui can be made at home by baking baking soda for an hour in a 250 degree F oven. Harold McGee of the New York Times explained baking the baking soda essentially changes the sodium bicarbonate into sodium carbonate which is an alkaline salt, that works perfectly in ramen noodle dough.

After a few experiments I learned that adding a little salt to the dough recipe made the noodles taste better. I never add salt to my regular pasta noodles. I also tried making noodles with all purpose flour and again with semolina flour. I happen to have a lot of semolina in my pantry right now. Turns out the noodle texture and flavor is similar with either flour, so I can say that those two flours are interchangable in this recipe.

With a successful recipe in the box, we are happily eating ramen that is 1,000 times better than the ramen both of us subjected ourselves to in college. Jack has been creating soup bases from broth, miso and even tomato juice. We’ve been adding pan fried meat like chicken or pork. Sauteed vegetables like eggplant and asparagus have entered the scene lately. Sometimes we amp up the spice by floating a bit of Cholula or Sweet Chili Sauce atop the whole dish. I’ve found that keeping portions of the noodles in ziptop bags in the freezer allows us to have the “instant meal” like the old days but with a fresh-made flavor.

Homemade Chewy Ramen Noodles

Ingredients

  • 1 cup hot water
  • 2 tbsp kansui
  • 1 tsp salt
  • 4 cups all purpose or semolina flour

Directions

  1. In a bowl, mix together water, kansui, and salt. Stir until salt is dissolved.
  2. Place flour in a large bowl.
  3. Make a well in the middle of the flour. Pour hot water mixture into the well.
  4. Using a fork, begin to blend the water and flour starting in the middle.
  5. Pull more flour in from the edge of bowl into the well in order to moisten all the flour. Continue to stir with the fork. The mixture should all look like scrambled eggs. There should not be any dry parts or really wet parts. If the mixture is too wet, add a little flour. If it is too dry, add a bit more water.
  6. When the whole mixture looks like the texture of scrambled eggs, knead it by hand until it is formed into a ball.
  7. Place ball into a ziptop bag, seal, and let rest for an hour.
  8. Divide dough into 8 pieces.
  9. Roll each piece through a pasta machine starting with largest setting (mine is 7). Keep running dough through the machine decreasing the setting by one each time.
  10. After some experimenting, I liked the texture and thickness rolled down through a 2 setting (second to smallest). Then, cut the pasta using the spaghetti cutter.
  11. Boil the noodles for 2 to 2 1/2 minutes to cook. They should be al dente. After cooking, drain them and immediately add them to your favorite broth.

Store-bought is easier, but homemade is tastier – Homemade Basil Pesto

pesto n

A bright, fresh taste that is missing in our store-bought favorite. Homemade pesto can’t be beat.

The combination of creamy pine nuts, salty parmesan cheese, bright and flavorful basil, spicy fresh garlic all combined to make a sauce that is simply magic. We douse our pasta in pesto, smear it on sandwiches, and swirl it into bread dough. We freeze big batches of basil when the leaves ripen in the summer and make fresh pesto all year long.

Homemade Pesto

Ingredients

  • 2 cups packed basil leaves (or frozen equivalent)
  • 1/2 cup grated parmesan cheese
  • 1/3 cup pine nuts
  • 3 garlic cloves
  • 1/2 cup extra virgin olive oil
  • salt and pepper to taste

Directions

  1. Place basil, parmesan, pine nuts, and garlic cloves in blender, food processor, or nut chopper attachment of a stick blender. Give the mixture a couple of blitzes to chop the basil leaves.
  2. With the  machine running, drizzle olive oil into basil mixture.
  3. When all is chopped and nicely blended, salt and pepper to taste.

A Homemade Spice and Seasoning Mix – Better Than Doritos!

Dorito Spices n

A mix of spices and flavors that will remind you of those chips that maybe you should be avoiding.

Awhile ago, I was at a camp with 33 students. As much fun as that sounds like it might be, I ate an entire family-sized bag of Doritos at the end of the first day to de-stress. That was the strongest thing I could find. There is something about those chips that is ridiculously addictive. I really don’t know what it is. What I do know is that those chips are not good for me. And, a whole bag? I knew better than that. Even though I enjoyed every tasty chip, I immediately went into a salt coma after finishing that bag. As much as I enjoyed the flavor of Doritos, I have not touched them since. But the flavor…

Recently, I came across a popcorn recipe that featured a spice mix reminiscent of those terribly addictive chips. Jack and I love a good date night featuring a movie and popcorn.  After tinkering with the recipe (it is no longer vegan), I have come up with a keeper. I’ve used it on popcorn and enjoyed it on homemade oven-baked potato chips which we devoured.

Better Than Doritos Spice Mix

Ingredients

  • 1 tsp garlic powder
  • 1 tsp onion powder
  • 1 tsp cumin
  • 1 tsp smoked paprika
  • 1 tsp chili powder
  • 1/4 tsp cayenne pepper
  • 1 tsp salt
  • 4 tbsp finely shredded parmesan cheese

Directions

  1. Mix all ingredients.
  2. Use to taste on popcorn, fried potatoes, grilled corn, and anything you’d imagine.
  3. Store leftovers in an air-tight container.

Honey Wheat Oat Banana Pancakes – Recipe for a Great Morning

pancakes oat wheat banana n

Good morning Ulaanbaatar! A stack of moist, flavorful pancakes topped with real maple syrup and we’re ready for anything the day has to offer. 

Boring oatmeal for breakfast? No way! One bite and you will forget how healthful these pancakes are. This may become your go-to pancake recipe. It is now ours!

Honey Wheat Oat Banana Pancakes

Ingredients

  • 3/4 cup rolled oats
  • 1 cup buttermilk
  • 1 large egg
  • 1 ripened banana, mashed
  • 2 tbsp unsalted butter, melted
  • 1 tbsp honey
  • 3/4 cup whole wheat pastry flour
  • 1 1/2 tsp baking powder
  • 3/4 tsp baking soda
  • 1 tsp ground cinnamon
  • pinch mace or grated nutmeg
  • pinch salt
  • chopped nuts for garnish

Directions

  1. Chop oats finely by using a blender or a nut chopper.
  2. In a medium bowl, soak oats in buttermilk for 10 minutes.
  3. Mix egg, banana, butter and honey into oat mixture.
  4. Mix flour, baking powder and soda, cinnamon, mace and salt into oat mixture.
  5. Heat pan over medium heat.
  6. Lightly oil pan.
  7. Pour 1/4 cup of batter onto pan. Cook until bubbles appear on surface, then flip. Continue cooking for another minute until pancake is golden brown.
  8. Serve warm with maple syrup and garnish with nuts.

Don’t Throw Out Your Broccoli Stems! Delicious Broccoli Potato Soup

broccoli potato soup n

Creamy, delicious and packed with flavor, this soup puts to tasty use something people tend to throw out – broccoli stems! 

In our kitchen, we try to get the most out of everything. We roast whole chickens and crack the bones for chicken stock. The fish we catch get picked clean to the bones. The vegetable odds and ends a lot of cooking show hosts scrape off cutting boards into into the trash end up in soups and other dishes. Having read that banana peels are edible, we gave them a go last summer. (Edible, perhaps; palatable, not.) For some reason, I grew up thinking that the only part of broccoli that people are supposed to eat are the florets. When I began to cook as an adult, a friend introduced me to a recipe with stir-fried broccoli stems. Delicious. Even before we met, Jack had been combining stems, garlic and chicken stock to make a tasty, nutritious soup as well as slicing the stems thin and adding them to stir-fries.

With a sunny high of 5° F here in Ulaanbaatar, this day called for a hot bowl of homemade soup. The tough outer layer of the broccoli stems do have to be peeled away, but it’s worth the effort. (I use a vegetable peeler for this.) Once you’ve removed this fibrous outer layer, you’re left with a tender, flavorful vegetable that can be sautéed and added to pasta dishes or puréed and served in soup, as is the case here.

Broccoli Stem Potato Soup

Ingredients

  • 2 tbsp olive oil
  • 1 medium onion, chopped
  • 2 cloves garlic, chopped
  • 3 cups chopped potatoes
  • 3 cups peeled and chopped broccoli stems
  • generous pinch dried thyme
  • generous pinch salt
  • 4 cups broth (beef, chicken, or vegetable)
  • 2 tbsp heavy cream
  • freshly ground pepper, to taste
  • toppings – Cholula hot sauce, parmesan cheese

Directions

  1. Sauté onions for a couple of minutes until they begin to be translucent.
  2. Add garlic to onions and continue to sauté for a couple of more minutes.
  3. Add potatoes, broccoli, thyme, salt, and broth.
  4. Bring mixture to a simmer. Continue to simmer until broccoli and potatoes are fork tender, about 15 minutes.
  5. Purée soup with a stick blender, or in batches in a regular blender.
  6. Serve hot topped with splashes of Cholula hot sauce and some shavings of parmesan cheese.