I’ve heard them a few times. In fact, we had one Tu Tu Tuu-ing outside our bedroom window in dark pre-dawn hours last fall. But until yesterday I’d never actually seen a Western Screech Owl before. This one had chosen a perch right outside the entrance to the elementary school here in Cordova, thereby acquiring instant celebrity status. Like most owls in daytime, he mostly slept, now and then barely opening his eyes for a sleepy look at the goings on near his perch.
Do you ever see owls where you live? What kinds?
Thanks for stopping by.Your likes and comments help other readers find these articles.
Developing recipes and writing a cookbook is obviously a creative process. Our inspiration may seem to all come from our own heads. Not always so. Often it’s more about iterations. We read about something, or see something, or taste something and our thoughts often go to, “This is good. How can we make it better? And how might we Alaskify this?” This philosophy is borne from a love of where we live and all the Alaskan ingredients that make The Great State one of the world’s best kept food-lovers secrets. Fifteen years in, we are still in the honeymoon phase!
Recently, we have been experimenting with pizza. If you’ve been following along, you know that one of our pantry staples is a few par-baked sourdough pizza crusts kept ready for quick use in the freezer. They’re still a great option. But what about fresh dough and a “wood-fired” pizza?
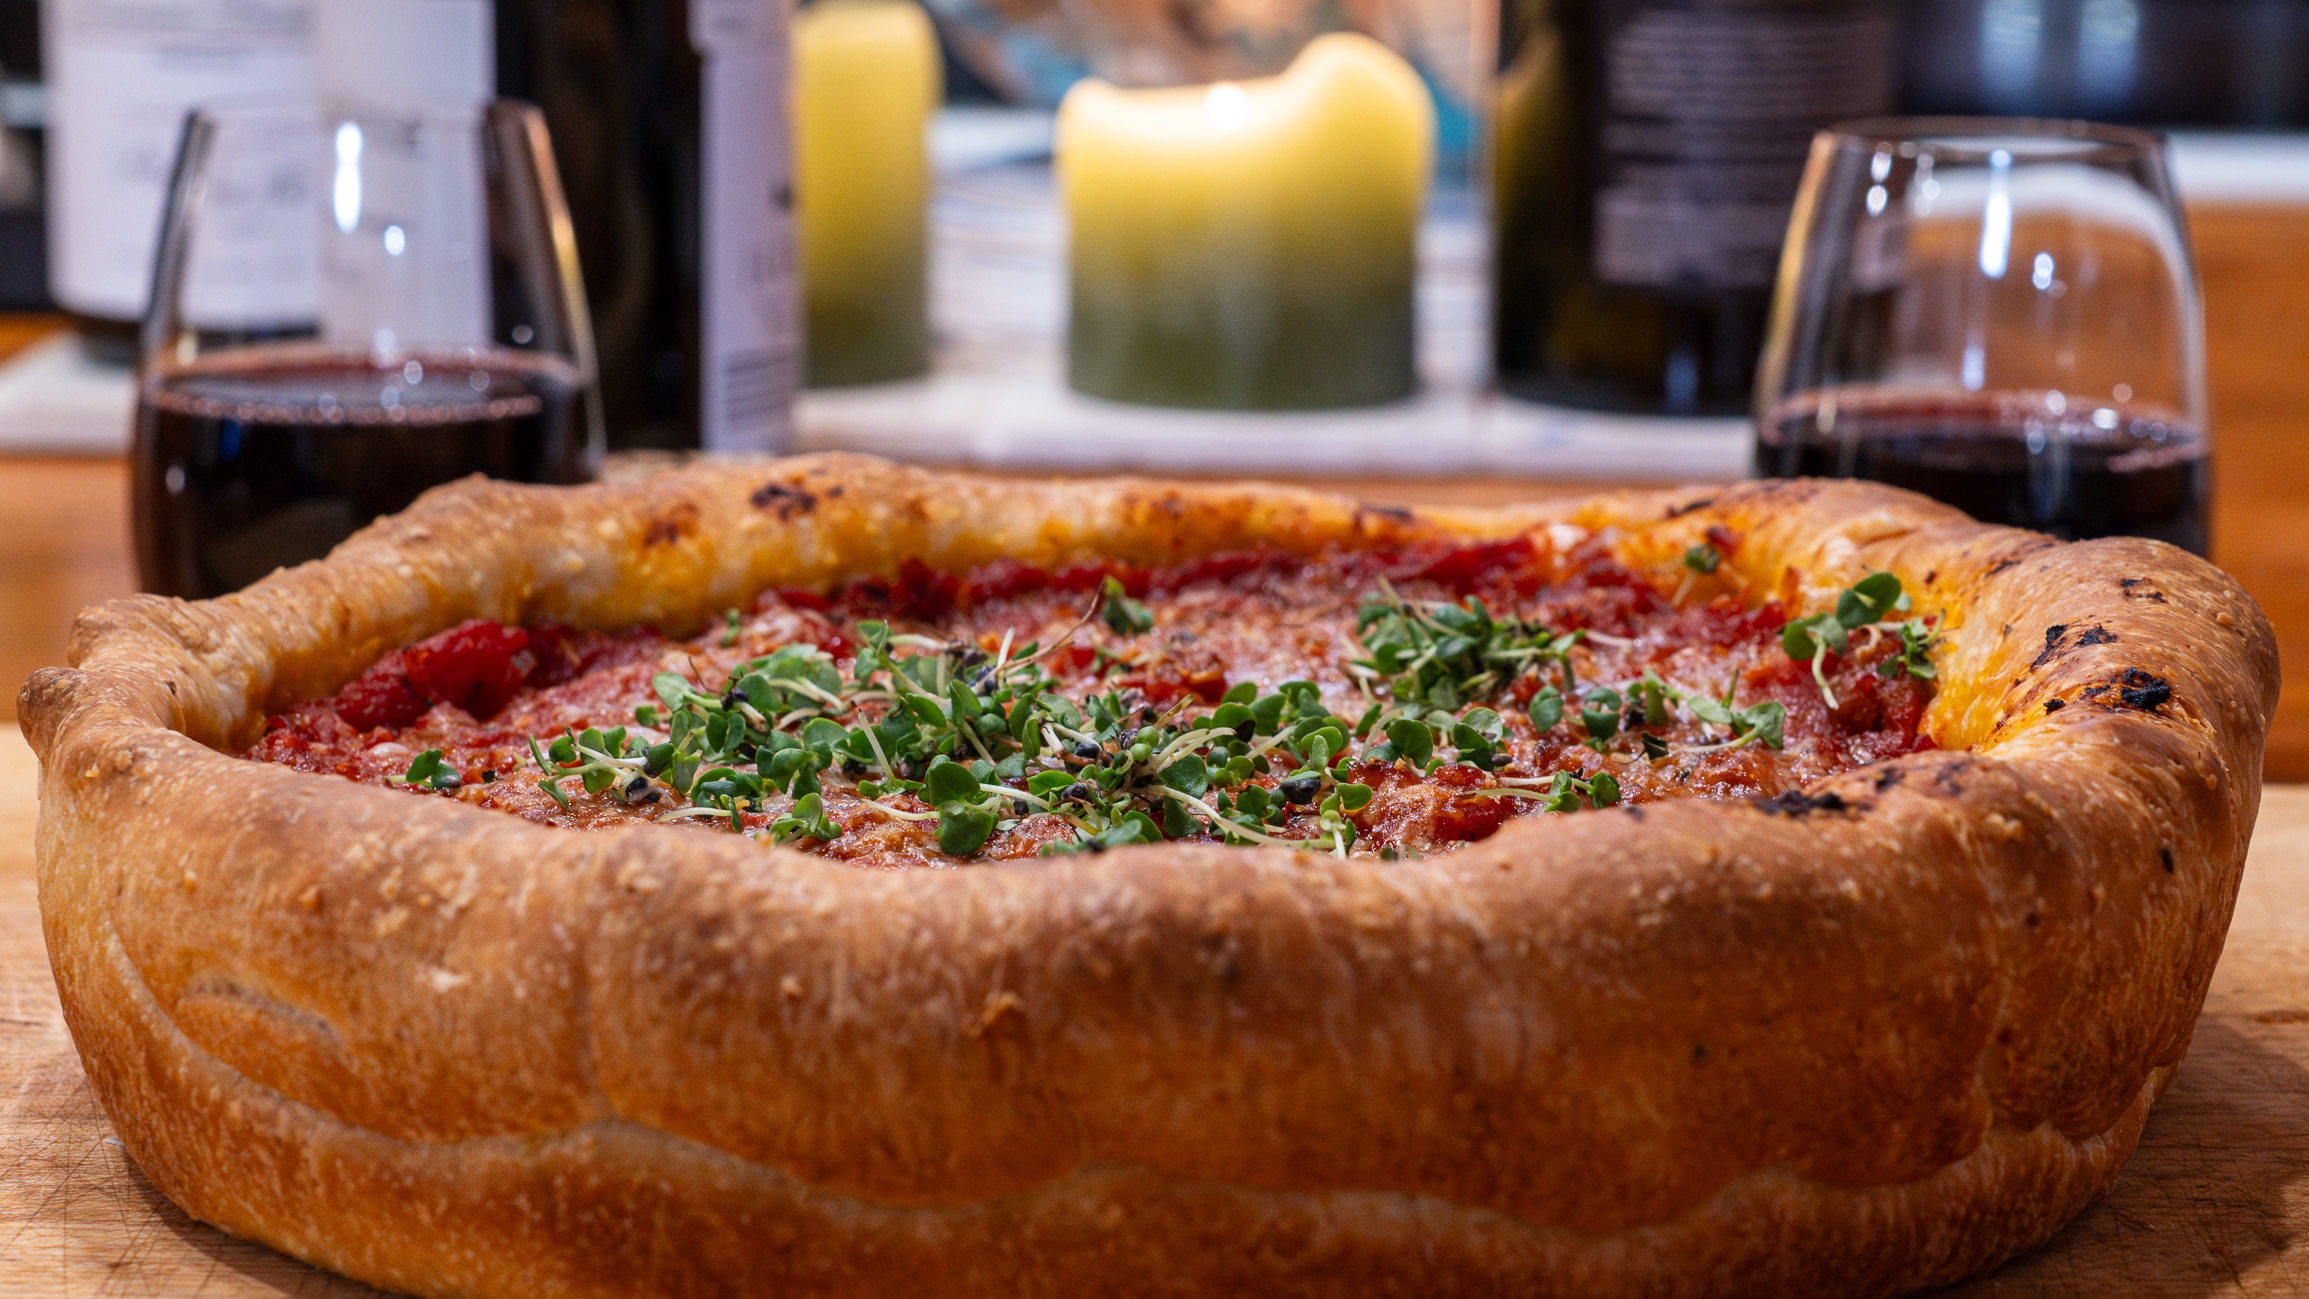
Chef Briwa (Culinary Institute of America and The Great Courses) demonstrated a technique to make a Margherita Pizza in a regular kitchen oven that comes out amazingly close to what can be achieved in a wood-fired pizza oven. Our first go at Chef Briwa’s technique turned out delightfully crispy with a pleasant amount of charring on a bubbled crust. More recently we turned our attention to a new technique for Chicago-style deep-dish pizza as demonstrated by chefs at America’s Test Kitchen. The results were fantastic, saucy and cheesy with a crunchy crust – the best deep-dish we’ve ever had. Both crusts involved time tending to the dough, so they are not about instant gratification or convenient quick use. But both were totally worth the effort.
With this inspiration, the question arises: How do we take these delicious foundations and build a beautiful Alaskified pizza. Charcoal grilled moose meat and foraged mushrooms? How about salmon sausage? Or marinated halibut? Let the experimentation begin!
Do you make your own pizzas? What “secret” ingredients or techniques do you use?
Leave a like and know that we appreciate comments! Join over 6,000 subscribers and thousands of regular readers from throughout the world as we continue to explore good food, adventures and Life Off The Beaten Path.
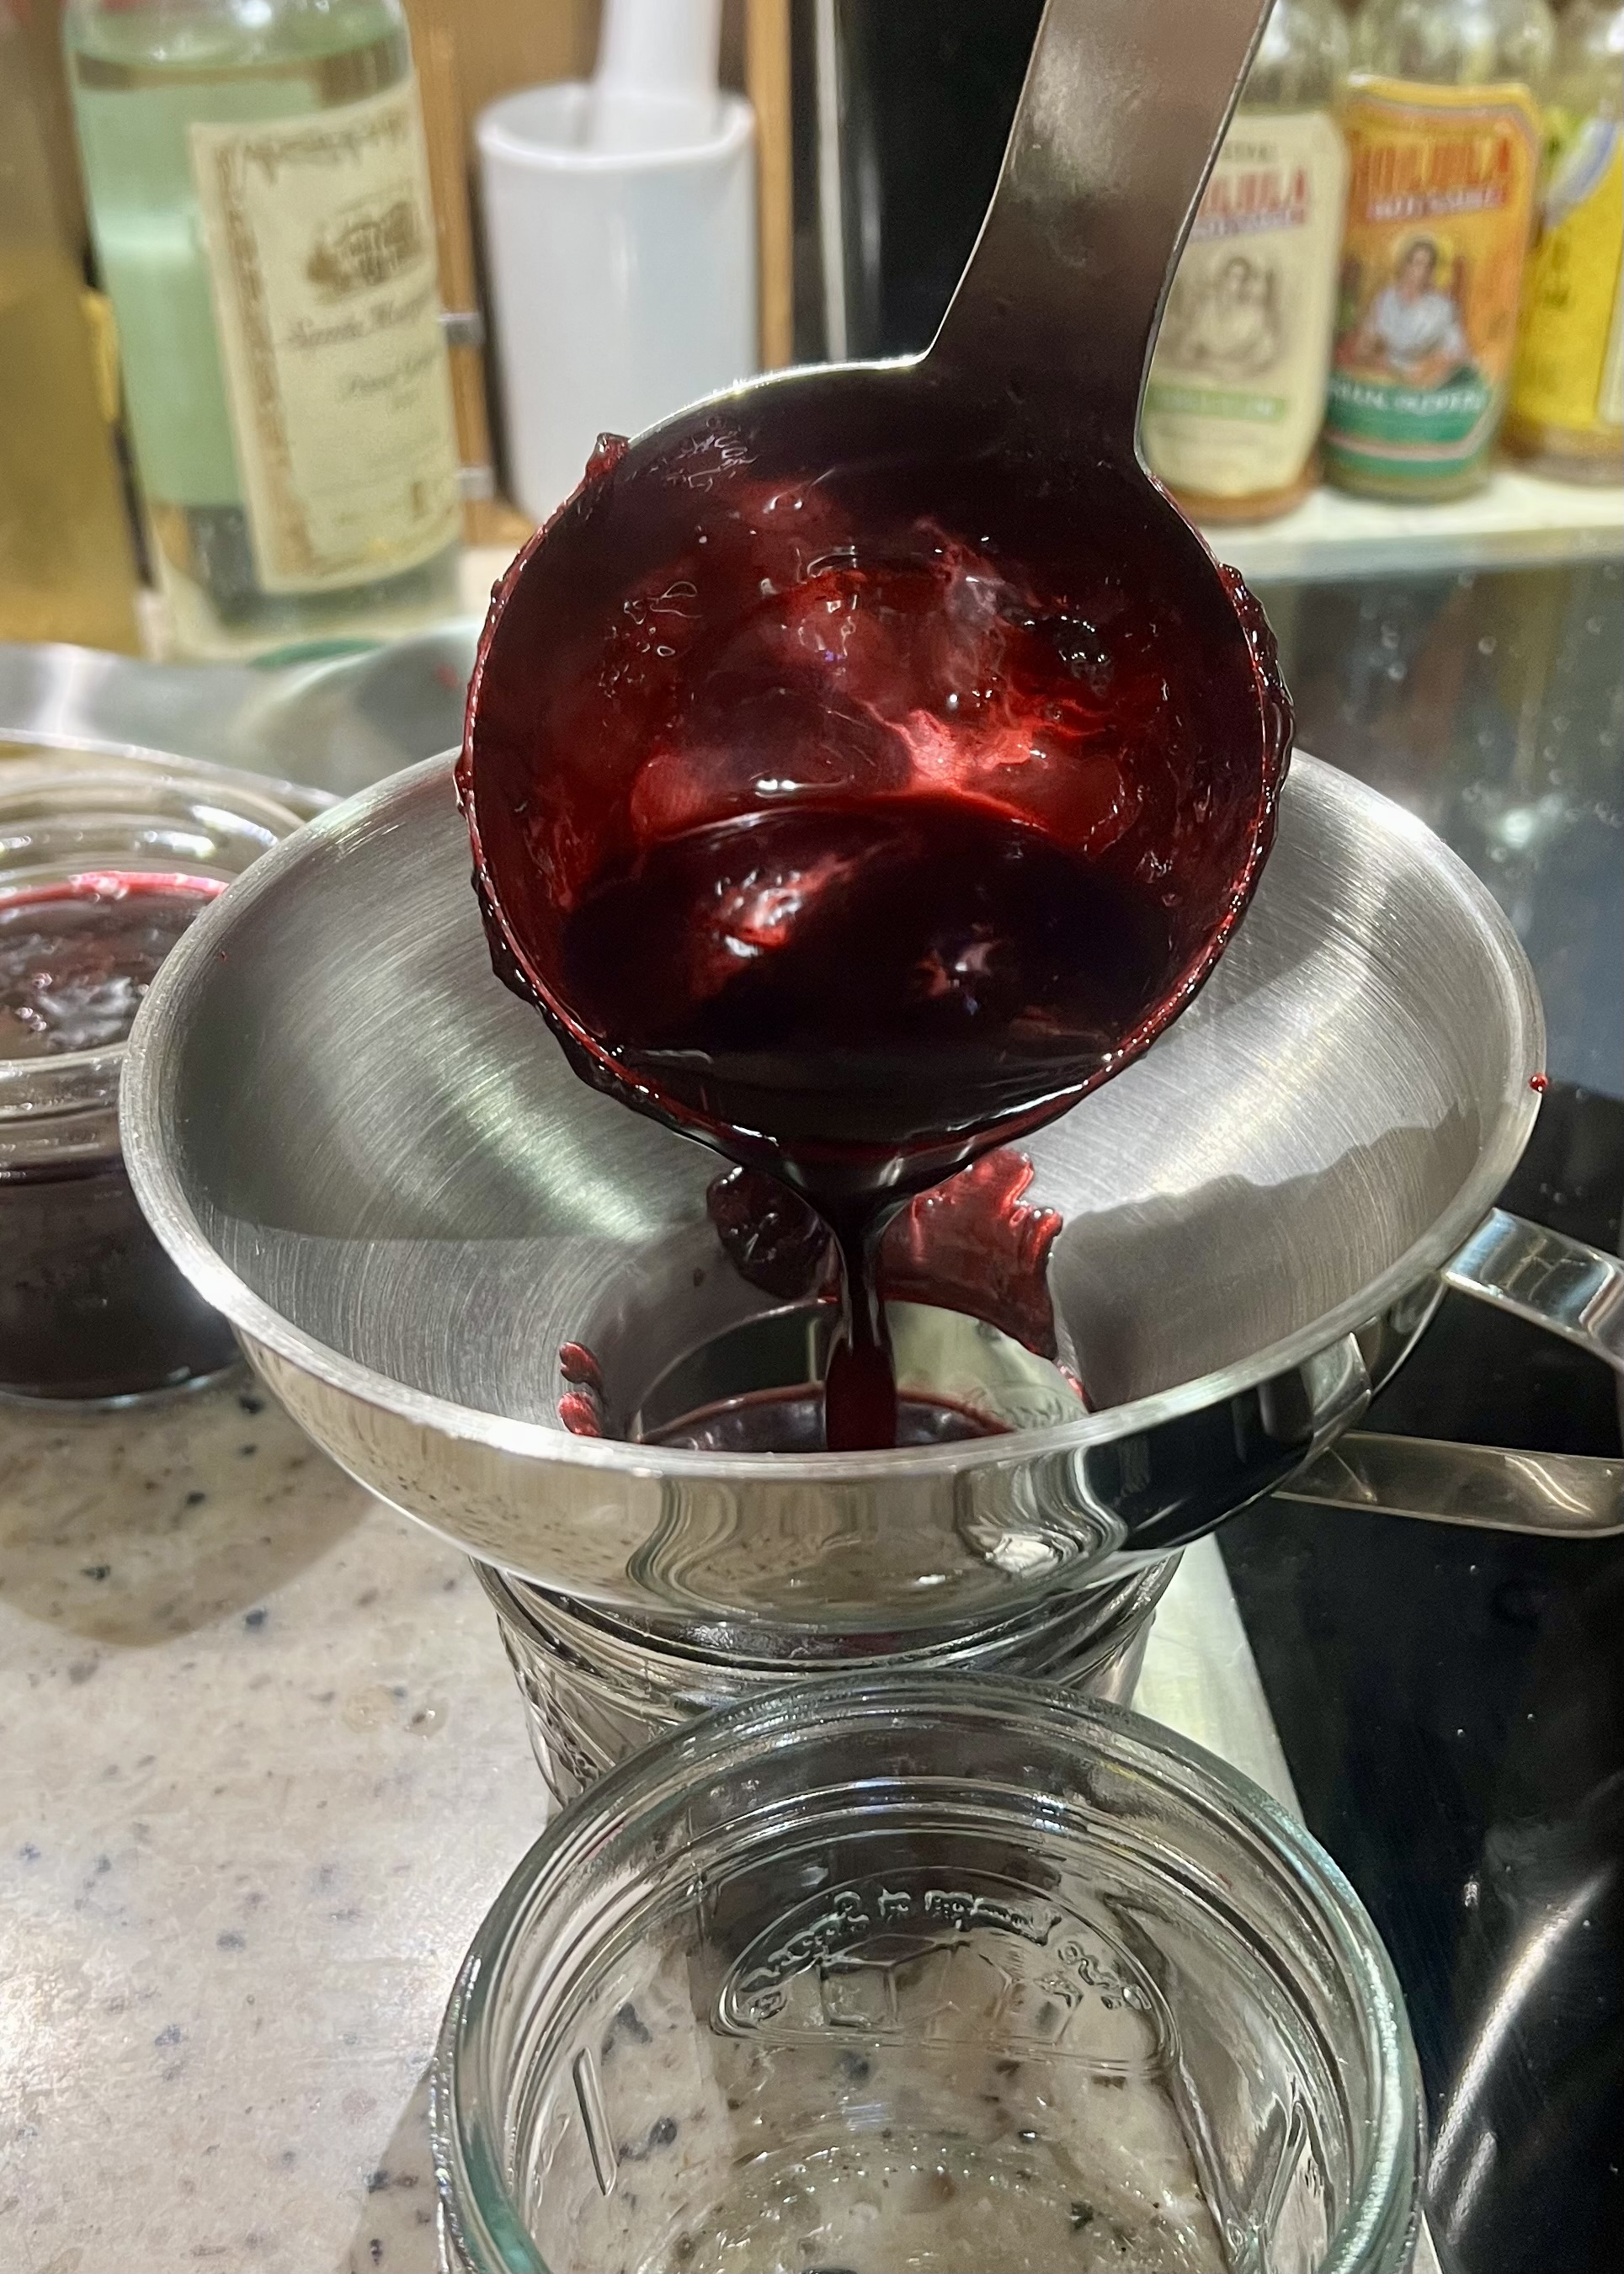
A summer memory frozen in a bag. Today, I thawed it out and let that summer day return.
A sun-drenched summer day, the two of us out hunting for wild strawberries. 2025 was quite a summer for those sugary little beauties and we came upon the biggest ones we’ve ever found. In searching favorite places, we also kept coming across wineberries (aka nagoonberries) – Merlot-colored tart gems that are hard to pass up even when we already have “enough” of them. They are prized for having a unique flavor that evokes a mixture of raspberry, strawberry and something else – something bright and wild not found in cultivated fruit. After a morning of foraging, we stopped for a picnic lunch at an empty campground next to a large pond. Our only dining company was a curious beaver who gave the water a quick tail whack as he swam by. After lunch, we decided to see what was growing along the forested shore. Lo and behold, a bush laden with huge, ripe blueberries!
We put aside a gallon of wild strawberries, wineberries, and blueberries from this day, frozen for later processing into a jam of memories. Today as I worked in the kitchen, steady snowfall blanketed the quiet landscape.
Leave a like and know that we appreciate comments! Join over 6,000 subscribers and thousands of regular readers from throughout the world as we continue to explore good food, adventures and Life Off The Beaten Path.
Christmas dinner success. This was our first try roasting a duck and root vegetables in a Römertopf – an unglazed terra cotta cooking pot. Quite tasty. The combination of parsnip, rutabaga, carrot and baby potatoes was a perfect base on which to roast the duck, which we first brined and then seasoned with herbs. As the duck released fat, the vegetables marinated and became super tender and flavorful.
Leave a like and know that we appreciate comments! Join over 6,000 subscribers and thousands of regular readers from throughout the world as we continue to explore good food, adventures and Life Off The Beaten Path.
Our long-standing tradition has been to keep a batch of par-baked pizza crusts ready in the freezer for a quick, easy, and delicious meal.
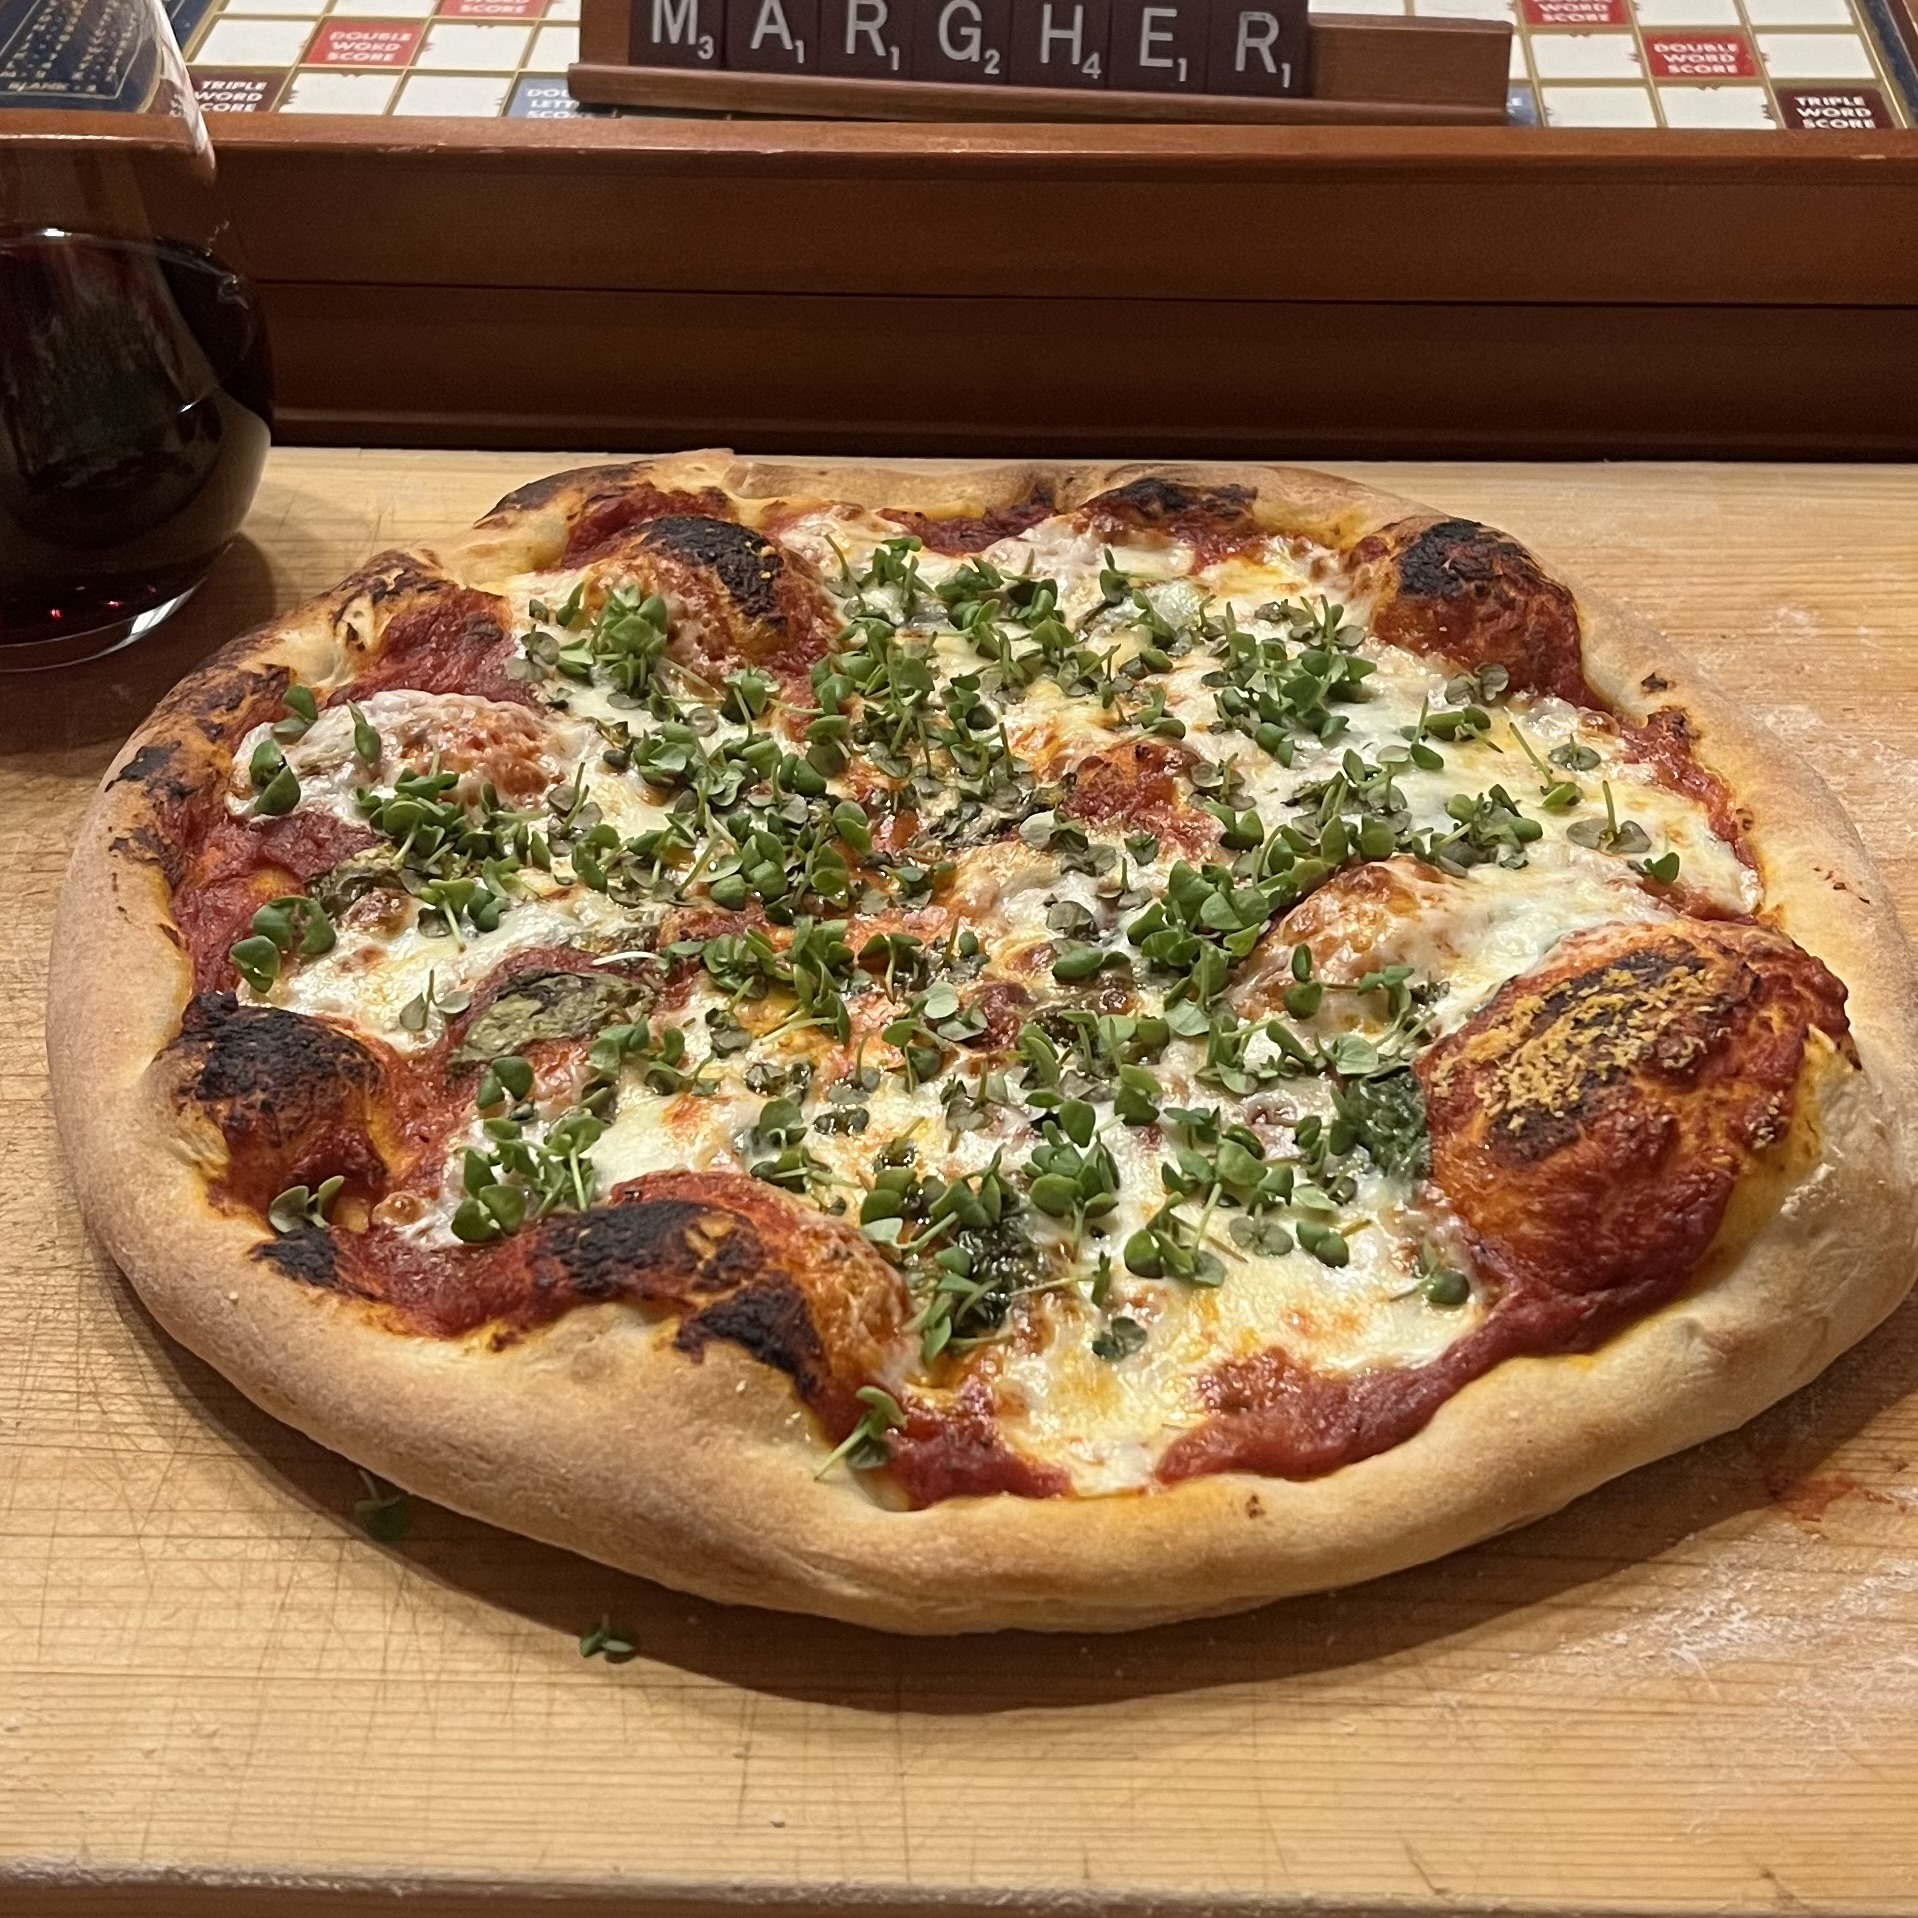
Recently we’ve been watching the Great Courses’ The Everyday Gourmet: The Joy of Mediterranean Cooking. Chef Bill Briwa delivered excellent instruction on how to make Neapolitan Pizza in a home oven. Why were the directions excellent? Just look at the photo. The pizza came as close to a pizza baked in a wood-fired oven as possible in a home kitchen. Nice crispy crust with gorgeous charred bubbles full of flavor. The addition of basil microgreens from our hydroponic garden gave a delicious and lovely finishing touch.
We are definitely converts. More freshly-baked crusts are on the menu!
Leave a like and know that we appreciate comments! Join over 6,000 subscribers and thousands of regular readers from throughout the world as we continue to explore good food, adventures and Life Off The Beaten Path.
Heirloom lettuces and spicy microgreens are happliy growing pest free.
Experiments often includes failures. But failures often bear insights and improvements, right?
Last summer, we experimented with a container garden on our covered deck, an area that seemed to receive abundant summertime sunshine and warmth. We planted cabbages, lettuces, peppers, and tomatoes. I was pretty confident the cabbages would grow, since they are cold-hardy. The peppers never came around, but the tomatoes were interesting.
We started the tomatoes inside from seed, then moved them to the deck in June, but found we had miscalculated the amount of sunshine falling on the deck. As summer progressed and the sun rose higher in the sky, the warmest, brightest sunshine of mid-day was blocked by the roof over the deck. The tomato pants developed v e r y slowly. By September, the plants were a foot tall and were starting to flower. Too late to fruit, I moved the plants to our indoor garden room and hand-pollinated the flowers which then developed into fruit. Hurray!
Disaster followed.
I didn’t realize it, but the tomatoes were infested with aphids – tiny black specks were soon flourishing on all the fresh, tender hydroponic greens. My garden was ruined! I read there are about 1500 recorded species of aphid in North American! I tried a couple of strategies to combat the little beasts, but with no success. My last resort was to kill all the plants, to move any potted plants back outside, to fully sanitize and deep clean the hydroponic garden and to start all over again.
Now, fresh seeds have sprouted and new plants are growing in the hydroponic garden without any signs of pests. No outside plants will mix into the hydroponic room ever again! Lesson learned.
Leave a like and know that we appreciate comments! Join over 6,000 subscribers and thousands of regular readers from throughout the world as we continue to explore good food, adventures and Life Off The Beaten Path.
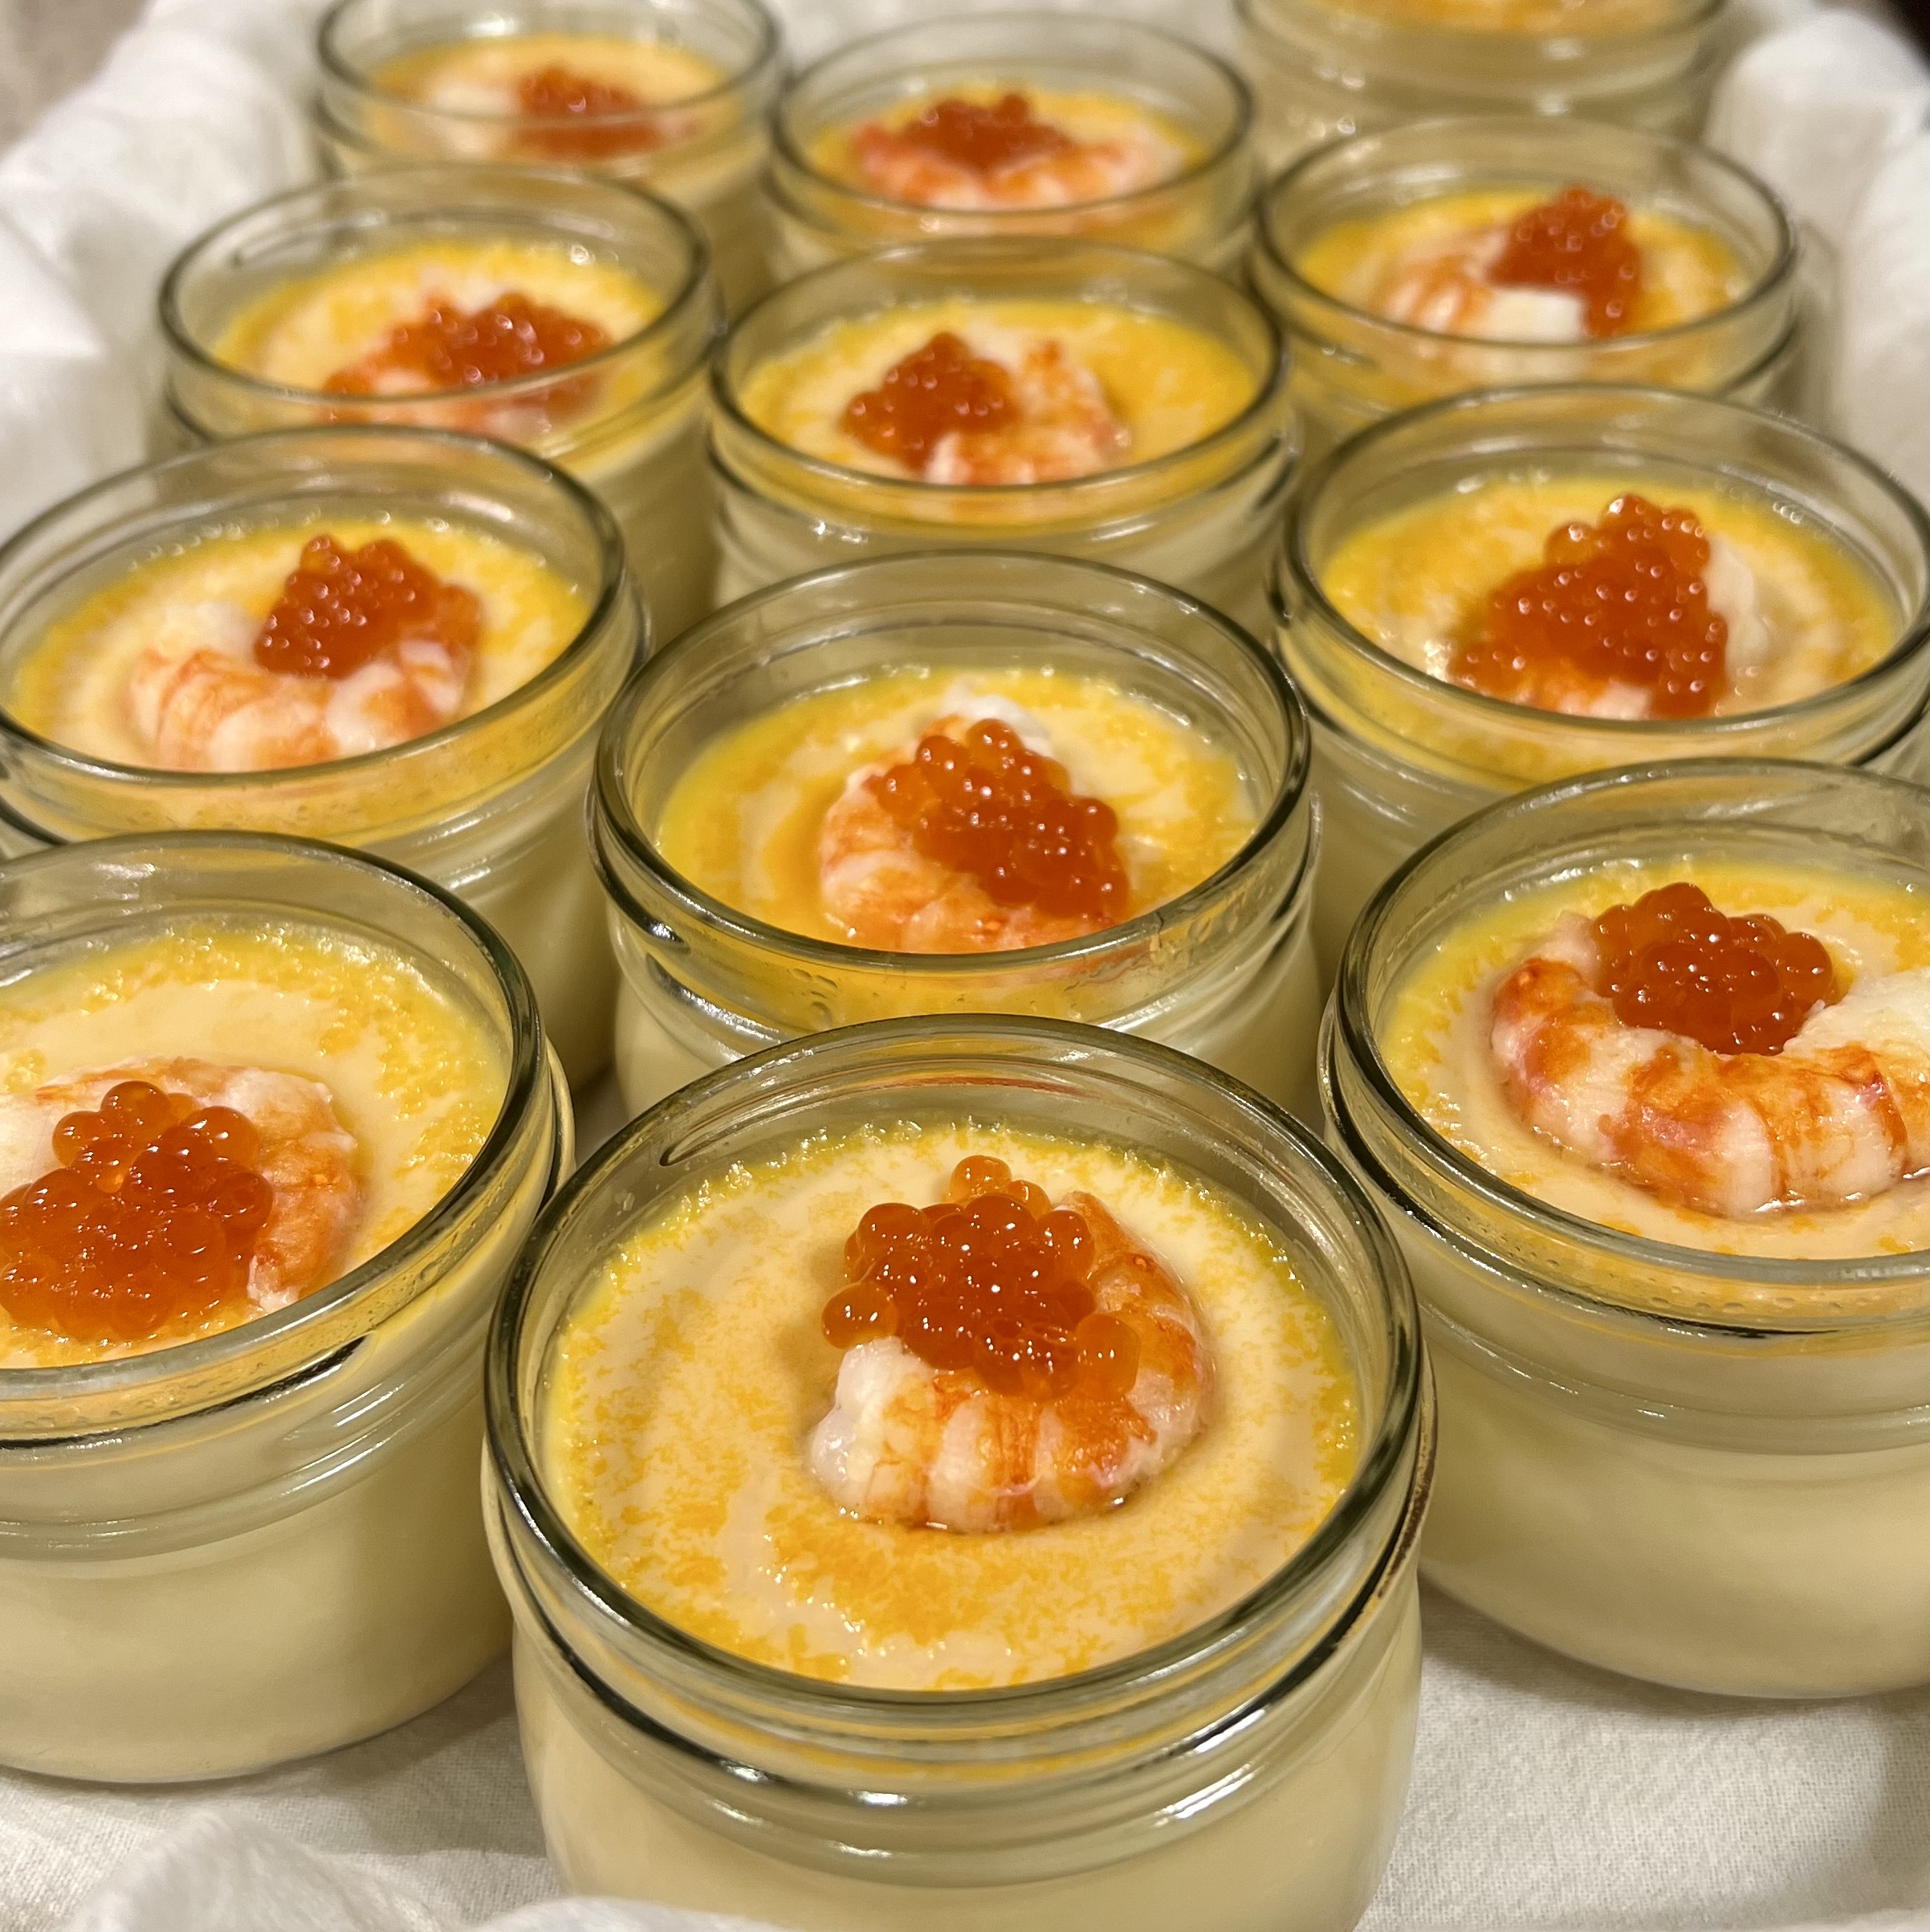
One of the most delightful things about this savory, silky custard-like soup is the surprise at the bottom. This version of a favorite soup lured you in with toppings of sweet spot shrimp fished from nearby waters and salmon roe ikura. Once you spooned your way through all that deliciousness, you would have been surprised by a nice bite of smoked salmon at the bottom of the bowl. In order to make this first course easy to transport to a Thanksgiving potluck, we made them in four-ounce canning jars. They were cooked bain marie, instead of the traditional steaming, which worked quite well.
Leave a like and know that we appreciate comments! Join over 6,000 subscribers and thousands of regular readers from throughout the world as we continue to explore good food, adventures and Life Off The Beaten Path.
These little custards were baked in two-ounce canning jars and are awaiting the finishing touch of a caramelized top. They are the perfect size for a dessert bite at a potluck.
Tis the season for pumpkin pie. Ten years ago (wow, 10 years!!), we posted a recipe after making a fall pumpkin pie and found ourselves with leftover filling. You know the problem, not enough filling to make a whole second pie, but the idea of tossing the extra unthinkable. We decided to bain-marie the remainder. When the little custards came out of the hot water bath, they seemed to want a bit of crunch. Out came the kitchen torch and a little sugar for a satisfying brûlée finish. And so, a new recipe for our repertoire was born.
Leave a like and know that we appreciate comments! Join over 6,000 subscribers and thousands of regular readers from throughout the world as we continue to explore good food, adventures and Life Off The Beaten Path.
Volunteers steam up copious batches of sumptuous Dungeness and King Crabin the icy night air of November.
Each year in Cordova, Alaska, the Native Village of Eyak sponsors a two-day celebration in honor of Elders and Sobriety. The culminating feast which typically features crab, deepwater shrimp, moose, chicken adobo, halibut, salmon, pasta, all kinds of desserts and other tasty fare is the culinary highlight of the year. Native groups from throughout southern coastal Alaska fly in to join local groups in events that include traditional dances, honoring elders, arts and craft sales and displays, keynote speakers sharing testimonies about the power of sobriety, and special recognition of military veterans. In the tradition of generosity that is part of Native potlatches, the entire community is invited and when, for example, veterans are honored, all veterans present are recognized with appreciation and gifts.
Human voices, drums, dances passed down from generation to generation. Note the Navy ribbons this Vietnam veteran is wearing.Most events took place in the Cordova High gym – a challenging place to make an interesting photo. I made a few double-exposures, some of which worked fairly well.Participants came from several communities, including Juneau, Kodiak, Yakutat and Tatitlekas well as Cordova.
One of the first foraged finds of our “summer” is fiddleheads. You can see by the canning date, these were harvested in May. They are tender and delicious and best served just-picked and lightly sautéed. Up here in the Upper 1 (as opposed to the lower 48), we love to figure out ways to preserve our summer finds so we can enjoy them all throughout the year. Freezing, drying, and pickling are all very popular methods.
During this past summer, we cracked into our winter pantry and sampled one of these jars. The first savory sour bite flashed me straight back to an all-time favorite meal – Raclette. This flavorful and delightfully fatty cheese originated in Switzerland. It is traditionally served by heating the cheese over a flame and scraping the melted cheese atop boiled potatoes and pickles. There is no better meal to warm you up at the end of a chilly day!
Wanting to put an Alaskan twist on this Swiss favorite, we’ve been trying to figure out how to acquire this specialty cheese in our fairly remote part of the world. After failed attempts of getting an Anchorage cheese shop to mail us some or having visiting friends hand carry us a couple of pounds, we gave up.
For weeks now, I’ve been grabbing things from our walk-in pantry. Every time I enter, I am met with those jars of pickled fiddleheads. Any normal person would just eat them in some other recipe. But I can be stubborn tenacious. Last weekend, I decided to try Amazon. Darn it all if there weren’t options for ordering Raclette cheese! Not deterred by the extra shipping cost, we decided to go for it. The cheese shipped out from the seller on October 29 and arrived today! It was well packed and arrived perfectly. Tonight’s menu is set. Melty raclette cheese served with boiled potatoes (traditional), pickled fiddleheads, pickled fireweed shoots, Alaskan reindeer sausage, and homemade sourdough bread. A nice bottle of Willamette Pinot Noir should be a perfect accompaniment. Cheers to tenacity!