Roasted Moose? Put it in a Pie and serve it with a Nut Brown Ale

moose-pie-2-01-17-n

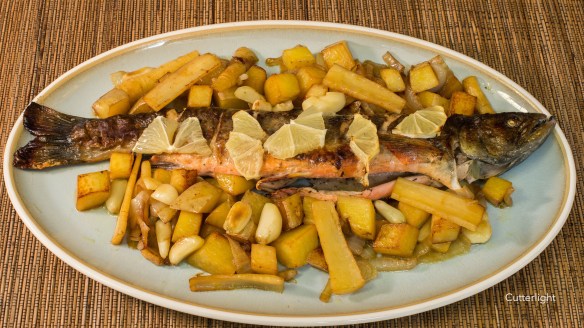
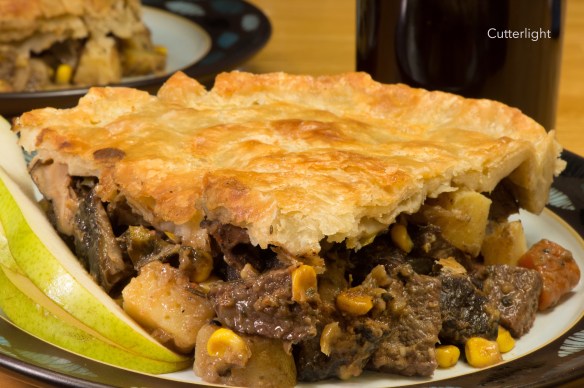
Tender roasted moose, caramelized onions, potatoes, parsnips and mushrooms pulled together with moose gravy, topped with a flaky, golden-brown crust and served with our home-brewed Nut-Brown Ale. That’s how we do it in Alaska.

This has been a good year for moose hunting in Chignik Lake, and while I’m not sure we’d know what to do with a twelve-hundred pound bull, anytime a friend offers up a few pounds, we’re in. This moose pie is a long-standing favorite recipe, easily adapted for other wild game or beef. Start with a pound of tender roast, toss in your favorite vegetables, add time-tested seasonings and a little gravy, top with a savory pie crust and bake at 375° F for about 25 minutes. Serves four Alaska-sized appetites.

Rustic Moose Pot Pie

Ingredients

  • 1 3/4 cups beef broth or moose broth
  • 1 bay leaf
  • 1 teaspoon dried rosemary
  • 1 2/3 cups potatoes, cut into 1/2″ cubes, skin on
  • olive oil
  • 1/3 cup flour
  • 1 pound roasted moose meat, cut into 1/2″ cubes
  • 1/2 cup sweet corn
  • 1/2 Brussels sprouts, quartered
  • 1/2 cup carrots, sliced into discs or chopped coarse
  • 1/2 cup parsnips, sliced 1/4 inch think x 1/2 inch
  • 1/2 onion, cut into slices and caramelized
  • 1/2 cup mushrooms, chopped coarse
  • 1/2 rounded teaspoon cumin
  • 1 teaspoon dried sage
  • 1/2 teaspoon thyme
  • several generous grinds freshly cracked black pepper
  • salt, to taste

Directions

  1. Place a baking sheet on the center rack of oven and preheat to 375 °F (190° C).
  2. Place broth in a pot, add bay leaf. Taste to determine if salt needed.
  3. Add potatoes. Simmer potatoes till just tender, but do not overcook. Save broth and remove potatoes to a large bowl.
  4. Meanwhile, in a large frying pan, add olive oil to cover bottom and bring to sizzling hot over medium/medium-high heat. Brown the mushrooms, remove and set aside. Add onions. Season with salt and pepper and cook till caramelized. Remove onions and set aside.
  5. Add additional olive oil to frying pan as necessary and continue heating over medium heat. Add Brussels sprouts, parsnips and carrots. Season with salt and pepper. Cook till Brussels sprouts are browned and all vegetables are just tender, stirring occasionally. Remove vegetables from pan and add to bowl with potatoes.
  6. Over medium-low heat, place approximately 4 tablespoons olive oil into a small frying pan. When oil is heated but not sizzling hot, briskly stir in flour a little at a time. Continue stirring until mixture thickens. Remove from heat.
  7. Heating beef broth over medium heat, stir in oil and flour mixture. Combine thoroughly. Simmer till reduced to a thick gravy.
  8. To the bowl that already has the potatoes and vegetables, add the moose meat, mushrooms, gravy and the remaining seasonings and mix together. (There are a number of ways to make a thick gravy. Try using a dark ale to deglaze the pan you used for roasting the moose.)
  9. Pour meat and vegetable mixture directly into a deep pie dish. Cover with a crust. Be sure to make holes in the crust to allow steam to escape. Brushing on a beaten egg will help create a golden brown crust.
  10. Place on baking sheet and bake at 375 °F for 25 – 30 minutes or until crust is golden brown.

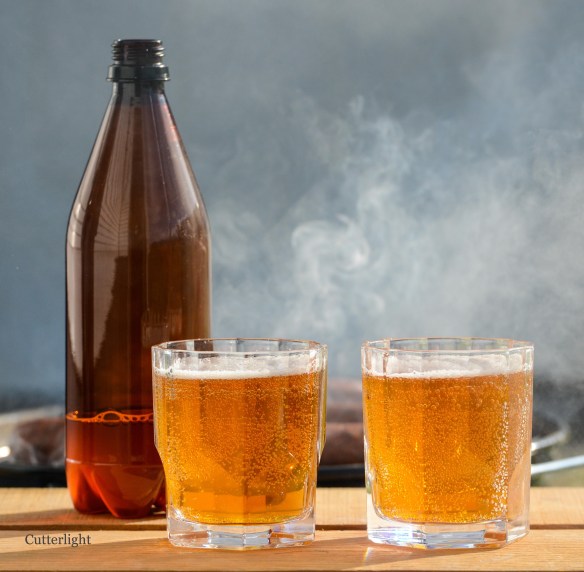
Although a full-bodied red wine such as an old vine Zinfandel, Malbec or Cabernet is a classic choice with this dish, a full-bodied ale pairs equally well.

Fine Dining for Two: Broiled Char or Trout

broiled-char-n

A hint of thyme compliments the delicate flavor of wild char, one or our favorite fish. No wild fish available? Look for Arctic Char at the fish market. They get high marks for being responsibly farmed and are delicious.

There’s something about wild char and trout that calls to simplicity. Among all species of fish, they are among the most demanding of unspoiled environments. Where streams, rivers and lakes are clean and lightly trammeled, these species often thrive, both their numbers and the setting they inhabit evoking bygone times. It is in such settings that light harvest of a few fish is sustainable.

When presented with such fish in the kitchen, the most basic ingredients are all that is wanted. Salt and butter, perhaps a little pepper or a pinch or two of an aromatic herb. A little lemon can be nice, too. Root vegetables such as potatoes, parsnips or rutabaga roasted or pan fried in olive oil and soy sauce make the perfect accompaniment on the serving platter.

Broiled Char or Trout for Two

Ingredients

    • 1 char or trout of about 16 to 18 inches (40 – 45 cm) (between 1 and two pounds, dressed)
    • fine sea salt (we use Grey Sea Salt in all of our salmon and trout recipes)
    • two light pinches of dry thyme (or about double that if you have fresh)
    • 1 lemon cut into thin slices, peel cut away
    • butter, sliced into thin pats
    • olive oil or canola oil
    • broiling pan. We use a Swiss Diamond cast iron griddle for this kind of broiling.

Directions

    1. Place a broiling pan near the top shelf in the oven and preheat on broil. You want the pan to be very hot when the fish is placed on it. This prevents the fish from sticking. Do not oil the pan yet.
    2. Rinse the fish in cold water and dry with paper towels. Make sure the gills and viscera have been removed.
    3. On a cutting board or platter, position the fish with its it’s open belly toward you.
    4. Using a very sharp knife, cut shallow, oblique slashes spaced about an inch apart (2.5 cm) down both sides of the fish. You want to break the skin without cutting all the way through to the body cavity.
    5. Rub fish inside and out with fresh lemon juice.
    6. Salt the fish inside and out. Sprinkle a little thyme inside the cavity on the sides.
    7. Place a few thin slices of butter inside the cavity and on top of the fish’s side.
    8. Place pieces of lemon on top of the fish’s side.
    9. Spread olive oil on broiling pan. A basting brush works well for this. Return pan to oven for about a minute to ensure that oil is very hot.
    10. Place fish on broiling pan or griddle. The fish should really sizzle when it hits the pan. Once the fish is on the pan, do not move it. (Moving a fish just after it hits a pan can cause it to stick to the pan.) Return to the oven and broil for 5 minutes.
    11. Remove pan from oven and gently flip the fish. Do this by rolling the fish on its back using spatulas. This will prevent the cavity from draining. Place additional pieces of butter and fresh slices of lemon on the up side of the fish and return to the oven. Broil for 3 or 4 more minutes.
    12. The fish is done when the slashes have opened, the skin is golden brown, the tail is crisp and the eyes are opaque.
    13. Serve with roasted root vegetables on warmed plates. Compliment with a light Chardonnay or a crisp ale.

Roasted Pumpkin Soup with Mahlab and Moose Meat

spiced-pumpkin-soup-n

With or without meat, a zesty bowl of pumpkin or squash soup garnished with roasted pumpkin seeds is an Autumn through Wintertime favorite.

Once you’ve got the basic concept of a spiced pumpkin soup down, it’s likely to become a favorite. There’s almost no end to possible flavor combinations – from simply shaking in your favorite Thai-style or Indian-style blend to trying a little of this and a little of that based on what’s on hand in your spice rack.

A new twist for us this time around was the addition of mahlab, an aromatic Middle East spice made from grinding the seeds of the St. Lucie, or Mahaleb, Cherry. Think almonds with a hint of cherries. This was, for us, a new spice recently ordered from Penzeys Spices. Although it’s usually used as an addition to pastries, breads, and custards (this spice will definitely go into our next crème brûlée) one whiff and we knew it would be a perfect compliment to pumpkin soup. If you’d like to do some of your own experimenting with this unique spice, we recommend that you purchase the seeds whole and grind them yourself as, reportedly, the flavor of powdered mahlab goes off fairly quickly.

Having just come into some really wonderful moose meat courtesy of a friend, we pan fried some in olive oil and cumin to add to the soup. Other wild game, beef or chicken would work well, too. Alternatively, this soup makes for an excellent vegetarian dish by going sans mean and substituting vegetable broth for chicken broth. Although not necessary, a little maple syrup is very good in this soup.

Ingredients

  • 2 pounds roasted pumpkin (preferably a pie pumpkin) or squash such as Butternut Squash
  • 2 cups chicken broth
  • 2 tsp powdered Mahlab
  • 1/2 tsp lemon grass
  • 1/2 tsp ancho chili powder
  • 1/2 tsp chipotle powder
  • 1/2 tsp cumin
  • 1 tbsp Thai red curry paste
  • 1/2 tsp powdered garlic
  • 1/2 tsp mace
  • 1/4 tsp cinnamon
  • 2 tbsp almond butter (or substitute a quality peanut butter)
  • 1 cup coconut cream
  • 4 tbsp maple syrup (or 2 tbsp brown sugar)
  • sea salt
  • 2 tbsp dried red bell peppers (or use fresh, diced fine)
  • 1 pound moose meat, other wild game, beef or chicken cut small, seasoned with cumin powder and cracked pepper, and pan fried in olive oil
  • smoked paprika (to garnish)
  • roasted pumpkin seeds (to garnish)
  • drizzles of extra virgin olive oil (to garnish)

Directions

  1. Place a baking sheet on lower center rack of oven and preheat oven to 400° F (200° C).
  2. Cut pumpkin in half and remove stem and seeds. Slice into wedges and use a very sharp knife to cut away stringy matter. Leave skin on and brush pumpkin flesh with olive oil. Place skin side down on a preheated backing sheet and roast for about 20 minutes. Test with a fork. It should be very soft.
  3. Remove pumpkin wedges from oven and place on a cutting board to cool an lower oven to 300° F (150° C).
  4. Meanwhile, clean seeds and place in a bowl. Mix with a little olive oil and sea salt. Spread evenly in a single layer over baking sheet. Bake for 45 minutes or until golden brown, stirring occasionally. Place seeds on paper towels to cool.
  5. Meanwhile cut the pumpkin away from the rind. In a large pot over low heat, combine pumpkin chunks and chicken broth and use a stick blender to purée until smooth. It is a good idea to hold some chicken broth in reserve to ensure that soup is sufficiently thick.
  6. Add Thai chili paste, seasonings and almond butter, mix well. Bring mixture to a very low simmer, stirring occasionally. Add salt and additional seasonings as desired.
  7. Add coconut cream and maple syrup. Use a stick blender to thoroughly combine.
  8. Add cooked meat and red bell peppers and let simmer a few more minutes.
  9. Serve hot with roasted pumpkin seed, a sprinkle of smoke paprika, and a drizzle of olive oil.

Smokey, Spicy Mix: In Hearty Soups, as a Rub for Poultry and Pork, and on Salmon, our Go-To Seasoning

jacks-smokey-blend-n

Jack’s Mix: Nine herbs, spices and seasonings create a blend that adds deep flavor and an agreeable spike of heat to pumpkin soup, chicken breasts, pork, broiled salmon fillets, moose meat pizza and more. 

Every kitchen should have a few items like this in stock – a house dressing, a specialty dipping sauce, or a proprietary spice or herb blend. This is “the secret:” the bottle that invariably gets emptied first, the jar that has to be replenished again and again while other similar items languish with their contents intact.

In the case of Jack’s Mix, sure, there are a wide variety of commercial rubs available, and most of them are quite tasty. But we wanted something a little smokier in flavor and with a certain zip that would best compliment our style of cooking. And since we prefer to add salt as a separate item in cooking, we wanted a salt-free blend. So we came up with our own blend from a handful of ingredients we always have on hand.

Our message in this post is to encourage you to give it a try. Pick something you use frequently – salsa, an Italian herb blend, barbecue sauce, salad dressing or a spicy rub and instead of continuing to purchase Brand X at the store, start experimenting with your own creation. It’s fun, you’ll likely learn something valuable about the way flavors work together, and when a guest exclaims, “This _____ is fantastic! What kind is it?” You can smile and casually reply, “It’s mine, just a little something I threw together.”


Uni & Ikura Amuse Bouche (Sea Urchin & Salmon Roe)

sea-urchin-amuse-bouche-n

Fresh from the sea, uni and ikura create a salty, savory combination.

Much as is true of most Japanese people, most Alutiiqs love virtually anything harvested from the sea. From octopus to chitons (locally known as bidarki), if it’s fresh from the ocean it’s likely to find its way onto the menu here in Chignik Lake. Sea urchins are highly prized.

And there’s really nothing to preparing them. Insert a small knife into the opening on the bottom of the shell, cut the shell open, and remove the bright yellow lobes, which are the urchins’ reproductive organs.  (They are not roe.) Most people are careful to remove the dark colored matter inside the shell, but the urchins we had were small and including this substance added, we thought, both a subtle additional flavor and contrasting color. In Alaska, we almost always have a jar or cured salmon roe on hand. This bright, salty, translucent salmon caviar is a perfect finishing touch on many dishes. For a popular recipe for making your own ikura, click here.

Oh, Daddy! Umami! Clam Fettuccine and Sea Urchin Amuse-Bouches

dorner-bay-clams-n-urchins-n

Fresh sea urchin appetizers, clams still wet with Chignik Bay brine, freshly made fettuccine, and  home-brewed Bavarian Weissbier – Ringing in 2017 Off the Beaten Path. Oh, Daddy! Umami! (Recipe below)

clam-fettucini-dorner-bay-n

When a friend showed up at our door on New Year’s Eve with a big bowl of fresh-from-the-sea clams and sea urchins, we immediately began planning out a celebratory dinner to greet 2017. While Barbra whipped up two servings of fettuccine, I set to work cleaning and preparing the seafood. A carafe of hot sake might have been perfect, but Barbra’s medium-bodied, slightly citrusy, Weissbier proved to be an excellent compliment to a shellfish feast that couldn’t have been any fresher.

sea-urchin-amuse-bouche-n

Umami Power: Sea urchin topped with salmon roe. Note to self: Stock a few bottles of sake for these occasions!

Clam Fettuccine for Two: This is a simple yet elegant dish. The standard butter and garlic mixture really comes to life with the addition of tarragon and a dash or two of grey sea salt.

Ingredients

  • Fettuccine
  • Cherrystone Clams, Butter Clams, Cockles or Ark Clams, rinsed to remove any debris. Clams should be closed tight. If a clam isn’t closed, give it a few vigorous taps. If it still doesn’t close, discard it, as it’s dead and may be unfit to eat.
  • Butter, preferably unsalted
  • Olive Oil
  • 4 large cloves of Garlic, chopped fine
  • 1/2 tsp dried Tarragon crumbled fine (or 1 tsp fresh chopped)
  • 1/4 tsp Coarse Grey Sea Salt
  • Nori (dried laver) cut into thin strips for garnish

Directions

  • Prepare the fettuccine as you normally would. Drain and then return to the pan with a little olive oil and toss together. This will prevent the noodles from sticking together.
  • In a small pan, heat about 6 tablespoons of butter and 2 tablespoons of olive oil over medium-low heat. Once butter has melted, place on very low heat to keep warm. Just before serving, return to medium heat, add the garlic, tarragon and sea salt and briefly cook while stirring. In about 30 seconds, you’ll begin to smell the aromas of the garlic and tarragon. Provided you have chopped the garlic fine, that’s all the cooking it needs.
  • Meanwhile, place clams in a metal strainer – one that will fit into a larger pot. Add an inch or so of water to the pot and place clams in strainer inside pot. The clams should be above the water so that they steam rather than boil. (Hint: If you place the clams inside a heat-proof bowl inside the strainer, you can save the juice from them as they steam open. The juice can be used in soups, sauces or in Bloody Mary Cocktails.) Cover clams with a lid and bring water to a boil. When clams are cooked, the shells will pop open. This generally takes about five minutes.
  • Meanwhile, place clams in a metal strainer – one that will fit into a larger pot. Add an inch or so of water to the pot and place clams in strainer inside pot. The clams should be above the water so that they steam rather than boil. (Hint: If you place the clams inside a heat-proof bowl inside the strainer, you can save the juice from them as they steam open. The juice can be used in soups, sauces or in Bloody Mary Cocktails.) Cover clams with a lid and bring water to a boil. When clams are cooked, the shells will pop open. This generally takes about five minutes.
  • Use a small knife to cut the clam’s abductor muscles away from the shell so that they can be easily eaten, but leave the clam meat inside the shell for a more attractive presentation.
  • Place the fettuccine on serving plates. (It helps to keep plates warm in the oven.) Arrange the clams on the plate. Pour the butter sauce on the clams and pasta. Add nori. Serve with slightly chilled Chardonnay or warm sake.

Salmon Candy Canapés: Lox, Ikura & Cream Cheese on Buckwheat Blinis

lox-ikura-blini-n

See below for recipes for salmon roe, lox and buckwheat blinis.

Upon arriving in Chignik Lake last summer, one of our first orders of business was to stock our freezers with enough salmon to see us through the coming months. Fortunately, catching plenty of Reds and Silvers was no problem as hundreds of thousands of wild salmon ascend the Chignik River from summer through fall. Although the Sockeye (Red Salmon) roe is somewhat smaller than that of other species, it nonetheless cures into a beautifully translucent ikura that tastes as good as it looks. Coho fillets (Silver Salmon) are our favorites for making lox. Separated by a slice of cream cheese, garnished with a wisp of nori and arranged on a savory buckwheat blini, these appetizers are perfect as Super Bowl party snacks or as a pre-dinner hors d’œuvre complimented with champagne or fine sake (酒).

Recipes:

Ikura: Curing Salmon Roe

Salmon Lox or Gravlax

Buckwheat Blini

Ingredients

  • 1/3 cup buckwheat flour
  • 2/3 cup all purpose flour
  • 1/2 tsp baking powder
  • generous pinch salt
  • 3/4 cup whole milk
  • 2 eggs, whisked
  • 1 tbsp butter, melted
  • additional butter for griddle

Directions

  1. Whisk together flours, baking powder and salt.
  2. In a separate bowl, whisk together milk, eggs and melted butter.
  3. Whisk wet ingredients into dry.
  4. Heat griddle and coat lightly with butter.
  5. Drop a tablespoon of batter onto griddle. Repeat with additional tablespoons.
  6. Cook for about 2 minutes, small bubbles will form on top of blini, like pancakes.
  7. Flip blini and cook an additional minute on flipped side.
  8. Serve warm or at room temperature.

Home Brewed Amber and our Razor Clam Fritter Recipe: Dinner in the Alaska Bush

amber-beer-n-clam-fritters-n

A wonderful marriage – home brewed dark amber beer by brewmeister Barbra and razor clam fritters by chef Jack. See the fritter recipe below.

Jack has been making razor clam fritters for years. He has culinary ties to the delicious shellfish from his life on the Oregon Coast. When we first visited Alaska, we dug the biggest razor clams either one of us had ever seen and promptly turned them into soups, pasta sauces, sashimi and fried dishes. These delicious beauties are something we try to stock in our pantry every year… we dig them ourselves or pick them up at our Anchorage Costco. The following recipe is tried and true. It’s been with us for years. We may change the seasoning up a bit, otherwise, we stick to the original, which has proved hard to improve upon.

To accompany our delicious fritters, we opted for our amber home-brew. It was only a matter of time before my yeastly attentions turned from bread to brew. Now that we live in a “damp” community, we are free to experiment with adult libations. Thanks to a company called Mr. Beer, I’ve been able to experiment with beer-making with great success. In addition to the amber beer (pictured above), we also are enjoying a slightly more complicated kit which yielded a robust, slightly-citrusy hefeweizen. We currently have a nut brown ale and a Mexican style lager fermenting. The beer we’re turning out would stand up nicely against any of the favorites we typically order in restaurants or buy at the package store. Brewing beer seems a natural addition to our kitchen. It certainly has been a tasty and satisfying compliment to our cuisine!

Clam Fritters: serves 4

Ingredients

  • 1 cup chopped clams
  • 1 egg, lightly beaten
  • 1 tsp lemon juice
  • 1 tbsp chopped tarragon (or substitute dry tarragon or marjoram)
  • 1 tsp baking soda
  • 1 cup flour
  • 1/4 cup clam juice
  • 1/4 cup milk
  • 1 1/2 tbsp melted butter
  • couple dashes cayenne pepper (to taste)
  • freshly ground black pepper to taste
  • oil for frying

Directions

  1. Chop clams on a cutting board. Not too fine. Place them in a mixing bowl.
  2. Add the egg, lemon juice, tarragon, cayenne, black pepper, baking soda and flour and lightly stir together.
  3. Blend the clam juice and milk. Add gradually to the clam mixture along with the butter, continuing to stir. Do not make the batter too runny and do not over-stir.
  4. Heat about 1/8 inch of oil in a frying pan.
  5. Drop batter in the hot oil – about 2 tablespoons per fritter. (They’ll cook better if they’re fairly small.)
  6. Turn when the bottom is browned, as you would for pancakes.
  7. Finish cooking till golden-brown. Serve with a side of slaw and a favorite ale or lager.

Alaska Gourmet: Pan-Fried Salmon with Herbed Butter on Butternut Squash Ravioli

salmon-on-pumpkin-ravioli-n

Fall food themes continue with this pièce de résistance fit for a king. Chinook salmon holds center stage drizzled with herbed butter and served on butternut squash ravioli. Food stylist extraordinaire Barbra came up with the idea of rolling shaved parmesan into tubes. 

With plenty of sockeye salmon harvested, cleaned and packaged in our freezers, it nonetheless wasn’t a case of “coals to Newcastle” when a friend offered up a couple fat fillets of Chinook. Reds, pinks, chums and silvers – they’re all welcome at our dinner table any time. But kings… with their higher percentage of healthful fat and their decadent melt-in-your-mouth texture… kings are special.  With a batch of butternut and ricotta ravioli in the freezer courtesy of Barbra, I knew just what I wanted to do with one of the fillets. This was as fine a meal as we’ve ever enjoyed. (Barbra promises the pumpkin/squash ravioli recipe will be posted soon!)

This dish goes particularly well with Brussels sprouts, a vegetable we especially appreciate out here in the Alaska bush because they ship well and have a long shelf-life in the refrigerator. Our favorite cooking method is to cut the Brussels sprouts in half lengthwise, toss them in a bowl with olive oil, sea salt and cracked pepper, and then place them cut-side down in sizzling olive oil in a frying pan. Turn the heat down (but make sure they’re still sizzling) and cover the pan. Check, and when the cut side has browned, flip the sprouts to the leafy side. Turn up the heat a little to get things really sizzling again, then turn it back down to a little below medium and cover the pan. The leaves will brown up and caramelize and a few will blacken. They’re ready to be served.

Pan-Fried Salmon with Herbed Butter on Butternut Squash Ravioli

Ingredients (serves 2)

  • 1-pound fillet of any wild-caught Pacific salmon, skin on
  • sea salt
  • black pepper
  • (Optional) mirin or white wine – just a little
  • 2 tbsp butter
  • 1 or 2 shallots, sliced fine
  • 1/2 tbsp tarragon (dried) or 1 tbsp fresh
  • 2 servings worth of ravioli stuffed with pumpkin, squash, mushrooms or light cheeses
  • parmesan cheese, grated or sliced, to garnish
  • Extra virgin olive oil

Directions

  1. Prepare ravioli per directions, timed so that it’s ready when the salmon is ready.
  2. Rinse fillet, pat dry with paper towels and cut into two portions. Inspect for pin bones, which can easily be pulled out with a pair of kitchen pliers. Sprinkle with sea salt and a little black pepper.
  3. Add a tablespoon or 2 of olive oil to a frying pan and turn to a little hotter than medium heat. When oil is ready to sizzle, carefully place fillets in the pan skin side up. Add just a splash of mirin. Cover and cook for 2 minutes, till meat is seared.
  4. Turn salmon over so that it is skin side down. Add another splash of mirin. Turn heat down to just below medium, cover. A general rule of thumb for fish is to cook for about 8 to 10 minutes per inch of thickness. When white substance appears on fillet, it is cooked through. Avoid overcooking.
  5. Meanwhile, over medium-low heat, melt butter in a small pan. Add shallots and tarragon and sauté just long enough to soften the shallots and release the tarragon’s aroma.
  6. Serve ravioli and arrange salmon on top. Spoon on herbed butter.
  7. Serve hot with a couple of fingers of your favorite bourbon.


The Damp Times: The News on Home Brewing in Chignik Lake

beer-first-n

With no place to pick up a case of beer for our Octoberfest sausage (grilling in the background), we decided to have a go at brewing our own. The results? A pilsner as light and crisp as the autumn weather we enjoyed today here in Chignik Lake.

Nothing compliments fried oyster po’ boys, grilled sausages with caramelized onions, deep fried rockfish or the end of a good run like a crisp, cold lager or ale. Living in a “damp” village where alcohol is permitted but not sold, we added “learn to make beer” to our list of culinary goals for this year.

For us, a kit was the way to go. The one we ordered came with a can of wort – the thick, molasses-like mixture that is the base of beer -, bottles, and everything else we needed. Total brewing time was about six weeks.

beer-first-w-grill-n

And the results… Well, take a look! We’ve already got our next brew going. Looks like it’s time to purchase proper beer glasses!