Homemade Ricotta Gnocchi

gnocchi w summer squash n

Oh so fluffy…pillowy soft and flavorful… that’s how to describe these homemade ricotta gnocchi. We oohed and aahed after every bite.

Every summer, free from the distractions of work, we set goals – projects to push ourselves as we explore passions and interests. This summer we decided to focus on things culinary. With three different Culinary Institute of America courses from The Great Courses waiting for us to dive into, we donned aprons, dusted off the DVD player, and got our notebooks ready for shopping lists, culinary tips and instructions.

Today’s challenge was ricotta gnocchi. We had made roasted squash gnocchi back in Alaska, so the concept of this delicious handmade pasta was not new to us, but this time we were anticipating a more traditional version of this classic dish. We began preparing for this batch of gnocchi a couple of days in advance by making a homemade ricotta-type cheese. You can find that easy-to-prepare recipe here. This surprisingly easy to make cheese is perfect for this gnocchi recipe, or you can use store-bought ricotta. Whether you make your own ricotta or buy it, you’ll want to let it dry out a bit by hanging it in cheesecloth overnight in the refrigerator.

Our CIA instructor, Chef Bill Briwa, began by making the dough and then rolling it out into long logs which he then cut into bite-sized pieces. He gave each piece a decorative pinch between his thumb and forefinger. As an alternative method of giving gnocchi a pleasing shape, I recalled seeing a video in which Italian grandmothers rolled the gnocchi down the back of a long-tined dinner fork to create decorative ridges to hold the sauce. With a lifetime of experience behind them, these women worked with incredible speed! Determined to make the Italian grannies proud, Jack and I quickly (although not as quickly as these women) rolled logs of dough, sliced bite-sized pieces, and rolled our gnocchi down the backs of forks. Given our lack of experience and how quickly and attractively the gnocchi came out, we clearly had good teachers.

And the result? Oh my. We made a light sauce featuring butter, olive oil and garlic, sliced fresh  summer squash thin on a mandolin, added a few halved cherry tomatoes, and briefly cooked up the sauce. It was perfect on the pillowy, flavorful gnocchi, as was the chilled bottle of Spanish Chardonnay we served. Fantastico!

Ricotta Gnocchi

Ingredients

  • 1 1/2 cups dry ricotta (if you don’t want to make your own, you could hang store bought ricotta in cheesecloth overnight to reduce extra moisture)
  • 1/2 cup finely grated Parmesan cheese
  • 2 tbsp all-purpose flour
  • 1/2 tsp fresh grated nutmeg
  • 1 egg plus 1 yolk
  • 2 tbsp unsalted butter, melted
  • salt and pepper
  • semolina flour for dusting

Directions

  1. Mix together ricotta, Parmesan cheese, flour, and nutmeg.
  2. Thoroughly mix in eggs.
  3. Mix in butter.
  4. Salt and pepper to taste.
  5. Sprinkle working surface with semolina. Use a fairly generous amount. This will absorb the excess moisture while the dough rests.
  6. Take 1/4 of the dough and roll it into a long log.
  7. Cut bite-sized pieces and set them aside on a piece of parchment paper.
  8. Repeat with remaining quarters of dough.
  9. Cook gnocchi in salted, simmering water. Gnocchi will float to the top when they are finished cooking.
  10. Gnocchi is more delicate than other pastas. So it’s best to remove it gently with a slotted spoon or similar tool. Serve immediately with a light sauce.

Gnocchi freezes well. Initially freeze while on parchment paper on a tray in order to keep the gnocchi separate, then transfer to a zip top bag.

Common Merganser with Chicks, Tuul River, Ulaanbaatar

common merganser 2015 Tuul River n

A healthy family of common mergansers (Mergus merganser) indicates an abundance of small fish in the Tuul River on the outskirts of Ulaanbaatar, Mongolia.

Mergansers are large diving ducks that subsist primarily on fish, although the young also fill up on aquatic insects such a the larva of mayflies and stoneflies. They make their nests in cavities in trees, sometimes a good distance from water. Less frequently, mergansers nest in holes in cliffs or high banks. They can be found on open water throughout the Northern Hemisphere, and are a good indicator of clean water and healthy populations of small fish.

Common Merganser hen 2015 n

If you look closely, you can make out the serrations on her bill – the perfect adaptation for holding onto fish. In contrast to the females, the drakes’ heads are dark green, their flanks are white and their backs are black. Although common mergansers are usually encountered on freshwater lakes and rivers, they are frequently seen in coastal bays and estuaries as well.

Common merganser family Tuul n

A baleful eye tells us we’ve approached close enough. Undisturbed this family went about their business, dipping their heads underwater in search of food as they paddled along the river’s current breaks.

Homemade Ricotta Cheese – As Easy as 1, 2, Cheese!

ricotta cheese n

A beautiful round of “ricotta” cheese made in our very own kitchen. Easy to make and delicious to eat! 

When will lived in the small rural village of Point Hope, Alaska, ricotta cheese was nearly impossible to get. The main way to acquire this cheese was by way of a kindly person hand-carrying it in on a flight from Anchorage. The desire to cook with ricotta and the scarcity of this cheese prompted us to learn how to make it. As it turned out, it was simple.

Living in the city of Ulaanbaatar in the dairy-loving country of Mongolia, you would think any cheese we would like would be at our fingertips. Interestingly enough, we have never seen ricotta in any of the grocery stores we frequent. Fortunately, milk as well as vinegar are readily available – all we need to make our own “ricotta.” We place ricotta in quotes to avoid the argument that what we are making is not authentic ricotta. The ricotta we turn out in our kitchen is delicious and works well in any recipe that calls for ricotta cheese.

So, in a few easy steps, you, too, can make your own ricotta cheese. You can use the initial warm ricotta to create delicious savory or sweet spreads. You can also let it dry out a little longer to make terrific pasta fillings or ricotta gnocchi.

Homemade Ricotta Cheese

Ingredients

  • 5 cups milk (I use whole, but 2% fat or more would also work.)
  • 2 tbsp white vinegar

Directions

  1. Heat milk to about 165 degrees F (74 degrees C) over medium heat.
  2. Stir in vinegar. You will notice the milk split into curds and whey. Let cool slightly.
  3. Hang double layer of cheesecloth in a plastic storage container. You can also line a strainer with cheesecloth and place over a bowl for the same purpose.
  4. Pour heated milk into cheesecloth to separate out the whey.
  5. Let drain for at least 30 minutes before using. The longer you drain, the drier the end result will be.

Stovetop Pizza – A Fast, Tasty Option Better than Delivery!

stove top pizza n

Twenty minutes from conception to the plate. Delicious stovetop pizza. Yes, we love anchovies. Can you spy those salty little morsels?

Awhile ago, someone shared a recipe for a homemade scratch pizza that could be made from start to finish in one pan on the stovetop. Intriguing. We usually make batches of pizza crusts which we partially bake and keep at the ready in our freezer. Of course, making our traditional crusts from yeasted dough takes time, not to mention space in the freezer. So we tried the stovetop pizza to see if this speedy pizza would cut the mustard.

What we discovered is a terrific method for making pizza in a galley, in a small camper kitchen, or anytime you want to quickly whip up a pizza. Heck, this is faster than ordering a pizza to be delivered!

The fifty dollar question… How’s the crust? No doubt, whether you make it in a wood-fired oven, a regular oven or over a grill, a traditional crust has a fuller flavor and better texture. But this quick homemade crust is quite good. Experiment with the heating till you get it just right, and you’ll end up with a crust that has better taste and texture than just about any ready-made frozen pizza or the soggy stuff delivered to your house. If one person creates the dough while the other whips up a sauce and grates the cheese, you can make one of these in 20 minutes! The crust is nice and crispy and is substantial enough to handle a lot of toppings. Use a non-stick pan such as those made by Scanpan or Swiss Diamond, and you won’t believe how easily the pizza slides out of the pan and onto a cutting board. Magical! And clean-up’s a piece of cake. So, the final verdict is four thumbs up. This is definitely a recipe that will go into our main collection.

20 Minute Stovetop Pizza

Ingredients

  • 1 cup all purpose flour
  • 1 tsp yeast
  • 1 tsp granulated sugar
  • 1 tsp salt
  • 2/3 cup warm water (105 degrees F/41 C)

Directions

  1. Whisk together flour, yeast, sugar and salt in a large pan. Make sure to use a pan with a fitted lid. We use an 11-inch (28 cm) pan.
  2. Stir water into the flour mixture. Mix well.
  3. Evenly spread dough on the bottom of pan using a rubber spatula.
  4. Top with your favorite toppings.
  5. Cover pan with fitted lid. Cook pizza for 5 minutes on heat a little hotter than medium.
  6. Continue cooking pizza for 10 more minutes on medium heat. Either vent the lid during this cooking or wipe out the condensation on lid to avoid a soggy pizza.
  7. Slide the pizza out onto a cutting board and enjoy!

Little Ringed Plover

Plover Little Ringed UB 2015 n

Little Ringed Plover, Charadrius dubius, Tuul River, Ulaanbaatar, Mongolia. Nikon D4, Nikkor 200-400mm lens, 1.4 teleconverter.

At about six inches (15 cm) from bill to tail and weighing just an ounce and a half or so (40 g), little ringed plovers are common along the Tuul River near Ulaanbaatar. Their small size, pale pink legs and bright yellow eye rings are diagnostic. These wary little birds seem to bob their heads and scurry back and forth along the shoreline constantly, hence the Latin “dubius” which means moving to and fro. They’re ground nesters. Among the shoreline rocks and pebbles, their light brown or grey speckled eggs are virtually invisible. As fall approaches, little ringed plovers migrate to Africa where they spend the winter.

We’re now at 40 species and counting in our urban birding adventures in and around Ulaanbaatar.

Rich and Beautiful Braided Swiss Bread – Züpfe

zupfe bread n

Rich and buttery Swiss bread provides a beautiful and delicious centerpiece for brunch. 

My bread-baking goal upon moving to Mongolia was to bake all of my favorite breads without the aid of my trusty Zojirushi bread machine that I relied on heavily in Alaska. The tiny house we will eventually live in will not have room for such an extravagant machine, so it was time to wean myself off of this terrific invention. In Alaska, I enjoyed throwing all my ingredients into a machine, going for a walk and coming back to beautiful finished doughs ready to shape and bake. These days, I’m finding that I really enjoy the process of manually bringing all the individual ingredients together to form delicious and beautiful breads. There is something satisfying about kneading dough and knowing, by touch, if it needs more of something.

The final bread on the list from my Alaska days to make from scratch was züpfe. I was introduced to this braided Swiss bread when I was young. I loved it. It could have been because of its soft, almost creamy texture or the lovely Swiss braids. I would eat as much of it as I was allowed. As an adult, I still love the flavor and the texture. The braids are fun to create and give an impressive finish. Bring this bread to your next dinner party instead of the traditional bottle-of-wine and see what happens.

Züpfe

Ingredients

  • 2 1/4 tsp active dry yeast
  • 1 1/3 cups warm milk (105F/41C)
  • 1 egg yolk
  • 2 tablespoons butter, melted
  • 3 1/2 cups bread flour
  • 1 tsp salt
  • 1 egg white
  • 1 tablespoon water

Directions

  1. In a large bowl, dissolve yeast in warm milk. Let stand until creamy, about 10 minutes.
  2. Add the egg yolk, butter, 2 cups of bread flour and salt. Stir well to combine.
  3. Stir in the remaining flour, 1/2 cup at a time, mixing well after each addition.
  4. When the dough has pulled together, turn it out onto a lightly floured surface and knead until smooth and elastic, about 8 minutes.
  5. Divide the dough into 3 equal pieces and roll each piece into about a 14-inch long log. Braid the pieces together and place on a parchment-covered baking sheet. Pinch the ends of the braids well so they don’t come undone.
  6. Cover with a damp cloth and let rise until doubled in size, about 1 hour.
  7. Preheat oven to 425 degrees F (220 degrees C).
  8. In a small bowl, beat together egg white and water. Brush risen loaf with egg wash and bake in preheated oven for 20 to 25 minutes, until golden brown.

Red-billed Chough: Corvids are Cool

Red-billed chough

Striking a regal pose after a morning of catching grasshoppers: Close cousins of crows, ravens, jays and magpies and adaptable to both urban and wilderness environs, choughs are common around Ulaanbaatar.

chough convention n

The convention: On the crest of this rocky hill, there were dozens of choughs. A hundred. Maybe more. Many of them were gathered around a cluster of chough feathers near these rocks. A fox? A kite? An eagle or hawk? Some predator had diminished their numbers by one. The entire flock was concerned.

choghs flock of n

Choughs in dawn light, hanging together, winging their way across the mountains and steppe near Ulaanbaatar.

Mini Matcha Cheesecakes with Shortbread Crust

Matcha cheesecake n

Delightfully green and chock-full of flavor, these mini desserts are sure to please a mini crowd. 

The smooth texture and familiar flavor of cheesecake draws us time and again to this delicious and decadent dessert. The beauty of homemade cheesecake is that it is a perfect canvas for so many creative ideas. The traditional vanilla flavor is sumptuous. But it is so easy to add, top, or infuse. I’ve been wanting to play some more with the matcha green tea powder I have in my pantry. I wanted to make a small sized cheesecake but I don’t have a small cheesecake pan. So I made small cheesecakes in a standard-sized muffin tin in order to turn out a small batch. These would be a lovely dessert to share at our next dinner party invite.

Ingredients

Crust

  • 1 1/2 cups all purpose flour
  • 1/3 cup granulated sugar
  • 1 egg, beaten
  • 1/2 cup butter, melted

Filling

  • 1 package of cream cheese, 250 grams, softened to room temperature
  • 1/2 cup granulated sugar
  • 1 large egg, beaten
  • 1 tsp vanilla extract
  • 1 tbsp matcha tea powder

Directions

  1. Preheat oven to 300 degrees F (150 degrees C). Line 8 standard-sized muffin tin cups with paper liners.
  2. In a medium bowl, mix together crust ingredients.
  3. Evenly divide crust mixture into lined muffin tin cups. Press down to form bottom of cheesecakes.
  4. Bake crusts for 5 minutes. Let cool.
  5. In a large bowl, whisk together filling ingredients. There should be no lumps and all ingredients should be mixed well.
  6. Divide filling evenly into paper lined cups.
  7. Bake cheesecakes until set, about 16 – 18 minutes. Centers should not jiggle.
  8. Refrigerate cheesecakes for 3 hours before serving.

Wisconsin Wildlife Services Removes 100’s of Beaver Dams Each Year, Many by Explosives

beaver dam blown up

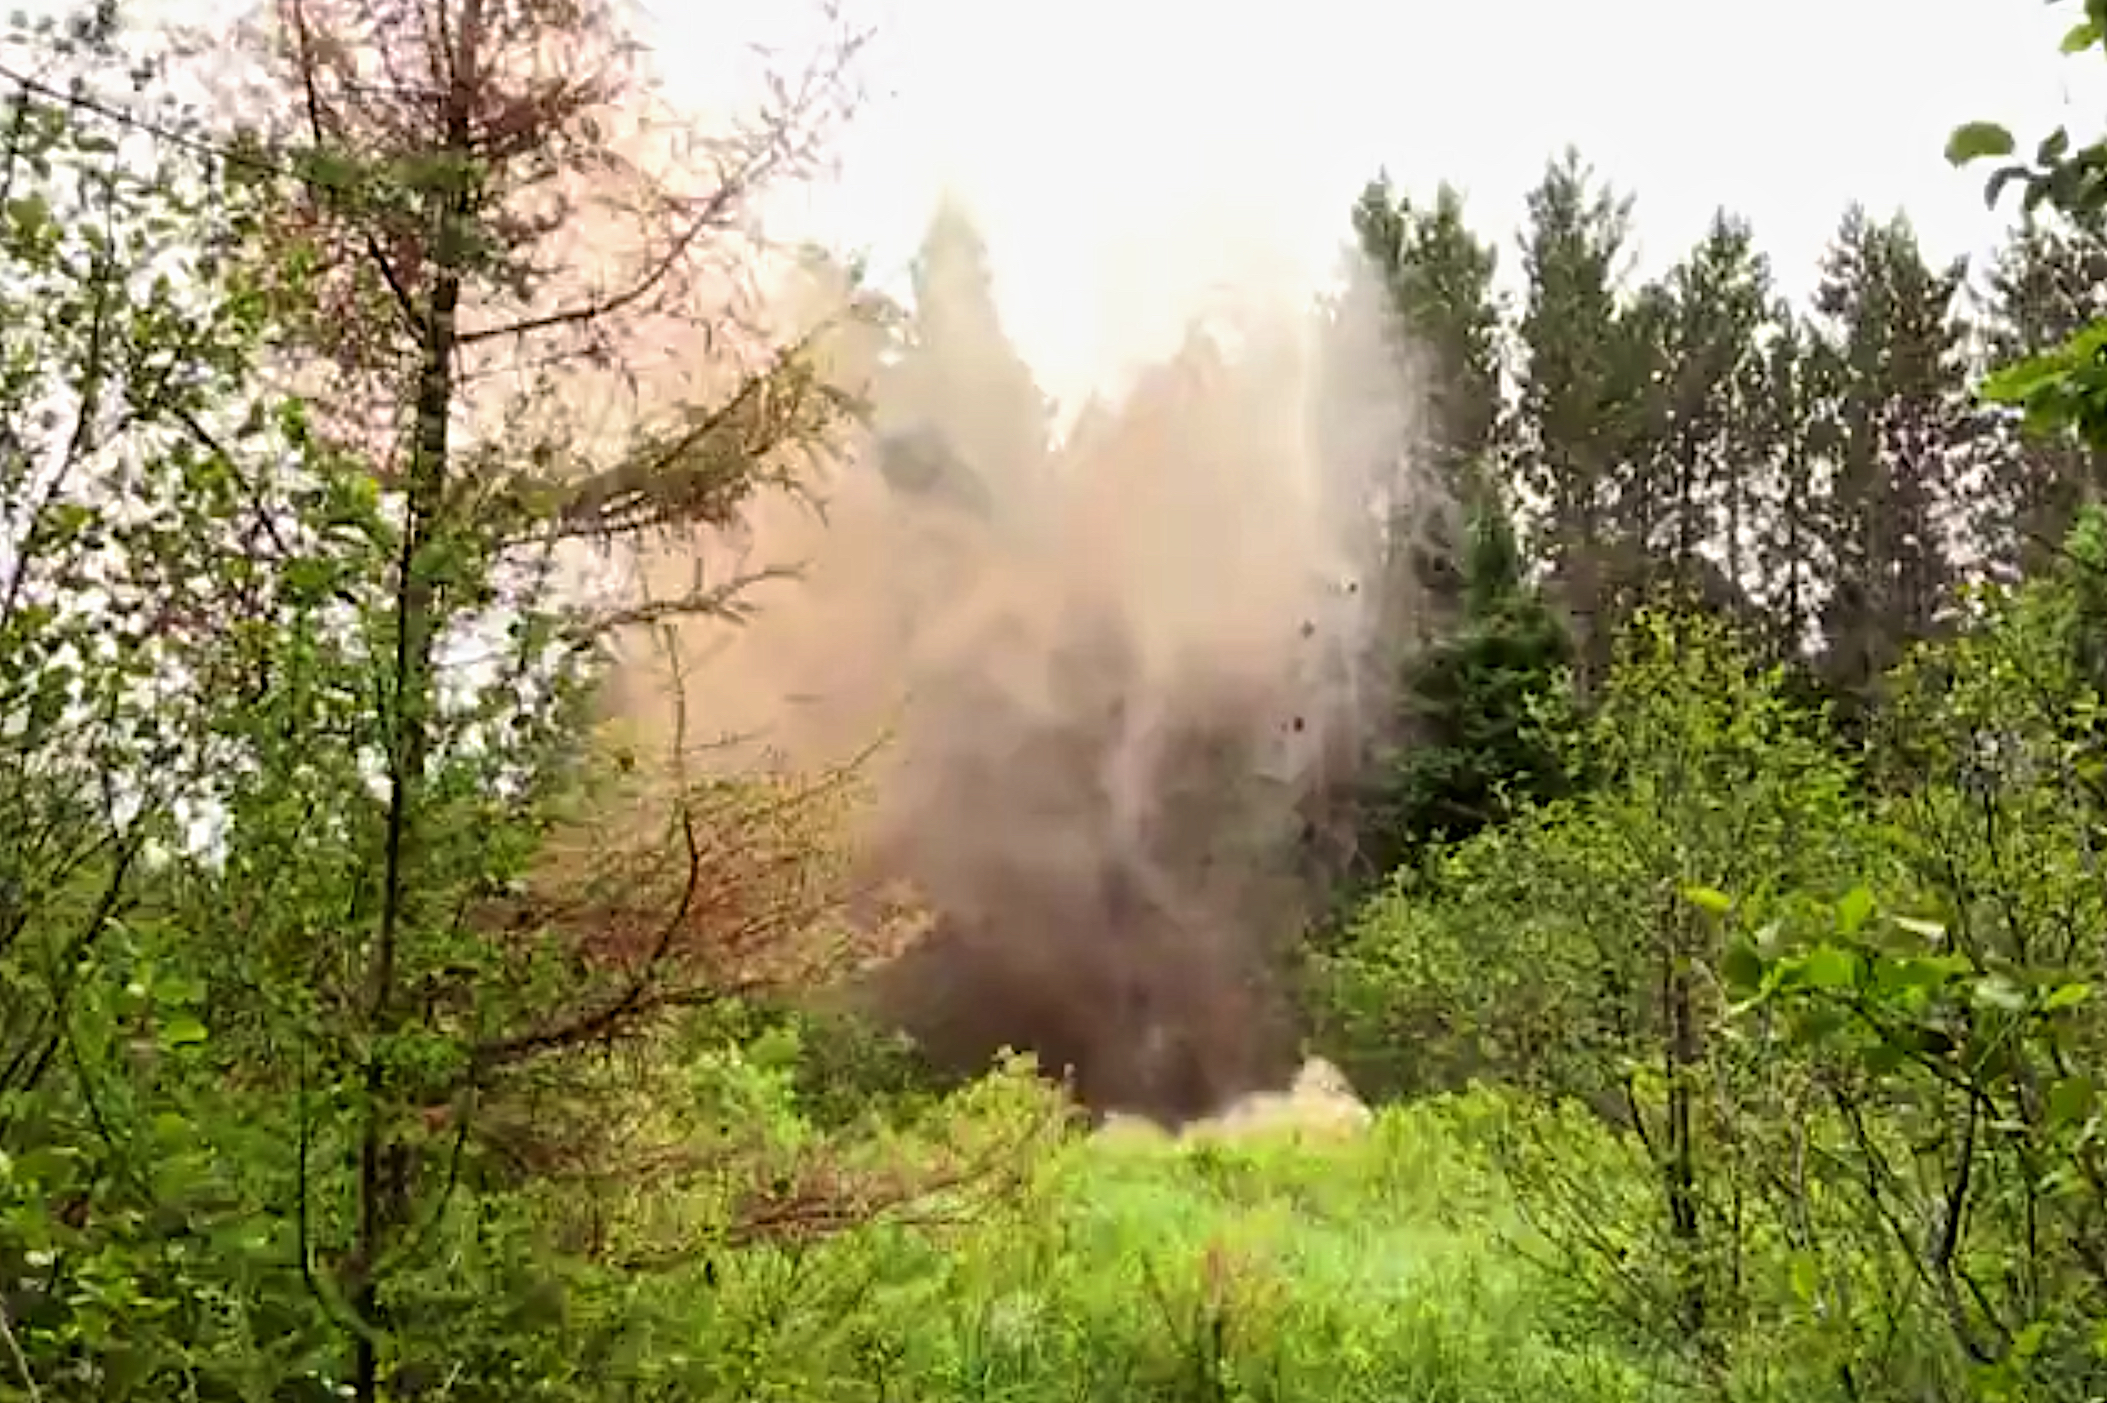
This video (see link below) showing a beaver dam being blasted sky high by Wisconsin Wildlife Services in the name of “improving habitat for trout” left us speechless. This particular detonation took place on the upper reaches of Wisconsin’s Wolf River, a National Scenic River. We’re interested to know what readers think of this strategy for managing wildlife and natural resources.

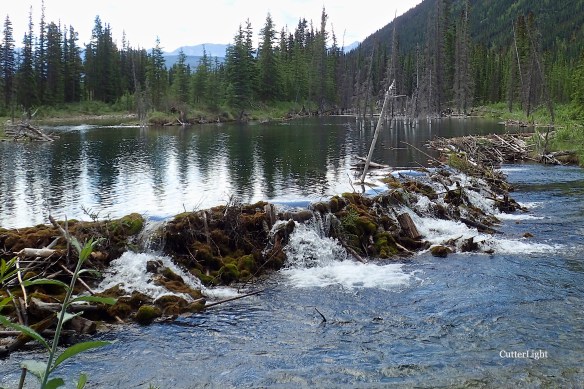
Beaver ponds such as this one in British Columbia represent biologically rich, exceptionally diverse, constantly changing micro-habitats within the larger forest.The many snags (dead trees) in this pond represent feeding opportunities for woodpeckers as well as potential cavity nesting sites for a variety pf species of birds and mammals. Eventually, this pond will become silted in, the beavers will leave, and a beaver meadow will replace the pond. These meadows, free from the shade of the forest canopy and with a bed of thick, fertile soil create places where unique species of flowers and other plants thrive. Black bears are among the many animals that visit these meadows to graze on the grasses and berries that may not exist elsewhere in the forest. The meadow itself will eventually be replaced by mature hardwood forest. So it has been in North America for thousands and thousands of years, with trout, beavers, bears and berries co-evolving.

The setting is a small stream in a Wisconsin forest. The water has been dammed by beavers. Because the pool of water created by the beavers may become too warm for healthy brook trout populations and because beaver dams can block the migration of these native trout, fishermen complained. Enter the Wisconsin Department of Natural Resources, the United States Forest Service, the Wisconsin Wildlife Services and several pounds of explosives. Although government officials occasionally remove beaver dams in order to prevent flooding of roads, make no mistake, most of these dam removals in Wisconsin are for one reason and one reason only: “The purpose of our work is to create a free-flowing stream for the benefit of the trout to be able to migrate up and down.”

See video at: http://www.nbcnews.com/video/government-blasts-away-beaver-dams-475081283719

In a recent three-year period, Wisconsin Wildlife Services removed over 2,000 beaver dams. According to the NBC News report cited above, government officials in Wisconsin use explosives on about 150 dams annually. The beavers are trapped and the dams are destroyed in order to …”(maintain)… one of the natural resources we’ve got for the public to enjoy, trout fishing…”

Barbra and I watched this video and listened to these comments with our jaws hanging open. Speechless. After about two minutes, the video came to an end.

“Wow,” was all we could manage to articulate at first. And then again, “Wow.”

For the past day, we’ve been researching this issue as thoroughly as we’re able to, reaching out to Trout Unlimited groups in Wisconsin and kicking our own thoughts around between each other. We haven’t reached any conclusions. But we do have a few observations.

If… if… the chief or only goal of environmental stewardship were to improve brook trout habitat, Wisconsin’s beaver management strategy might deserve a round of applause. Brook trout thrive in cold, free-flowing streams that feature clean, silt-free rock and gravel bottoms. Temperatures in beaver ponds can hit 70 degrees or more under the summer sun, near the upper limits of what these native char can tolerate and well above their preferred temperature range of 55 – 65 degrees Fahrenheit (12 – 18 degrees C). And because brook trout have very specific requirements for successful spawning – small, clean gravel where upwelling from springs occurs – it’s critical that they be able to access these areas during the fall spawning season.

So just blow up the beaver dams, right?

Not so fast.

moose in beaver pond n

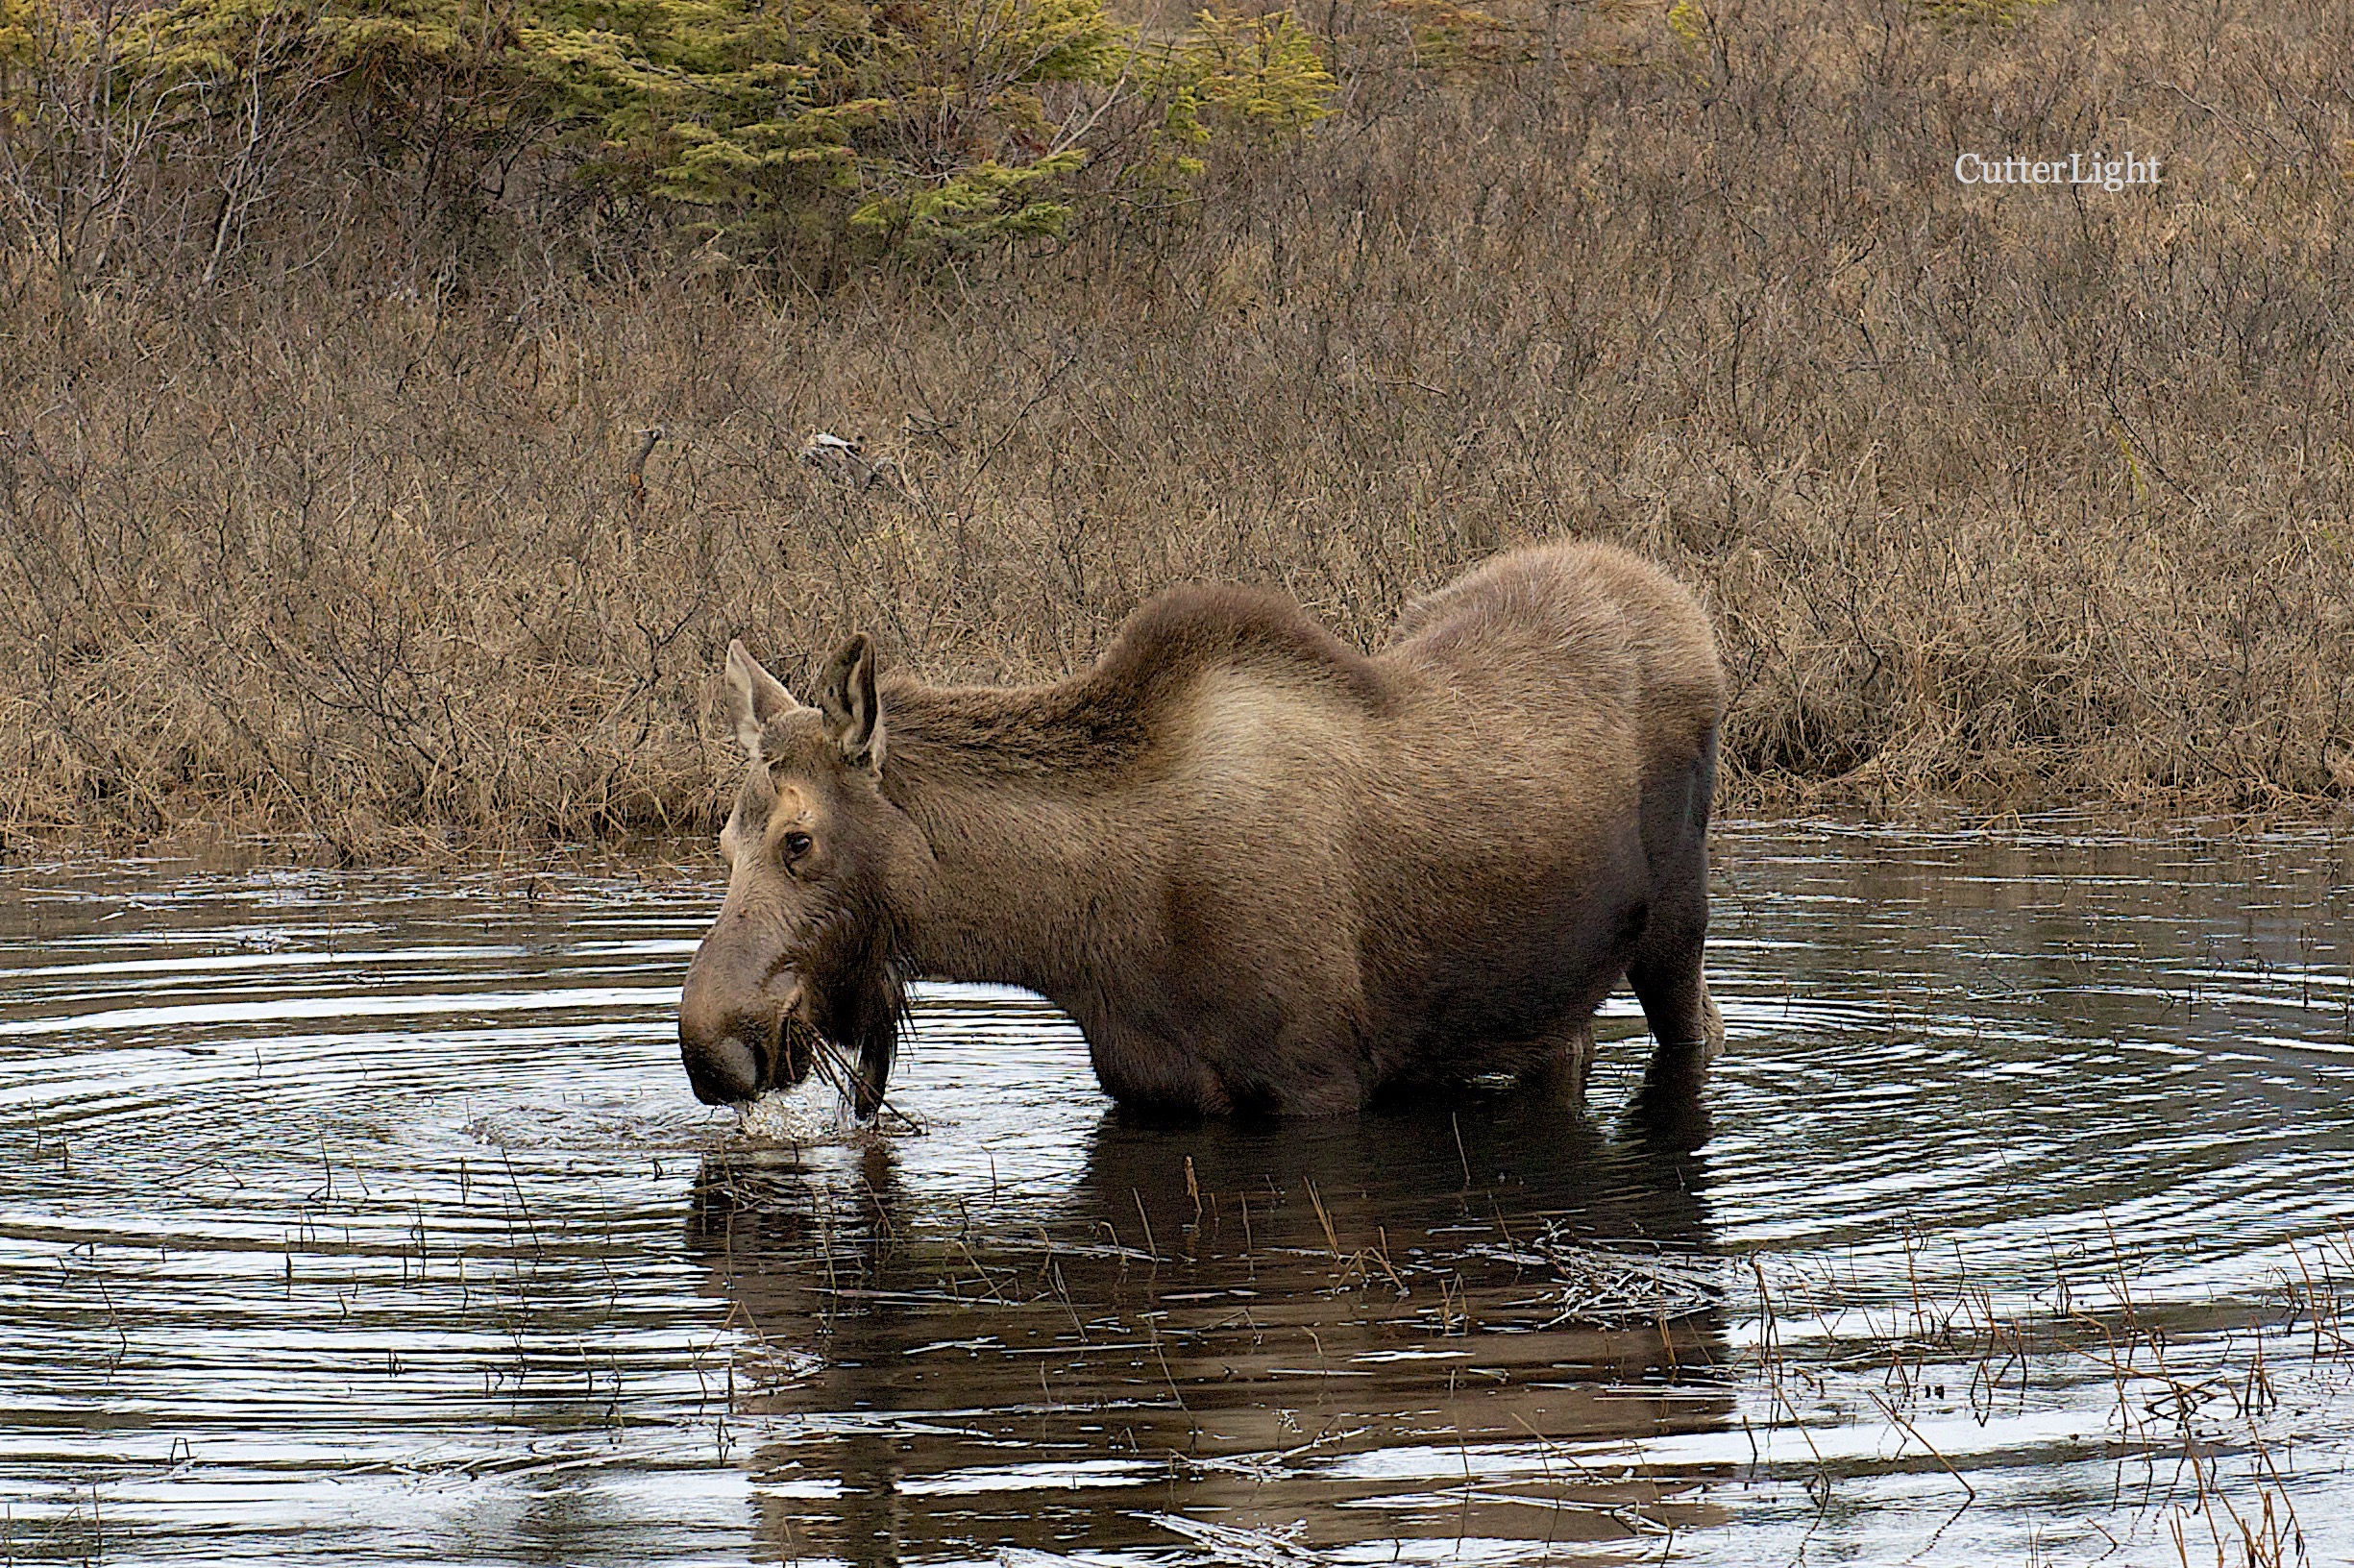
After a long winter in Alaska, this young moose finds a meal in the upper reaches of a north country beaver pond.

Beaver ponds represent dynamic, ever-changing micro-habitats that foster some of the greatest species diversity in the forests where they are found. We’re for biodiversity. As much as we enjoy trout fishing, we would never wish that our desire to catch a particular species of fish be placed above the overall health of an ecosystem.

During the life of the beaver pond, it can provide vital habitat for all kinds of animals. As trees are drowned, they become snags. (One Wisconsin DNR report stated simply that “beaver dams kill trees” – an example of how a statement can be both completely true and completely misleading. Dead trees are part of every healthy forest.) Pileated woodpeckers and other woodpeckers utilize these snags as forage bases and nesting sites. The cavities woodpeckers create in turn become nesting sites for flying squirrels, owls, wood ducks, and host of other mammals and birds. Meanwhile, these ponds become important stop-over or seasonal habitat for a variety of waterfowl and often attract shore nesting species. Tree swallows, flycatchers and similar passerines thrive in the edge habitat created by the beavers’ activity. Again, the snags provide nesting sites, and the cleared airspace above the insect-rich pond creates excellent feeding opportunities for insect eating birds as well as for bats.

The pond itself becomes one the most biologically rich systems in the forest – perhaps the most biologically rich. Everything from burrowing mayflies to dragonflies and damselflies to a variety of aquatic beetles inhabit these waters. Amphibians such as newts, salamanders, toads and frogs depend on these these ponds as well, which provide vital nurseries for their young. Aquatic and semi-aquatic snakes take advantage of the smorgasbord, and in turn may provide a meal for a hawk. Deer, moose, turkeys and grouse are among the frequent visitors to the edge habitat found along the shores of beaver ponds.

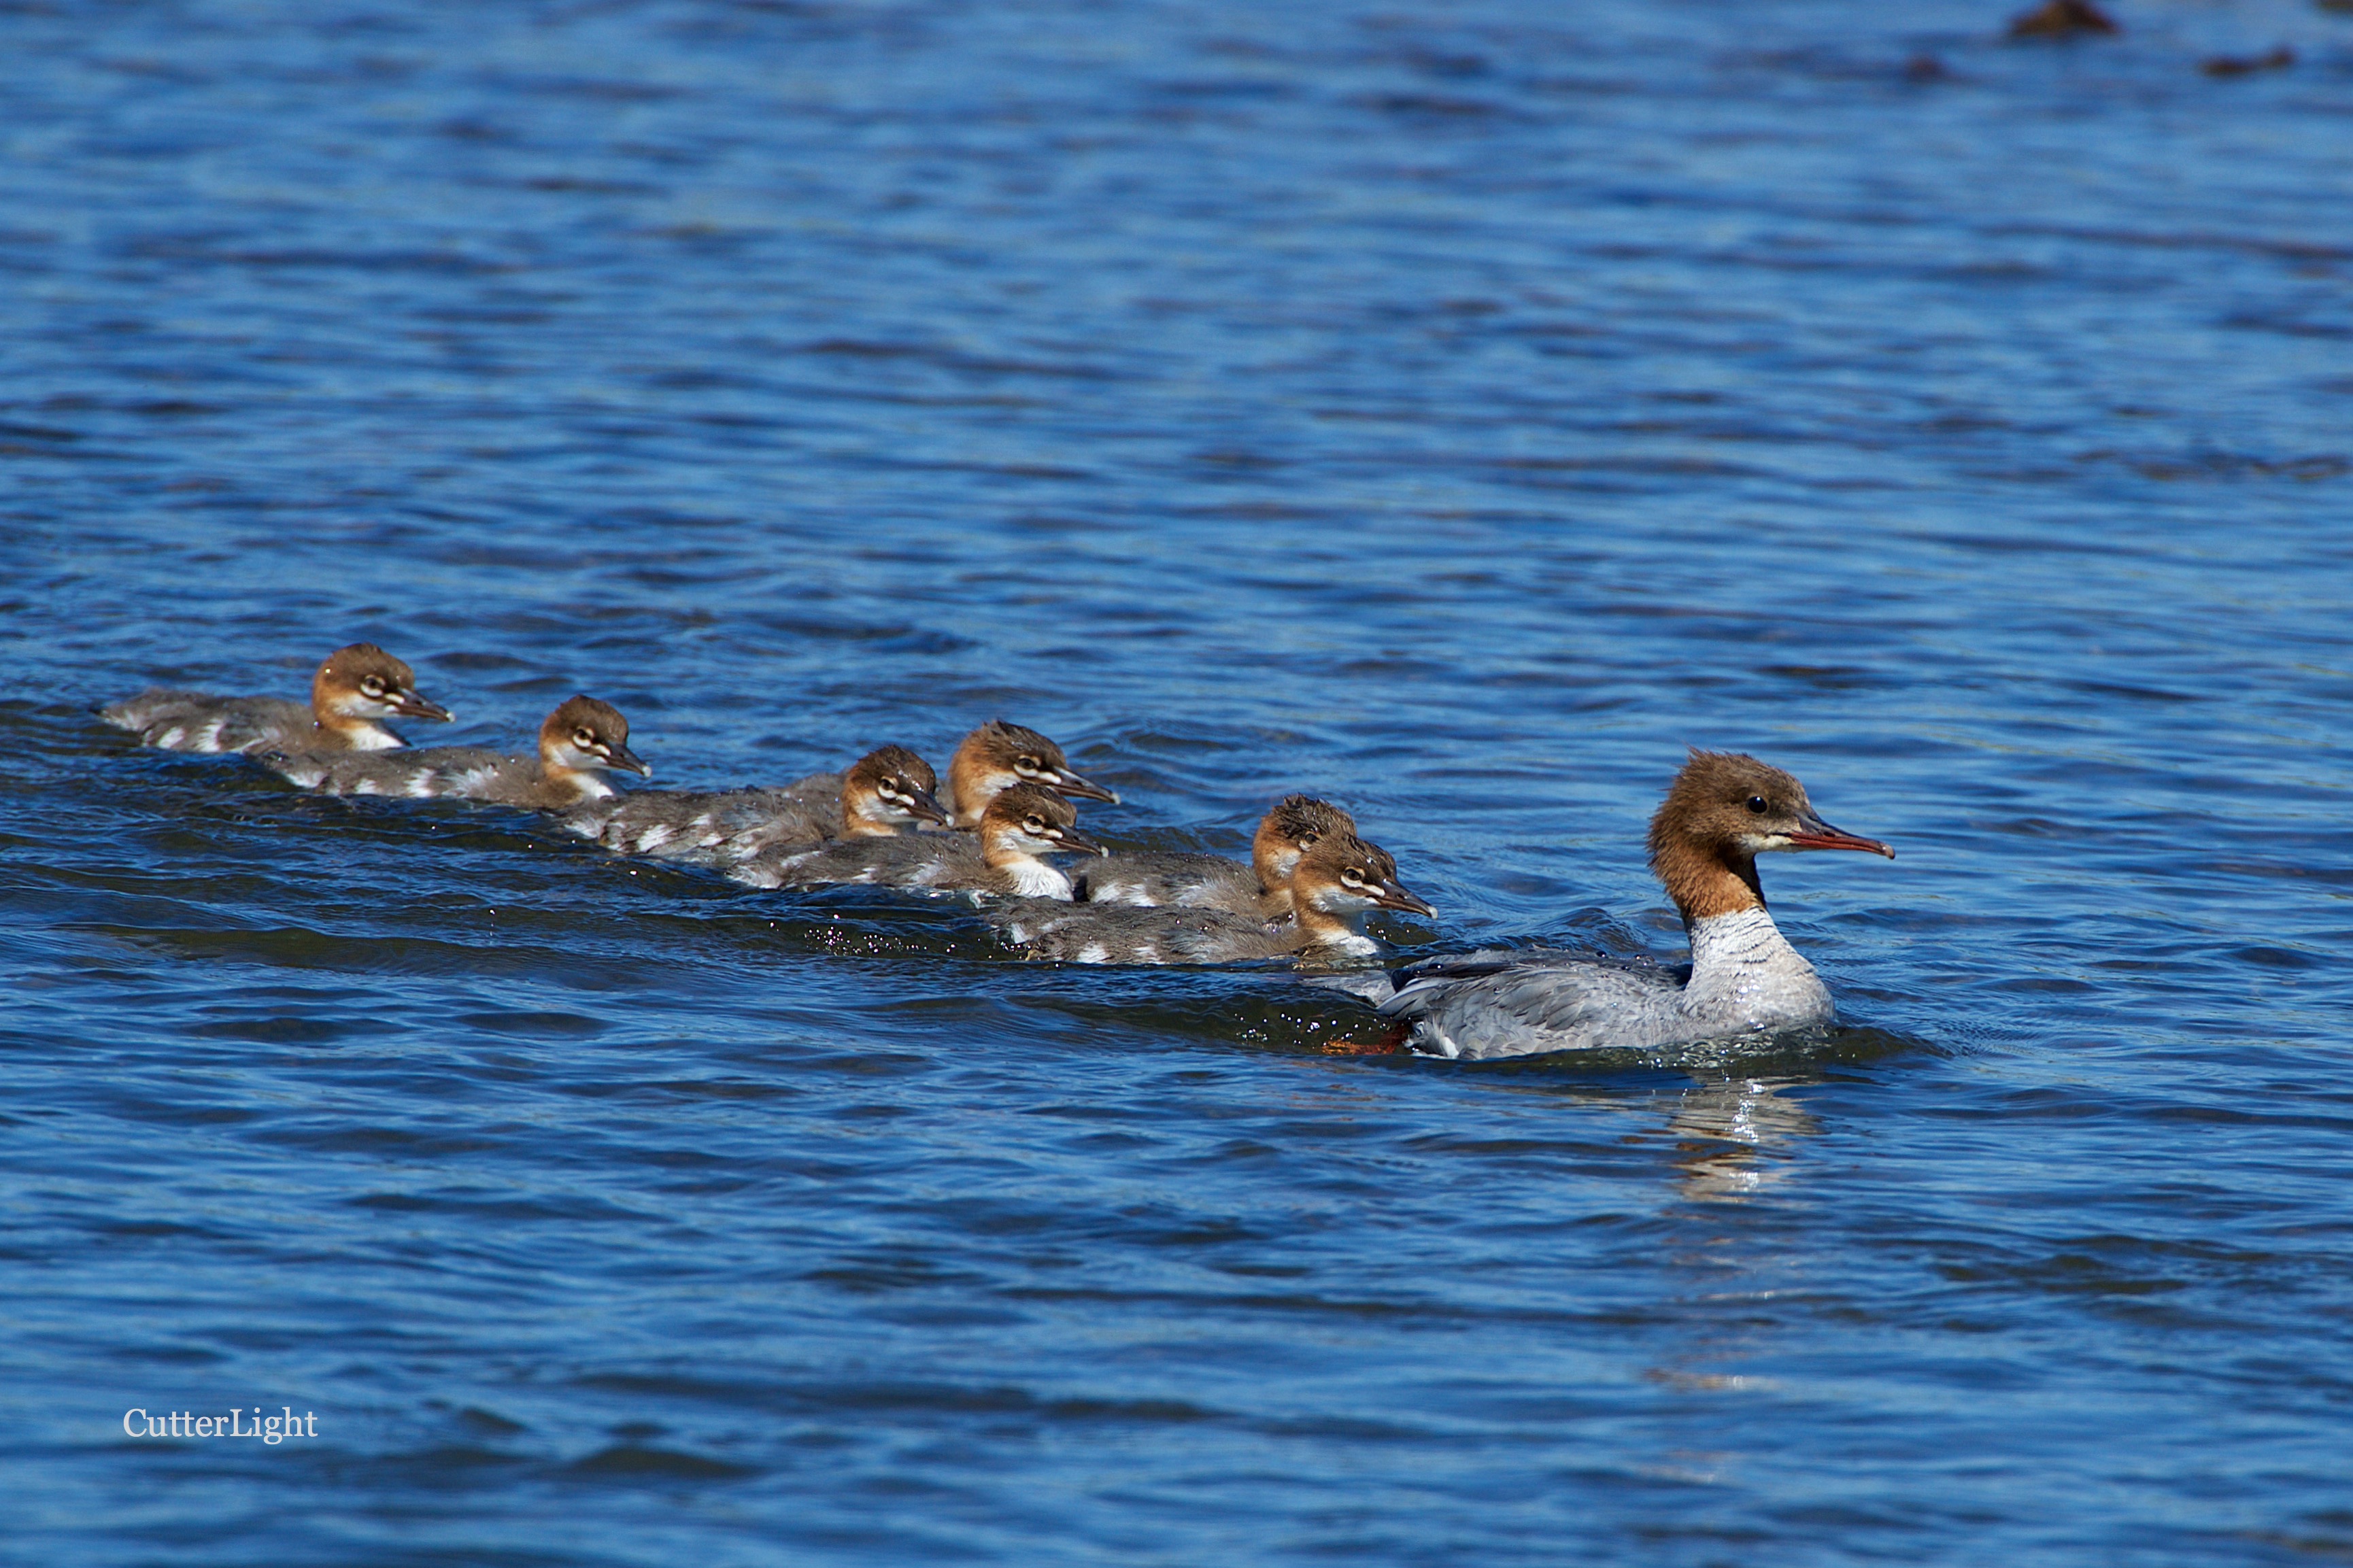
Silt prevented by the dam from moving downstream eventually creates a rich bed of mud which in turn fosters the growth of aquatic vegetation. This vegetation may provide a meal for a moose or a migrating duck, a nursery for the young of certain fish species, a place for a tiger salamander to attach its eggs, or an ambush post for a predacious diving beetle. What’s best for trout is not necessarily best for the countless other species that depend on the habitat created by beaver ponds. Healthy stream and forest systems feature a variety of habitats.

One of several stunning flowers we photographed last summer along the shores of a beaver pond.

Moreover, because these dams cause water to pool, some of that water percolates down into subterranean aquifers. This should be an important consideration in a state that is rapidly pumping its aquifers dry. The particular stream in question, the upper reaches of the Wolf River, becomes vital lake sturgeon spawning habitat further down river. As the underground aquifers beaver dams contribute to resurface in the form of springs further downstream, these springs cool the main river, which helps ensure that lake sturgeon spawn successfully. Take away the beaver dams upstream, and you take away a piece of a complex system which countless species have evolved to thrive in.

Eventually these ponds become overly silted, increasingly shallow and the beavers move on. Over time, the dams break up, the stream cuts a familiar channel, often finds a rock bed again. What’s left behind is a beaver meadow – a place with thick, rich soil capable of supporting an incredible variety of trees, flowers and grasses. For the overall health of the forest, it’s a good thing that these dams retain forest soil. Butterflies take advantage of the abundance of flowers, deer and bears come for the grass, and the snags – the trees that died when they became flooded – continue to provide nesting sites for a variety of animals till the day they fall to the earth and become nursery logs.

It’s important to keep one other fact in mind. Salvalinus fontinalis, the native char most fishermen refer to as the brook trout, has been co-evolving with beavers and beaver dams for longer than humans have been on the North American continent. This sudden need to “manage” wildlife is an outcome of an ongoing series of humankind’s mismanagement of this planet.

All this being said, it may appear that we’ve made up our minds on this issue.

We haven’t.

Between the absence of sufficient natural predation and insufficient economic incentive for more beavers to be trapped for their pelts, we understand that it is entirely possible that Wisconsin’s beaver population is out of balance. This would seem to present three options:

  1. Reintroduce predators and foster the growth of their numbers. Predators? That would be wolves. The problem with that strategy is that wolves historically have been more interested in ungulates such as deer and moose (and even in voles and mice) than in beavers. Prior to European settlement, the population of beavers in North America is estimated to have been between 60 and 400 million. There were lots of wolves back then, too. They apparently weren’t eating many beavers.
  2. Continue the present strategy. Where beaver dams appear to be negatively impacting brook trout habitat, kill the animals and tear out their dams. If the dams can’t be broken up by hand, employ explosives.
  3. Do nothing. Let it go. Enjoy the biodiversity beaver ponds foster. If the natural activity of beavers temporarily (or permanently) makes a stream unsuitable for brook trout, rest assured that the habitat is probably becoming just right for other species. Find another stream to fish, or tie up some Clousers and go bass fishing.
  4. And if anyone is really concerned about rising temperatures in streams, maybe consider getting rid of your air conditioner, installing double-paned windows in your house, and locating in a place where you can leave your car at home and walk to work, to the grocery store, and to your friends’ homes.

We’re sure there’s more to the beaver situation in Wisconsin than we currently realize. We’d love to hear what others think. Thanks for reading.

Sincerely,

Jack & Barbra

Cranberry Banana Bran Muffins

muffins cranberry banana bran nSuper moist muffins bursting with cranberry and banana flavor and , shhhh, healthful bran. 

I inherited a bag of bran from a friend who moved from Ulaanbaatar earlier this summer. Had she not explained that the cyrillic words translated to wheat bran, I would have never guessed. There is a section in most grocery stores here in Ulaanbaatar that houses a variety of mysterious products that, I think, come from Russia. Sometimes I can decode the cyrillic and figure out what the items are. In most cases, I leave them alone. Now that I understand the cyrillic word for wheat bran, I can see that this ingredient is readily available in the stores we shop.

A week or so ago, I made my first bran muffins with my new pantry. They came out pretty well. They definitely had a bran flavor, which is to sat that they tasted like they were good for us. Partnered with an egg and a freshly brewed cup of coffee, we enjoyed daily breakfasts with that batch. Our test question when rating our recipes is, “If you got this ____ in a restaurant, would you be happy?” The bran muffins I made were good, but not impressive by any measure.

By contrast, today’s bran muffins are absolutely impressive and we would be delighted were they served to us in a restaurant or café. While there’s still enough bran in them to warrant the title “bran muffin,” the ripe bananas provide moistness and flavor the former muffins lacked and the cranberries add much-needed texture. The soured milk also adds moisture and a buttermilk flavor. When I put all the ingredients together, I was concerned that the batter would be too liquidy. It turns out the bran absorbs some of the liquid, so the ratio of liquid to dry ingredients was perfect. Not only did the muffins pass our test question, we’ve already eaten four muffins in one morning. That’s the true test.

Cranberry Banana Bran Muffins

Ingredients

  • 2 large eggs
  • 2/3 cup packed brown sugar
  • 1 cup ripe banana, mashed
  • 1 cup milk soured with 1 tbsp lemon juice
  • 1/4 cup light oil, such as canola
  • 1 tsp vanilla extract
  • 1 cup wheat bran
  • 1 3/4 cup all-purpose flour
  • 1 1/2 tsp baking powder
  • 1/2 tsp baking soda
  • 1 tsp ground cinnamon
  • pinch salt
  • 1 cup dried cranberries

Directions

  1. Grease 12-muffin tin. Set aside.
  2. Preheat oven to 400 degrees F (200 degrees C).
  3. In a small bowl, mix together wet ingredients. Set aside.
  4. In a large bowl, whisk together bran, flour, baking powder, baking soda, cinnamon and salt.
  5. Pour wet ingredients into dry and whisk until smooth.
  6. Fold in cranberries.
  7. Pour batter into muffin tin. Each muffin cup will be full.
  8. Bake for 20-25 minutes. Muffins will be lightly browned and a wooden pick inserted into the middle of muffin will come out clean when done.
  9. Let cool in pan on wire rack for about 5 minutes before removing.